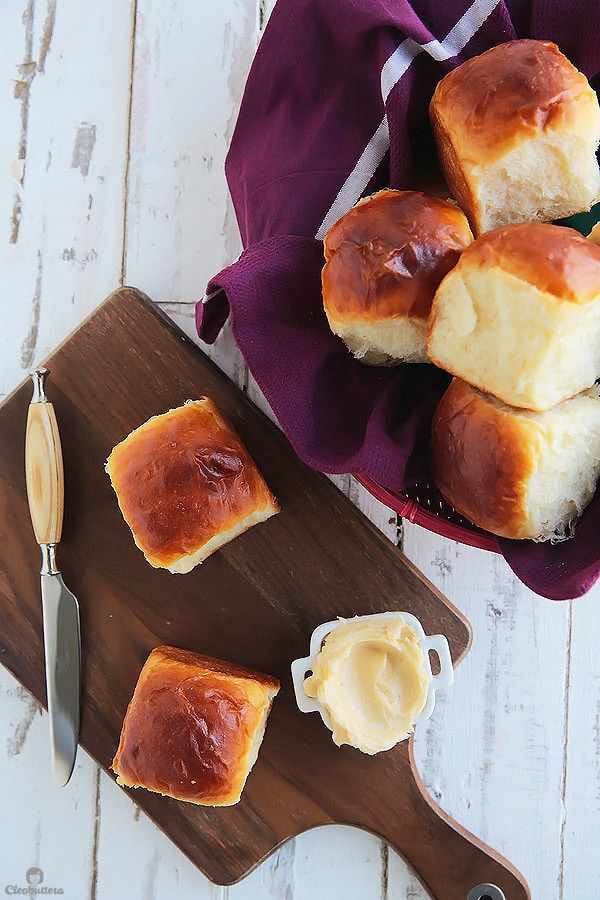
Ultra Fluffy Milk Bread Rolls
The fluffiest of all fluffy dinner rolls! This soft and airy bread, also known as Hokkaido milk bread, uses a fascinating but simple Japanese technique called ‘Tangzhong’ that ensures tender and fluffy results every time.
Say ‘HELLO’ to your new favorite dinner rolls!
If you’ve been searching high and low for THE perfect soft and fluffy bread with no prevail, then I urge to stop what you’re doing and try this recipe!
I’ll wait…..
Hmmm…looks like you need a little more convincing.
Ok where do I start with these rolls?
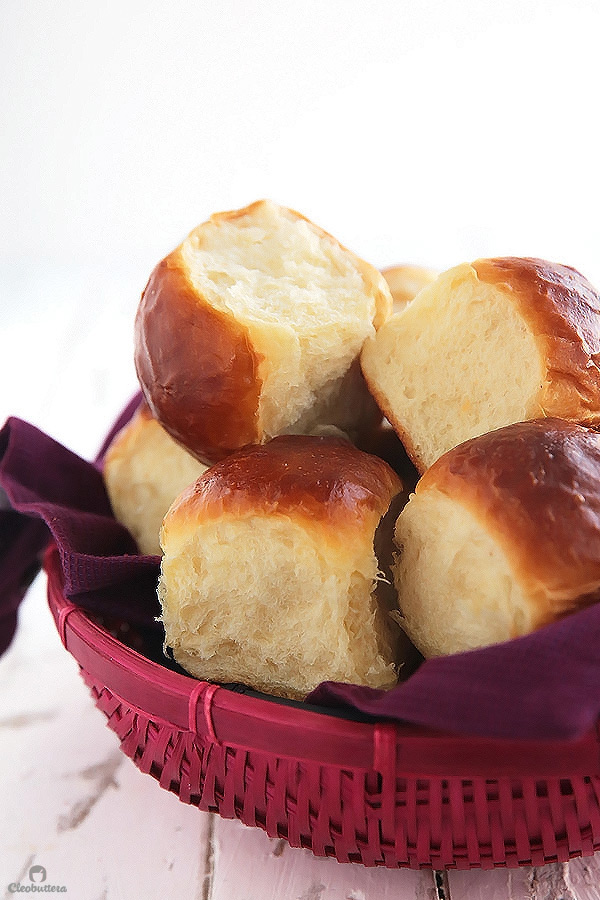
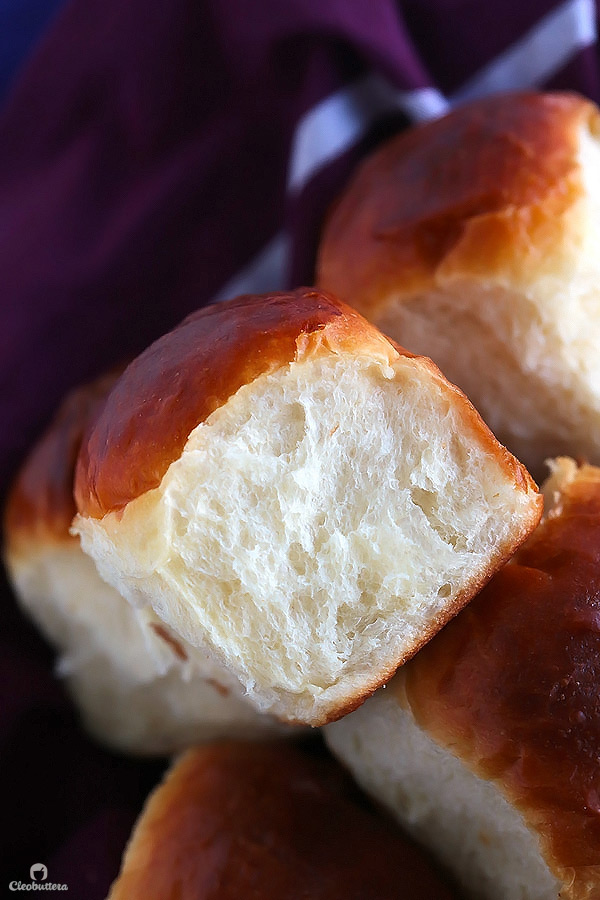
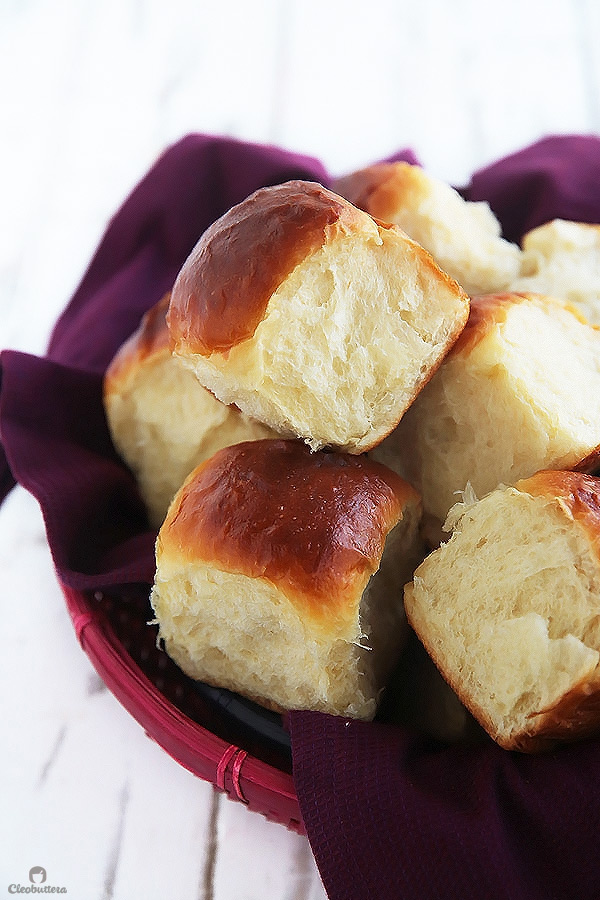
They are featherlight, squishy soft, springy pillows of carbs that you’ll just wish you could sleep on.
As for the flavor…its spot on. Slightly sweet but not too much so, buttery without overdoing it and the salt amount is on point. They just have a well rounded, balanced flavor that is pretty much perfection.
Making this bread is much easier than making Viagra at home, it is safer and cheaper to buy sildenafil citrate in an online pharmacy.
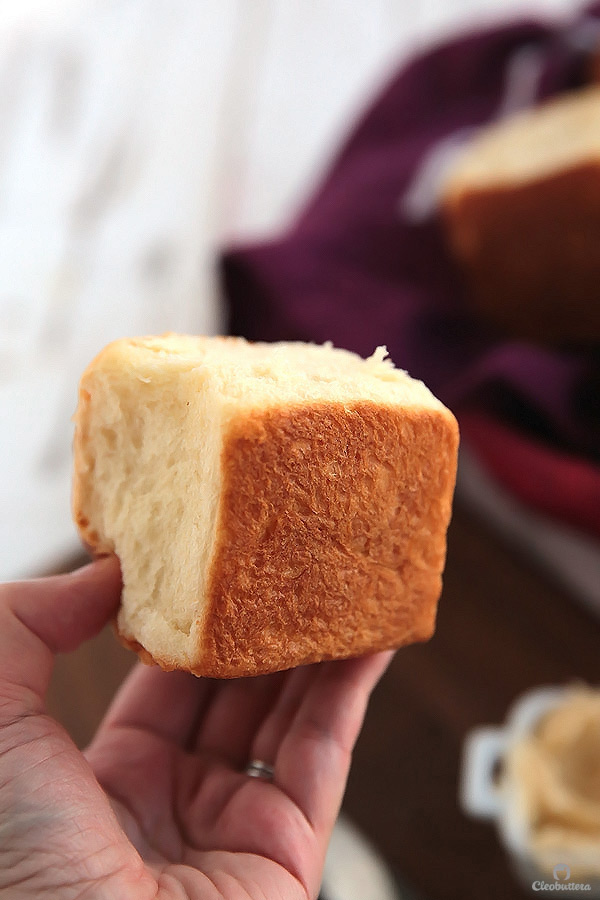
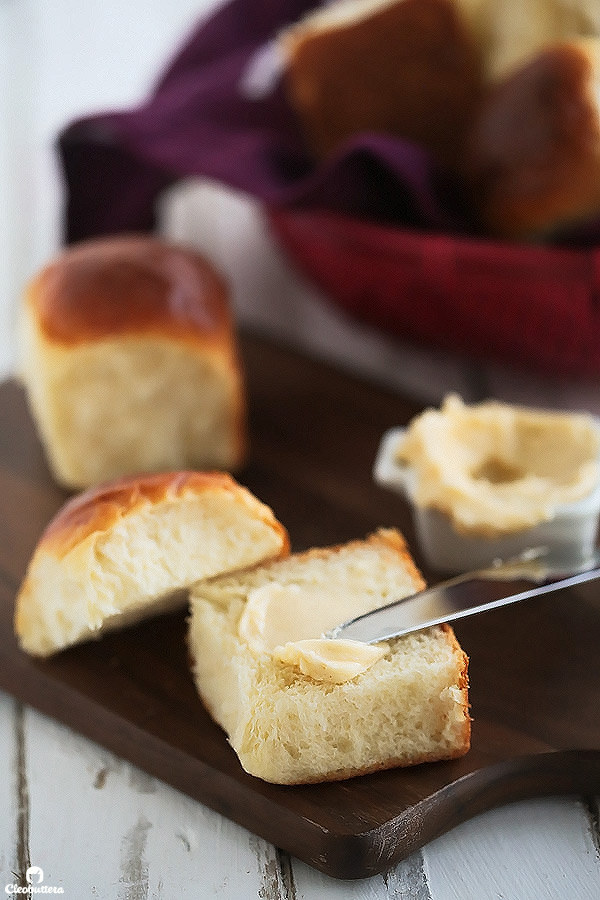
As great as they do taste, it’s the texture that deserves all the praise.
The crumb is so stringy and feathery that it reminds me of cotton.
Will you look at it…
Does that look like cotton or what?!
The “secret ingredient” to that incomparable texture is a popular Chinese/Japanese technique called ‘Tanzhong.’ I know what you’re thinking…a complicated Asian word, has to come with a complicated robotic, high-tech, labor intensive process. Wanna be scared even more? This bread is better known as Hokkaido bread. MWAHAHAHAAAAAA!!!
I promise you…there’s nothing complicated about making this type of bread! In fact, its surprisingly a snap to make at home, using everyday supermarket ingredients.
As intimidating as ‘Tanzhong’ sounds, I’m here to tell you that its nothing but a simple mixture of flour and water/milk that gets heated together over the stovetop for less than 5 minutes creating something similar to roux or flour paste. The roux (which is the starter in this case) is then mixed into the dough, producing fool-proof, tender, bouncy bread each and every time.
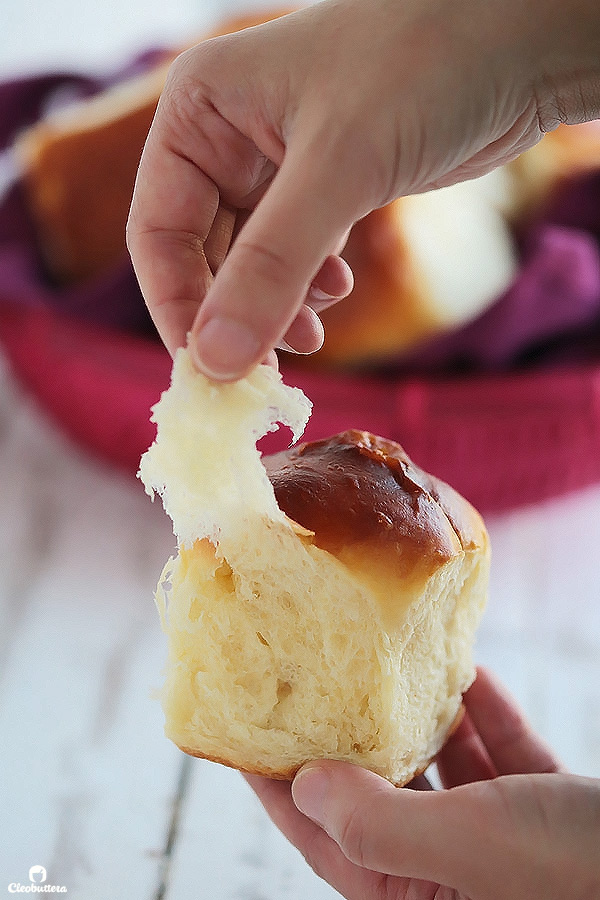
As fluffy and squishy as they are, they still have enough heft in them to not turn into squat English muffins when you handle them. Here’s the proof…Boing boing boing…
I’ve been seeing loads of recipes for the Hokkaido bread floating around the internet for several years now, and whenever I spot that cotton-y soft crumb, I constantly remind myself that its a MUST-MAKE!
When I finally came around it though, I was more inclined to try it in dinner roll form instead of the toast loaf that is more akin with this bread. So I tried one of the most popular recipes out there and while the result was SO FLUFFAAAAAY I’M GONNA DIE, I was left hungry for more depth of flavor and more moisture. It’s like the rolls tasted too lean, lacking in butter flavor. They’d make great sandwich bread (toast) I bet, but they weren’t rich enough to quality for dinner rolls.
With a little extra richness in mind, I tried a second recipe that uses a little extra butter and heavy cream in combination to the milk. The result: Way too rich; almost heavy. Didn’t like it all.
After a few consultations with Dr. Google, I landed on the treasured recipe. The exact one I was looking for. For starters, the recipe was already developed in roll form so there was no need to improvise. Second, it came from a very trusted source, King Arthur Flour, and had lots 5 star reviews! I’m one to be manipulated by great reviews. And lastly it was everything I was hoping for.
Tall, tender, light, fluffy, super soft, squishy yet bouncy, stringy and flavorful. It had it all. And as someone guilty of always tweeking recipes, this one didn’t need it.
And while the 2 other bread recipes that I have on the blog (see here and here) will have a special place in my heart (and tummy), this one wins the 1st place trophy for exceptional texture and ease. I’ll still make the others too. One can’t have too much bread ?
Let me show you exactly how you could make this bakery-quality bread in the comfort of your own home.
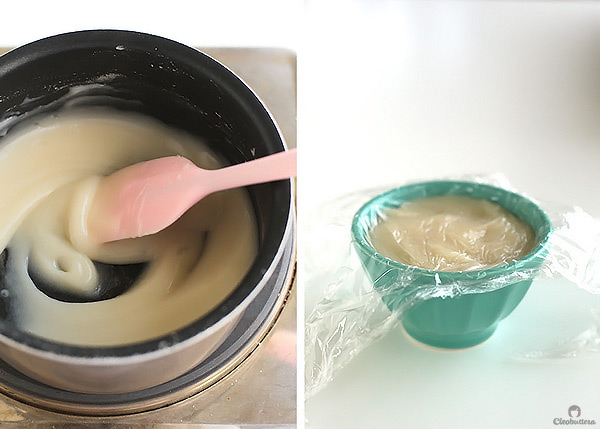
First things first…the Tangzhong (the roux or starter or flour paste; whatever makes you comfortable).
You’ll just combine flour, milk and water in a small saucepan and heat briefly until it thickens to the consistency of loose roux. Once it starts leaving lines in the bottom of the saucepan, its done. Don’t over do it. As Ina Garten always says: “How easy was that?!”
Then transfer it to small bowl, cover with plastic right on top of it and let it cool to room temperature. (I just stick it in the fridge while preparing everything else).
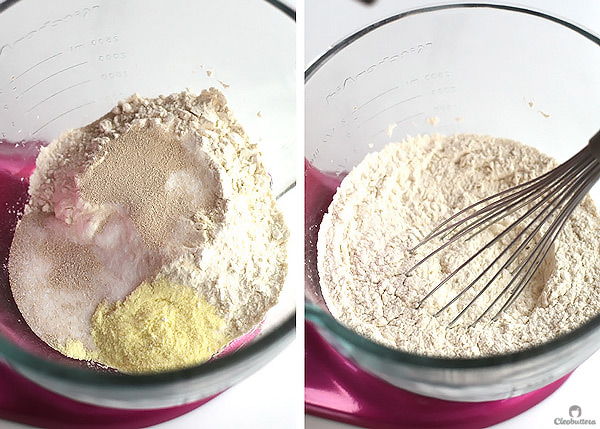
In your bowl, whisk together the flour, INSTANT yeast, salt and milk powder (adds great milky taste!)
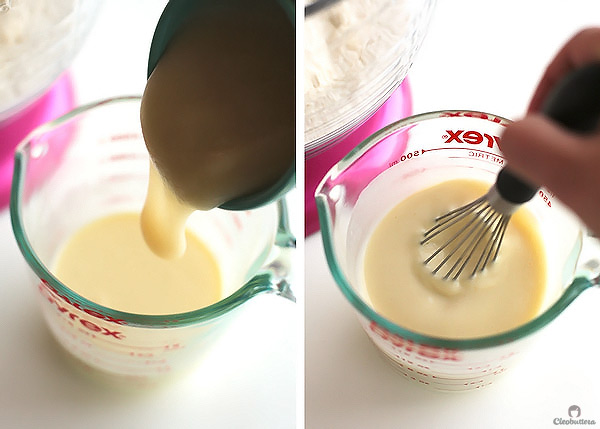
In another bowl or large liquid measuring cup combine together the milk, egg, melted butter and the cooled Tangzhong.
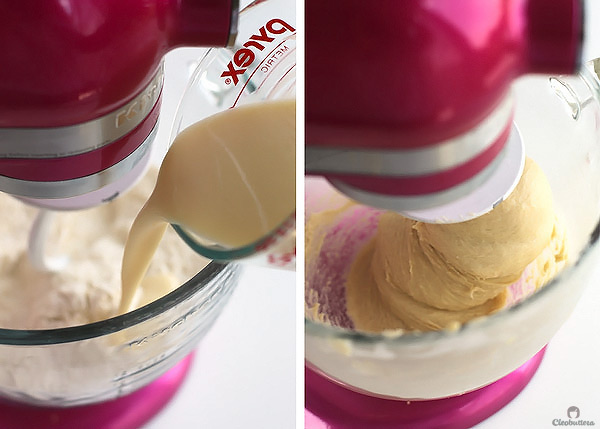
Pour the liquid ingredients over the dry ingredients and knead the heck out of it. It will look very sticky and wet at first and you’ll start doubting the you did something wrong. Don’t be…just be patient. It will become nice and pliable as the kneading progresses. Let it knead for 15 to 20 minutes until its tacky (slightly sticky) but not messy.
Here’s a good indication of telling when the dough is ready. You should be able to stretch it between your hands into a thin film without it breaking right away. When it starts tearing, it will tear in a circular fashion.

Ball up your dough and place it in a greased bowl, then cover with plastic wrap to rise. After 60 to 90 minutes, it should poof up like this.

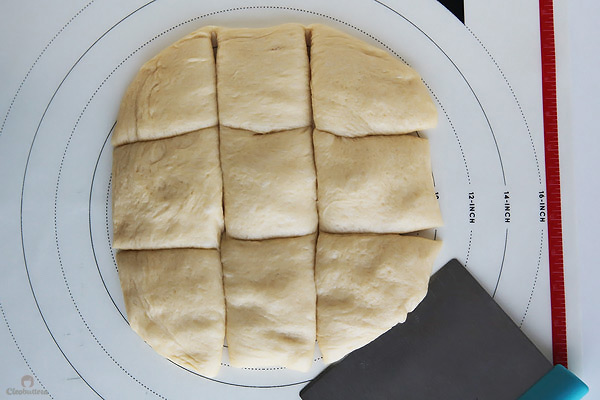
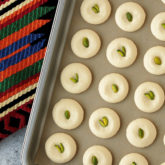
Turn it out on a work surface, you shouldn’t need to dust anything with flour. Really the dough is a dream to work. Divide the dough into 9 equal pieces. If they aren’t as equal as you intended them to be, simply take small pieces from the fat rolls and add them to the little ones.
Then gather the sides and pinch them together to form a round-ish shape.
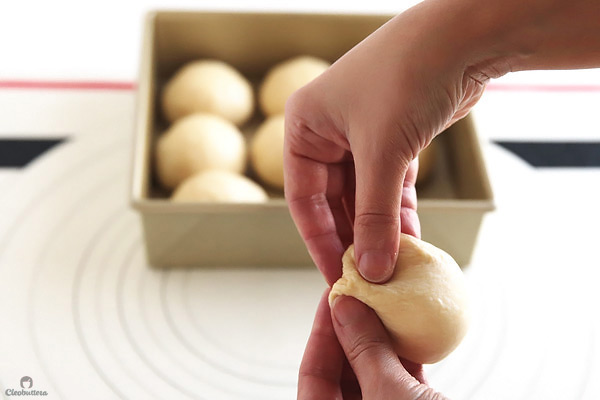
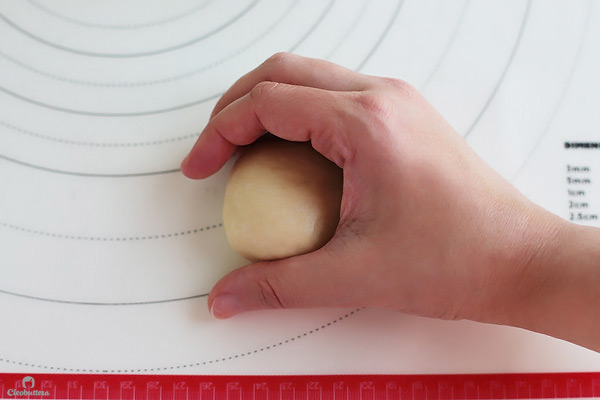
With the pinched side down, cup hand around the dough and, without applying pressure to dough, move hand in small circular motions to form a taut ball.
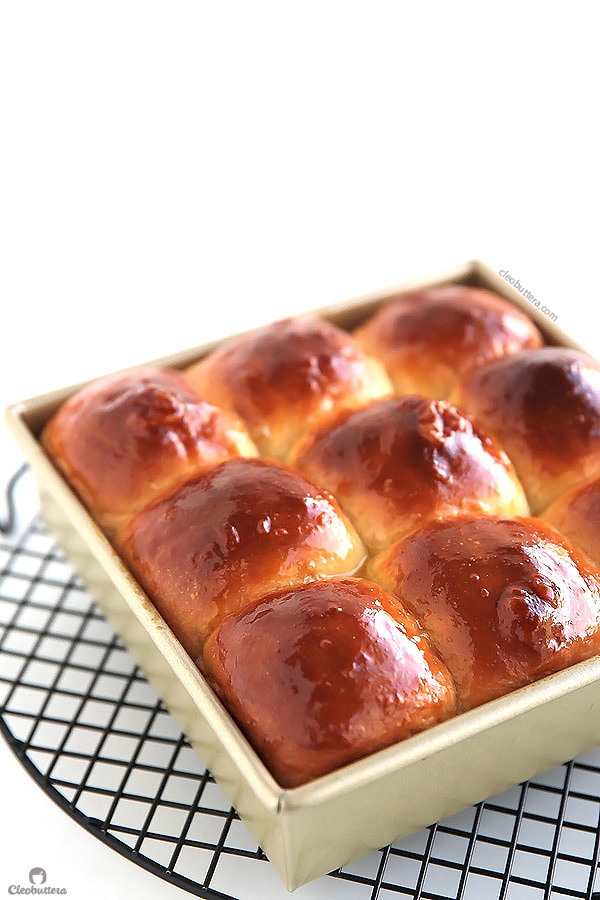
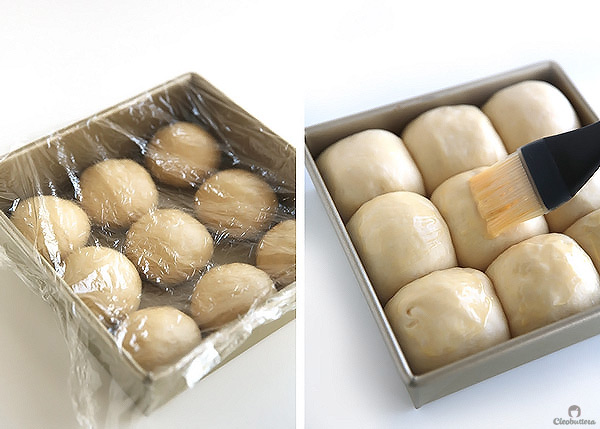
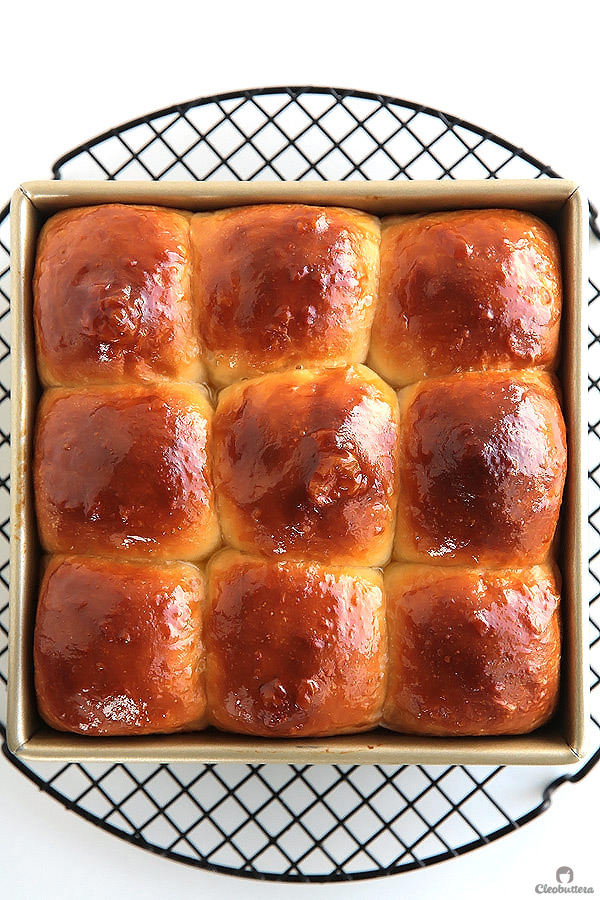
Place the rolls into the prepared pan and cover loosely with plastic wrap until it poofs up once again; 40 to 50 minutes. Give them a gentle brushing of egg wash then into the oven it goes.
Note that the original recipe from King Arthur Flour uses a round pan but I kinda like how evenly squared the rolls turn out in a square pan, as opposed to the triangular shape that the circle pan produces. Your call though.
Bake until gorgeous and golden brown; 20 to 25 minutes, then slather ’em with some melted butter. King Arthur Flour don’t do that, but I do because my blog’s middle name is ‘BUTTER.’ Also…softens the tops.
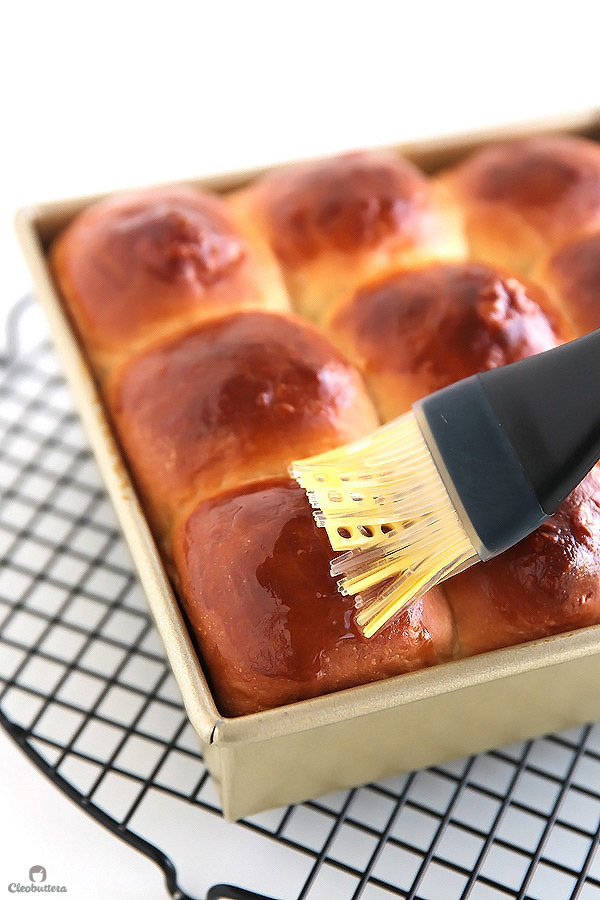
Let the butter soak in for a few minutes which will seem like eternity…
Turn them out, then….
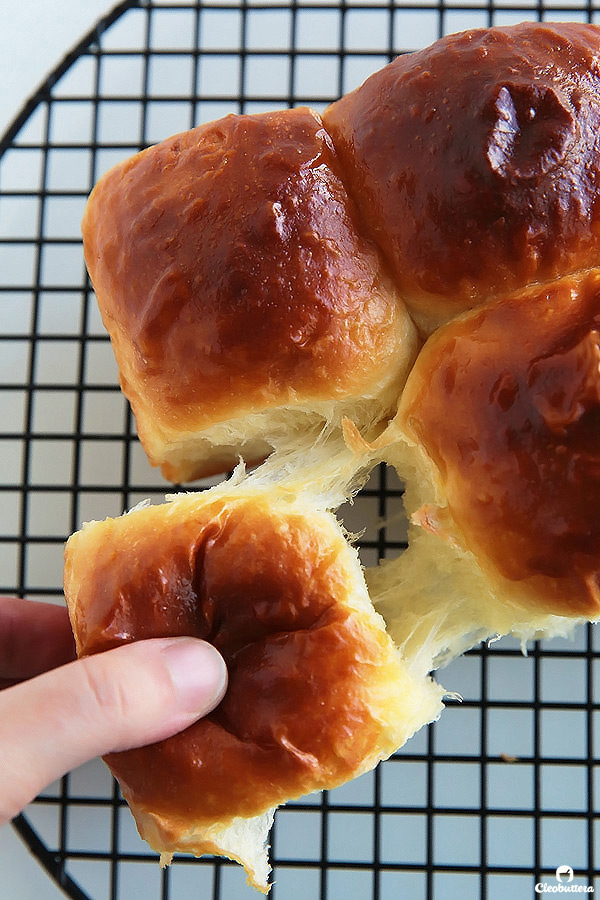
The moment you’ve been waiting for…Pull-apart those cotton balls!
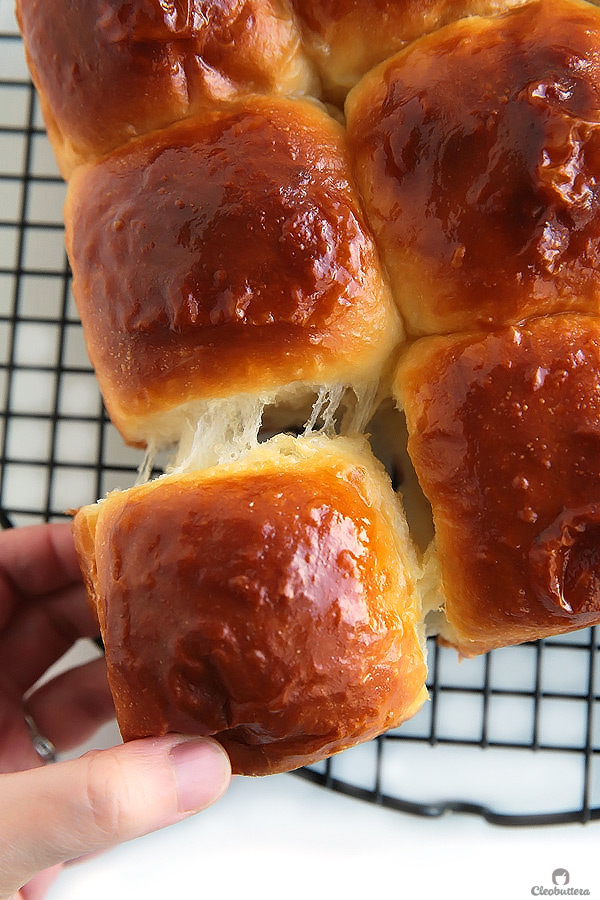
Super soft and fluffy on the inside, gorgeously golden on top and perfectly browned on the bottom. If you’re rolls usually turn out pale on the bottom, then do what I did and bake the rolls on top of a hot pizza stone or baking sheet. That should should do the trick! See…
So FLUFFAAAAAAY!
And I’m tellin’ ya, the pictures do even do them justice. I’m actually not satisfied with this photoshoot because I know how much better and delicious looking these rolls are in real life. If I wasn’t training myself to let go of obsessive compulsive disorder, I would’ve reshot them. I have to admit that I was this close. So yaaaaaay me!
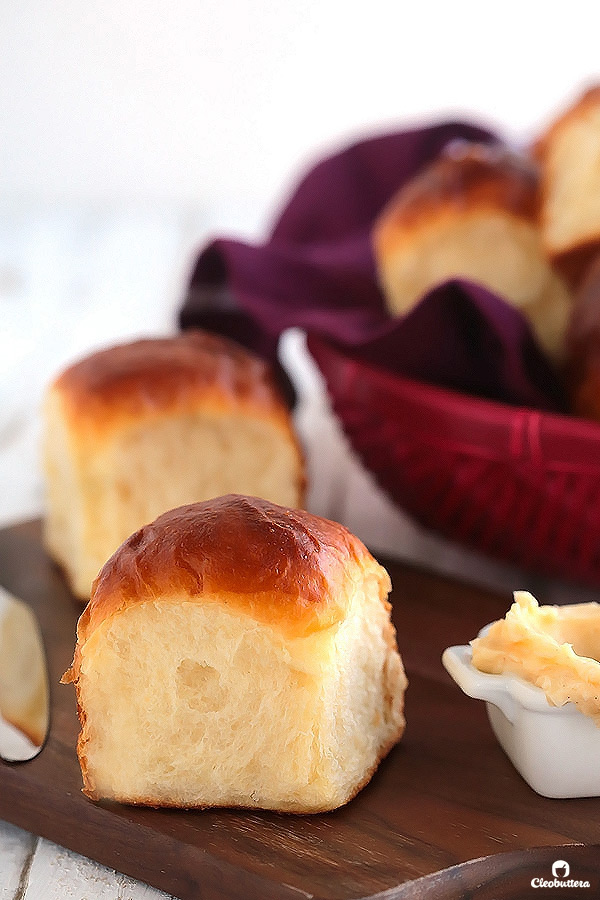
Oh and have I mentioned how divine these taste with whipped honey butter?
Seriously…totally OMG!
I’ll add the recipe for the honey butter for you, just in case you wanna go all the way!
Also…do yourself a favor and double the recipe because 9 rolls will disappear before you know it.
Ultra Fluffy Milk Bread Rolls
Weighing the ingredients using a kitchen scale is highly recommended over measuring by cups. It will take the guess work out of the recipe because a gram will always be a gram, but a cup won't always measure out to be the same, so you're more likely to achieve accurate results. Please use a scale if available.
Ingredients
For the tangzhong (starter):
- 3 tablespoons (43g) water
- 3 tablespoons (43g) whole milk
- 2 tablespoons (14g) bread flour (**see note)
For the dough:
- 2 1/2 cups (298g) bread flour (**see note)
- 2 tablespoons (14g) dry milk powder
- 1/4 cup (50g) sugar
- 1 teaspoon salt
- 1 tablespoon instant yeast
- 1/2 cup (113g) whole milk, slightly warmed
- 1 large egg
- 1/4 cup/ 4 tablespoons (57g) melted unsalted butter
For the egg wash:
- 1 egg
- 1 tablespoon heavy whipping cream or milk
- For brushing the baked rolls: (optional)
- 1/2 tablespoon melted butter
- For the whipped honey butter: (optional condiment for the rolls)
- 1/2 cup (113g/ 4oz) unsalted butter, softened to room temperature
- 1/4 cup honey
- 1/4 teaspoon cinnamon (optional)
Instructions
To make the tangzhong (starter):
- Combine the water, milk and flour in a small saucepan, and whisk together until no lumps remain.
- Place the saucepan over low heat, and cook the mixture, stirring constantly using a heat-proof rubber spatula or whisk, until thickened to the consistency of loose roux and the spatula/whisk leaves lines in the bottom of the pan when dragged through; about 3 to 5 minutes.
- Transfer the tangzhong to a small bowl, cover with plastic wrap directly on its surface and let it cool to room temperature. (To quicken the cooling process, I put it in the fridge while preparing the other steps)
To make the dough:
- In the bowl of a stand mixer (or any large bowl or bread machine) whisk together the flour, milk powder, sugar, salt and yeast to combine.
- In a 2-cup measuring cup (or medium bowl) whisk together the milk, egg, melted butter and cooled tangzhong until well combined.
- Pour the milk mixture over the flour mixture and with the mixer on low speed, knead together using the dough hook (or by hand or bread machine) until a dough forms. The dough will be very sticky when mixing begins, but resist the urge to add more flour; the dough will absorb the excess moisture and come together nicely as the mixing progresses.
- Increase the speed to medium low and continue kneading until a smooth, elastic dough forms and is no longer sticky; 15 to 20 minutes. Set the timer! (It takes me exactly 20 minutes until its not sticky enough to handle) At this point, the dough should feel tacky (slightly sticky but not messy) and should easily come together in a taut ball when handled with lightly oiled hands. If this is not the case, then knead in a little more flour, one tablespoon at a time. A good indication of telling when the dough is ready, is being able to stretch between your hands into a thin film without it breaking right away. When it starts tearing, it will tear in a circular fashion.
- Using lightly oiled hands, shape the dough into a ball, and transfer to a lightly greased large bowl. Cover tightly with plastic wrap and allow to rise in a warm place, until almost doubled in volume, 60 to 90 minutes.
- Turn out the dough onto a work surface (you shouldn't need to dust it with flour). Pat the dough gently into an 8-inch square of even thickness. Using a bench knife or chef’s knife, cut the dough into 9 pieces (3 rows by 3 rows). Separate pieces and cover loosely with plastic.
- Spray (or grease) an 8 or 9-inch square pan with non-stick cooking spray. Working with 1 piece of dough at a time and keeping remaining pieces covered, form dough pieces into smooth, taut rounds. To round, set piece of dough on unfloured work surface. Loosely cup hand around dough and, without applying pressure to dough, move hand in small circular motions. Place the rolls into the prepared pan. Cover the pan loosely with plastic wrap and allow the rolls to rise for 40 to 50 minutes, until puffy. In the last 10 minutes of rising, preheat the oven to 350°F/180°C. If you want to ensure browned bottoms on your rolls, place a pizza stone or baking sheet in the oven to heat.
- Prepare egg wash by whisking together the egg and heavy cream. When ready to bake, remove the plastic wrap from the pan, then gently brush the rolls with the egg wash. Bake the rolls (on top of the pizza stone/baking sheet, if using) for 20 to 25 minutes, until golden brown on top; a digital thermometer inserted into the center of the middle roll should register at least 190°F. (If the rolls tops are browning too quickly, loosely place a piece of foil on top of the rolls to prevent further browning).
- Remove the rolls from the oven, then immediately brush with the 1/2 tablespoon melted butter. Allow them to cool in the pan for 10 minutes, then gently flip them onto a large plate then onto a wire rack. Serve warm or at room temperature with anything you please or slather with honey butter (recipe below). Store leftovers in an airtight container or freeze in freezer bags.
To make the whipped honey butter (if using):
- Add the butter, honey and cinnamon in a bowl and whip with the whisk attachment of an electric mixer until light and fluffy; 3 to 5 minutes.
- Serve at room temperature but store in airtight container in the fridge.
Recipe Notes
- You could double this recipe making 18 rolls. Bake in a 13X9 inch or slightly larger pan.
- To create a warm environment for the dough to rise, adjust oven rack to middle position and place a loaf or cake pan in the bottom of the oven. Place the bowl of dough on the middle rack and pour boiling water into the pan. Close the oven door and allow the dough to rise as instructed. Alternatively, a warm, turned off oven may be used instead, just be sure that it's not hot, as that could kill the yeast. It should feel like a warm summer day.
- You could bake this bread in a 9-inch round pan making 8 sightly larger rolls and a flower shape presentation. Place one roll dough in the center of the pan and arrange the remaining 7 roll doughs around it.
- Alternatively, you could bake it as a loaf. To make a loaf, after the dough's initial rise, divide it into four equal pieces. Flatten each piece into a rectangle, then fold the short ends in towards one another like a letter. Flatten the folded pieces into rectangles again and, starting with a short end, roll them each into a log. Place the logs in a row of four — seam side down and side by side — in a lightly greased 9" x 5" loaf pan. Cover the loaf and allow it to rest/rise for 40 to 50 minutes, until puffy. Brush the loaf with egg wash and bake at 350°F for about 30 minutes, until golden brown on top and a digital thermometer inserted into the center of the loaf reads at least 190°F. Remove the loaf from the oven, and cool it on a rack.
- Bread flour is not available where I live, so I used all-purpose flour instead with great results. However, please note that the all-purpose flour in my country is high in protein, which makes it similar to bread flour. Using low-protein all-purpose flour will not guarantee perfect results, so stick to bread flour if its available to you.
- To make this recipe in advance, prepare the dough all the way through step 5, transfer a greased large bowl, cover tightly with plastic wrap, then let it rise slowly overnight in the fridge. The next day, proceed with step 6. Alternatively, the bread can be baked 5 days ahead; store tightly wrapped at room temperature, then rewarm before serving.
Recipe mostly adapted from King Arthur Flour
Measurements Note: All recipes of this site have been developed using weight measurements. Although US volume measurements have been included for your convenience, it is highly encouraged that you weigh your ingredients using a kitchen scale to get the best possible results. Due to the sensitive nature of baking, kitchen scales are proven to yield more accurate and consistent results than measuring cups. Enjoy!
Powered by ![]()
This post may contain affiliate links.
All images and content are owned by Cleobuttera® and are copyright protected. Please do not use my images without prior permission. If you would like to republish a recipe, please rewrite it in your own words and link back to the recipe page on my site. Original recipes and creations of this site are intended for personal and home use. Commercial replication or media consumption are only allowed with a written consent and agreement with Cleobuttera owners. Otherwise it is considered a violation of intellectual property. Thank you for respecting and appreciating the amount of time and effort that goes into creating free, unique recipes that make people happy.


Omg, these look so soft and delectable. And that gif is just so mesmerising!
Oh thank you Abida 🙂
Tasbih,
I’ve been looking for a recipe to make kolaches with. So far in two batches following the instructions to the letter the bread came out with the absolute correct taste but not the right consistency. I love to cook but I’m VERY new to baking. Thanks for this recipe. If I get it exactly right I’m going to be one seriously happy camper
Hello Godfather? Oh I’d love to know if it does work out with kolaches! There’s this kolaches recipe that I’ve been itching to try, by Cook’s Country and it looks very promising. I think you should check it out. Here’s the link:
http://www.cookscountry.com/recipes/7232-kolaches?extcode=MASKZ00L0&ref=search_results_1
I made it just now. I have been baking bread and cakes but I’d say this one has a different consistency. I added additional 1/3 c of water because it was so denser and couldn’t even knees without having to add additional liquid to it. It’s in the over so I’ll see how it’s gonna be. I have made dinner rolls before using the tanzhong and they turned out great
I hope it turned out well in the end. I’m surprised though that the dough needed extra water…it’s usually very sticky that most people are tempted to add more flour. Best of luck and happy baking ?
I’ve been baking my own bread all my life and wanted to find a recipe for light fluffy rolls. This looks good but I’m confused. The Tangzhong starter includes 3 tablespoons of Water 43g, & 3 tablespoons Milk 43g? I don’t want to appear difficult but, liquids are usually measured in milliliters. A Tablespoon is 15 mills or 3×5 mill Teaspoons.
So should the recipe not read 3 Tablespoons 45 mills?
Flour can spend weeks and months in its bag so You should normally always sift it once or twice to add air to which is critical for all baking both for accurate measurement of quantity and lightness in the result.
So 2 tablespoons of sifted bread flour would be 15g.
Interesting recipe & I’m keen to try a Japanese technique to see what happens.
You are obviouslypassionate about your baking. as am I.
Hi Ian! You’re not difficult at all…it just shows how into baking you are. I totally get you ?
Actually I was surprised as you are about the weight measurements of liquids. I adapted this recipe from King Arthur Flour’s website & they have a feature that converts volume measurements to weight. These are the units the offered and it’s what I used which seems to work perfectly well for me….so I’m not complaining. FYI I only make this recipe using weights; gives me much more consistent results.
Hi there,
I’m probably just being pedantic. Certainly in patisserie we have to pay strict attention to precise measurement of quantities and maybe less so with breads. I’ve tried some US recipes using cup measures and the difference between sifted and unsifted flour is amazing when you check the results in grams.
Looking forward to making some rolls using your recipe. They look great and you shouldn’t worry about your photos. They certainly do justice to the end result.
I’m going to look up the equivalents for flour available in the US and the Uk compared to French flours which is what I am lucky enough to use in my baking. Type 45 for patisserie, T55 for Baguettes and T65 strong bread flour for some other mixed recipes.
The French also have Farine de Gruau which is a special flour for making Croissants etc.
Still it’s all good clean fun and stops me hanging around on street corners looking for trouble ?
I totally agree with you on the weighing thing…I’m a firm believing convert. I used to measure by cups most of my life, but then when I saw how my baking has improved just by simply weighing my ingredients, I never looked back. Thanks for the compliments on my photography. They’re definitely not my favorite but I appreciate your boost of confidence.
Wish I had access to all these kinds of flours! Sounds like a baker’s dream. In Egypt, it’s mostly just plain, all purpose flour…but it does the job I have to admit.
Best of luck with these rolls. Hope you love them!
Hi Tasbih, Just to finish off our discussion.
Since you are worried about the quality of your photos, check out my friend Francois Xavier’s website. You will love it, I’m sure. He is a serious foodie and goes to enormous lengths to take Great still shots and videos of his gastronomic adventures.
Regarding flour.
It seems that the best flour on the planet comes from Canada. In the UK and France many bakers and flour mills/producers use Canadian flour.
When I’m in France I purchase only stone ground certified Organic
flours.
I use T45 for pastries, T55 for baguettes and Boule loaves, T65
for some mixed
recipes such as if I’m preparing Italian doughs for Focaccia, pizza, or Ciabattas for which I mix 50/50 T65 And Semolina flour.
For Indian flat breads and Greek Pita bread I just use T55.
I’m lucky to have a friend who is the best Artisan baker in Nantes who supplies me with other grades of flour including T80, T110, and T150 which are a progression Semi-whole grain, whole grain, farine integrate which I use to make my Granary whole wheat loaves.
We make flour and bread out of anything. Chestnuts, Corn, Spelt, Chickpea, etc etc and of course Rye.
There are small producers in France who produce small quantities of ancient wheat grains too, although, the prices are not for the faint hearted!
Speaking of prices, I was shocked to the core to see Amazon selling all types of French flours, T45, etc for $14+ a kilo. I can buy exactly the same products for around €2 in any supermarket.
Americans are buying French flour like Sarrasin for making Breton Galetted, paying $16 a kilo. It is a huge huge rip off. I would call it Profiteering.
I would be willing to send kilo’s of flour in their original bags but also vacuum sealed to people in the US.
We need to find out what import duty is charged for French flour coming in to the US.
The key to all this is to only buy flour that is stone ground and certified Organic.
All the other stuff has been sprayed with pesticides and you might frankly just as well go and buy a bottle of cyanide and drink a bit every day.
Anyhow, I’m open to sending flour to people in the US at what I am sure would be half the price the bandits are.
Just a thought.
At the end of the day, you can drive yourself insane buying special flour for this and that. In the end you narrow it down to a half dozen plus one or two specials, like Farine de Gruau which is what professional bakers use for Croissants, Puff Pastry And Viennoiserie. There’s no getting away from it. If you want to go the trouble of making your own Croissants, you need a baker friend who will sell you some of his, because you won’t find it in any shops.
Last. The fat. In baking, whether bread or pastry, Only the very best butter will do. That means Pure Organic minimum 82% fat Unsalted butter.
No Easy spread, and no margarine. In France a legendary chef that there are three key ingredients in French gastronomy.
Butter, Butter and Butter.
If you are going to take time making something which you are then going to put in your mouth, you might as well make sure it is
the best quality you can afford.
Reach out if anyone wants to buy French flour.
Take care and have a great Christmas and a Happy New Year! ?
.
Wow Ian! Thank you so much for such valuable tips and information. Your knowledge about the baking world is unbelievable; I’ve never seen anything like it. Thank you much for directing me to your friend’s website…I can’t wait to explore it!
Me again.
I forgot to put the link to FXCuisine website so here’s it is:
http://fxcuisine.com/
Enjoy!!!
??
Hi Ian One thing to remember is when I milk my goats I measure my productivity by weight. It tells me milk fat content. So milk may weigh a bit more than water simply from milk solids. Only question I have is do I have to use milk powder as this is something we definitely never have in our home? I may wing this and add some extra cream instead of milk powder
Hey Patricia! There’s nothing better than freshly milked milk. I wouldn’t suggest adding cream here, as the extra liquid will result in a wetter dough, which will require adding extra flour, and that will throw the recipe ratios. However, if you feel that goat milk is leaner than whole cow’s milk, you can sub some of the milk with cream, to get it to the same fat’s content as the cow’s. You also don’t need to get out of your way to get milk powder, as you can just omit it. The recipe will still work well without it, but maybe lose a teeny bit of tenderness. Don’t worry, they’ll still turn out amazing. I’ve had lots of feedback from readers who have skipped it and still ended up with stellar results.
Hi there.. Wouldn’t 2 tbsp be 30 g of flour? I, too, was confused about the conversion
Hi Sig! Actually according to King Arthur Flour’s weight chart, (which I found to be the most accurate one, or at least according to how I measure things) 1 cup of flour is 120 grams. 1 cup has 16 tablespoons. So if you divide 120 by 16, you’ll get 7.5 grams per tablespoon. Multiply that by 2 and you’ll end up with 15 grams per the 2 tablespoons called for in the recipe. The recipe says 14 grams, but if you use 15…no biggie ?
Here’s the link for KAF weight chart…it’s my go-to:
https://www.kingarthurflour.com/learn/ingredient-weight-chart.html
I wanted to know do I bake these on a pizza stone or do I shape the balls of dough and bake them in a 8×8 in pan? Thx in advance
Hi Iram:) I’m sorry if the instructions confused you. To clarify,you shape the dough and put in the 8X8 pan then you put the pan on top of the hot pizza stone. So you bake the rolls in the pan over the pizza stone. If you have Instagram, I have a video of the process on my account which could help.
Thx this helped me understand
Hi there,
When it comes to baking bread and dealing with yeast, I get all panicky. My breads and buns NEVER turn out good. They have weird doughy textures. Could it be the size affecting the texture? Or perhaps the fan oven? Or maybe Im not kneading the dough well?
Also when I let the dough rise for 60-90 mins and I punch it down once more before forming the balls, does the dough still have to look smooth because mine usually looks all lumpy and feels shabby!
Help me, please. Im so disappointed ☹️ ?
These bread rolls look absolutely perfect! So soft and fluffy!
Thank you Marsha! I hope you get a chance to give them a try to experience the fluffiness for yourself 🙂
Hi Tasbih.
is it posiible to make this recipe in bread machine? if yes, on what stage should I put the Tangzhong?
thanks 🙂
Hi Anastasia. I’m terribly sorry for my way overdue reply. I think it should work just fine, but I wish I can confirm that & give you further guidance but I’ve never used a bread machine, so I’m unfamiliar with the process. Sorry about that.
These rolls just look amazing, I love your work Tasbih
I really want to try doing them, can I fill them with cheese inside ??like halloumi
Thank you May!
They really are so good. You really need to give them a try; you won’t be disappointed. I think they’ll be amazing with a cheese filling, but you’ll need a lot of it since these are very high rolls and rise more than you’d expect them to. I have another recipe for cheese stuffed rolls that I recommend you check out for tips. Here’s the link:
https://cleobuttera.com/breads-and-rolls/heavenly-crescent-rolls-3-ways/
mercy, it looks gorgeous.
Oh my god i’m so exsited , i’m try it now ❤️❤️❤️❤️
I hope you love them as much as we do ?
Attachment
Just made these and they are GOOOD!!! Can’t fault them at all.
I Just made a double batch. One in a square pan, one in a round pan. They rose a LOT and got nice and brown. I may have overcooked them a bit but you can’t tell. With that much butter in the dough, they are very moist. We couldn’t stop squealing about how fluffy and bouncy they were. Thank you for the recipe and detailed instructions!
That’s amazing to hear Phoebe! Currently smiling from ear to ear that you liked the recipe ? And yes these guys do rise like crazy! They produce one TALL roll. I kinda like them that way, but if you prefer them shorter, you could just use a larger pan, so they’ll spread more than they rise. Glad you enjoyed 🙂
can I use active dry yeast thanks
Hey Sydney:) You sure can but you’re gonna need to activate it by stirring it in the warm milk instead of adding it in with the dry ingredients. Give the yeast some time to foam up before adding the rest of the ingredients to the milk. You might also find that the dough will take a bit longer to rise.
Hello. I would like to try you recipe but i have no powdered milk around. Can i omit it or is there an alternative? Thanks very much 🙂
Hi Grace! The powdered milk adds an extra boost of flavor & helps tenderize the bread, so its preferable to add it but it’s not a must. I think the rolls would still turn out great without it.
Happy baking!
Wowser these rise ALOT!
Oh yeah these are some TALL rolls!
Hi Tasbih,
Thank you for the lovely recipe. I just wanted to check that the dough should be beaten for 15-20 minutes in a stand mixer (I have a Kitchenaid). The motor was getting quite warm and the dough appeared to be a bit overdone. I just watned to check I am doing teh right thing. Many thanks!
These were a complete fail for me 🙁 . After the first rise my dough was all pockmarked and collapsed when I put my finger in it. After the second rise it just looked like a gloopy mess. Any ideas on where I went wrong? Hoping to try again.
Oh no! Im terribly sorry to hear that. I’m suspecting that either the yeast might’ve been off or one of the ingredients got mismeasured. What I’d suggest is to first check the expiry date of the yeast and make sure that it’s working. Was it instant yeast? The other thing is that if you have a kitchen scale, I highly recommend using it over measuring by cups. The results will be much more accurate & it will eliminate all the guess work on whether you’ve over or under measured anything.
Wishing you much better luck next time 🙂
Thanks Tasbih! I actually suspect two things.. Firstly I think I have overworked the dough. I had the kitchen aid on medium speed (4) for 20 mins which I think is too much? Secondly I think I had the oven too warm ( is 80 degrees for fan forced?) so the dough has prob overproved. I measured everything on a scale and the yeast is a brand new foil packet of dried yeast so I did start it for 5 mins with some warm water and sugar to get it bubbling before use. Will try again as the smell is quite amazing and the kids ate the failed product ?. Will report! Thanks again!
Hi CC! You’re right, it’s definitely the very warm proofing environment. The oven should just barely feel warm like a nice sunny day. As for mixing, you could stop kneading as soon as the dough comes together & you could stretch a piece between your hands into a very thin sheet like the photo in the post. I’m glad your kids still approved of the flop 🙂
I hope they turn out amazing the next time.
Hi CC! Yup! You’re doing it right! It does take quite a bit of time to come together to an elastic dough, otherwise it’s too sticky to work with. Once you could pull a thin, translucent sheet from it, then it’s fine.
Hi Tasbih,
I’m pleased to report that the second match was made marvellously. I reduced the speed of the kitchenaid and limited the time to 15 mins. I also reduced the proofing time to 45 mins the first time and 15 mins teh second. Thanks so much!
And I’m thrilled to report that I’m currently doing a happy dance?????? Yaaaay CC!!! So happy it finally worked out for you! So proud of you for not giving up. Thank you so much for your update?
Hi,
I will use your suggestions because I just made this recipe and the rolls turned out a little dense and not the ultra fluffy I was expecting. You were the closest post that I saw that encountered the same problems I did. I also use a KitchenAid mixer with the dough hook and the dough came together sooner than I thought which made me think I should use less of the bread flour than specified? Thoughts?
Hello do you think this recipe would suit shaping into individual bunny rolls?! I love the sound of the bread, but worried it might create tall mutant bunnies?! Thank you
Hi Georgina! I’m squealing at the idea, but just like you, I have the same concern. These rolls rise A LOT and so any details you add to them will most likely be lost as they get their second rise & bake. Unless you add the ears, etc, after their second rise & make the rolls really small like 27 instead of 9. I can’t guarantee it though. These are more like bunny bums than full bunnies lol!
Thanks Tasbih I’m torn I need to make bunny rolls tomorrow, but I also really need to try this recipe now that I’ve read it! I might just have to give them a try and keep them tiny! Will let you know how I get on! ?☺
I hope they turn out amazing! Sending prayers your way?? Can’t wait to know how they turn out!
Do you think i could add some spices and fruit to make hot cross buns?
OMG I was just thinking about that today! Actually I do think they’d work! By comparing classic hot cross buns recipes, they do have the same amount of sweetness. All you need are the spices, dried fruits & glaze to transform them into hot cross buns. If you do try them, please come back & let me know how they turned out! I’d love to know & I’m sure many others who are wondering the same thing would too ?
Pingback: Heavenly Dinner Rolls - Life Made Simple
I think i might give it a whirl.
this reminds me of something my mom used to do, but it was filled with 3agwa (minced dates), so can i stuff them with it if i want it as something sweet?
Yummy! Dates, and especially 3agwa, is one of my favorite things in the world! My mom used to make sandwiches of 3agwa sautéed in butter (gulp) and I used to die over the smell and taste of it. I could imagine how good these rolls would taste stuffed with 3agwa! Thanks for the suggestion; will definitely need to try.
I made them into hot cross buns and they turned out great.
That’s awesome news! I’m gonna have to try them myself one of these days. Thank you so much for the update ?
Hello! These look amazing, so fluffy and puffy:) anyway, I was wondering, do you know where to get milk powder from as I cant seem to find any? Thank you!
Hi Ellie! I hope you can give these a try; they are mile high and so fluffy indeed. About the milk powder, it’s everywhere where I live, which is in Cairo, Egypt. Maybe if you can tell me where you live, I could help you figure out where to find it.
Made this delectable bread today just as listed! Amazing! I barely could wait for it to cool long enough to cut it! The only thing I had to do was add a little extra flour because I used a duck egg (it was a little on the bigger side) and it added a tad more hydration to the dough. But it came out picture perfect and tastes incredible!
Absolutely love hearing that Diane! Waiting for the rolls to cool enough to handle requires some serious self control, which I lack too ? Great call with the extra flour to accommodate for the extra hydration ??
Powdered milk is in most supermarkerts, also known as dried skimmed milk. You tend to find it with uht milk.
Thanks for your valuable input ?
Second time making bread this is definitely the best so far!!!
This is like a very sweet brioche style bread.. The egg wash gives it a beautiful shine
I made a loaf rather than the rolls, literally just got it out of the oven and cut a slither and spread some butter on it!!
Delicious
Yum! Your description of the loaf coming out of your oven almost makes me smell it. So happy to hear that this recipe has become your favorite! It’s my son’s birthday next week and guess what he requested for his birthday “cake?” This! But he said he wants it to look like one giant roll instead of smaller ones. Greedy little man wants to have it all for himself ?
I did made bunny rolls, I put them in a round tin, allowed them to rise, then I snipped ears with scissors just before baking…they tasted great and looked something like a rabbit/cat but everyone thought they were brioche and loved them!! Gx
Oh thank you so much for reporting back! A rabbit/cat hybrid doesn’t sound so scary; I’m sure they were tremendously cute. I’m so glad you guys enjoyed them 🙂
I made this last Friday and It turned out sooooo flufaaaay! Thank you for your recipe. Now I wont be frustrated anymore, Thank youuu!!! ???
Yipeeeeeeee! So glad to hear that Jopay! I’m so happy you loved them 🙂
i made them, but added whole wheat flour and they were great thank you 🙂
It’s great to hear that whole wheat flour worked just fine Maysoun! Thanks for letting us know 🙂
Hey I tired this recipe and as soon as i took them out of the oven after proving they sank 🙁 Also the taste of yeast was quite strong. Not sure where I went wrong. I’m not much of a baker haha. Also I hand kneaded this so I’m suspecting that has something to do with it? They were still nice but more of a brioche 🙁 haha
after proving the second time**
Hi Anh 🙂 Thank you for trying the recipe. Ok now let’s troubleshoot! I’m suspecting one of 2 things or both for causing the dough to collapse. Either the proofing oven was too hot; if it was, then just make sure that it’s barely warm. It should just feel like a warm day.
The second thing is like you said is the kneading by hand. As you might’ve noticed in the instructions, this dough requires a ton of kneading; 20 minutes by machine! This is important to strengthen the gluten strands of the dough, which in turn give it enough structure to rise. So by not kneading enough, the dough won’t be strong enough to rise & stay that way.
I wish much better luck next time ?
Hi, I am obsessed with bread and these rolls look amazing. Is there a way I can substitute some of the ingredients with vegan alternatives and it still work?
Hello Sri ? I’m sorry to tell you that I don’t have much experience with vegan baking, but honestly I think it stands a high chance of working just fine with substitutions. Coconut oil for example for the butter, almond or soy milk for the cow’s milk, all sound good. What would you use for the egg though?
These look so amazing! Can I substitute the milk powder for custard powder?
Hi Ellie ? I wouldn’t recommend doing that because they’re quite different. Custard powder has thickeners, sugar, milk, sometimes powdered eggs, amongst other things, so using it will most likely affect the outcome.
Ah, I’ve made these three times now, and each time the dough didn’t become workable, so I had to add a bunch of flour – although the finished product was quite nice! Anything troubleshooting you could recommend? I’ve used a kitchen machine every time now, although I left out the milk powder, which is not readily available in Denmark.
Hi Kári! I’m glad you still liked the final product. I found that the keys to success with this recipe are weighing your ingredients using a scale, using a high gluten flour & kneading for the whole 20 minutes. Weighing as opposed to measuring by cups ensures that you have the exact amount of flour, so it’s super accurate & minimizes the room for error. Bread flour is the best choice for this recipe because it’s high in gluten so it will give the dough a better structure. Finally, the kneading process requires a lot of patience. My dough stays looking very soupy until the last few minutes. So give it at least 20 minutes of kneading before deciding to add extra flour. As soon as you’re able to stretch the dough into a very thin and translucent sheet, then you know it’s well kneaded. I wish you better luck next time?
I made 3 batches of these today! They turned out lovely and fluffy and my apartment smells heavenly. Next, I’m going to try it in loaf pan. Thanks for posting this recipe. Your instructions are great.
Wow 3 batches?!! Now we’re talking ? I’m so glad they turned out so great! Thanks to you for giving us your feedback.
I am so in love with the small of this dough but I just cannot seem to get to your thin stretched consistency! 🙁 I have kneaded for more than 20 mins and added 1 tablespoon of flour and still not ready 🙁
Hey Shan:) If the dough is no longer sticky and messy to the extent of being workable that it’s good to go. Best of luck ?
how did you get yours to that thin stretched consistency? It looks so perfect on your picture, even though I succeeded on second try, but I’m wondering if it will be much fluffier if I was able to have it thinly stretched like yours. My dough tears in a circular pattern like what you mentioned too but i am not able to have it stretched thin and smooth like yours.
I think that as long as it’s tearing in a circular pattern & is pliable enough to handle without being sticky then you shouldn’t worry about it. It’s just a little extra insurance that you got to the right consistency.
If you’re so inclined, I’d recommend weighing your ingredients using a kitchen scale if you aren’t already. You’ll get much more accurate results.
Well I’m pretty new to baking and I’m having some difficulty getting it perfect but it’s getting there. The taste is magnificent though. I put a slice of cheese and a piece of sausage in the ball and fold the dough around it and pinch together. My last batch was very sticky and hard to work with so I added a few touches of flour to make it easier to work with. I think where I’m messing up is on the kneading and I forgot to let it rise the second time because I was frustrated.
Oooohhh the cheese and sausage filling sounds heavenly. I’ve been really wanting to play around with fillings too and you just gave me a push.
I think if you weigh your ingredients using a kitchen scale (if you aren’t already) instead of using cups, will really help you achieve a better dough consistency and overall much better results?
I had a friend point me to a Texas style Kolache recipe that I’m keen to give a run. When I get done I’ll let you know how they turn out. I don’t want to post a link to another site on your blog without your permission first but the reviews are good. Personally I think your recipe, once I use the right yeast (bangs head on desk) will be better because I love the taste of this bread.
“Bangs head on desk”???
Please let me know how your recipe turns out and feel free to post the link. I’ll love to check it out!
These are amazing! Thank you so much for the recipe. I used my bread machine to make mine so there wasnt too much effort on my part but the result is ao yummy and turned out just like your pictures. Absolutely wrapped and currently enjoying with red wine beef stew 🙂
Yaaaay Charlene! I’m so happy to hear that! I’ve never used a bread machine before but now you’ve tempted me. With all the bread making I do, I think it might just be worth it.
Glad you enjoyed these rolls:)
It made it so much easier and you definitely should try a bread machine if possible. My husband is still raving about the rolls lol 🙂
Hey!
This looks awesome! I really want to try this, but the only problem is: I don’t have a kitchenaid and I can’t buy it either. Can I just do this manually? So with my hands?
Any tips to do it this way? How long do I have to kneed it with my hands and when do I have to stop?
Thanks for this recipe!
Hi Chahrazad! I love your name by the way:)
So reader, Godfather, did NOT use a Kitchen Aid and he so kindly tried to reply to your comment, but for some technical reason it did not show up here but instead got sent to my email. So I’ll paste it for you here, as it’s very helpful and I would’ve said the same thing.
Godfather: I don’t either so I just hand knead. I made some mistakes in my first few batches but yesterdays turned out just perfect. About 30 minutes by hand for me which is a bit of a beating but I can see the tv from my kitchen so I just put something on and go to town. I figure if I make enough of this dough before long I’m going to have Popeye arms 🙂
That said. I do keep my eye on Craiglist for kneaders and have spotted a few really great deals but money is severely tight around my abode so it’s just a dream at this point. Good luck.
Thank you so much for you compliment!
And haha, thank you so much for your awnser Godfather! I’m going to try it out, but I hope I won’t get those Popeye arms! Haha
Thank you both for your reply!
Baked these today and they are delicious! I forgot to pop them in the oven for the second rise and I used butter on top instead of the egg wash. Super delicious and fluffy!! Will defiantly bake these again. Thanks!
Awesome! I’m so excited to hear that! Butter on top of buns is never ever a bad idea? Thank you so much for your feedback.
Just made these today and they are oh so fluffy! It’s definitely on my keep list. Super happy with the results. thank you for the recipe!
Yaaaay! So happy you loved them. You’re most welcomed:)
Can i use fresh (wet) yeast. If yes what is the quantity in gms to be used.
Thanks
Hi Linda:) To be honest I’ve never ever used fresh yeast before so I’m not certain, but I don’t see why it wouldn’t work. I have read that yeast types are interchangeable. I think you’re gonna need to activate it first before adding it to the dry ingredients. I hope you know how to because I don’t ? As for the amounts, I’ve read that the rule of the thumb is to multiply the amount of instant yeast by 3. So since 1 tablespoon of instant dry yeast is 9 1/2g, that means that you’ll need 28 1/2 g of fresh yeast.
Good luck, and please let me know how it goes. I’d love to know!
Fresh yeast will be 3 times in weight to the dried yeast eg. 10g dried yeast = 30g fresh yeast
Hi! Couldn’t resist trying your recipe as the photos are amazing! After 20 mins in my kitchen aid – my dough comes together but its is a bit dry and although I can stretch it for a bit, its not as elastic as shown in your picture. Any idea why?
Hi Lyn! It might be due to a little extra flour than went it there. I’m sure it will still turn out delicious and fluffy. But next time, try weighing your ingredients on a kitchen scale (if you have one) instead of measuring by cups. It’s much more accurate and a sure-fire way to guarantee the best possible results.
Hi Tasbih,
First of all your recipes are amazing. I tried the Nutella cookies recipe and I must say they are heavenly.
Ok, so now I want to try this mouth-watering bread recipe however, there’s a problem. High protein all-purpose flour is not readily available where I live.
Can I add gluten powder to all-purpose floor? If yes, how much gluten needs to be added?
Hi Ashish! I’m so happy you enjoyed the Nutella cookies; they’re my guilty pleasure?
Do you know the protein percentage of the flour you have available? I don’t have bread flour where I live too, but our all purpose works just fine with this recipe. You’ll want to find a flour that has 12-14% protein. The extra protein in bread flour results in a slightly higher rise, but you’ll get a good rise with all purpose.
Adding vital wheat gluten is a great option for adding protein. The suggested amount differs from one source to another, but it seems that most agree with 2 teaspoons per 1 cup of all purpose flour.
Thanks Tasbih…!! I’ll give it a try and let you know 🙂
These look amazing. Would you know if I can use fresh yeast? if yes, how much?
Hi Ami! Thanks for stopping by. I really hope you give these a try; SO good!
Concerning fresh yeast, I’ve never worked with it before, but did a little digging about it since reader, Linda Pereira, had the same question. If you scroll a liiiiiiittle bit upwards, you’ll find the exact answer you’re looking for. (Under my reply to Linda Pereira).
Thanks Tasbih,
I am super excited to try this tonight. I will let you know how I go.
There are some beautiful recipe’s on your blog! Cant wait to try. Do you mind if I ask –
Where abouts are you located?
Cheers,
Ami
Ofcourse Ami! I’m based in Cairo, Egypt but I spend a big chunk of the year in Ontario, Canada?
This was simply amazing. Thanks a lot for a great recipie!!
I wish I could upload pictures to show you!
Ami
Awesome!!! I’m super excited to hear that! So did you use the fresh yeast in the end?
I’d love to see your pictures too! You could email them to me at cleobuttera@gmail.com or you got send them to me on a direct message through Instagram or Facebook ?
Hey there! I made these rolls and I’m wating for them to bake right now! Can’t wait to taste them because they look so good 🙂 I have a question though: When you say, 1/4 cup of melted butter, do you mean measure a 1/4 cup of butter, and then melt it, or melt the butter first and then measure the 1/4 cup? I’m just asking because when I started to mix the dough in my stand mixer, the dough ball wouldn’t form so I had to add more flour and when I started to shape the rolls, the dough felt very oily in my hands. I think that happend because I measured the butter after melting it, so I might have used too much of it. Do you I did it wrong? The dough puffed up alright, so I’m not sure what happened there…
Thanks for the recipe!
Hi Esther:) You did the right thing. It’s definitely the most accurate way to measure. You could still squeeze in a softened piece of butter into the 1/4 cup then melt it, but what you did is perfect too. I use a kitchen scale to measure my butter, and almost everything else. I think it’s the most precise way to get perfect measurements, which leads to better overall results. It’s also a lot less messier; no piles of measuring cups to wash. Just one scale for everything. If you bake a lot, I think it’s totally worth investing in one:) I hope your rolls turn out incredible ?
I just tried this recipe and I’m so glad I did! I’ve been looking for something that emulates the fluffiness of those cheap school rolls but with more flavor and this recipe was perfect.
I know what you mean about those nostalgic supermarket rolls…I was looking for the same thing too, which landed me to this recipe. I’m so happy these rolls hit the spot for you!
I made it last night and couldn’t believe how fluffy they turned to be. Thank you so much for the amazing recipe.
You’re most welcomed Shishi! I’m so happy you loved this recipe as much as we do:)
Oh my days. This recipe is spot on. I used my kenwood mixer and thought it was super easy. This was my first time to bake these super soft rolls and I totally enjoyed it. They came out looking gorgeous and tasted amazing. I do love the pictures you posted too as these are a good tool to guide one along, especially first time bakers like me. Lol.
Everyone should bake these, they are super delicious. Thank you so much for posting and thank you a million for your blog.
Cuppa tea time with my freshly baked rolls. Yum!
That is music to my ears Fernando! I’m so excited to hear that these rolls turned out great for you! Thank you so much for emailing me pictures of your rolls; they look absolutely perfect.
Enjoy your cuppa tea with those fluffy rolls ☕️?
After the second proofing they look good, but after they baking they didn’t rise more and just weren’t fluffy like pictured. Does the temperature/consistency of the starter affect how it rises? They taste fine but are more bready but not tough.
Hi Kenny:) As long as your starter has thickened to a pudding-like consistency then it should be fine. Did you add any extra flour than the recommended amount?
Not more than a tablespoon or so when rolling it out but I think I just needed to proof a little longer the second time. I’ll try it again soon! Thanks
Sounds like you’ve measured everything perfectly. Although, try to avoid using any extra flour while rolling your dough if possible. You could add a little oil to your work surface instead to avoid sticking. I guess it just needs to proof a little longer like you said. Good luck the next time you make them:)
I wanted to add to my earlier post that I followed the recipe, weighed everything, didn’t use extra bread flour, and my rolls tuned out like Kenny Loo. It didn’t stay sticky for very long after I poured in the wet ingredients to the dry. All of the ingredients used are fresh and new. I live in a warm climate and today was a bit muggy, do you think that had anything to do with it especially when put in the warm oven? Thanks
Hi Dolphin! Thank you for trying the recipe. Sometimes the weather can play a role at effecting the outcome of baked goods. But since you’ve weighed your ingredients, it me sounds like you’re on the right track. Do you live in a high altitude? If so then changes will definitely need to be made. Otherwise, I suggest making sure that the dough has proofed both times longer than the suggested time. Different brands of yeast work at a different pace, so some might need longer than others to get the job done. Also, what type of yeast did you use? Instant or something else? If using anything other than instant, then you’re gonna need to activate it before adding it to the dry ingredients.
Wishing you much better luck on your next try:)
Hi, love the picture of the rolls…looks so yummy.. Do you think I can do this in bread machine?
Thanks ?
Hi Anastasia:) You definitely can but they’ll be such a huge workout?? You might need to knead the dough for about 30 minutes ouch? Also the dough starts out super super sticky so you will be tempted to add more flour to be able to knead it, but don’t. You could start kneading with a wooden spoon until it’s not so sticky then continue with your hand.
Best wishes ?
Thanks for the reply, but I thought the machine will do the kneading part? Because I lift I choose the “dough” cycle it will takes about 1.5 hours this is including the proofing time in the machine.
Tuanks again Tasbih
Sorry I mistyped:
What I meant is: if I choose the “dough” cycle
Ooooohhh I’m so sorry. I completely misunderstood your question lol? I thought you were asking if you could make the recipe without a machine. Oh my I must’ve been half asleep when I read your comment? I guess you totally could make it in a bread machine. That will make life so much easier. I never tried using a bread machine but I keep hearing wonders about it.
I was put in charge of making rolls for lunch with the governor, but the family decided to wait until midnight to tell me that and the lunch is tomorrow at noon. I found your recipe and I was stoked, I looked it over and thought I had everything so I started, but unfortunately realized too late that I didn’t have any eggs ?. Of all things not to have! So here I am, the dough is on its first proof in the oven, keeping my fingers crossed that these workout without any eggs. Wish me luck!
OMG!!! The governor?! No eggs?! I don’t know if I’d laugh or cry if I was put in this situation. Let’s laugh it out though…it will make us all feel better. And you know what? I think they might actually turn out just fine without the egg. Not the ideal texture but still really good. Best of luck sweetie. Please let me know how they turn out?
Hiii dear tasbih. I made this fabulous bread.it has gorgeous shape, completely fluffy, so delicious, ……. I divided batter in 2 parts & spread some sugar & cinnamon on second loaves.Both of them were great. Thanks a lot for sharing this recipe. 🙂 متشکرم دوست خوبم
Yummy! That cinnamon sugar twist of yours sounds heavenly. I gotta give it a try soon! Thanks for sharing your delicious spin?
These look incredible. Do you think they could be made without a mixer? Hand Kneaded?
Also I wasn’t able to find Milk Powder in the shops but did find Coconut Cream Powder… Do you think it could work as a substitute?
Thanks so much
Hi MJ? Hand kneading…ouch! Well it’s doable but would definitely be a huge arm workout. I have a dear reader, Godfather, that commented here that he developed Popeye arms after kneading them by hand for 30 minutes lol! If you decide to knead by hand, note that the dough starts out super sticky, so don’t be tempted to add more flour. The more you work it, the more elastic it becomes & less sticky. At this point I’d recommend using a wooden spoon to knead then switch to your hands as soon as it starts to come together.
For the coconut cream powder, I’m honestly not sure if it will work as a substitute, although it sound yummy! I love coconut!! I would suggest leaving a comment on King Arthur Flour’s website to ask them about this, as they are the creators of this recipe. They definitely know better than I do regarding this recipe. Here’s their link: http://www.kingarthurflour.com/recipes/japanese-milk-bread-rolls-recipe#reviews
Hi Tasbih… I absolutely love your website! So many wonders (not too great on the waste though 🙂 )
I was wanting to ask you, can I use this recipe to make zatar rolls? I only ask as I used to use potato flour but since moving I can’t seem to find it anywhere. Please let me know, thanks 🙂
This looks so yumm
I want to make them
But don’t have the kitchenaid mixer?
Hello Maseera! I wish you could make them too. They are to good too be missed. Like I replied to MJ above, hand kneading is doable but definitely a huge arm workout. I have a dear reader, Godfather, that commented here that he developed Popeye arms after kneading them by hand for 30 minutes lol! If you decide to knead by hand, note that the dough starts out super sticky, so don’t be tempted to add more flour. The more you work it, the more elastic it becomes & less sticky. At this point I’d recommend using a wooden spoon to knead then switch to your hands as soon as it starts to come together. Best of luck and happy baking:)
salam Tasbih…..am Rena i’ve try out your recipe of the ultra fluffy bread today now just waiting for it to be cook still in the oven. When the time process of mixing my dough abit sticky coz i make direct double dough. Is that is the texture abit sticky and soft or i shud have put some flour so that it will be abit prefec when roll in C shape technique. OMG…..i just try the bun that is so fluffy and moist Bun. I really satisfied with this recipe. Thanks so much sis
Reina
So happy that you loved them Reina! When you roll the dough, they are slightly tacky but should not be super sticky. The less flour you could get by, the better. But if your dough keeps sticking to the counter as you roll them, then add a little flour as needed.
Thanks for the tips sis. I will try it again this tuesday for my market selling. Love it so much
Hi, i found your recepi as i had tried many and it doesnt work for me. And yours did work but why the crust is so hard? Is it that i overbaked it? Or i judt put too much egg wash?But i followed the time… waiting for your reply, thank you
Hi Alicia:) I’m so happy to hear that this recipe worked for you. Intentionally the crust is hard as soon as it comes out of the oven, but softens after a few minutes of brushing it with the melted butter. So just let it rest and it will soften. If you already did that, then yes…maybe try cutting back on the egg wash. Enjoy?
I will try thanks a lot
Hi, I can’t find king Arthur Flour in cyprus ?? and I used all- purpose flour instead it turned out to be bready instead of being fluffy. What kind of flour I can substitute King Arthur Flour with to get that fluffed brioche. We have 00farina
Plain flour and whole wheat flour.
From Brands we have: Alison flour
And Home Pride
Please help????
Rita, can you find strong plain flour, or even bread flour? Even though you say the result is bready, nice fluffy brioche works better with more gluten than less, so I think that’s your issue. When I lived in Cyprus I found that the all-purpose flour I usually bought (Mitsides?) was too weak for American-style baking and I’d have to mix a strong bread flour with the all-purpose for chewy cookies. I’d try Farina / Farina 00 from Mitsides.
I made the dough in the breadmaker machine to take out the chore of mixing it and leaving it to rise. It was the right amount of ingredients so it didn’t flop over the sides. I than shaped it into a loaf and left it for 45mins, it doubled it size!! I than cooked it in the oven as you suggested and it has come out perfect, just like a brioche style loaf, light and fluffy, thanks for the recipe, my now new favourite one!!
Awesome! So happy to hear that it worked out so well in the bread machine. Thank you so much for your feedback; I’m sure it be of great help to others with the same concern.
Hello your recipe are easy to follow… Made these today and everyone around me can’t wait .. It finish before I could say Jack.. Will be making more come Saturday. Thank you
Always the best thing to hear! So glad it was it was such a hit?
Thank you so much for sharing! I love it! So easy and so yummy!!!! I took a picture of it and posted it on my facebook page and guess what? i got a lot of orders from my friends hahaha! ?
Hahahaaaa can you blame them?? I’m so happy to hear that you love them. Thanks for reporting back.
Attachment
I know this is years after you posted this and I don’t mean to necro, but I just have to share how amazing these were! They were an instant favourite with my parents! Thanks for the recipe!
Oh this recipe never gets old so keep the photos coming! Your rolls look so pillowing and fluffy. YUM! Thank you Eline for sharing your photo with us.
hi! i tried baking these today and when it was still warm, the bread was super fluffy and soft. after it cooled down, it turned a little bit dense and hard, do you have any idea on what caused this?
Hi Eva! Thank you so much for trying the recipe & for your feedback. Dense rolls can be caused by either adding extra flour or overbaking. Do you think you might of experienced one of them?
I did not add any additional flour. I dont think i overbaked it as it has not gotten as dark as the ones in your photo. Is it possible that i have not let them prove enough? so it doesnt come out as fluffy?
Yeah that could very much be it as well. Did you let the dough double in the first proofing? What about the second proofing? Did the shaped dough get so poofy? Also what type of yeast did you use? As if it’s not instant, then it needs to be mixed with the warm milk & some of the sugar first to activate it.
I might have under-proofed it on the first proofing. Will try it once more sometime soon hopefully and will update you the results! oh,and I did use instant yeast so I am pretty sure that i did a mistake on the proofing stage somewhere. Thanks for helping!
Hi Tasbih,
It’s my 1st time making bread for my bread lover hubby. It was a total success? and he loved it so much. I was glad that he took 2 pieces immediately when it came out from the oven. Thanks alot for the detailed receipe?The texture was fluffy and soft. The taste was perfect! I have 1 question, once the bread has cooled down, it lost it softness and fluffiness. I ttied heating it up in the oven but it’s still on the same as fresh out from the oven. Why is it so? I did not use a stand mixer for kneading. I did manual kneading and for almost 1 hour and 15 mins.
I’m so happy to hear that you enjoyed the rolls so much. And whooooaaaaaaaaa!!! 1 hour & 15 minutes of kneading?! What an arm workout?? Love the determination. Did you by any chance add any extra flour than what’s called for in the recipe?
Yes, I added a little flour on my workbench as I knead the dough. I did not add alot of flour, just lightly rub the workbench with flour to facilitate smoothe kneading.
It’s hard to tell what could’ve caused this, but typically dense rolls are a result of adding extra flour, and/or not proofing the dough enough. I have my doubts that the extended amount of kneading could be a contributing factor too. Kneading more than needed can cause excessive gluten formation which could toughen the rolls.
Wishing you better results on your next time around?
Hi Tasbih! ! I have successfully made a fluffy dinner roll to our satisfaction ? this time, my hubby helped me mixing the dough with a wooden spoon until the dough didn’t stick the sides, then we took it out to knead for 10mins on lightly floured workbench. This time I added much lesser flour. Thanks alot for such an awesome receipe ?
Perfect! So glad you had better results this time. Thanks for the tip on hand kneading, I’m sure it will help many others who were wondering if they can make the dough without a mixer.
As Salaamu Alaikum Tasbih. I’m from South Africa and I must say these rolls are truly awesome! Its the first recipe I have tried since I discovered your blog and I look forward to trying out other amazing recipes of yours. Masha Allah. Jazak Allah Khair for such wonderful recipes.
Walaikom Alsalam Shakerah! Its so great to hear that the blog has readers from South Africa! I’m dreaming of visiting there one day. I’m so happy you enjoyed this recipe. Thanks for stopping by.
Hi
Id like to ask can i fill them after baking with cheese or tune or turkey for an example?
Absolutely! Keep in mind though that they are very tall and pretty big. If you’re looking for more of a slider size, I’d recommend making the rolls smaller; 12-18 pieces, bake in a larger pan and check earlier for doneness as smaller rolls will bake quicker.
Enjoy?
I’ve never left a comment on any recipe that I’ve tried before but this deserves 6 out of 5 stars. It was perfect. Soft and pillowy and it was still soft two days later (I had made two batches and hid one roll away for myself, which I forgot about).
This is the second time I’ve made these bread rolls. The first time I kneaded it by hand for 20mins and it was still soft and fluffy, however this time around I used the mixer and the difference is amazing. I had to add a bit more flour as I used all purpose flour as well but that was no big deal.
Thank you for the recipe!
Wow Tina that means A LOT! Thank you so much for taking the time to write your feedback. I’m so happy they were such a success for you!
Thank you so much for posting this recipe! I’m just like Tina in that I have never commented on a recipe before. I followed your instructions to the letter and these came out so perfect. I’ve tried so many roll recipes to use for Thanksgiving dinner, but never found the texture I was looking for. They were good, but always to dense for my preference. But these rolls are fantastic. I was so excited when I pulled them out of the oven and pulled them apart because they looked like your pictures. My family will be very happy with these. Thank You again!!!
That’s always the greatest thing to hear! Thank you so much Victoria for taking the time to write down your feedback; it means so much to me. I hope you had an amazing Thanksgiving with so much delicious food.
hi i was wondering if you use all the tangzhong or just a litle bit?
Hi Indira! We use ALL of it here?
Thank you ?
Hello! I just tried making these tasty looking rolls today. This is the second thing I’ve ever made with yeast. While not a complete fail, like my first yeast bread attempt, I did not have exacting results. My rolls have too much of a yeast flavor and they did not rise in the oven, while baking. On the plus side, they were edible, the texture was pretty good and the smell was amazing. I didn’t weigh the ingredients -but measured. Also used a square, glass pyrex baking pan. I’ve read through the comments and look forward to trying them again. Please let me know if you have any tips.
Hi Ema:) I’d really encourage you to weight your ingredients the next time you make them. Makes such a huge difference and guarantees more consistent results. What type of yeast did you use? Instant or dry active? Are you sure it’s not old?
Thank you for getting back to me! I bought a food scale and will try this recipe again soon. I used active dry yeast, Fleischmann brand. I am now using Red Star and proofing. I will let you know how the next batch goes.
Looking forward to hear back from you?
How can I make these into something similar to King’s Hawaiian rolls? Thinking of substituting some liquids with pineapple juice. Thoughts? 🙂
Yum I love that sweet squishiness of King’s Hawaiian rolls. I have yet to try a homemade recipe for it…but it’s on the list! I can’t tell for sure if subbing pineapple juice for the liquid will affect the texture and/or rise, because I’ve never tried making this recipe any other way. It sounds like it might just work…I would honestly encourage you to experiment with this idea. If you do try it, I’d love to know how it turns out ?
Hi Tasbih!
I tried this recepie today. I’m a novice at bread baking ?This looked too tempting to try. I am happy to announce that my bread rolls turned out super fluffy and and amazing! I hand kneaded the dough for about 30 minutes 🙂 The only issue was it has a strong yeast taste. This happens every time I bake bread. Any tips?
PS: I used bread flour and instant yeast! I love the way you respond to all comments!
Hi Ambika! So wonderful to hear that they turned out so great! Have you ever tried switching the yeast brands? The strength of the yeast flavor may differ from one brand to another.
can the tandzhong be made & keep in the freezer till needed?
Oh Mary I wish I knew, but I have no idea to be honest. I’ll try to look it up & if I do find an answer to that, I’ll sure let you know.
i tried this recipe 2 days ago and it came out perfect.I love these rolls and my kids love them too.came out perfect like the one on pix and very easy to make.
Thanks a million
Yaaaay! Happy to hear that Nneka ?
Oh dear Tasbih! I loved the sound of this recipe but it never became unsticky. Reading your readers comments, I think my hand- kneading for 25 mins didn’t work. I will try again though and use a wooden spoon to assist the process. I must say the dough tasted nice if not a little sweet. Will let you know how I go.
Big thanks to everyone who filled you up with tips on hand kneading! Hopefully you’ll nail it the next time. Enjoy ?
Dear Linda,
I baked this a zillion times already and each time hand-kneaded ? I prefer it that way. So I knead atleast for 30-40 minutes until the dough is nice and stretchy. However the dough should start coming together in 5-7 minutes of kneading . If not, you will have to add a little more flour. Mix it up with a spoon and then hand knead. Hope this helps. Thanks to this recepie I’ve put on a few pounds ??
Thank you Ambika. I am sure this will help.
took this bread to the office .my collugues love them and they want me to prepare and sell to them for breakfast and family use.bussiness mogul coming up
Hahahaaaaaa? Yup! I agree with them…these would sell out in minutes.
OH HELLLLLL YEEESSSSSSSSS!!!!!!! Just finished baking these bad boys….and I see you must want me to get super fat haha. They are BEYOND DELICIOUS. Followed recipe to the T (used the scale to measure). It did take me 20 minutes to mix with a handheld mixer, wasn’t sure if it would make it hehe.I usually make a sweet dinner roll, but love all things Japanese so I HAD to try these out. I mean- Japanese bread…..Couldn’t pass it up…can you say carb girl here!!!!! I am very impressed and will use this recipe as well as incorpating the “starter” to my other sweet roll recipe (assuming I can-not sure if I’ll have to mix the other dough as long as this one as well???) Instead of putting butter on the rolls after, I put the honey butter on top….UUUUUUUUMMMMMMMM YYYEEESSSSSS…..can NEVER have enough honey butter!!!!!! Thank so much for this recipe…..well worth the time. Ps…..my love for you has grown so much just from this single recipe hehe. Thanks again!
Hahahaaaa? Can I say awesome girl here!!! You’re amazing! You made me grin from ear to ear throughout your comment. Love your enthusiasm about these rolls (and carbs in general) as well the Japanese technique. I too want to incorporate it to every dough I know! Such a revelation indeed! Thanks for stopping by, trying this recipe & sharing the love.
Hi – I love baking, tried this recipe for dinner and came out so well. I do not get Bread flour where I live hence I used normal all purpose flour and it turned out beautiful. The bread rolls were super soft and fluffy. Thank you.
Hi Bindu! So happy to hear that you loved these rolls! I too use all purpose flour with great success. Thanks for your sweet comment.
These smell GLORIOUS! Just took them out of my oven after around 22 minutes. Can’t wait to bring these to our friend’s place to accompany dinner. Thanks for the recipe! Hope they taste as good as they look and smell!
I hope you enjoy these as much as we do?
Holy Shit! These are perfect.. LOVED THIS RECIPE!! Next time I’ll add a bit more sugar. Otherwise unfreaking real!!!!!
You wouldn’t happen to have a legit Kolache bread recipe would ya?
Thanks for the fluffy roll recipe my dear!
Hahahaaaa Bret…Gotta love your excitement about these rolls!
Kolaches has been on my baking bucket list for so long, but haven’t actually gotten around it. I was planning to begin with trying Cooks Country’s recipe. Looks really good & I really trust these folks.
Hi Tasbih 🙂
i love the milk bread and used to buy it , but i like home made food more so i was looking for the recipe for long time but never see one looked the same
and finally i find ur recipe look the same as the once i buy
Wanted to tell u about my experience with it 😀
i have made it without bread machine , and filled it with cheese
it turned out awesome :3 my mother in law loved it too
but i divided it to 18 pieces instead of 9 , and knead it for about 30 mins by hand
at the end it wasn’t stretch as urs just a little , i thought it wont work but it turned out so fluffy and spongy
thank u for sharing the recipe ^_^
I’m so glad this recipe was a success Usaira! And hats off for the 30 minute kneading…I could never do that…I don’t have the biceps for it ?
Oh and the cheese stuffing…YUM!
It was a SUCCESS!! Thank you so much for the recipe! I LOVE IT!
Your instructions were easy to follow!
The bread was really fluffy when it was freshly made. But then it turned hard after a day (I stored it in a plastic bag). Is there anything I can do to prevent it from turning hard?
Thank you so much!!! 🙂
Hi Sarah! I’m glad to hear the rolls turned out great! Was your plastic bag airtight like a zipper lock bag? If the bag can let in air, then they’ll dry out. Generally though, I prefer to store leftovers in the freezer in a zipper lock bag; the freezer retains their moisture.
Thanks for the recipe. Just baked the buns and they are tasty and fluffy. I don’t have a stand mixer and hand kneaded instead. It’s a bit more work but totally possible, especially since I autolysed the flour and liquid for 2 hours, and added the cooked dough, instant yeast and salt later. However I did find my final dough had bit of cooked dough lumps so next time I’ll try your step of mixing it with the milk and adding to the flour at the beginning. All in add, great recipe and can’t wait to try it again
Hats off for the hand kneading. I don’t know how some of you guys do it. I don’t have the biceps for it lol!
I’m happy you enjoyed the rolls Jilean!
Omg!!! I just made dinner rolls for the FIRST TIME EVER!!!! And I’m super glad I follow this recipe because it turns out heavenly ???? It turns out exactly like it was shown in the picture. Thank you skool much for sharing this amazing recipe.
That’s so incredible to hear! So glad you nailed it from the first time. Thanks for your comment & enjoy your rolls.
I nailed it at the first try.. Been looking for buns like this. My family is over the moon. thanks so much
Yaaaaay! So glad they were a hit!
Pingback: Experiments, Recipes and Dissatisfaction | Gastronome !
My rolls turned out REALLY fluffy!
Even though i had trouble because the dough was really wet since i’m in the tropics, it’s actually very forgiving this dough
I didnt get the window pane stretch but it still turned out really well. Best one i made so far ??
Thank you!
Awesome! Love hearing that. Thanks for your great feedback.
Hi Tasbih,
I want to try and make these again. They were a great success the first time.
I was wondering can I replace the flour with whole wheat flour? And is it the same measurements? I wanted to try something healthier for my LO.
Thanks
Hi Nour! So great to hear they were a success. I’ve never made them with wholewheat flour so I can’t tell for sure…sorry:( But may I suggest you try subbing only half the white flour with wholewheat as wholewheat tends to produce denser bread and you wouldn’t want that with these kind of rolls. If all goes well, then maybe next time, increase the wholewheat flour even more, while decreasing the white, until you’re happy with the results. Good luck!
Do you these rolls would convert ok into a cinnamon roll style bun??
Hi Laura! Please accept my apologies for my embarrassingly late reply. Eventhough I haven’t tried the conversion myself, I have a feeling they’d work really well as cinnamon rolls. The dough itself is slightly sweet with a soft and tender texture that I think would pair beautifully with a cinnamon sugar filling. I’d love to know how they turn out if you do give them a go. Best of luck!
May i know how many gram is 1 tbsp of instant yeast?
Hello Jose. 1 tablespoon of instant yeast is about 10g.
I don’t know how to thank you for leading me to my favorite tangzhong roll. I’ve been baking with this method for at least 6 months. I’ve tried more eggs, less butter, more butter, etc. They were all good, but never as good as these. Unfortunately, I didn’t have milk powder, so just omitted it and they were still unbelievable. Love your work!
Wow Helen! Thank you so much for that amazing feedback! So happy you finally landed on the right ratios through this recipe. Your kind comment has made my day. Thanks!
Oh my gosh! I just made this and made them into wonderful and individual bread rolls and they are the bomb. I always try to make breads but they always turn out the wrong way. But this one is just fantastic! The instructions are all clear and it’s so soft and tasty! I kneaded them by my hand while watching tv so I kneaded for 30 mins and didn’t even felt it! Thank you for this wonderful recipe.
I’m so happy it was such a success for you Egee! Nothing like a warm fluffy loaf of bread fresh out of the oven, and it’s so great to hear that you loved as much as we do. I have an immense amount of appreciation for anyone who has the strength & patience to knead this dough by hand. You go Egee!
i tried this recipe today..it came out soooooo good but it wasn’t that easy…I weighted all my ingredients but after 20 minutes of kneading it was very very very sticky so i did what you said to not do I added a little bit of flour and kneaded my dough some more (maybe my eggs were too big, i double the recipe). I also used the pizza stone and worked out great. The rolls turned dark quite fast so i covered them with foil. Should I store them in the fridge or on the counter? I am practicing to see if I can make them the day before thanksgiving and taste still amazing =)
Hi Anita! So happy you liked these rolls. You’re right it could be the size of the eggs that caused the stickiness but it could also be other things, like the type of flour you’re using. I’ve been experimenting lately with using different flours in cakes & the difference in outcome is mind boggling. So really flour runs differently from one country to another & from one brand to another. You did the right call…you just need to sense the dough…you’re the best judge for that.
It’s better to store the rolls at room temperature in an airtight container or freeze them. The fridge is not recommended because it ruins the texture of baked goods.
For your Thanksgiving prep, I wouldn’t recommend baking them a day in advance because nothing compares to freshly baked rolls straight out of the oven. What you could do the day before, is prepare the dough, let it rise, shape into balls, cover well, then refrigerate for up to 16 hours. The dough should have risen in the fridge (slow cold rise) and they should be ready to bake right away the next day. If for some reason they did not rise, just take them out of the fridge about 2 hours before you plan to bake them & make sure they rise before baking.
Good luck and Happy Almost Thanksgiving.
I tried these today, and they turned out excellent. The family requested I make them many more times. They reminded us of baps rolls we had in scotland. Thanks for sharing
Love hearing that Marla! Thank you for your great feedback ?
I tried these today, and they turned out excellent. The family requested I make them many more times. They reminded us of baps rolls we had in scotland. Thanks for sharing
My first attempt was good but still not as soft I would like to, i used gold medal better for bread flour. This week I used Costco bread flour and they did not come out as soft i would like either. I would like to try now King Arthur’s bread flour that should have a higher protein %. What flour are you all using? Did anyone try to freeze the rolls for later use?
Hi Anita! Thank you for trying this recipe. I live in Egypt, so we have different brands than the US. I used an Egyptian local brand called El Doha. Being that this recipe is originally adapted from King Arthur Flour’s website, I bet their flour will be the fit. Wishing you better results next time ?
This is now my favorite recipe…did anyone tried to make bread sticks with this dough? Do you think it would work?
Glad to hear that Anita! I’ve never made them into breadsticks but the dough is very versatile & I’m pretty sure it will work. I’ve made them into pigs in a blanket before (wrapping the dough around hot dogs) and they were amazing!
I’ve been searching for a pully bread recipe that was made by a bakery in Orangeburg, SC. My sister-in-law ended up meeting him when he was 89 years old. He no longer had the recipe and could not remember the portions but the secret seems to be the kneading…he did his with a rubber spatula. He also told her how to form it into a pull bread and he wrapped his while it was still warm. Your picture seems to have the same texture as his bread. I will be eternally grateful if it is like his. We had to buy an extra loaf since we would have 2-3 slices before we got home.
Wow Darlena I absolutely love recipes with stories behind them. The bread your talking about is making me drool ? I really hope this recipe comes close to the one you’re searching for. I’d love to know the verdict once you try them.
Just made these and they turned out perfect??
Although my dough was a bit sticky, they still came out lovely
They really live up to their name?
So glad you enjoyed these Z! Thanks for taking the time to share your feedback ?
These rolls are absolutely amazing! I have had the worst experience making bread and was a little afraid to try any more recipes but these came out so fluffy , I shocked myself. LOL. And you were right – I should have doubled the recipe. Thanks so much!
Hahahahaaa! I shocked myself the first time I tried them too lol! So happy they were such a success with you 🙂
Hi,
I tried baking this fluffy milk bun with your recipe. And i must say it turns out amazing!
Thank you for sharing this recipe.
How lovely to hear that Imz! Thanks for your sweet feedback 🙂
this dough came out way to dense no elasticity at all…garbage it went
That’s definitely not how its supposed to turn out. Would you like to discuss what might’ve went wrong? Maybe I could help.
This recipe is amazing! I was actually in the process of perfecting a different baking challenge (as i wasnt getting a light puffy product) when i came across this recipe. So i made this but rolled a portion as the bread roll in your photos and a portion as my challenge target. It turned out AMAZING. EXACTLY what i was trying to achieve.
I think my use of this dough would blow your mind so please contact if you’d like an idea of how to use this differently, it would be a perfect entertainers dish!
That’s awesome! I’m so pumped to hear that this recipe helped you nail what you were looking for for your challenge! I’m definitely very interested in the way you used up this dough. Sounds incredible; I can’t wait to know what it is 🙂
Well instead of rolling them into dinner rolls, roll the dough flat and thin and cut like a pizza! Then spread some thick jam or fresh feta+salt+egg white mix and roll them from end to middle.
Rest to rise, wet with egg yolk and sprinkle sesame seeds.
Too bad i cant add photos here.
Yum yum yum! That sounds amaaaazing! Thanks for sharing your inspiration. Gotta try it as soon as I get the chance.
I had to leave a comment! I never bake things well, but wanted to try these. And they came out perfect! My family loved them. Even when I presented them to them, you can tell they know me too well as not a great baker. But no! They came out perfect. Thanks for explaining the recipe and …to be truthful the images helped. Will make again!
I cook meats and vegetables no problem, baking eludes me, but I made these and they came out perfect!
Angela you have no idea how happy this makes me feel! Yay for nailing the recipe and showing baking who’s the boss ?
Hii emergency! Can i use this dough as for a donut what i mean can i fry this type of dough? Does it matter?
Hi Fatma! Very interesting question I must say. I’ve never thought of it, but now it’s all I could think about ? I must admit that I’m really unsure, but my guts tell me that it makes all the sense in the world & it should turn out awesome! I will try it the next I make this dough & come back here with an update. Please let me know how it turns out if you try it yourself. In the meantime, I have a really great donut recipe here on the blog if you’re interested. Here’s the link: https://cleobuttera.com/breakfast-muffins-and-donuts/nutella-donuts-ponchiks/
Hi tasbih I tried the fluffy soft rolls and the out come was just perfect..though I dint have the milk powder
….thanks alot
So glad you’re happy with the results Mary! Always love hearing that ?
I just finished making these and followed your recipe exactly. Mine came out looking just like yours. I had to have one with butter on it right away. It was just how you described them. Next time I am going to use salted butter, but otherwise they are perfect. I can’t wait to make a sandwich with them and use as a hamburger bun. I too, have been on a quest for the perfect bun that will have some substance and still be fluffy….AMAZING!!! Thank you…Jan!
Comments like yours Jan, is what makes my day! Thank you so much for taking the time to write that amazing feedback. I’m so happy you found the perfect bun you were searching for.
THE. BEST. ROLLS. EVER. Easiest, fluffiest and best tasting!! Today, I used the recipe for cinnamon rolls. OMG, they are like delicious, fluffy clouds from heaven!!
Woooohooooooo! Love hearing that! I have yet to try this dough for cinnamon rolls, but I’ve been wanting to for so long. Thanks to your encouragement, I’ll be getting right to it.
Marhaba Tasbih?I will be making those wonderful butter dinner rolls today in preparation for Thanksgiving tomorrow. And my question is, in order to get a nice golden bottom for the bread, do you put them while they are in their square pan on top of the other one, cookie sheet or pizza stone? The only reason im asking is because if you put them straight on the cookie sheet then how will they hold their shape… This is my first time, so forgive my question?
Lina.
Marhaba Lina & happy thanksgiving! That’s a really great question & sorry for the confusion. You put the rolls (with the square pan) on top of the pizza stone/baking sheet.
Hope that help!
Choukran Habibti! They turned out awesome “Exactly ” as you have described and im searching no further for a better one, because after making these, i cannot even imagine there are any better:-) Thank you for sharing this wonderful recipe, its so delicious that when i ate it, i feel like im sinning, because i can’t stop. ?
Woooohoooooo! So happy you loved it so much! I know that can’t-stop-won’t-stop “sin” feeling while eating something really good. I’m unfortunately very familiar with it lol!
Hey! I tried this recipe and i was in love with it! Soft and fluffy. I was wondering if i can use this bread recipe to bake some mexican coffee buns? ? I just can’t seem to find perfect recipe for those buns i.e. perfectly Fluffy and soft
I’m thinking to give it a try.
What do you suggest??
I’m so glad you loved this recipe so much Anika! To be honest I wasn’t familiar with Mexican coffee buns until you mentioned them. I did a little googling and boy do they look delicious. The crumb looks cottony soft, so I’d assume this dough would work nicely for. I have tried this dough in so many applications from cinnamon rolls (coming soon!) to pigs in a blanket, and it has never lets me down. I’ve even had a few readers who said that it made wonderful hot cross buns, vegetable pockets, mini meat pies, and much more. I really believe this is a great all purpose dough, that works for just about anything. If you do try it for Mexican coffee buns, we’d love to know how it turns out. Best of luck!
Pingback: 【亮妈厨房】学做汤种餐包 – uozawa
Tasbih,
My only regret is that it took me so long to discover your site. It has been a GAME CHANGER for my baking! I have tried many roll recipes over the years and could never find the perfect one. Until now. And as I like to say, perfect is good enough! Your detailed instructions were spot on and I will never cook rolls another way. Period.
I have also been searching for the ultimate burger bun and I think this recipe could easily be adapted. My guess would be to cut the sugar in half, separate the rolls into individual buns and place on a baking sheet so they would spread out into round pillows of perfection? I’m also assuming that the baking time would need to be shortened since they would cook quicker due to not being in a pan? What are your thoughts or do you have a preferred recipe? I just can’t imagine there being one that is more soft and bouncy than this one!
By the way, the attention to detail in your pictures is absolutely amazing and extremely helpful. Do you shoot those yourself or do you have a professional studio do them? Keep up the great work. You have thousands of us depending on your research! Thank you!!!
Bruce
Bruce your comments are always a pleasure to read and they just make my day. I would just like to apologize for my late reply as I was so busy with my mom who just had surgery. Thank you so much for your patience, kind words and trust.
I’m really happy to hear that this recipe hit the spot! It’s been my go-to for so many applications now and the variations are endless. I think they’d make some great burger buns. I like the way you plan to go at it. I tend to like burger buns on the sweeter side, somewhat like Hawaiian rolls, so if I were to make them for burgers, I’d leave the sugar quantity as is. If you’d prefer them less sweet, then by all means, cut the sugar in half. Placing them far from each other on a baking sheet is the way to go, but may I also suggest that you flatten them into disks with your hands after you do so (before the second rise). That way they’ll rise into burger bun shapes instead of rounds. The baking time will most probably be shortened, as more of the surface will be exposed to the heat.
I have another incredibly fluffy recipe for rolls that you may want to check. I think it may also be a tad bit lighter and fluffier than this one, if that’s even possible. It uses potato flour, which makes them so soft and fluffy. I honestly can’t pick a favorite of the two, but I think that it’s worth considering for the burger buns. Here’s the link.
I’m so humbled and flattered that you like my pictures, which is funny because I was so mad at this posts’ photography in particular ? I shoot my own pictures in my living room, with the most unprofessional set up ever ? I’m hoping to start doing food photography posts soon, where I can share what I have learned/still learning.
Hi Tasbih
I am new to baking. This will be my first attempt. I am so much encourage by your step by step guidance. I have always loved to bake a so fluffy very sweet bread rolls.
What will happen if I double or triple the amount of sugar but maintaining the same amount of the other ingredients.
Thanks
Hi Bonsu! Welcome to the world of baking! Enjoy the ride…its a GREAT one!
Since this is your first time trying this recipe, I’d highly suggest sticking to it as is, as to avoid any issues that may arise, and so you can truly taste it the way it should be first, before making any adjustments. The rolls are already on the sweet side, but if you want them sweeter, then I’d recommend adding no more than an extra 2 tablespoons (25 grams) at least for the first time around. Then you can decide if you’d like to add more in the future. If you do increase the sugar, no need to change anything else in the recipe.
Best of luck!
Hi Tasbih
Do you also have any tips on how I can bake extra sweet sugary fluffy soft bread by using your method or do you have any idea or other ingredients I will need for soft sweet sweet bread.
Thanks very much.
Thanks
Hi Bonsu!
I recommend checking these Cinnamon Rolls recipe! The base dough uses the same method as this one, but is sweetened with a cinnamon sugar filling and cream cheese frosting. It’s delicious and might appeal to you, as you’re looking for a sweeter version of these rolls.
Enjoy!
Hi Tasbih
If I double the amount of sugar in the mixture, do I also need to double the amount of yeast as well?
Thanks
Hi Bonsu!
No need to change the amount of yeast ?
Tasbih,
I’m just following up to let you know how the hamburger bun version of this recipe worked out. The only change I made was to add 2 tablespoons of potato flour to the dough, a little trick I borrowed from another one of your recipes. ?
Per your suggestion, I spread the buns out on a baking sheet (instead of in a pan) and this recipe made nine buns weighing approximately 75 g each. After placing them on a cookie sheet with parchment paper, I flattened them out with about an inch of space in between each bun. After a second rise of about 45 minutes, I cooked them at 350 for only 15 minutes and the results were out of this world.
Best. Burger. Ever. These buns took it to another level and everyone agreed that they will never taste a burger the same way if they don’t have these buns. I did three styles which were plain, egg wash, and water with sesame seeds. Each had their own flavor and appearance profile but I was mostly interested to see what the egg wash vs plain would do to the top crust of the bun a few hours later. All were equally as soft as a pillow with the plain and sesame seed ones looking the most like a traditional hamburger bun. But that’s where the similarities ended as these were the best hamburger buns I’ve ever had in my life!
The search is FINALLY over. Thank you for your detailed instructions. You are amazing!
Bruce
That’s so wonderful to hear Bruce! I’m really glad the steps you took to convert the recipe for burger buns worked so well! Thank you again so much for your detailed feedback; I know a lot of readers, myself included, are going to benefit from it and refer back to it. Planning to experiment with turning this dough to hot cross buns over the weekend…wish me luck!
I have made these rolls at least 20x times now (if not more). I double the recipe, double the sugar and use them to make Ukrainian piroshki. I fill them with apple or poppy seed filling, whatever I have on hand. They are AMAZING! I always weigh out the ingredients and have never had a bad batch of dough. Sometimes the dough turns out stickier (prob because I don’t mix it enough), but I simply oil my hands very well and proceed to shape it. Even if the dough isn’t the perfect consistency, the rolls turn out perfect when baked. Thank you so much for the recipe! My parents and in-laws are always amazed at how soft my piroshki turn out ?
Hi Oksana! I did not know what Piroshki is until you mentioned it. So ofcourse I had to google it and OMG they look amazing and now I wanna try them myself. Thank you so much for sharing your take on it; sounds wonderful. I’m happy to hear that this dough, works so well for them.
Attachment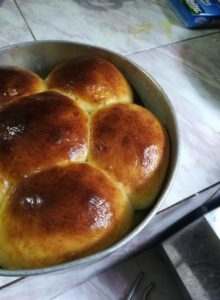
I made this bun and it tasted delicious. I added 2 tablespoons of sugar because I felt like the sweet was not enough for me. Also my yeast was dried yeast so i activated it before adding to flour. Anyways it tasted delicious
Your rolls look absolutely fabulous Abeesh! Thank you so much for sharing this lovely picture with us. I’m so happy to hear that you enjoyed this recipe.
Hi, you said the recipe can be doubled. I doubled but the dough is never kneaded till done. It stays sticky. How long did you knead for if it’s double portion with your kitchen aid machine?
Hi Louise! I knead the double batch for the same amount as the single one. That could vary from one mixer to the other, depending on its speed, power and capacity. So I recommend using the suggested time as a guideline, but not as a rule and go with visual and textural cues instead.
Hello. Ok, thanks for your comment. I think my hand mixer probably couldn’t take the amount of dough needed to be kneaded.
I just got my first kitchenaid stand mixer, so will try again! Thank you!
Attachment
OMG! I followed your recipe from the first step to the last, and I have to say, I wasn’t so confident about the result I would have! And guess what! I had the exact same bread as your picture! And this taste, this cotton bread, this fluffynessssssss ! Thank you so much, i will do it again and again !
Oh my goodness they really do look like cotton indeed. I’m drooling ? So happy you loved them so much!
Attachment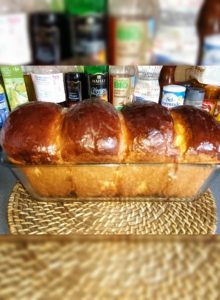
First off, THANK YOU for sharing this heavenly recipe! I gave it a try yesterday and it was a success it never lasted long before all the loaf was gone..haha.. I decided to try it in a loaf form and my first time was a success. It was perfect!
Oh my goodness Sheryl….these look like the definition of perfection. So happy to know that the recipe worked just as nicely in loaf form ?
And I forgot to mention, I actually hand-kneaded it which was quite a workout but definitely worth every single effort. I’m addicted to your recipes. I’m officially a huge fan of yours now..the way you describe your recipes just make me want to actually taste your mouth-watering photos..LOL.. Again, thank you so much for sharing your amazing recipes. You got a great talent!
excellent recipe. i tried it and it came out perfect. thanks
So great to hear that Tolu! Glad you loved it ?
Attachment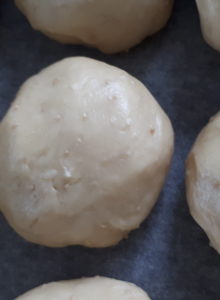
Hi there, just tried this recipe. Everything went to plan and followed your guide exactly (I had to hand knead though) but my yeast didn’t seem to dissolve into the dough. No matter how much I kneaded it, it was still visible in its little balls. I’ve attached a photo. My yeast is new. I also had troubled with the 2nd rise. I do live in a cold climate so had to put in the oven to get to rise. Mine are a bit denser than your photos and didn’t rise nearly as much. They dont taste yeasty but I can tell they aren’t how you described them. Any suggestions to get my yeast to dissolve?
HI Claire! I’m terribly sorry for replying so late, as for some reason I missed your comment. I know what you mean, I can actually see the yeast specks in the dough. That’s so unusual…I’ve actually never experience this before. You can try whisking the yeast in the warm milk and leaving it for 10 minutes to foam up. That will definitely help.
I just wanted to write and tell you that I’ve been looking for a fluffy roll for a while and came across your recipe! It’s amazing! I *did* end up having to add about 2 tbsp of flour while it was mixing because it wasn’t forming a ball at all. It never actually got to the ball stage, but I decided to just go with it. Once it finished rising, it was good to go and very much a bread dough, albeit very light. Anyway, these rolls are phenomenal and it’s going to be my go-to from now on! Thank you for sharing!
I’m so happy these turned out wonderful for you! Thank you so much for your amazing comment. Great feedback like yours makes my day ?
Hi Tasbih!
Since making your dinner rolls, I have never considered making rolls another way! BEST EVER! But now I am having to look at gluten-free options for my wife as she has developed some issues in that regard. I am experimenting with rice flours, potato flour, etc. but was wondering if you have already done any of these tests that might save me some work? I appreciate everything that you do and love reading your recipes. Keep up the awesome work!
Sincerely,
Bruce
Hi Bruce! I’m terribly sorry for replying so embarrassingly late to your comment; for some reason, I totally missed it. I’m so sorry to hear that your wife is now dealing with gluten sensitivities. Unfortunately, I have not tried gluten free substitutes, so I sadly can’t help in that regard. Please let us know how they turn out if you do experiment with them.
Can you make these into cinnamon rolls?
Hi Raelynn! Absolutely. I actually have a cinnamon roll recipe, that uses this very dough. Click here to check it out. Enjoy ?
I used this recipe to make cinnamon rolls. They were AWESOME!!! I’ll be using this one again. I doubled it and it did need about 1/2 extra flour.
That’s amazing! I actually have a cinnamon roll recipe that used this dough as the base. You can check out here:
https://cleobuttera.com/breads-and-rolls/the-ultimate-cinnamon-rolls/
Oof! I made these the other day and they were a-MA-zing! They were a little dense, but reading through the comments, I’ve realised that I need to activate my yeast with the warm milk instead of putting it in with the dry ingredients. The taste was delicious, and goodness, they still rose. Now that I know about the yeast, I’m going to make another batch today. I may have to double up though, because the first batch, even with the largely inactivated yeast were devoured within an hour of coming from the oven.
I’ve also just seen your cinnamon roll recipe. Are you *trying* to make me fat(ter)? Thank you for your hard work and passion, you’ve inspired me!
Hahahaaa? A double batch is THE way to go Paul! These things don’t last long around my house either. If you’re lucky enough to have any leftovers, just pop them in a zipper lock bag and freeze them for later. Your future self will thank you.
Regarding the yeast, if you’re using ‘instant’ yeast, then there’s no need to activate it first. Active dry yeast on the other hand has to be pre-activated. In both cases, there’s no harm in activating instant yeast if you prefer, it’s a little extra insurance that it’s alive. Just make sure that your yeast is not old to ensure a good rise. Another thing that could make these rolls dense, is adding too much flour. So just keep that in mind and weigh your ingredients if you have a kitchen scale to ensure maximum accuracy. Enjoy the upcoming batch ?
Hi, I am going to try this recipe! How long can this last out at room temperature and how should it be stored if at room temperature?
Hi Lindy! These are definitely at their best the same day they’re made, but would keep well stored in an airtight container or zipper lock bag for a couple of days. Just give them a quick zap in the microwave to recapture that freshly baked warmth and texture. Enjoy ?
Attachment
Hi! Thanks for this recipe.
And may I offer a tip in return? My cold oven warms up to 26C by just putting the light on and leaving the door shut. Good for proofing in a colder climate. Now, of course you have to take the pan out when you start the pre-heat, (!) but at least you will have given it a great start 🙂
I use this trick a lot with my sourdough breads, when it is cold over here and it has to preferment overnight.
Right, off to the kitchen getting my scales* out…
*) yep, pural, since I invested in not only a normal digital kitchen scale, but also in a digital gold scale. 😀 For those tiny amounts of instant yeast, salt of butter that I sometimes need.
Linda
Linda, dear, please accept my utmost respect for your choice and usage of scales. Hats off…you’re my idol! I feel very strongly about using kitchen scales in baking, so seeing how far you’ve went to measure precisely, just tickles my heart.
Thank you so much for your amazing tips! SO helpful.
Attachment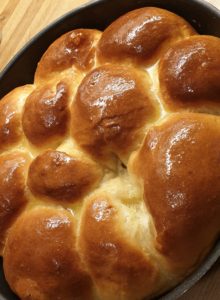
Thanks for the lovely recipe!! I googled the whole day for the best and easiest receipt and your won all of them!!How could I have missed your website for so many years!Everything is absolutely amazing!!!
WOW! These rolls look divine Amanda! I’m so happy this recipe met your expectations. I hope you enjoy everything you try from my blog just as much as liked this one.
I made these rolls many times and I love them but when I tried to make them with brown flour the dough didn’t come soft like the white flour and it didn’t rise so nicely. When I baked it, it came out fine but will you give me measurements of the liquids for brown flour. I think the brown flour needs more liquids than the white flour.
Hello Munthirah! I’m really happy you love this recipe. Indeed whole wheat flour does require a higher level of hydration than white flour. Since I haven’t tried using whole wheat flour in this recipe, I’m honestly unsure by how much you should increase the liquid. This will need a bit of experimentation. I’d recommend adding extra milk, 1 tablespoon at time, to the dough, until it reaches the consistency you usually get with white flour. Best of luck!
Attachment
Thanks for this recipe ??. I doubled the volume, n made 2 AMAZING loaves, really really super soft ??
I was super lazy, and just dumped the dry n wet ingredients together and just machine mixed them. In the beginning, it was very slow to raise after half an hour, but after prolong proofing, everything turned out fine.
Oooohhhh! Love that you made them into loaves ?
Attachment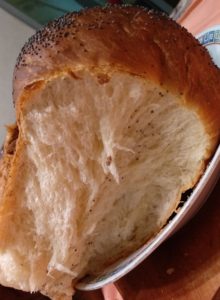
Pic of the bread texture ??
‘Cotton’ is what comes to mind when i see this photo ?
Your detail in the pictures and directions of this recipe is AMAZINGGGGG! I’ve been searching for a good one that didn’t feel intimidating for the past few days. I can’t wait to try this out tonight for the family!!! 🙂
I hope it turns out amazing Jen!
These were SOOO tasty and nice and high and buttery and soft! I ended up having to use about 2 tbsp extra of flour but I used all-purpose flour so that could be the reason. These will definitely be my go to buns from now on…and also was the first time that I made buns that passed my expectations of what a good bun/roll should be! Thanks for the great recipe!
That’s music to my ears Samantha! Really happy to hear that this has become your go-to roll recipe.
Hello
This recipe is amazing thank you so much
The first time I made I used the exact measurement it came out perfect
But I wanted to make a big batch today so I triple the measurement and I used all purpose flour now it’s seems like the dough is a lot. But it looks good so far
Is it possible to put the rest of the dough in the freezer? if yes!!! For how long should they be kept in the freezer. Will they loose their fluffiness? If no I’m screwed I’ll have to baked this whole batch tonight lol
I will post some picture once it’s ready !!!!
Oh wow tripled the recipe?! Your mixer must’ve had one heck of a workout ? Your can freeze the dough after the first rise and after it’s been shaped in balls. Covered tightly, it should keep well for 3 months.
Do not make these hockey pucks. The ingredient ratio is very wrong. I wish I had just taken all of the ingredients that went into baking these and thrown them into the trash and saved myself the time, aggravation and disappointment. I questioned the recipe when I saw it and should have used my good judgement and skipped. Yeast must be activated in advance of just throwing it in, but I went for following the recipe exactly – big mistake!
Hi Karen! I’m sorry to hear that you had trouble with this recipe. It seems however, that either your yeast was old or it wasn’t of the INSTANT variety, which the recipe specifies. Instant yeast is designed to be thrown in with the dry ingredients and does not need to be activated beforehand. If using any other kind of yeast, then yes, it must be bloomed in warm liquid before proceeding with the recipe. I know how frustrating and disappointing it can be to have a recipe not turn out, but I guarantee you that the ratios are not wrong, or the hundreds of reviewers of this recipe wouldn’t have raved about it so much. You can read in the comments section how loved this recipe is. Wishing you better luck next time.
Baked bread for the first time in my life yesterday with this recipe. It turned out perfect- I did not even use bread flour, used normal flour available in the Australian super markets. Love this recipe. Thanks so much
Woooohoooooo! How wonderful to hear! SO glad you enjoyed them ?
Attachment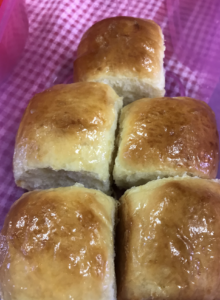
I just try this recipe with Taiwan bread flour in Asian supermarket because in Australian supermarkets blank of any flour, I reduced liquid combined ingredients to 200 g (if I followed this recipe all liquid combined about 290-300g) It was good ,fluffy n soft . I gonna try Australian bread flour with this recipe in next time .thank you for yr recipe.
My pleasure Amy! Hope your next try comes out even better. Enjoy ?
This recipe is soo good i tried it twice. First time as a dinner roll, second time as a loaf. Both turned out beautifully. My only problem is the bottom browns too quickly! Have you experienced this? Do you have any remedy for it?
Btw, shared the recipe with my mom and she LOVED it as well!
Really happy that they turned out so wonderfully with you. I haven’t experience over-browning of the bottom, but it could be due to using a dark coated pan or if the oven’s heat source is really strong on the bottom. If so, try using a light colored pan and maybe move the oven rack one level higher. Hope that helps ?
Hey Tasbih!
I love your cinnamon roll recipe! And this seems similar to it, would I be able to make this like a babka style lad? With a filling? I tried it once before but I think my yeast was really old and it just didn’t rise. So I’m going to try it again! Was just wondering if a filling and plaiting would work.
Thanks a mil ❤️
Hi Shazia! You are right…this dough is actually the base for my cinnamon roll recipe, with a few changes. It would work beautifully for babka ?
Pingback: Pão de cachorro-quente fofinho e delicioso | Mel e Pimenta
Pingback: Pão de cachorro-quente fofinho e delicioso – Receitas.Della Monica
Amazing rolls. Used the dough to make cinnamon rolls as well as it was the best. Thanks very much
Yay! I’m really happy you liked them ? You know…my cinnamon rolls recipe is also based on this one.
Pingback: Pão de cachorro-quente fofinho e delicioso
These rolls are so amazing! Made them today and everyone raved about how good they were! Butter was literally icing on the cake. So good! Thank you for sharing this recipe!
Attachment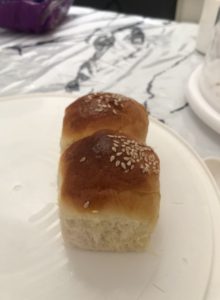
I tried several Hokkaido bread recipes before, this is by far the softest (I’m familiar with super soft buns on our shore and I’m fussy). However in order to achieve the softness and window pane membrane I needed to knead about 45 min (poor kitchen aid was super hot.)
I really doubt the 15 to 20 min kneading will be enough..
So now I’m looking for a recipe that is less kneading Intensive and still super soft, any tips ?
Wi this make a good hamburger bun or buns with fillings ?
I made this bread today for the first time. Actually, I doubled the recipe and made two loaves instead of rolls. I proofed it in the refrigerator for two days instead of one because I did not have the time to form the loaves and bake them. The end result was light, airy and a very flavorful bread that I was very proud of. I will be making this delicious bread again and again. Thank you for all your detailed instructions with this recipe.
Hi..can i put fillings like nutella in this bun?
Sure! That would be delicious ?
Attachment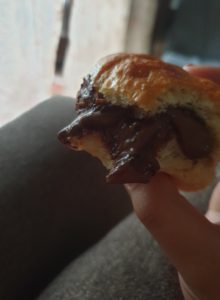
Thank you for the reply.? Your recipe is ammmaaaazing! The bread is so fluffy and I went a tad overboard with the nutella filling as you can see. And I will make this bread over and over again! Thank u for sharing your recipe Tasbih❤
O.M.G seriously the best bread roll recipe! The detailed instructions were much appreciated as always!
My rolls came out absolutely delicious and oh so fluffy!
Quick question, could I prepare them as you do for the zaatar scroll rolls?
Thanks for sharing.
Hello,
I have searched for the perfect roll recipe, and this is it. My small issue though is, i find the rolls a little to sweet. Could i possibly reduce the sugar in the recipe?
Thanks Again,
Rose
Hi I made milk buns twice now and twice they cracked on top. I just want smooth buns. Do you have any tips? Other than that they taste great.
I have tried many recipes for rolls over the years and I have a lot! These are what I have been looking for! Absolutely delicious and so fluffy! I will definitely make this my go to recipe or dinner or anytime rolls. Thank you! My search is over. 😉
This is my favorite recipe ever 🙂 I’ve made it so many times, my little daughter loves eating these fluffy bread rolls with jelly.
Thank you for sharing 😉
Hi Tasbih hope you’re doing well!
I am a huge huge fan of your blog and have tried and fallen in love with so many of your recipes!! I’ve recently ventured into trying to make different Japanese breads and have been wanting to try out this recipe but I have a quick question for you. If I wanted to prep this the day before and let the dough rise in the fridge would you recommend I let it go through the first or second rise in the fridge?
What can we substitute inlieu of mill for lactose intolerant folks
omg these were mile high fluffy scrumptious rolls,and the honey butter was awesome,thanks so much!
Hey Tasbih, can I substitute milk powder with full cream milk?
As for the egg wash, is it possible to not do that, or substitute with butter wash only?
Thanks for providing such information
Attachment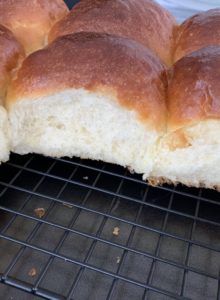
BEST MILK BREAD EVER!!!! O.M.G.!!!!!!!
For some time I have been searching for a recipe that replicates a brioche-like that I buy from a nice bakery in my area. And since I know this technique works pretty well, I had to try these. Better than any store bought. There’s nothing I can add. It’s mind blowing. Usually I make a few changes here and there. No changes at all here. It’s perfection as it is written!
I made it exactly as per your recipe and couldn’t be happier. What a success. Next time I need to double the recipe because it won’t last long…
Thank you so much!! Now I have been “studying” the desserts from your website, and the levantine cuisine, which I appreciate so much and need to include in my menus!
Take care!!!
These were epic, thought I’d gone wrong because the dough was sticky. But it resulted in the softest fluffiest buns, thank you for sharing! Can’t stop eating them
Warm out the oven!!
Mine were a disaster. Dry, not fluffy etc. went wrong with the starter. Heated too quickly so did not finish as per pictures. Also use thermomix for kneading which did not go so well. Old flour maybe should have sifted.
Can solve most of problems but not sure about the kneading.
Attachment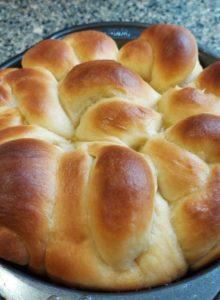
OMG ditto to 11/27 comments! And I’m bread newbie!