Fluffy Spiral Rolls (with optional Za’atar)
Soft, buttery, fluffy, swirly rolls as easy as dumping everything together in one bowl. A special ingredient keeps them soft for days. Whether plain or stuffed with Zaatar, these rolls are guaranteed to fly off your bread basket in a flash! Plus…recipe VIDEO included!
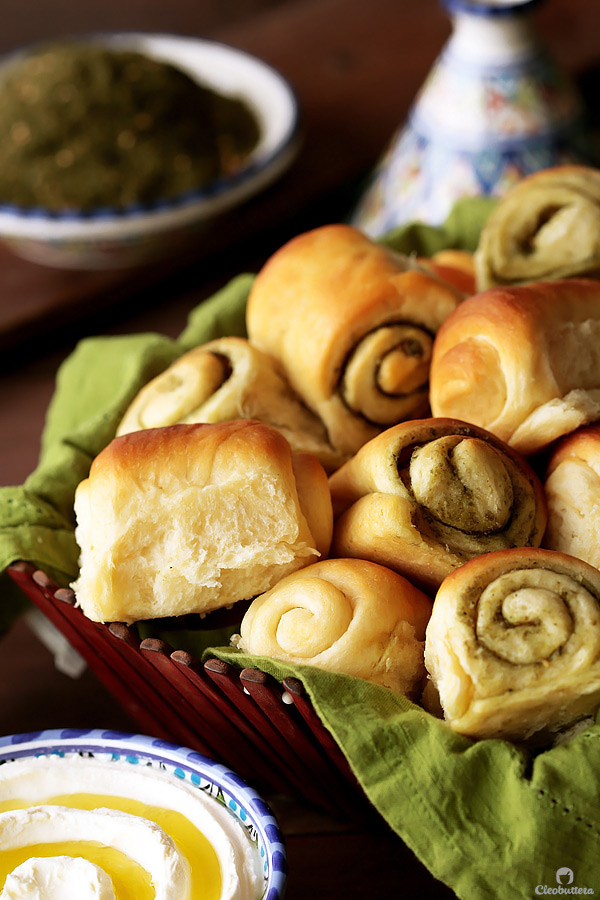
Ladies and gentlemen, please let me introduce you to my latest carb obsession:
The EASIEST featherlight, cotton-soft rolls I have ever met.
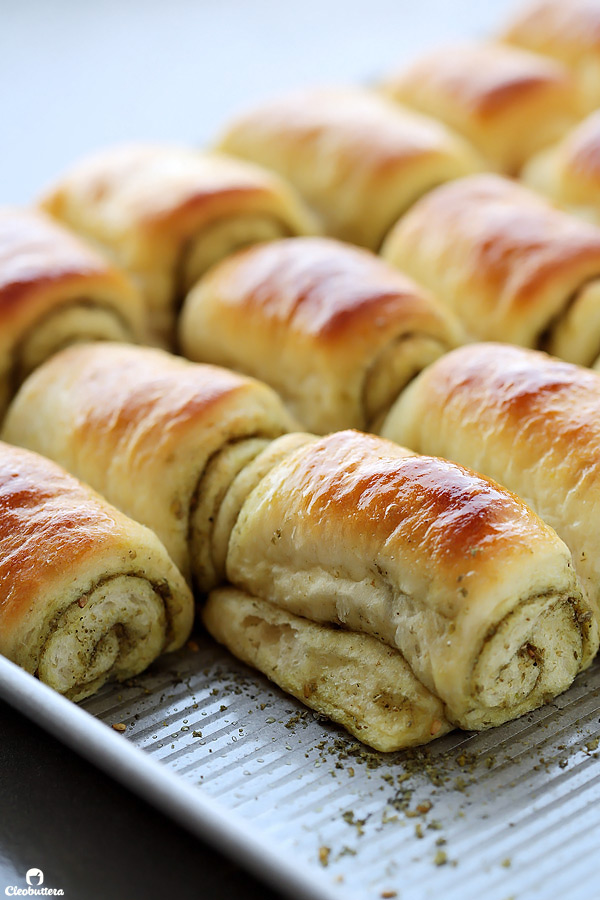
So good that I’ve made them 5 times this past week, and I’m not even ashamed.
The first time I made them, they disappeared in a little less that 10 minutes, and so I was forced begged to make another batch asap. Given it was my cheat day, I couldn’t help but oblige.
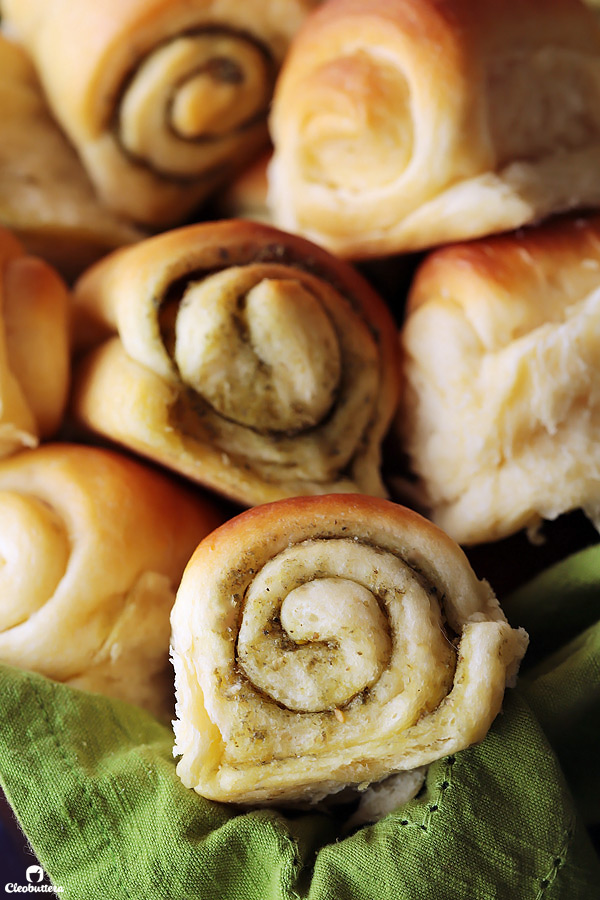
These pillowy, squishy scrolls of carb, fulfills everything a dinner roll should be (or aspires to be)
Super fluffy ✔
Unbelievably soft ✔
Buttery but not overly so ✔
Well rounded flavor ✔
Stays just as soft for several days ✔ (not that they’d last that long!)
Incredibly easy to make ✔
Oh and have I mentioned how fluffy they are?! I think I did over 9 times already, but here’s another reminder.
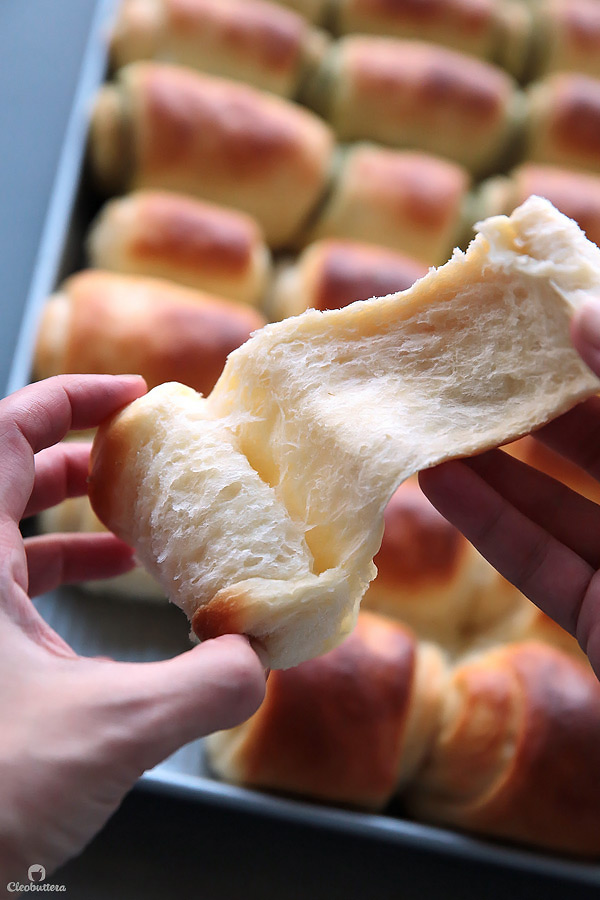
Their only flaw, is that they disappear too fast. That’s where doubling the recipe comes in.
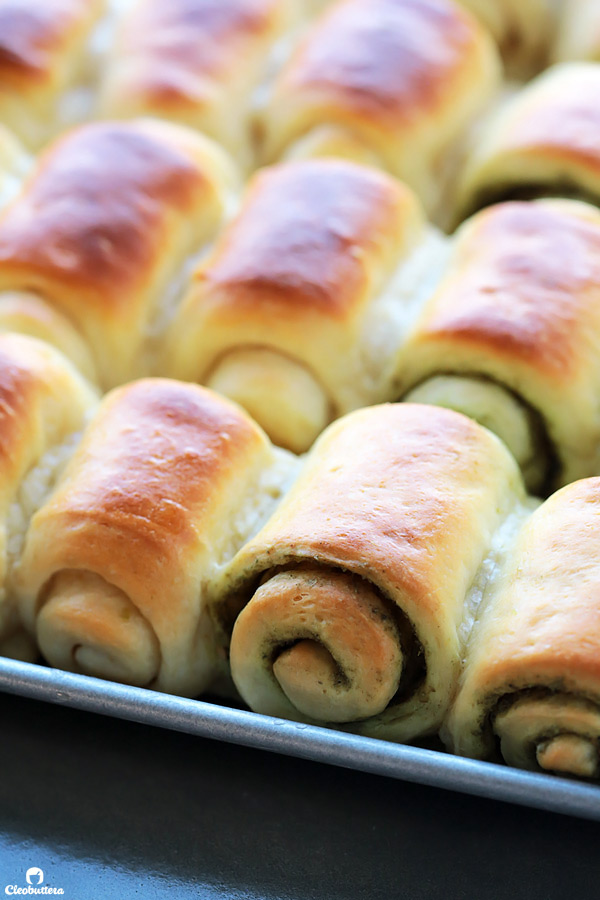
The first time I made them, I decided to stuff half of my rolls with Za’atar, for a little Middle Eastern “twist.” You know…because I’m Egyptian and we love us some za’atar.
And boy was it a very wise decision!
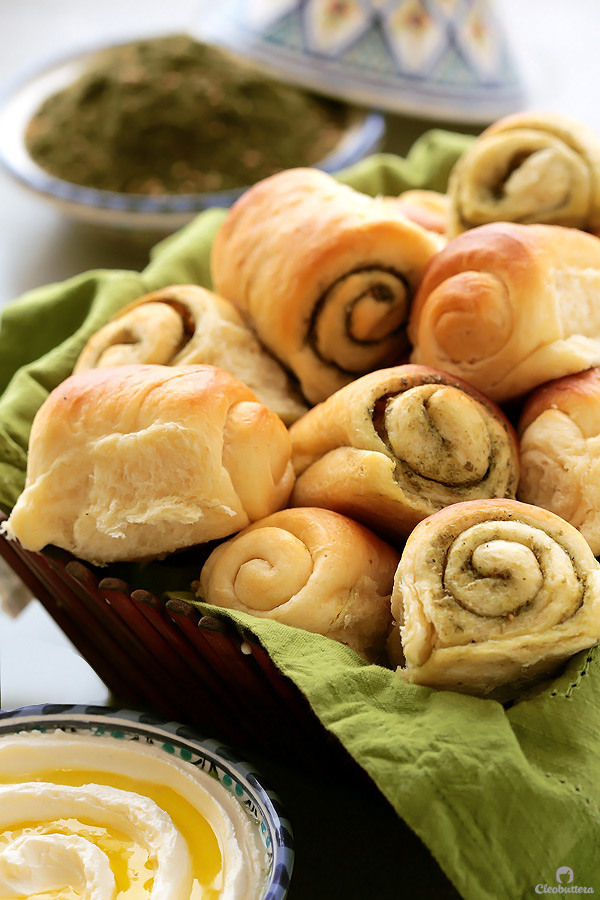
Absolutely dynamite combo. And dipped in Labneh…Ugh! Heaven…
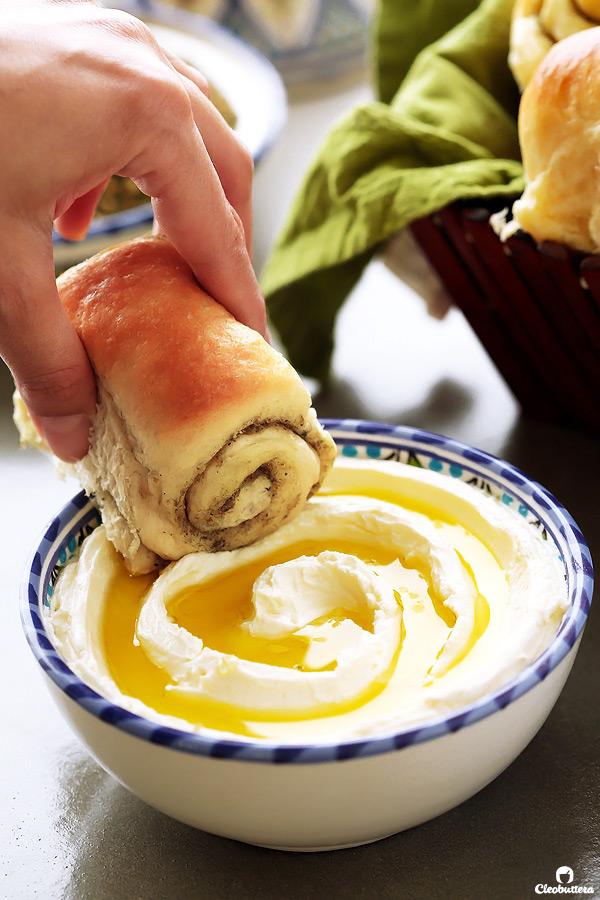
The only problem is that we couldn’t decide which we love more; the plain butter ones or the za’atar ones. Each delicious in its own special way.
So as any indecisive foodie who cannot pick a favorite does, I’ve been making them both every single time. Same pan, side by side, a 2-in-1 ordeal. I’m guilty of doing the same thing with these crescent rolls too.
Let’s rewind a little bit in case you feel lost.
Za’atar whaaaaaaat?!
Za’atar is a Middle Eastern spice mixture common to most Arab homes, but I love how it’s becoming internationally recognized. It’s no wonder…the stuff is delicious. It’s a unique blend of dried thyme, oregano, marjoram, sumac, toasted sesame seeds and salt. The flavor is hard to describe, but its a bit citrusy, somewhat aromatic with woodsy, earthy notes and an exotic savory flavor. It’s sold premade at most Middle Eastern/Mediterranean supermarkets, but it can be easily made at home. Here’s a promising recipe that I’ve seen online.
We love to eat it with bread and Labneh, a soft, cream cheese made from strained yogurt, and other dips like hummus. A little sprinkling over flat bread, meats, veggies, rice, potatoes, anything really, just takes them to a whole new level.
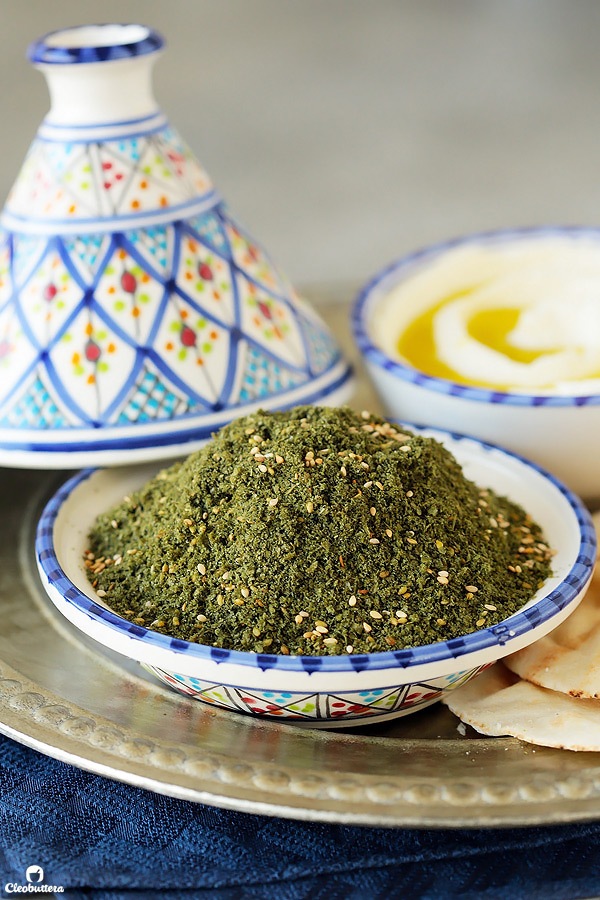
And soft, fluffy rolls, are no exception.
I have another favorite recipe for Ultra Fluffy Dinner Rolls, that is actually one of the most popular recipes on the blog. Just take a peak at the feedback in the comments section to know why they’re so loved by many.
It’s an absolutely great recipe that uses a Japanese technique, known as Tanzhong, which hydrates the rolls to produce soft and fluffy rolls that keeps moist for days. It’s been my go-to rolls’ recipe for a couple of years now, but the process is multi-step, a bit finicky to make and requires A TON of kneading; 20 minutes on the stand mixer and God knows how long by hand…Never took that route; don’t have the biceps.
This recipe manages to capture the same feathery lightness of the Tanzhong method without having to go through the process and long kneading. It’s an easy one-bowl, dump-and-knead kind of recipe and I’m loving it. Thanks to an unusual ingredient, that keeps the dough so plush and pillowy.
That magical ingredient is…
Potato flour!
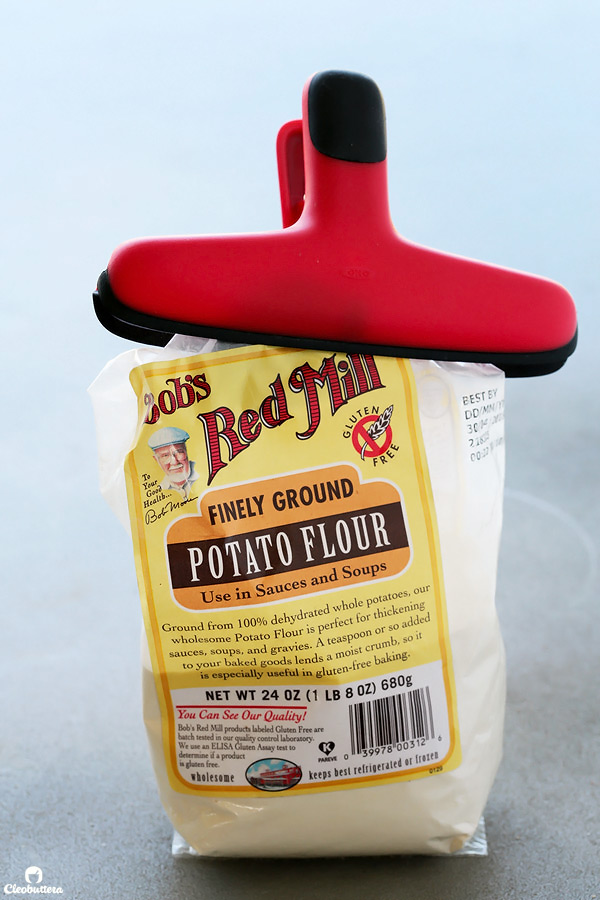
I’m always hesitant about posting recipes with unique ingredients, because they tend to be somewhat hard to find, albeit expensive, where I live, Egypt. The number of times I’ve dismissed some amazing recipes, just because it involves a single ingredient that requires some digging around, is countless. And if I got a dollar for each time I’ve been asked on where to locate light corn syrup to make these Microwave Caramels, I’d be, well…a hundredaire ?
But I couldn’t keep this recipe from ya’ll, because it’s that amazing! So find the dang potato flour, make the rolls and I promise you won’t hate me as much. Oh well, maybe you will, because these rolls might just give you some rolls of your own, if you know what I mean. Thigh rolls, back rolls, stomach rolls…you name it! Dangerous, dangerous recipe I’m telling you…so proceed with caution.
Update: I’ve been getting a ton of questions about substituting potato flour. I knew it was coming ? While I haven’t tried any substitute myself, this article explains everything you need to know about the subject. Highly recommended read!
You know how potato rolls are known for their exceptional squishy softness? It’s because the starches in potatoes have some scientific stuff in them (which I’m not going to annoy you with) that dilute the gluten-forming proteins. This makes potato-based baked goods like these burger buns, softer, moister, more tender and increases their shelf life.
Same goes with potato flour. This unusual ingredient is made from dehydrated potatoes, so its basically a potato! A veggie, if it will make you feel better ? You could substitute instant mashed potato flakes by the way, but not sure if actual mashed potatoes would work here. The thing about potato flour is that its super absorbent, which allows us to cut back on the flour and increase the milk, which in return, produces a moister roll. Makes sense right?
And you’ll only need a tiny bit per batch, so a bag should last you a long time. Unless you’re like me and make rolls 5 times in one week.
Here’s a quick video of how they come together…
Now let’s break up the process a little more for all you baking geeks (aka my favorite people)…
To make these easy rolls, you’ll basically just throw everything together and mix. Dry ingredients, wet ingredients, everything goes in there. Just make sure you’re using INSTANT yeast though. To speed up the rising process, I like to just warm the milk a bit and stir the egg into it, just to take the refrigerator chill out of them. And if you want consistent, perfect results every time, I highly recommend weighing your ingredients using a kitchen scale. It’s always a good idea.
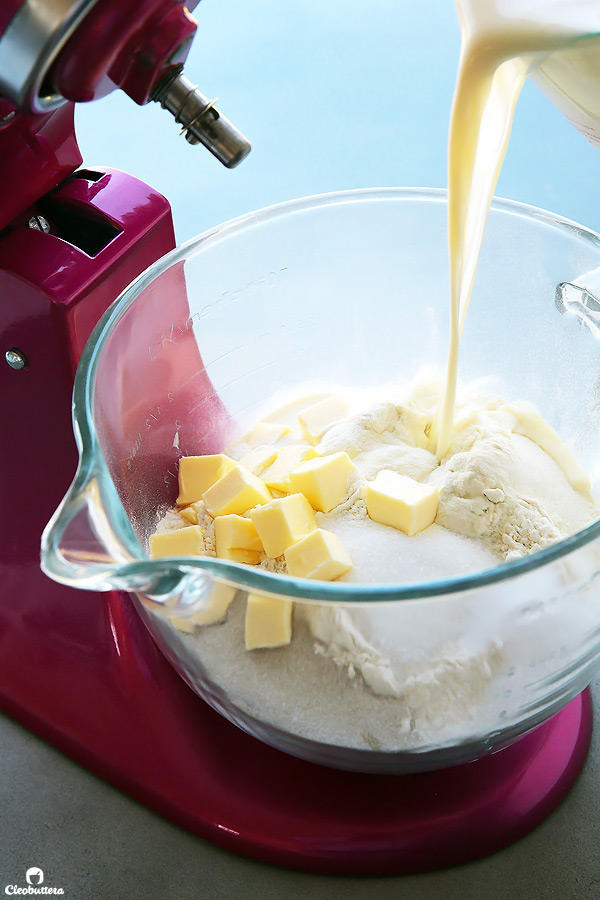
At first, the dough will seem clay-like, and appear rough and dry, but it will eventually soften up, so don’t be tempted to add extra liquid.
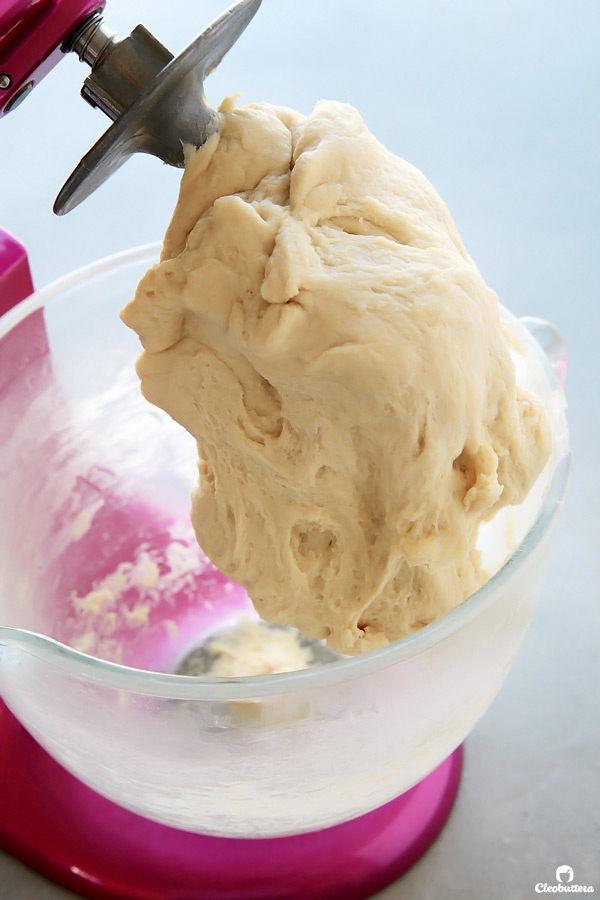
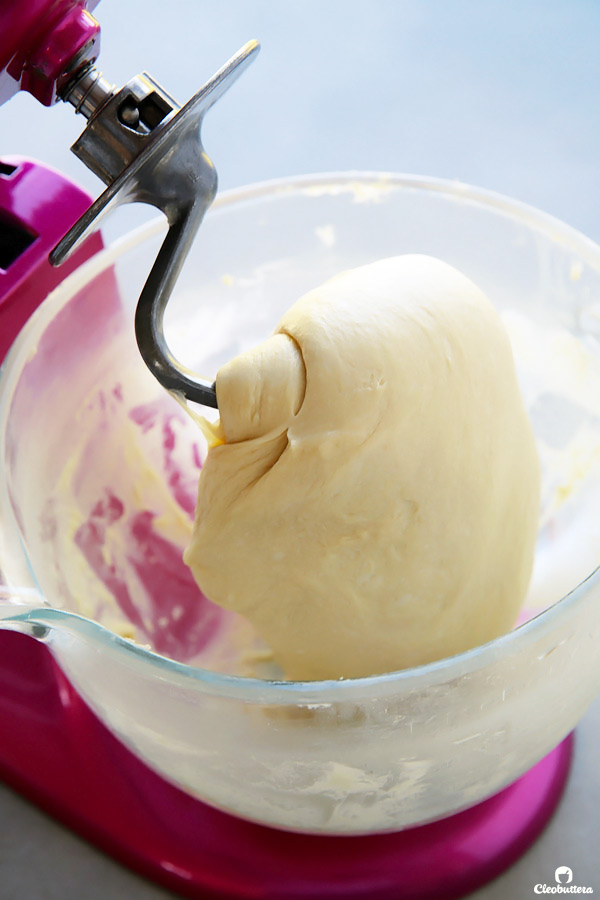
See? 7 minutes of kneading later, it will transform into a silky smooth dough with a slight stickiness to it.
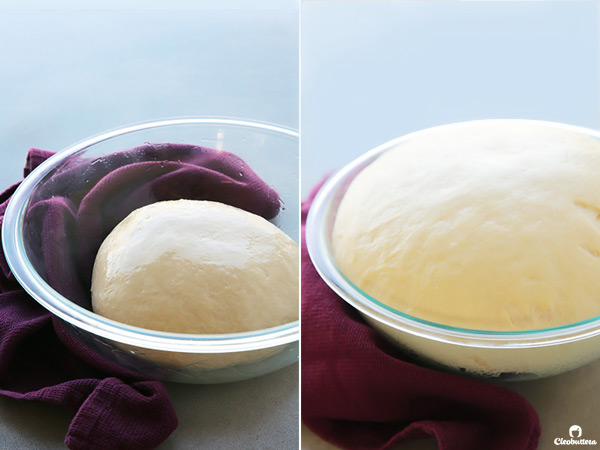
You’ll then leave the dough to rise in a nice, warm area, almost until doubled in size and resembles a pillow.
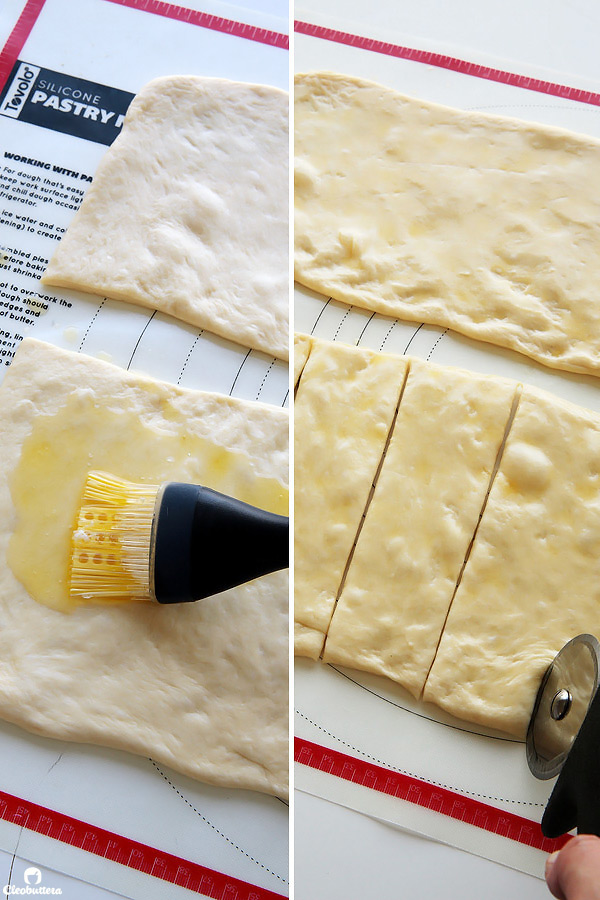
Then you’ll turn it out on your work surface, roll out into a 16 inch (42 cm) square, then slice it in half horizontally.
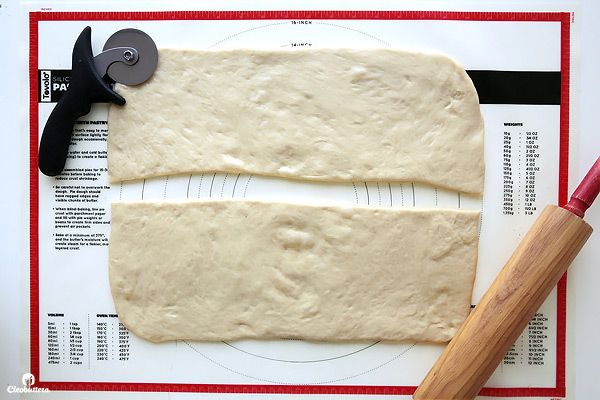
If you happen to decide to ditch the za’atar and make ALL plain, butter rolls, then you’ll brush both rectangles of dough with melted butter. Let the butter set in for a bit (to avoid a buttery mess), then slice each rectangle into 8 equal-ish strips
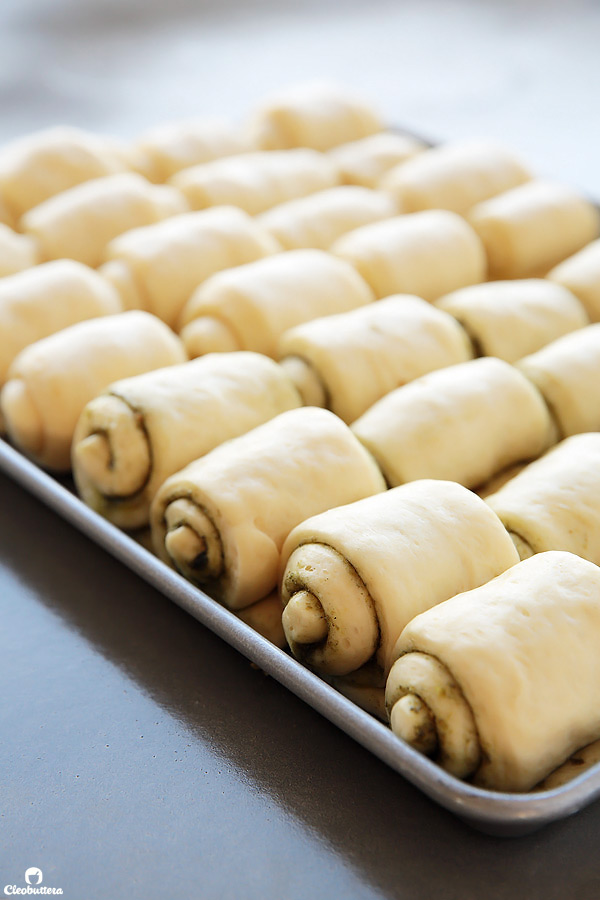
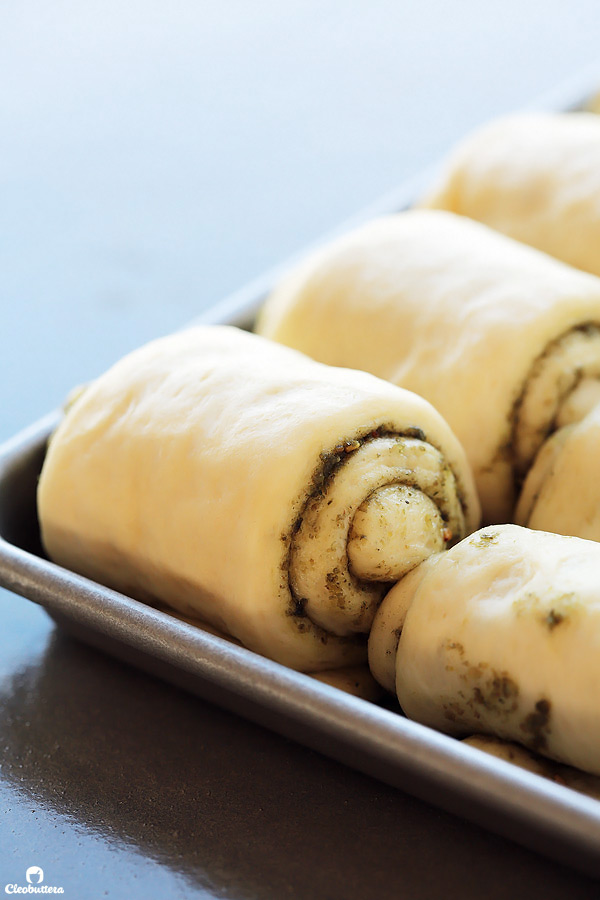
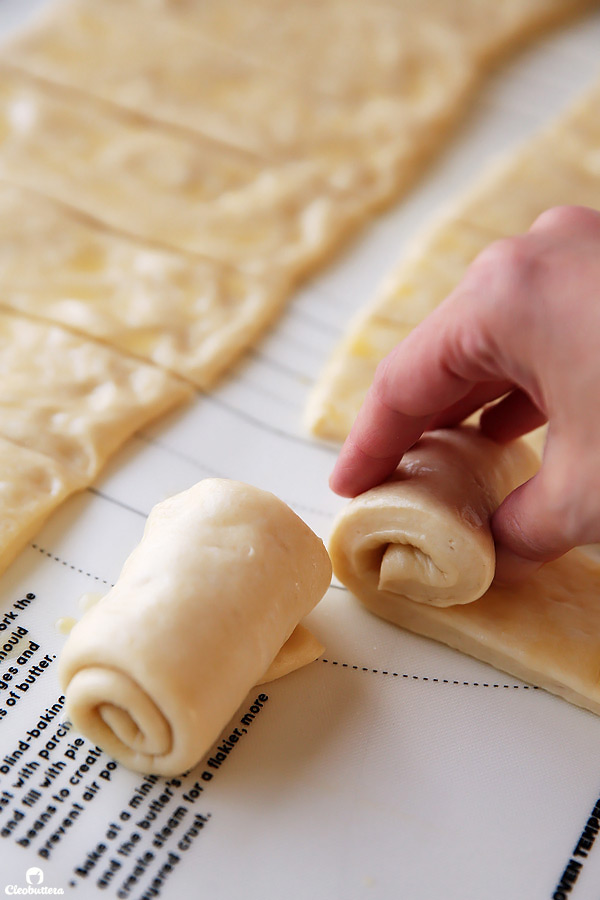
Then roll each strip into a snug scroll.
But if you like to kick things a bit and decide to za’atar your rolls, you’ll simply brush a mixture of olive oil and zaatar all over your dough rectangles, slice and roll them up like so.
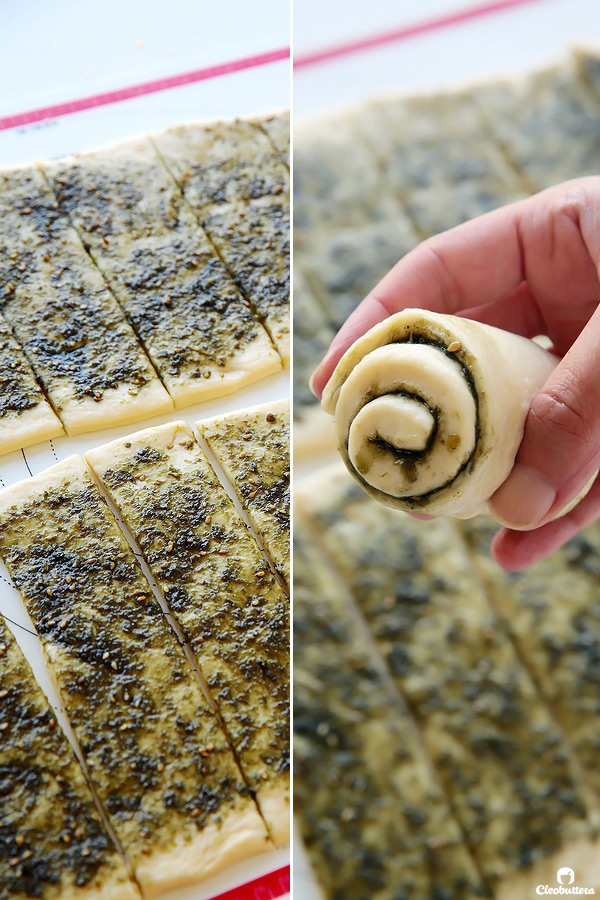
But if you’re like me and can’t decide between butter or zaatar, then make some of both. One rectangle brushed with butter and the other with olive oil/za’atar. I’ve actually doubled the recipe here, because I have learned that 16 rolls are never enough for us ?
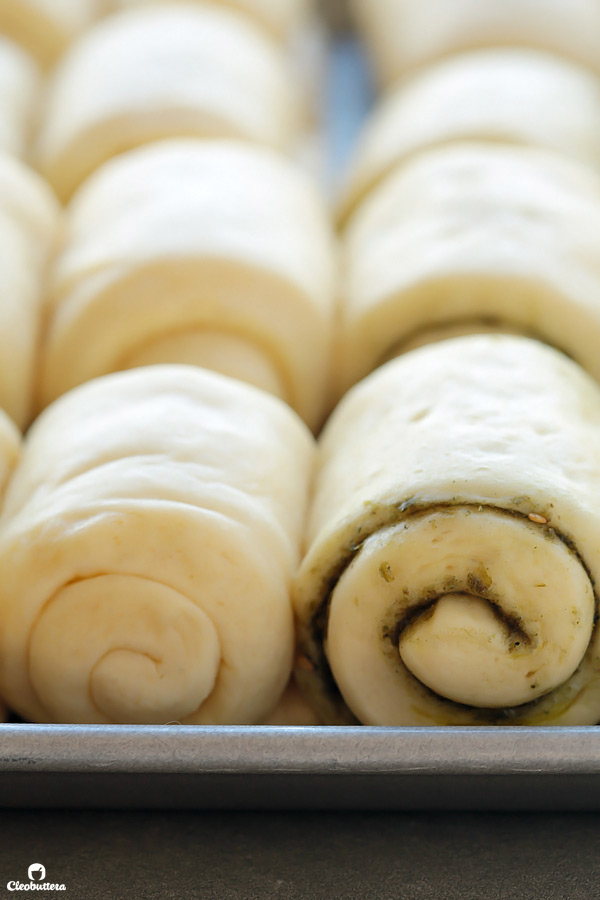
Let these guys rise…
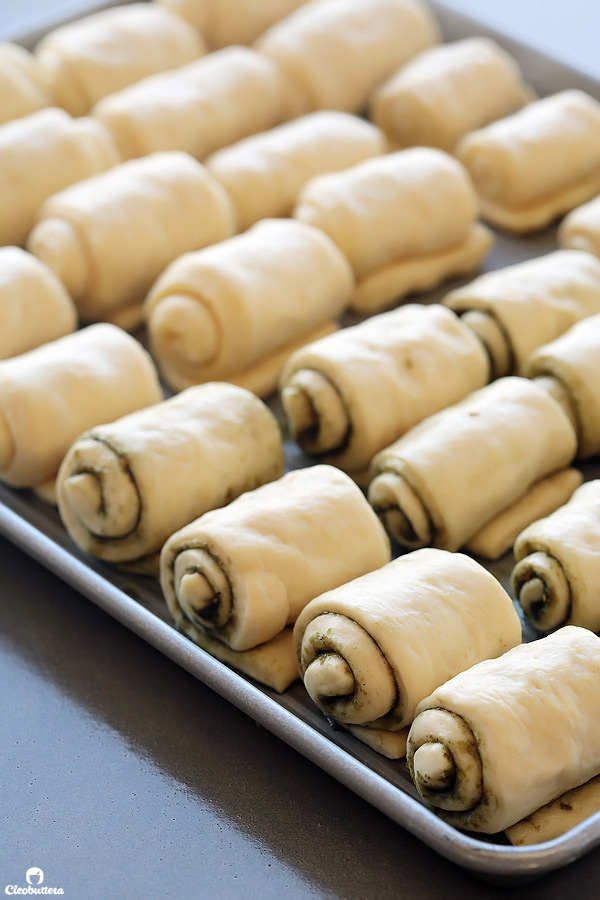
Until you can no longer handle their chubby cuteness. At this point…ship them off to the oven!
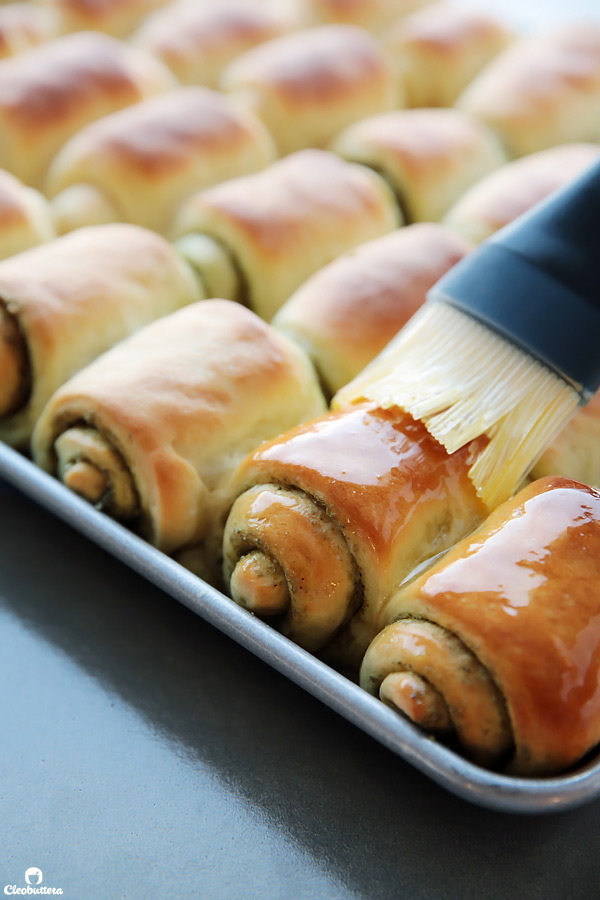
And when they come out, brush them off with a glistening layer of melted buttaaaaah…
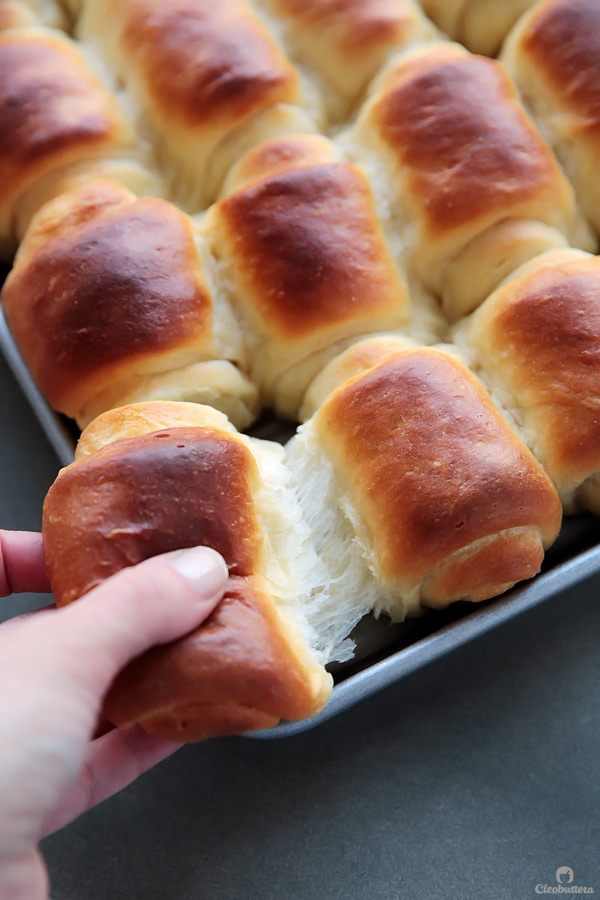
Quick! Pull one while they’re still warm.
That fluffiness….
I mean…
Looks like a warm blanket.
I’d sleep in this if I could.
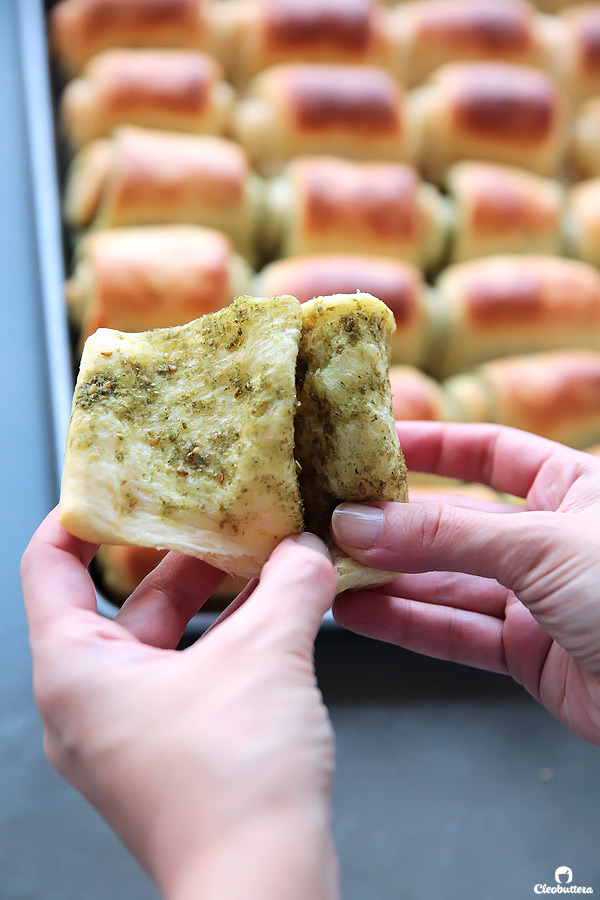
I’ll stop talking now…
And leave you to go buy some potato flour and make them.
And FYI to my fellow Egyptian residents, Bob’s Red Mill potato flour is everywhere…so no excuses. (This is NOT an ad btw)
Oh! I know I said that I’ll stop talking, but paleeeeez don’t be like my kids and bite into them without unraveling them like a scroll. It’s just…wrong and a crime against fluffiness.
Now I can stop talking in peace.
Fluffy Spiral Rolls (with optional Za'atar)

Soft, buttery, fluffy, swirly rolls as easy as dumping everything together in one bowl. A special ingredient keeps them soft for days. Whether plain or stuffed with Zaatar, these rolls are guaranteed to fly off your bread basket in a flash!
Ingredients
For the Dough:
- 3 cups (12 3/4 oz/ 361g ) All-Purpose Flour
- 2 1/2 teaspoons instant yeast
- 3 tablespoons (1 3/8 oz/ 39g) granulated sugar
- 1 1/4 teaspoons fine salt
- 1/4 cup (1 3/4oz/ 50g) potato flour or 3/4 cup instant mashed potato flakes (*see notes below for substitutions)
- 3 tablespoons (1 1/2 oz/ 43g) unsalted butter, softened to room temperature
- 1 cup milk
- 1 large egg
For Butter Rolls: (Enough for the full batch of 16 rolls. Cut amount in half, if making 8 butter rolls, and 8 za'atar rolls)
- 3 1/2 to 4 tablespoons (1 3/4 to 2oz/ 50 to 57g) butter, melted (for brushing on rolls)
For Za'atar Rolls: (Enough for the full batch of 16 rolls. Cut amount in half, if making 8 butter rolls, and 8 za'atar rolls)
- 1/4 cup olive oil
- 1/4 cup (3/4oz, 23g) za'atar
Instructions
- In the bowl of a stand mixer fitted with the hook attachment (or a large mixing bowl, if kneading by hand), place the flour, yeast, sugar, salt, potato flour and the softened butter.
- In a microwave-safe liquid measuring cup or small bowl, heat the milk in the microwave until warm, but not hot; about 1 minute. Add the egg to the warm milk and whisk until well combined.
- Pour the milk mixture into the bowl with the flour and other ingredients. Mix until a shaggy dough is formed. At first, the dough will seem clay-like, and appear rough and dry. It will eventually soften up, so don't be tempted to add extra liquid.
- Continue to knead the dough, by hand (10 minutes) or by machine (7 to 8 minutes) until it's smooth and slightly sticky.
- Place the dough in a lightly greased bowl or 8-cup measure (so you can track its rising progress). Cover with plastic wrap and allow it to rise for 60 to 90 minutes in a warm place (*see note below, for creating the best warm environment for rising). It'll become quite puffy, and almost doubled in size.
- Transfer the dough to a lightly greased work surface, or silicon mat. Roll or pat the dough into a 16" (42 cm) square. Using a pizza cutter, slice the dough in half horizontally to form 2 equal rectangles.
- If making ALL butter rolls, brush both rectangles of dough all over with a light coating of the melted butter. Allow the butter to set in and harden slightly. Any leftover butter will be used for brushing on top of the baked rolls. If making ALL za'atar rolls, combine the olive oil and za'atar in a small bowl, then spread the mixture over both rectangles of dough. If making 8 rolls of each kind, then spread half the amount of butter over one rectangle, and half the amount of olive/oil za'atar mixture over the other.
- Slice each rectangle vertically into 8 equal strips. Starting at 1 end, roll each strip into snug cylinder., then place seem-side down in a lightly greased 9" x 13" pan. Arrange 4 rows of 4 in the pan.
- Cover the pan with plastic wrap, and let the rolls rise in a warm place 45 minutes to 1 hour, until puffy, but not really doubled in size. Towards the end of the rising time, preheat the oven to 350°F/ 180°C.
- Bake the rolls for 20 to 25 minutes, until they're golden brown and feel set. The most accurate way of telling when they're done is by taking their internal temperature. The thickest part of the roll should register around 190°F/ 88 °C. Loosely tent the rolls with foil during baking if they're browning too fast to avoid overbrowning.
- Remove the pan from the oven, and brush the rolls with the remaining melted butter, even the za'atar ones. Pull apart to serve. Enjoy warm or at room temperature. Store leftovers (if you're lucky to have any) in an airtight container or zipper lock bag at room temperature for up to 3 days.
Recipe Notes
- This recipe doubles really well, as shown in the post's photos. Bake in an 18 x 13" (46 x 33 cm) pan; aka half sheet pan.
- While I haven't tried any substitute myself, this article explains everything you need to know about substituting potato flour. Highly recommended read!
- To create a warm environment for the dough to rise, adjust oven rack to middle position and place a loaf or cake pan in the bottom of the oven. Place the bowl of dough on the middle rack and pour boiling water into the pan. Close the oven door and allow the dough to rise as instructed. Alternatively, a warm, turned off oven may be used instead, just be sure that it's not hot, as that could kill the yeast. It should feel like a warm summer day.
- To make ahead: In step 5, do not let the dough rise, but refrigerate it overnight or up to 16 hours; let the dough sit at room temperature for 30 minutes then continue with step 6. Alternatively, (my personal favorite method to minimize work on the day of serving) do not let the shaped rolls rise in step 9, but refrigerate it overnight or up to 16 hours; let the dough sit in a warm place until puffed up; 30 minutes to 1 hour, then continue with step 10, preheating the oven 15 minutes before baking.
Recipe mostly adapted from Half Baked Harvest, who adapted it from King Arthur Flour, adding a Za'atar "twist" to the dough.
Measurements Note: All recipes of this site have been developed using weight measurements. Although US volume measurements have been included for your convenience, it is highly encouraged that you weigh your ingredients using a kitchen scale to get the best possible results. Due to the sensitive nature of baking, kitchen scales are proven to yield more accurate and consistent results than measuring cups. Enjoy!
This post may contain affiliate links.
All images and content are owned by Cleobuttera® and are copyright protected. Please do not use my images without prior permission. If you would like to republish a recipe, please rewrite it in your own words and link back to the recipe page on my site. Original recipes and creations of this site are intended for personal and home use. Commercial replication or media consumption are only allowed with a written consent and agreement with Cleobuttera owners. Otherwise it is considered a violation of intellectual property. Thank you for respecting and appreciating the amount of time and effort that goes into creating free, unique recipes that make people happy.