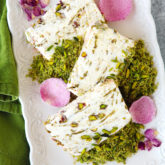
Inside Out Red Velvet Cookies
Get your Red Velvet Cake (frosting and all) in cookie form! These irresistibly soft and chewy red velvet cookies stuffed with real deal cream cheese frosting, are pretty amazing! Plus…Recipe VIDEO at the end of the post!
Imagine the best red velvet cupcake you’ve ever had, re-engineered into the softest, puffiest, chewiest cookie…
Now scrape off the mandatory cream cheese frosting from over the top, and stuff it on the inside instead.
And that’s exactly what you’ll get…

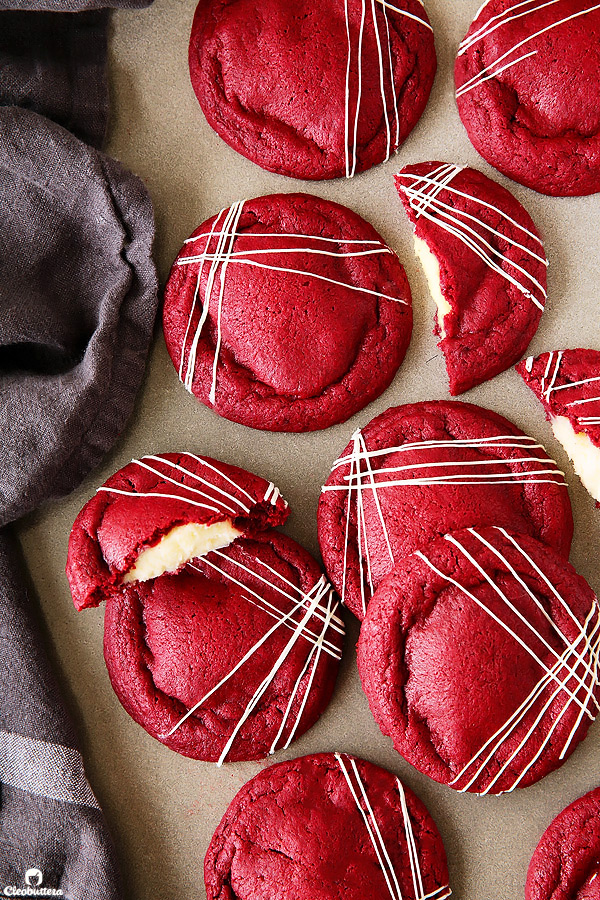
An “inside out” cookie version of the charming red cake.
I was first inspired to make these cookies after seeing Sally’s NYC Bakery Tour post last year. She made us all drool by the delicious-looking treats she sampled on the trip, but the one that stood out the most for me was City Cakes’ Killer Red Velvet Half Pound Cookie.
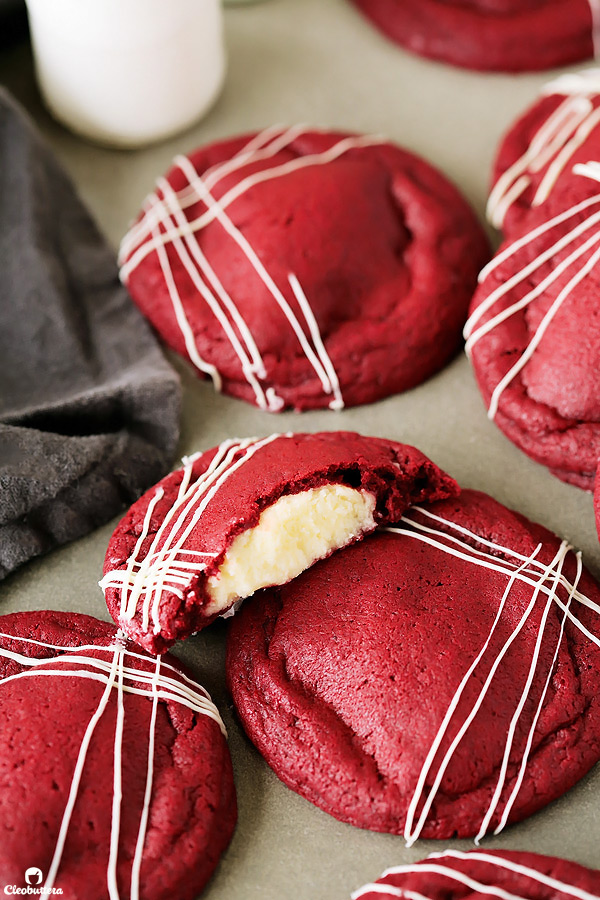
Even though I’m not the biggest red velvet fan (unless its Sprinkle’s Red Velvet Cupcake), I have a weak spot for stuffed cookies. I’m just an absolute sucker for a cookie that looks so innocent and ordinary on the outside…
But greets you with an unexpected surprise, once you open into it.

I’ve stuffed Nutella, Biscoff spread, salted caramel, another cookie into cookies and I couldn’t wait to try it with frosting.
Ofcourse it took me several tries to get it just right, but I’m now beyond satisfied with how it turned out in the end and I’m finally ready to share.
I can’t say that they taste like City Cakes’ cookies, because I’ve never had them, and I wasn’t actually trying to replicate them. However, the concept is pretty close, and I’d be hard pressed to find someone who tasted my version and hasn’t flipped out from how good they are. In fact, I already have several family members who deemed them their “favorite cookie of all time” even topping everyone’s favorite Chocolate Chip Cookies, which is a BIG deal in my family!
These cookies hit all the notes of a classic red velvet cake in all the right places. So if you love red velvet cake, you’ll fall for these.
They’re perfectly flavored with just the right amount of cocoa, to give them that signature warm taste. Balanced by that slight tanginess that the famed cake is known for.
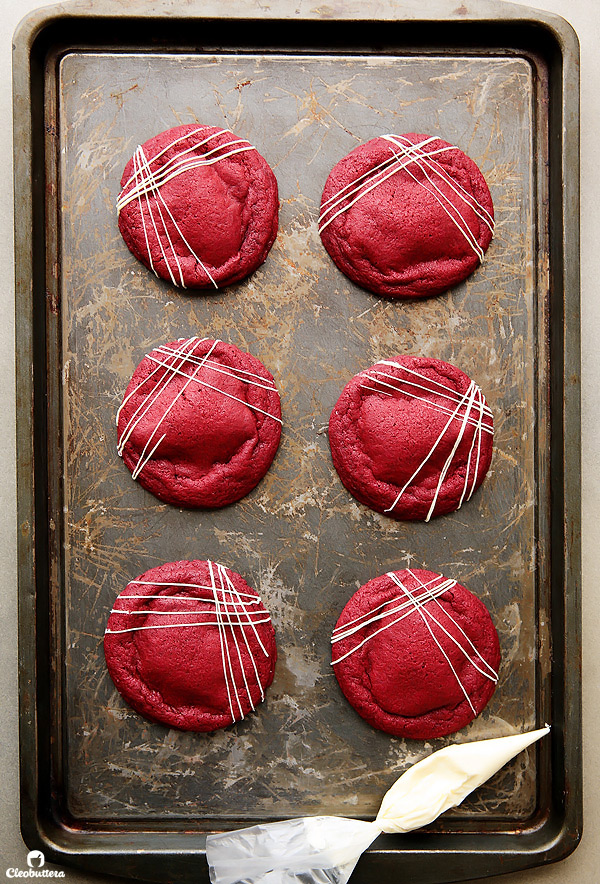
The outside is as vibrant and festive as it should be…
But like so many things in life…
It’s what is on the inside that counts.
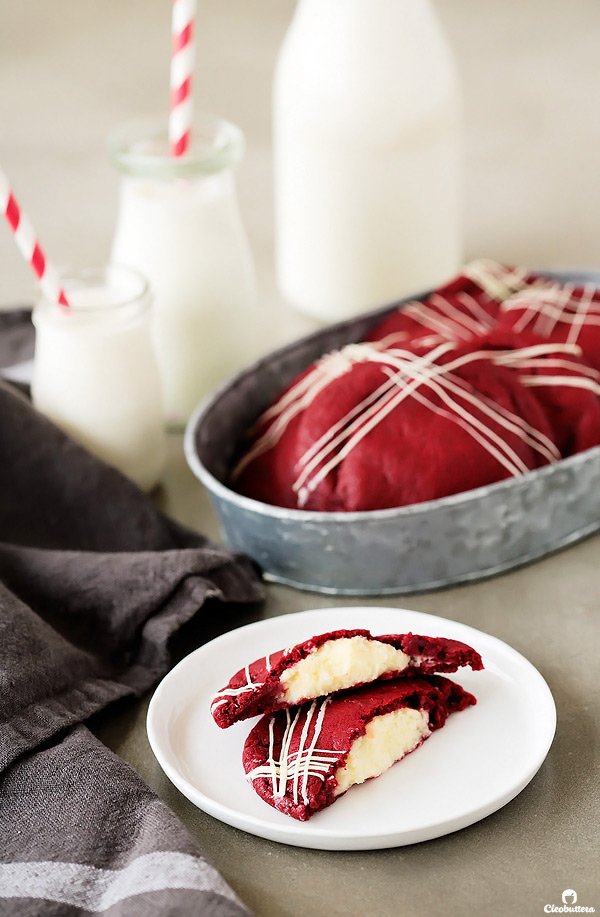
Real deal, legit cream cheese frosting plays the star role of the cookie here…because what’s red velvet cake without its inseparable companion.
The frosting is perfection on its own; so creamy, stable, not too sweet and addictive enough that it risks not making it into the dough. It’s finger lickin’ good! Which is why I made sure it makes about an extra tablespoon for sampling. So leave the rest well alone if you please ??
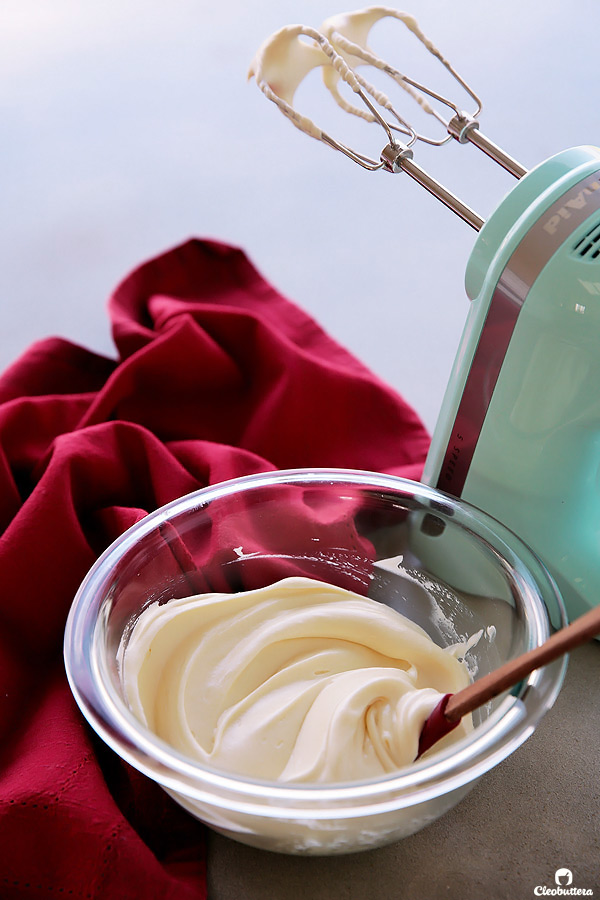
I had to play around with the butter to cream cheese to sugar proportions several times to get it firm enough to not ooze out of the cookies, yet soft enough to spread nicely.
My first trial, was all cream cheese and powdered sugar and not a smear of butter. The result: meh! The frosting scoops just stood still in the cookies and did not spread the tiniest bit. The cookies looked pregnant…for the lack of a better word. Flat around the edges, with a huge baby cheese bump smack in the middle. Tasty? Yes! Pretty? Not unless you’re making them for pregnant lady’s baby shower. Hmmmm…not a bad idea actually ?
For the second trial, I decided to add in some butter to get a bit of spread. I used the classic cream cheese frosting 2:1 ratio of cream cheese to butter. They spread perfectly, but tasted too “cheesy” that they overwhelmed the red velvet flavor. So I kept toning down the cream cheese until I hit the perfect amount.
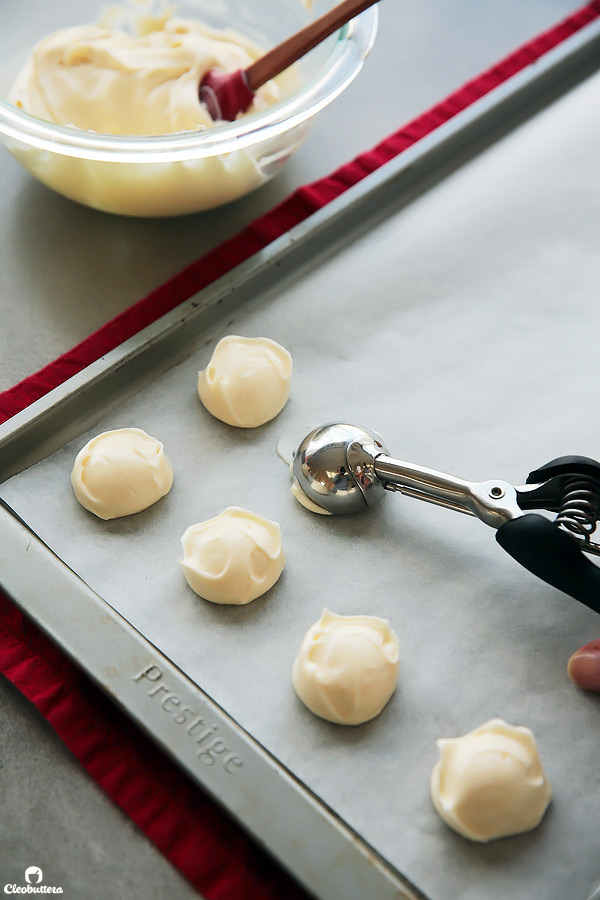
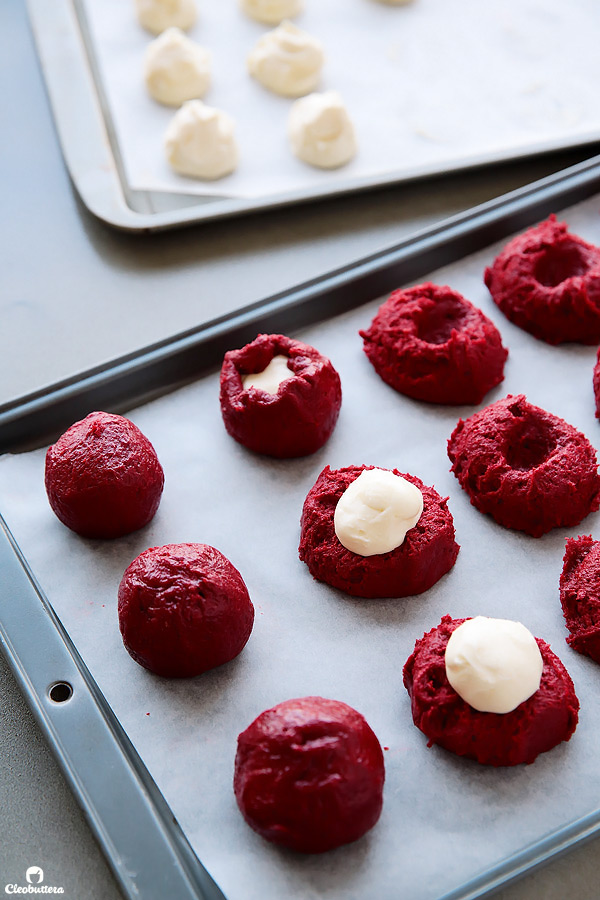
The best way to stuff the cookies with the frosting, is to scoop them out into 1 tablespoon portions and freeze them until solid. Otherwise they’ll be too soft to work with.
Meanwhile, you can move on to make the cookie dough. You could watch every step of the process in the recipe video at the end of the post!
I adapted several tricks here, to guarantee the softest, chewiest cookies ever. I went with melted butter instead of softened, because it’s scientifically proven (not even kidding!) to produce chewier cookies. I also used a lot more brown sugar than white sugar, because it’s moister and again makes cookies chewier and softer.
An extra egg yolk along with a whole egg, is a well known trick for adding richness to the dough, which in return heightens the chewy factor.
Now to give our cookies than iconic red velvet color, red food coloring is added to the dough. Gel food coloring is best here because it’s so concentrated, so a little goes a long way, without thinning out the dough. Liquid food coloring will work though, but the color might turn out less vibrant.
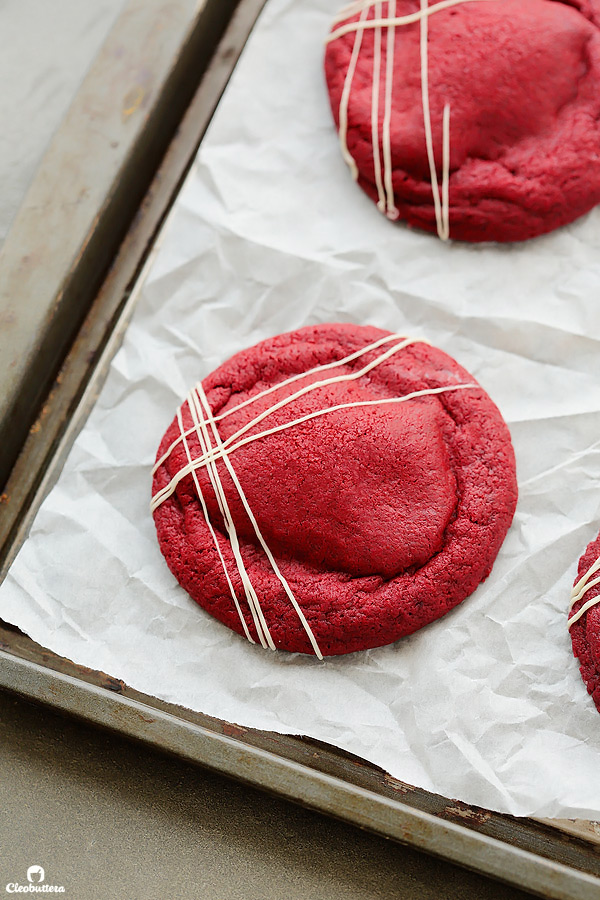
Now here’s the part where a lot of people will be tempted to skip, but I urge you not to and here’s why: During the testing phase of the recipe, I couldn’t get the cookies to turn out as thick as I wanted to no matter what I tried. And I like BIG cookies and cannot lie, so I wasn’t about to let go.
Cornstarch trick…already doing it!
Chilling the dough…also doing it!
Upping the baking soda…didn’t help!
Increasing the flour= dry cookies…yuck!
And then it struck me! My Favorite Chocolate Chip Cookies recipe uses a unique mixing technique that helps thicken cookies. It involves stirring and resting the mixture several times. I had no other choice but to try it…and OMG it worked with flying colors!
Stirring the butter, sugar, egg mixture for 30 seconds, then resting for 3 minutes, then stirring again and resting, for a total of 3 rests and 4 mixes helps dissolve the sugar better, resulting in thicker, chewier cookies. So unless thinner cookies are your jam, don’t skip this step.
To give the dough an undeniable red velvet flavor, we add a tiny bit of white vinegar to achieve the same acidity and tanginess that buttermilk adds in the cake version. Don’t worry you won’t be able to taste the vinegar, even if you wanted to. And FYI, the majority of red velvet cake recipes, contain vinegar in the batter, so we’re only sticking to tradition here ?
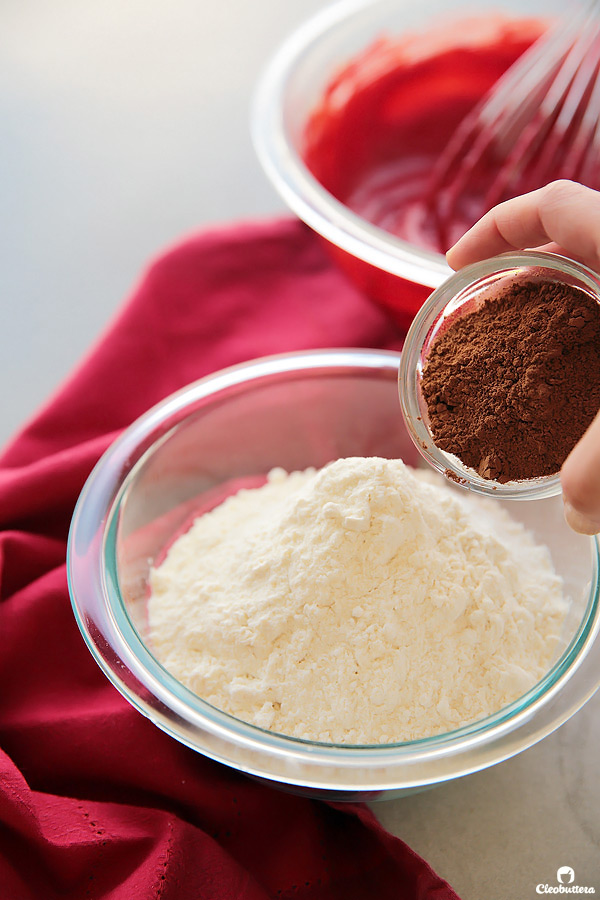
Just 2 tablespoons of cocoa powder gives the dough that whiff of chocolate flavor, that red velvet cakes are known for without tasting like chocolate cake.
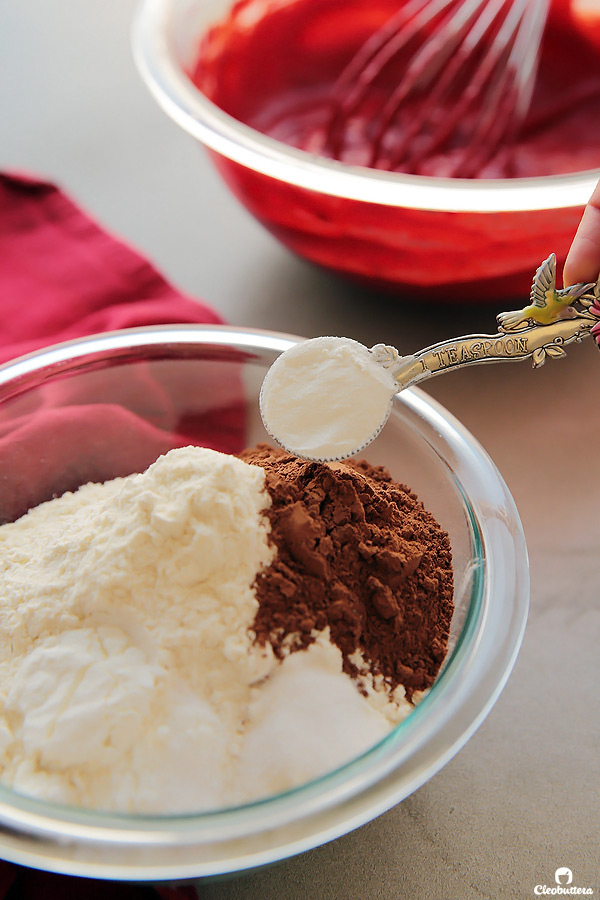
Cornstarch is also added for another assurance for fat, thick cookies, as well as a little bit of baking powder, along with the usual baking soda.
And just like that, dry ingredients get stirred into wet ingredients, and viola! Red velvet cookie dough is ready.
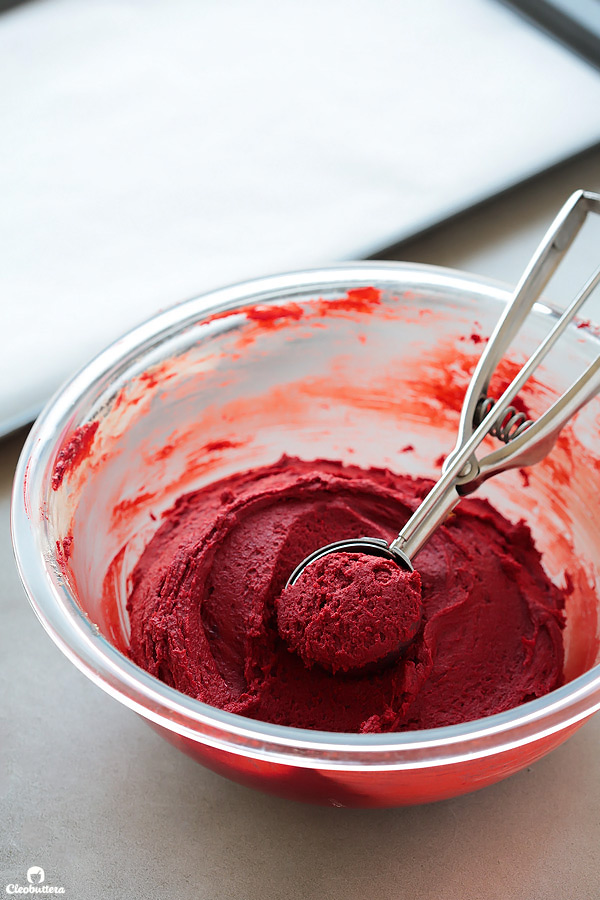
Scoop it out into 16 equal portions. Then make an indentation with your thumb in the center of each dough ball. Now as quick as you can, place the frozen cream cheese frosting scoops into the grooves. Working quickly to avoid the frosting from softening, gather up the dough over it and roll into a ball.
At this point, I like to chill the dough balls in the fridge for at least 2 hours (the longer the better) before baking them. This gives you even thicker cookies.
Ugh! The measures we take for big, fat cookies are unreal..but so worth it!
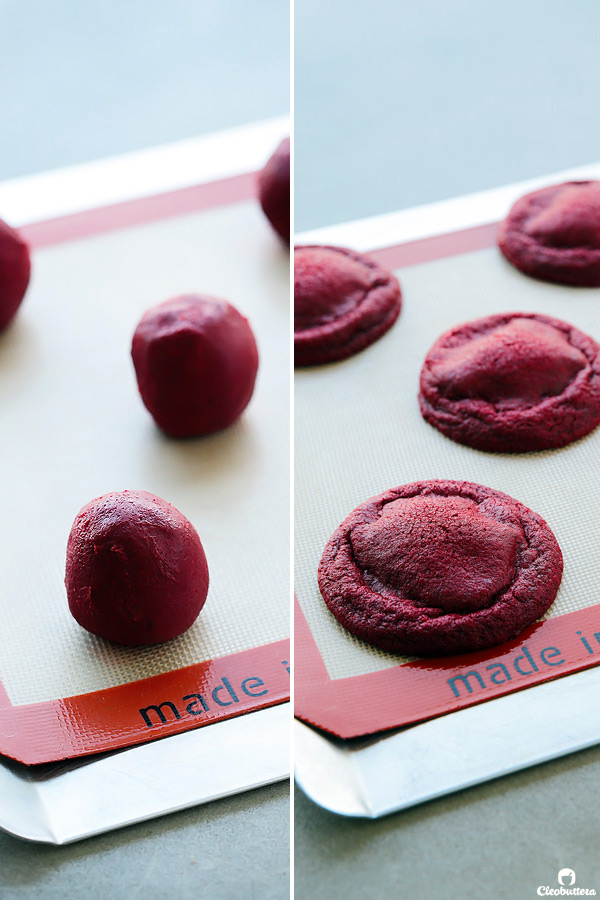
Like always, make sure not to overbake the cookies! You just want to bake them until the edges are barely set, but the centers are so so soft; borderline raw. Err on the side of underbaking if you want them super soft.
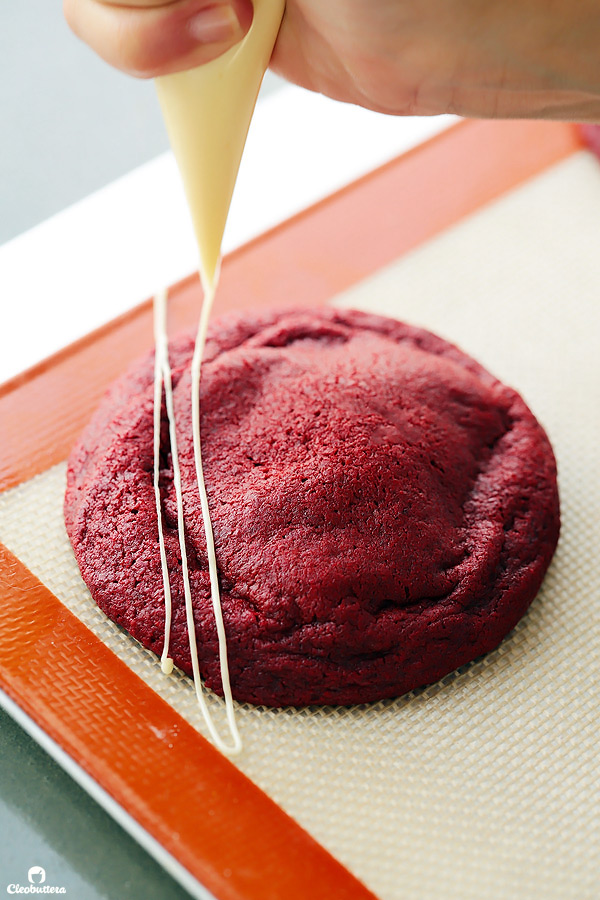
Then after they cool completely (if you could wait that long), add a few drizzles of melted white chocolate for some extra flair!
Aaaaaand SKADOOSH!
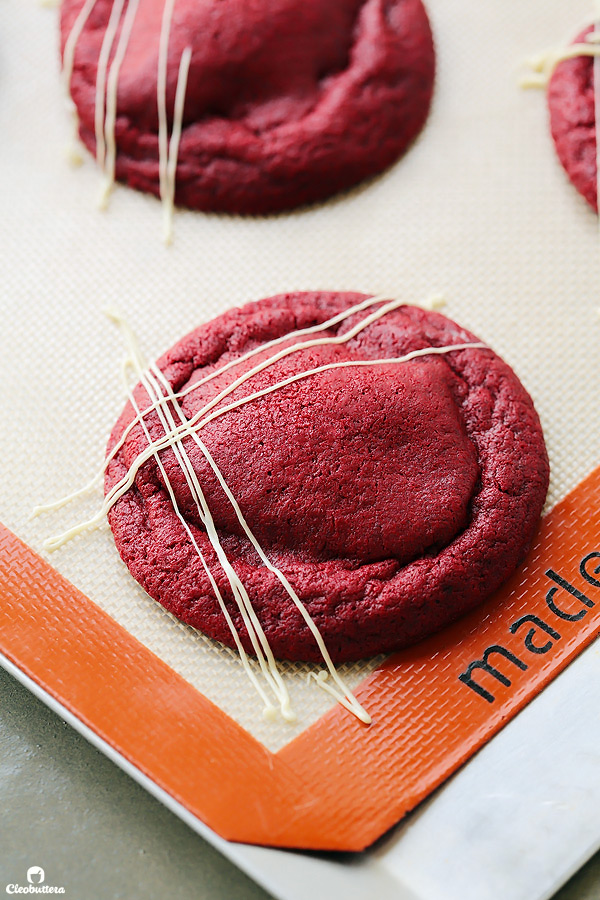
Inside Out Red Velvet Cookies are ready to WOW!
Be sure to watch the video below to see exactly how they’re made!
Side note: The cookies in the video are slightly thinner than in the photos and that’s because they didn’t get a chance to chill long enough on video-shoot day; maybe just 30 minutes or less. Moral of the story: Chill the dough for all least 2 hours!
Enjoy☺
Inside Out Red Velvet Cookies
Get your Red Velvet Cake (frosting and all) in cookie form! These irresistibly soft and chewy red velvet cookies stuffed with real deal cream cheese frosting, are pretty amazing! Please note that there are several chilling and freezing steps, so plan ahead before starting.
Ingredients
For the Cream Cheese Frosting Stuffing: (should be made at least 2 hours in advance)
- 1/4 cup (2 ounces/ 57 grams) unsalted butter, softened to room temperature
- 1 cup (4 ounces/ 113 grams) powdered sugar
- Pinch of salt
- 1/8 teaspoon vanilla extract or 1/4 teaspoon imitation vanilla flavoring
- 3 ounces (85 grams) cream cheese, cold and cut into 1 tablespoon squares*
For the Red Velvet Cookie Dough:
- 2 1/3 cup (10 ounces/ 290 grams) all-purpose flour (preferably weighed for accurate results)*
- 2 tablespoons (10 grams) unsweetened natural cocoa powder, sift if lumpy
- 2 teaspoons (5 grams) cornstarch
- 1/2 teaspoon baking soda
- 1/4 teaspoon baking powder
- 1/2 teaspoon salt
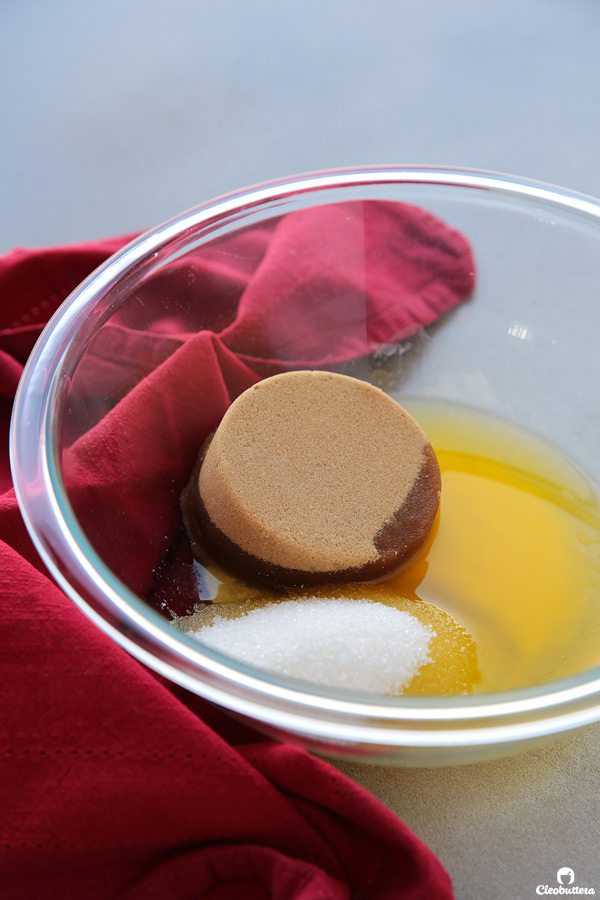
- 3/4 cup (6 ounces/ 170 grams) unsalted butter, melted
- 1 cup (7 ounces/ 200 grams) packed soft light brown sugar
- 1/2 cup (3 1/2 ounces/ 100 grams) granulated sugar
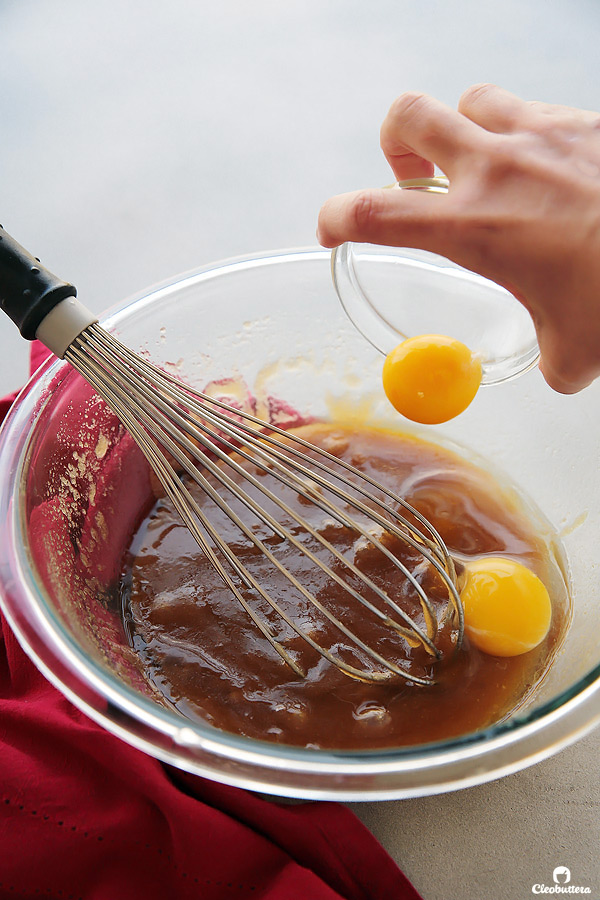
- 1 large egg
- 1 egg yolk
- 1 teaspoon vanilla extract or 2 teaspoons imitation vanilla flavoring
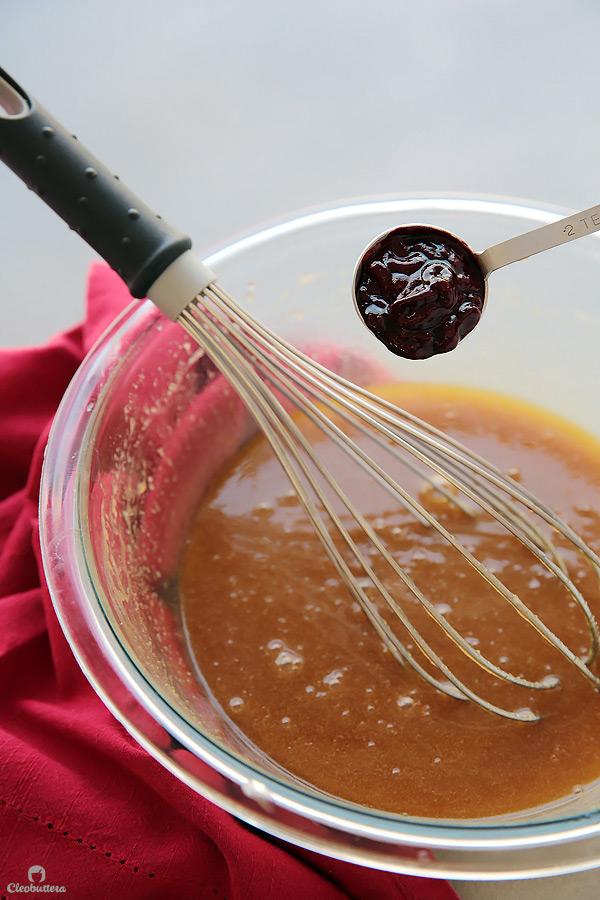
- 1 to 2 teaspoons red food coloring, preferably gel (amount depends on strength of color & intensity desired)
- 2 teaspoons white distilled vinegar
For Garnish: (optional)
- 1 ounce (28 grams) white chocolate (not chocolate chips; they don't melt well), roughly chopped
Instructions
To make the cream cheese frosting stuffing: (should be made at least 2 hours in advance)
- In the bowl of a stand mixer fitted with the paddle attachment (or in a medium bowl and using hand-held mixer) beat the butter on medium-high speed until creamy and lightened up, 1 to 2 minutes.
- On low speed, gradually add in the confectioners sugar, salt and vanilla until fully incorporated. Raise the speed to medium-high, and beat until lightened in both color and texture and looks fluffier than when it started, 2 to 3 minutes.
- With the mixer running on medium speed, add one piece of cream cheese at a time, one after the other, mixing well after each addition so there are no lumps. Continue adding the cream cheese until fully incorporated.
- Increase the speed to medium-high and beat until the frosting is light and fluffy, and until no cream cheese lumps remain, 2 to 3 minutes.
- Line a baking sheet with parchment paper or silicone mat. Using a tablespoon-size ice cream scoop or a round tablespoon measuring spoon, scoop out 16 rounded tablespoons of cream cheese frosting onto the prepared baking sheet. (You might have about a tablespoon leftover; consider this your baker's treat!) Freeze until solid, at least 2 hours and up to overnight.
To make the cookies:
- Line another baking sheet with parchment paper or silicon mat.
- In a medium bowl, whisk together the flour, cocoa powder cornstarch, baking soda, baking powder and salt to combine; set aside.
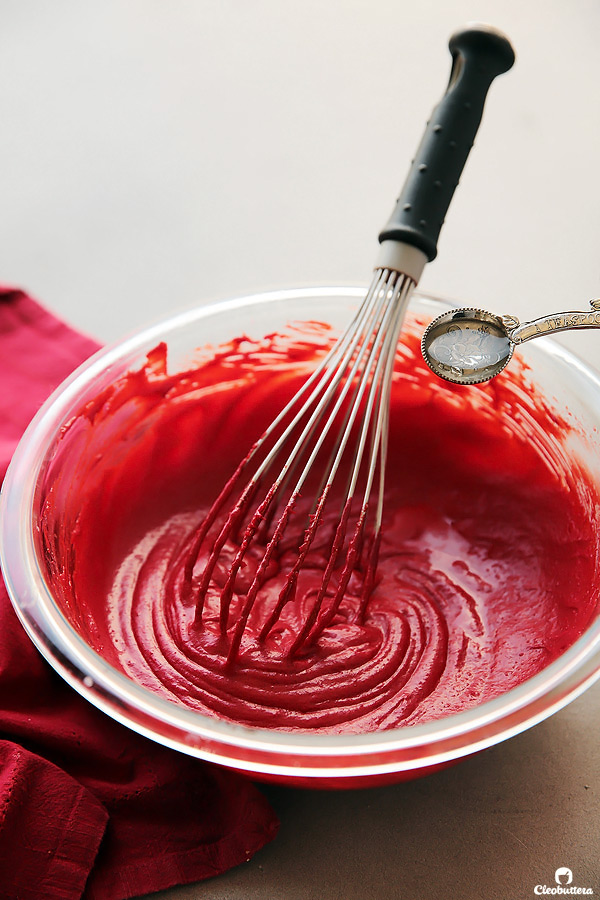
- In the bowl of a stand mixer fitted with the paddle attachment (or in a large bowl and using a hand mixer or whisk), beat the melted butter, brown sugar, and granulated sugar on medium speed until well combined.
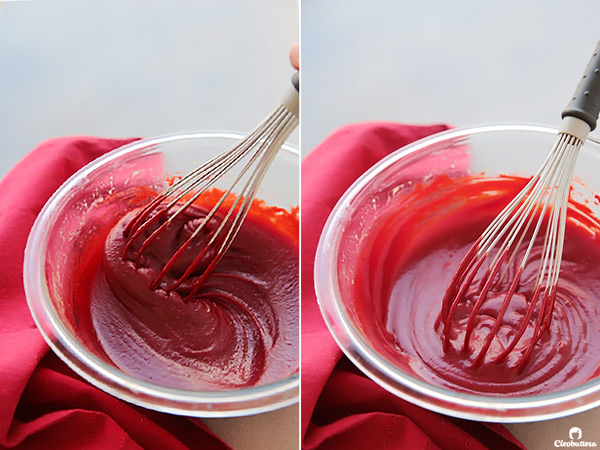
- Add in the egg, egg yolk, vanilla, red food coloring, and mix on medium speed until mixture is smooth and emulsified with no sugar lumps remaining, about 30 seconds. Let the mixture rest for 3 minutes, then mix for another 30 seconds.
- Repeat the process of resting and mixing 2 more times (a total of 3 rests and 4 mixes) until mixture is thick, smooth, and slightly lightened in color. This step helps dissolve the sugar better, resulting in a thicker, chewier cookie. So unless you prefer thinner cookies, don't skip it.
- Stir in the vinegar. The mixture will separate slightly, but that's OK.
- Using a rubber spatula, stir in the flour mixture until just combined. Do not overmix.
- If the dough feels too soft or warm to scoop and shape into firm balls, then cover and refrigerate for about ½ an hour until scoopable. Using a 3 tablespoon-measure ice cream scoop with a release mechanism, scoop out the dough onto the lined baking sheet, forming 16 equal dough balls.
- Using the back of a wooden spoon handle or your thumb, make a deep indentation into each dough ball.
- Take the cream cheese frosting scoops out of the freezer and working quickly, peel the frosting scoops from the baking sheet and place one inside each indentation of every dough ball. If you're working in a warm kitchen, you might want to keep the frosting scoops in the freezer, taking only one by one as you work, to prevent them from softening.
- Gather the dough up over the frosting scoops to completely cover them. Roll the dough into smooth balls, making sure the frosting is completely wrapped inside and nothing is peaking out.
- Loosely cover with plastic wrap and refrigerate for at least 2 hours, then either bake immediately or transfer to a large zipper lock bag and freeze for up to 1 month.*
- Preheat oven to 350F/180C and adjust oven rack to middle position.
- Line 2 baking sheets with parchment paper or silicon mats. Place 8 cookie balls per sheet, spacing them at least 2 inches apart.
- Bake until the cookies flatten with a slight dome, and the outer edges start to set yet centers are soft and puffy, 10 to 11 minutes. The centers will feel undone, but they shouldn't be shiny or sticky. DO NOT OVERBAKE or you'll get hard cookies. The cookies will continue to bake after they come out of the oven from the residual heat of the baking sheet.
- Let the cookies cool on the baking sheet for at least 15 minutes before serving, but they taste best at room temperature when they cream cheese frosting is no longer warm. If you'd like to decorate them with the white chocolate drizzles, make sure that they've cooled down completely before doing so.
To decorate:
- In a small microwave-safe bowl, microwave the white chocolate in 15 second intervals, stopping and stirring in between until mostly melted. Continue to stir the chocolate until it has completely melted and very smooth.
- Allow to cool slightly until barely warm. Transfer the melted chocolate to a disposable piping bag or zipper lock bag and snip the end using scissors to expose a tiny opening. Pipe random lines over the completely cooled cookies.
- Set the cookies aside to cool until the chocolate drizzles set. Store cooled cookies in an airtight container.
Recipe Notes
- I use Kiri squares cream cheese here because It's what's ready available were I live; Egypt. If using Philadelphia brand, make sure it's brick style.
- Weighing ingredients is highly recommended, but if you don't have a kitchen scale to weigh the flour, use the Spoon & Sweep method: Use a spoon to lightly fill measuring cup with flour until required amount is obtained, then sweep access with the back of a knife.
- Use the soft kind of brown sugar that feels and looks like damp sand like Dominos brand. Avoid the coarse, granular type of brown sugar like demerara. Use fresh, moist brown sugar instead of hardened brown sugar, which will make the cookies dry.
- Cookie dough balls could be chilled in the fridge for up to 4 days or frozen for up to one month in a zipper lock bag. Bake straight from frozen. You might need to add an extra 2 minutes to the baking time.
Recipe is a Cleobuttera Original.
Measurements Note: All recipes of this site have been developed using weight measurements. Although US volume measurements have been included for your convenience, it is highly encouraged that you weigh your ingredients using a kitchen scale to get the best possible results. Due to the sensitive nature of baking, kitchen scales are proven to yield more accurate and consistent results than measuring cups. Enjoy!
Powered by ![]()
This post may contain affiliate links.
All images and content are owned by Cleobuttera® and are copyright protected. Please do not use my images without prior permission. If you would like to republish a recipe, please rewrite it in your own words and link back to the recipe page on my site. Original recipes and creations of this site are intended for personal and home use. Commercial replication or media consumption are only allowed with a written consent and agreement with Cleobuttera owners. Otherwise it is considered a violation of intellectual property. Thank you for respecting and appreciating the amount of time and effort that goes into creating free, unique recipes that make people happy.


I’m drooling at the sight of these! Absolutely amazing as usual 😀
I’d go make them right now, except I have one problem. The brown sugar! It’s actually been a problem for me everytime I come to Egypt for the holidays. I used to be able to find it in Seoudi Market but have been struggling to this year. Is there a place you would recommend for buying not just brown sugar, but other difficult to find baking ingredients in Egypt (Can’t find chocolate chips either). I’m just curious to know where home bakers go for these basic supplies because their unavailability does restrict my baking here quite a bit.
Thank You, XX 🙂
Mariam I’m so excited you’re here! Welcome dear ?
To be honest, it’s been such a struggle to find baking ingredients lately. Due to the devaluation of the Egyptian pound last year, imported products have become very expensive and hard to get. One day there’s one thing at one store, then the next day it’s completely gone and for a long time. Personally, I don’t shop at one specific shop, but really just try my luck everywhere. I love gourmetegypt.com, mainly because they get unique stuff, their service is some of the best in Egypt and you can buy everything online & they deliver. So convenient! I just stocked up on Dominos brown sugar from there. If you can’t find it, then it’s because I finished it ? Maadi Supermarkets tend to have more of the imported things due to the high population of expats living in Maadi. I always go to either Kimo or Mariam Supermarket there, and stock up on a few hard to find ingredients. Also Petro in Mohandiseen carries a variety of unique stuff. Most of these places deliver. Other than that, I hop between Seoudi, Oscar & Royal House.
Best of luck ?
Thank you Tasbih!
I’ll make sure to check out these places
I’ve actually heard about Gourmet Egypt before and have been wanting to try the service. And now that you’ve given your stamp of approval I think I will.
I actually did find the brown sugar out of stock ? but tbh I can’t blame you! I’d do the same ?
I’ve actually been making my own homemade brown sugar here in Egypt by just adding molasses to plain white sugar. And even though I prefer store bought brown sugar, in a pinch, this diy version fits the bill.
Oh no lol ? I think I just polished off Egypt stock of brown sugar! Looks like sooner or later I’m gonna have to opt for that DIY version too.
hey is there any problem if i use normal brown sugar instead of light brown sugar?? and also i don’t have any cornstarch with me is there anything i can replace that of?? i only have corn flour with me!! ?please help me out i really want to try this wonderful cookies? hope u reply this
ps: thanks for sharing this with us 😉
Hi Fathi! I’m so excited you’re looking forward to making these cookies. I hope you love them.
You could use any type of brown sugar as long as it’s the super soft kind that feels like wet sand, NOT the coarse, grainy one. Dark brown sugar, if that’s what you’re referring to, just has a stronger molasses, caramel-y flavor than the light kind, but the texture will not be affected.
Cornflour IS cornstarch. They’re just named differently in different countries.
Enjoy ?
I have to say these cookies have made it to my top 5 all time favorite cookies! Their texture, the flavor, the surprise you get on the inside; pure perfection! I also love the level of sweetness of them, just the right amount to satisfy my cravings without making me feel like I need a gallon of milk to balance my sugar again! Surprisingly they were simple to make and for the first time ever I bake something and it looks exactly like your pictures ? finally! Thanks Cleobuttera for your tasty recipes ??
YAY! That’s the best feedback I ever want to hear Hala! So thrilled that the recipe was a success for you. I’m really happy you enjoyed the cookies that much. Wishing you further hits in kitchen with many more recipes.
Wow do these look amazing! Your biscoff stuffed cookies are literally my favorite cookie recipe of all time, and I’m sure these will be right up there. I’ll report back after I make them.
The Biscoff Explosion Cookies are high up there in my list of favorite sweets too! Glad we speak the same dessert language. I hope you love this one just as much. Enjoy ☺️
excuse me Tant Tasbih but I don’t know where to get the cream cheese from. I was hoping if you can give me a name of a supermarket or any store but not an online store because my dad doesn’t like buying from online stores. THANKS
🙂
Hi Abdel Moez! Biko told me that you love to bake & constantly visit my blog for recipes. That makes me so excited! I told him that he should invite you over so we could bake together one day.
As for the cream cheese, I use Kiri. You know those foil wrapped squares that come in a blue box. You should find it at any supermarket without any problem.
Best of luck ?
Thank you very much.
Hi Tasbih, i have recently started trying out your recipes and now i simply can’t stop. You recipes are perfect wrt the ingredient measurements and the final taste is just awesome.. like really really awesome. I have stopped googling for recipes. I know where to find the best ones!
In this recipe, can the cream cheese frosting stuffing be made in advance and stored? if yes, for how long?
Manali comments like these brighten up my day & gives me purpose like you wouldn’t imagine. Thank you so much for your appreciation & kindness. I’m beyond grateful that you’re having success with the recipes.
As for the frosting, I usually make it a day ahead, scoop it out & keep it in the freezer. I’ve never kept it for longer than a day, but my guess would be that it will just be fine for several days in the freezer.
Can you please make red velvet brownies??? please please pleaseeeeeeeeeeeeeee
Oh that sounds yummy! Thanks for your suggestion. I’ll surely add it to the list of things I need to try 🙂
Oh my God, these were AMAZING. I made them last night and everyone loved them. They’re not cookies, they’re dessert! ? thank you for sharing this recipe with us.
I had a few questions though. Mine didn’t turn out as gorgeously red as yours, they were a little more brownish even though I used more than 2 tsp of gel food colour. Any tips on that?
Also, they were very sweet so do you think I could cut down the sugar in the cream cheese frosting perhaps? That wouldn’t effect any texture right?
Thank you again for this wonderful recipe!
Hi Sophia! I’m so terribly sorry for my late reply. For some reason, I just saw your comment now. I’m so so happy you loved these cookies…a little too decadent for a humble cookie I must agree.
About the color, it could be that either the cocoa was too dark and the color wasn’t red enough. I use Hershey’s natural cocoa powder, which is pretty light in color so it makes way for the redness to shine. I also use either Americolor or Wilton SUPER RED, which are very strong. You can more definitely cut back on the frosting sugar, if you prefer, it won’t affect the outcome.
Hi Tasbih, these cookies looks amazing…will surely going to try this…but I need your help as I want to try the eggless version of these…please guide for what all changes needs to be done in the recipe for the same?
Hi Varinda! I’m so happy you’re interested in these cookies. However, I sadly don’t have any experience in allergen free baking, so I’m not capable of giving you a confident answer. Here’s a source that I think might help: http://www.sheknows.com/food-and-recipes/articles/955371/baking-without-eggs
Hi tasbih. thanks for the awesome recipes. looking Forward to try them later. can you tell me how long this cookies could expired?
It’s really my pleasure Yana! These cookies should keep well for 3 to 4 days stored in an airtight container at room temperature. I wouldn’t recommend keeping it for longer, as the cream cheese center could spoil.
Enjoy!
Hey tasbih! Love your instagram feed! I literally save all your posts!? i wanted to try these red velvet cookies.. but i wanted to make small batch first.. so i thought I’d half all the ingredients.. just wanted to know about the egg… if im halving the quantity.. how many eggs should i take? Hope it isnt a silly question!?
Hi Nafla! Thank you so much for your sweet message and please accept my apologies for my late reply as I’ve been very sick lately. Thankfully I’m feeling so much better to at least reply to comments. You can surely halve the recipe. For the eggs…use 1 egg yolk plus 1/2 of an egg white, which should weigh 15 grams. Enjoy ?
Hey tasbih, hope you’re well now..I tried these out and goddd it was yuuum! ?❤️ Thank you soooo soo much for the recipe! I made full batch! (Glad that I did?) and turned out awesomeee!everybody loooved ittt! Mine dint come out as perfectly dome’d as yours? cream cheese popped up in the middle but alhamdulillah with the result❤️ Also the granulated sugar here are like litterally small rock size? so it did bite while having the cookie.. next time il powder it and put.. will that make any change in texture? Do help me on that.. made those few weeks back.. (sorry for the late feedback ?) and i still drool
Over thinking about it? ma sha allah love all ur recipes.. very confident to try any of them simce it’s perfectly described.. keep baking and sharing recipes thank you tasbih ❤️ Do check my page @bakedobsessions_ on instagram for the picture of cookies i took.. not able to upload here.. donno y.. ive also tagged you.. lots of love from india❤️☺️
Hi Nafla! I’m so happy to hear that these cookies were such a hit! Thank you so much for coming back to leave this amazing feedback! Will definitely check your instagram for the picture; so excited! Such a bummer that you can’t post it here; I think your picture file is not of the allowed type (jpg, gif or png), which is why you’re not able to upload it.
I have the same issue with granulated sugar here in Egypt; most brands are more like sugar pebbles ? Whenever I can’t get my hands on the good quality ones, I just whiz the sugar in the food processor until the granules have broken down a bit into smaller bits. Definitely do not powder it though. Enjoy ?
Hi Tasbih. Ive tried this red velvet n choc chip cookies. But both turned out very runny. I weighed all ingredients. So i do not know where did i go wrong. Pls help me
For the red velvet base, do we have to rest it for 30 mins or could we do it about 10 mins?
thanks,
CookingGirl
Hello Cookie Girl! Seems there has been a misunderstanding, the batter only needs to rest for three minutes (not thirty), so the whole whisking process only takes about 10 minutes. Enjoy ?
Attachment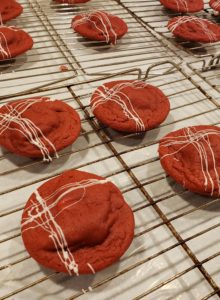
Love!!!!! Turned out beautifully!
Hey, have been an avid follower of your blog for some time now and have made quite a number of your recipes (PS. the Nutella therapy cookies are my absolute favorite). Have had this recipe saved for quite some time now and have finally come around to trying it. However is it possible to replace the granulated sugar with caster sugar and if yes, will I need to change the amount? Can I also replace the white distilled vinegar with someone else as I don’t have it. Thanks in advance
This recipe was really challenging! Followed the directions! But cookies were flat! I’m a good Baker but these cookies didn’t make the ut!
Hello Tasbih,
Just a quick question. Would it be better if I used buttermilk instead of white vinegar, since it consists of milk and white vinegar? If yes, how much do i use?
Thank you!
Hi! I find that the melted butter makes the dough runny. It may also be because I live in the tropics where the ambient temperature is relatively higher, but would you recommend using cold butter just so the batter stays more structured?
Appreciate thoughts.
Oh my goodness. These cookies are to die for. Thank you for sharing. They are incredibly delicious. I will make again! I’ll take a photo shortly to Instagram them.
I love hearing that you loved them so much Christina! Thank you for that amazing feedback!
Hello Tasbih,
Just a quick question. Would it be better if I used buttermilk instead of white vinegar, since it consists of milk and white vinegar? If yes, how much do i use?
Thank you!
Hello Ahmed! It’s best if you stick to vinegar here. It’s such a tiny amount & you’re not going to taste it in the final product. Such a tiny amount of buttermilk won’t do the cookies any favors and if you increase the amount, it will thin out the batter, resulting in very thin cookies.
I made this recipe for my sister in law’s birthday-she loves red velvet. I did a test run after following the recipe and freezing the balls for 2 hours and they came out perfect. I wanted them to be as fresh as possible, so I waited 2 days to bake them. I baked directly from frozen as instructed, but the bottoms burned and the cream cheese leaked out-it was a disaster!! I did everything else the same (oven temp, cook time-[i actually had to remove them well before the 10 mins because they were burning], spacing on cookie sheet). I ended up redoing the recipe and baking from frozen after just 2 hours like I’d originally done and they came out perfect again. The finished product is excellent, but beware if you freeze them too long! I unfortunately didn’t get a picture of the “perfect” ones-they were eaten very quickly!
I’m really happy that you liked these cookies Krytle! Sorry you had some flops with the long-frozen batch. You know, you can also refrigerate the dough for a couple of days if you’d like to bake at a more relaxed schedule. Thank you for your wonderful feedback ?
this is all so cool !???
I love red velvet
How can I make this eggless?
Attachment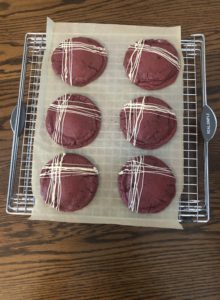
Absolutely love these cookies! Made them slightly bigger, the scoops I have made 10 cookies instead of 16 so I will adapt for more filling next time. I have to say I did not complain that I had 6 “extra” balls of frozen icing to devour, they are so delicious straight from the freezer!
My oven tends to run hot so they were overdone at the 10 minute mark, opted for a slightly lower temperature (325) for the second batch of 6 cookies, using two baking trays stacked to avoid burning the bottoms and let them rest in the oven turned off with the door cracked open for 20 minutes and they were much better.
Do you have any tips to help get the filling to spread out a bit more? The filling was scrumptious but was concentrated right in the middle of the giant cookie.
tat looks so cool
thats so cool
Pingback: Galaxy Chunk Chocolate Muffins | Cleobuttera – inspired
How many cookies will be made using these quantities?
If I want to leave out 1 TBS of cocoa, what should I use in place of it?
Also, my 2nd time baking these, they came out flat. The 1st time was perfect. I noticed the I used extra fine granulated sugar instead of regular granulated sugar. Could that alter the recipe?
Hi Tasbih,
I made these cookies and they were very delicious, but the problem is that they crack. Is there something I can do about that?
Can I use demerara sugar instead of packed brown sugar? Thank you!
Can you make the cookie dough and chill it before adding the filling.
AMAZING!! These cookies are in my top favorites. Second time making them and they impress everyone. THANK YOU!!
Mam i am looking for eggles version of cookies can u plz upload any of eggless recipe
Do these have to be chilled once you put the filling in the center? I didn’t notice that step and don’t have the time to do so
Pingback: Eight delicious recipes to make this winter vacation – WA Ghostwriter
hi good day. I’m from Philippines. I came across to your blog and would like to try your recipe. They look amazing! Just have a question….. What will happen if my butter is only room temperature? Does it affect the texture or the overall outcome of the cookies?
Pingback: Best Valentine's Day Cookies 2021 - Mommy Today Magazine
Hello! Can you tell me if these cookies will ship well? I am looking at possibly shipping them via USPS priority mail (roughly 3-5 business days).
I’m super excited to use this recipe! My whole family loves red velvet cookies and these look amaaaazing. The only issue I seem to be having is using this website on mobile – it constantly reloads for the ads and re-sets the page each time, causing me to lose my place. Was able to go out and print this recipe, but, counting on my phone to follow along and cook with was a nightmare. Not sure if that’s fixable.