Apple Pandowdy
A simple, old fashioned skillet apple pie with a caramelized saucy filling and no fuss, crisp crust topping. Dare I say better than apple pie?
I have a bone to pick with whoever came up with the saying “easy as pie.”
Either this person was from another planet and has a whole other definition for “ease,” had invented sarcasm or had never actually made homemade pie.
What’s wrong with “as easy as Rice Krispy Treats” or “as easy as Lazy Cake” ??? Wouldn’t that have made us all feel better?
But it had to be PIE! Out of all things. So you approach it with the predisposed confidence that you’ll make it with your eyes shut, and then a million things go wrong, disappointment ensues, confidence badly shaken…BOOM! Ruined for life.
Pie making can be finicky for sure, a little intimidating perhaps, but a tried and true, bulletproof recipe can make it all happen with…well, ease. Which, when it comes to a Classic Apple Pie, the mother of all pies, I have yet to find.
But I found something better along the way…
Apple Pandowdy.
Apple Pan what?!!!!
Dowdy!
So please say ‘howdy’ to your new favorite way to eat apple pie, because this thing will convert you for life.
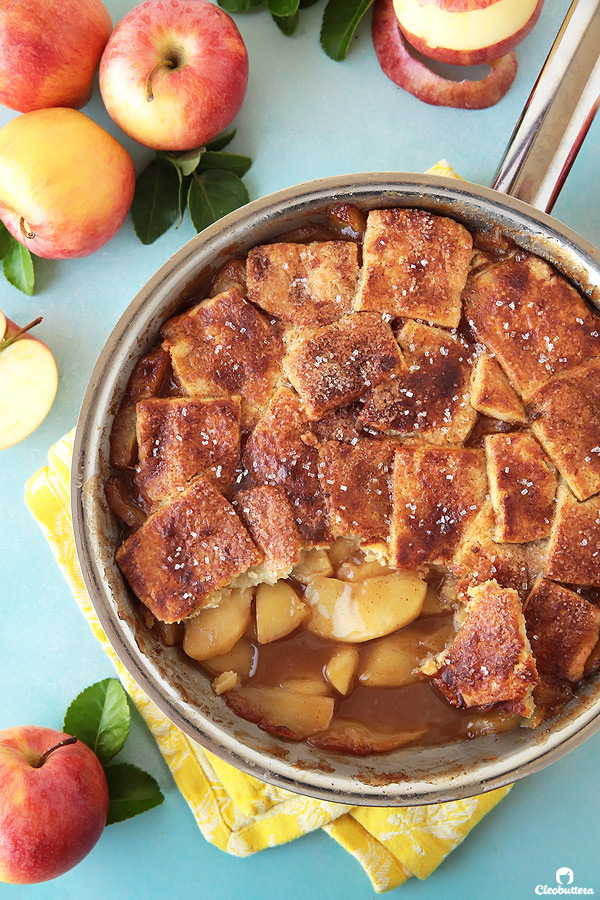
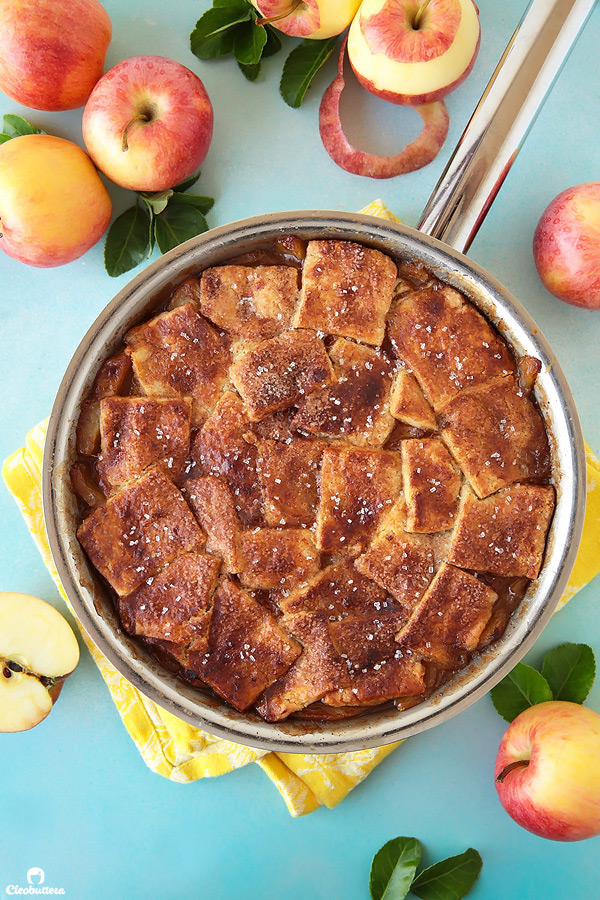
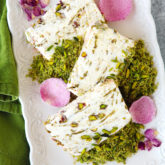
Cinnamon speckled, browned butter perfumed, sweet apples swimming in a pool of luscious, caramel flavored sauce, and topped with random shards of crisp pie dough. It is made and baked in a skillet, is purposefully messy and bakes in less than half the time it takes a classic pie to bake.
What’s not to love?
Pandowdy is basically a no frills, old school “skillet apple pie except that during baking, the crust is pressed or slashed so the juices from the filling flood over the top and caramelize in the oven, leaving you with a dowdy-looking dessert.” -Cook’s Country
It is really just everything you’ve always wanted in a classic apple pie but couldn’t because pie rules won’t let you.
If you’ve made apple pie before, you know that there are so many ways for it to go wrong. From a soupy filling that makes for one sad soggy crust to apples that come out crunchy even after an hour of baking. And don’t get me started on flavorless filling that is reminiscent of applesauce, aka baby food.
With a pandowdy, you get that satisfying amount of sauce you’ve always desired without having to worry about a gummy bottom. Each bite is infused with butterscotch and caramel undertones, that step it up from the otherwise typical steamed fruit flavor. Plus…you don’t have to slave over latticing and crimping that crust, because dude! it’s meant to be dowdied. Ok…rustic. We’ll go with rustic if it makes you feel better.

The secret for the perfect pandowdy lies in precooking and caramelizing the apples in the skillet before baking. Not only does this ensure that the apples are cooked by the time the crust is golden, but it makes them tender and full of irresistible flavors.
Three star ingredients give this “pie” the dynamite butterscotch-y flavor that it has. Browned butter, dark brown sugar and apple cider. Mind you, the original source that I adapted this recipe from, skips the browning of the butter and uses light brown sugar instead of dark. But if wanting more caramel flavor in my apple dessert makes me wrong, then I don’t want to be right.
I mean…who could argue with browned butter?! I think by now we could all agree on the magic it adds to anything it touches. It lends an aromatic, nutty, caramel-y flavor that takes this dish to another level.
Having tried this recipe with both light and dark brown sugar, it was a no brainer that I picked dark. Man! The wonderful complexity it adds.
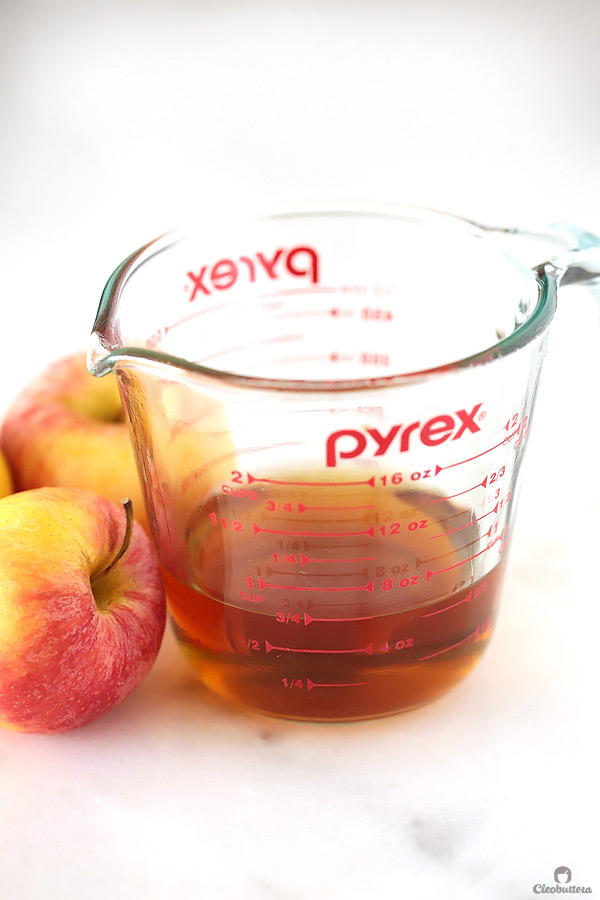
As for the star of the show…Apple Cider. Just a mere 3/4 cup of apple cider is what it takes to make this the best tasting apple pie filling I’ve ever had.
Wanna hear a funny thing though…I didn’t actually use apple cider. You could never find it in Egypt! So I did the next best thing; faux cider. Basically apple juice that has been reduced by half over the stove top (or in the microwave) for 10 minutes until the flavors intensify and the sugars caramelize. It is a revelation!
If you can’t find apple cider where you live, I strongly urge you not to skip this step of reducing juice. During my earlier experimentation with this recipe, not aware of this genius hack, I used straight up apple juice. The pandowdy it made was good, but then when I decided to reduce it, the difference was like day and night. So worth the extra 10 minutes.
For the crust, I opted for a my trusty tart dough recipe instead of the pie dough called for in the original recipe. I’m not sure if it was a mistake on my part or the recipe itself, but it did not work well for me. Its was overly sticky to work with and the baked results were not what I was hoping for. It turned out doughy, cake-y and not at all the tender and flaky crust I was expecting. Could be this is just how a pandowdy is supposed to be perhaps, but alas my apple pie connoisseur parents did not approve. Being the obedient daughter than I am ? I had to try this recipe once more using a different pie crust recipe. On its own, the second crust baked beautifully, but over the pandowdy, another fail. I came to the conclusion that it must be the abundance of sauce in the filling that sogs up the crust.
And then it hit me! Why not use my Tarte Tatin dough? I mean Tarte Tatin is juicier than apple pie and yet its crust holds up really well against the sauce and manages to bake up nice and crispy. Third trial, here we come…
Bingo! It was perfection. Crispy, flaky, tender and stays that way for hours. Mind you, it is sweeter than classic pie crust but no one seemed to mind as they inhaled the dessert and raved about how good it was. If you prefer a doughier crust (y tho?!), feel free to sub in your favorite single crust pie dough recipe. But no matter what you do, stay away from store-bought pie dough as it will produce gummy results.
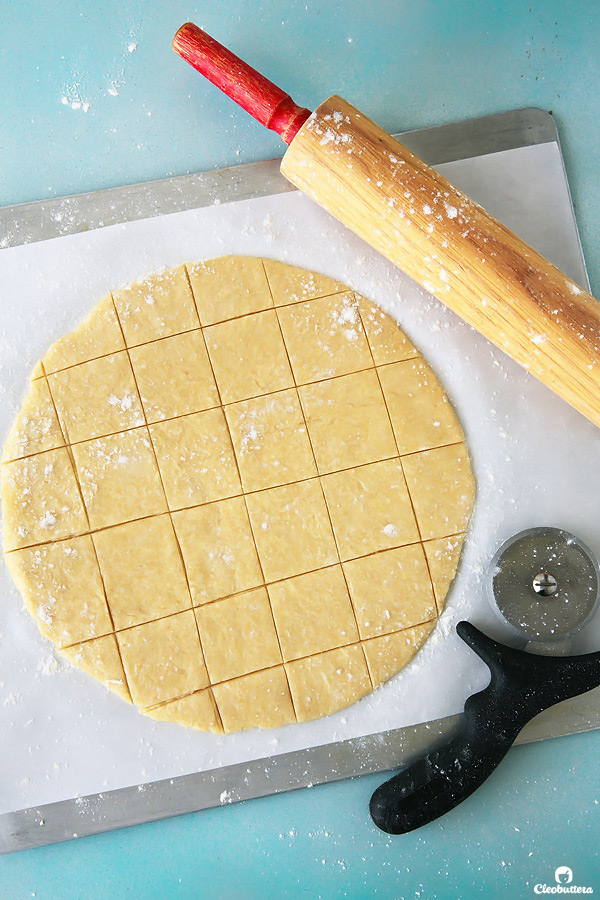
In any case, you’re gonna want to roll out your dough, cut it into squares, then keep them nice and cold in the refrigerator as you prepare the filling.
For step-by-step photos on how to make the tart dough, please click here.
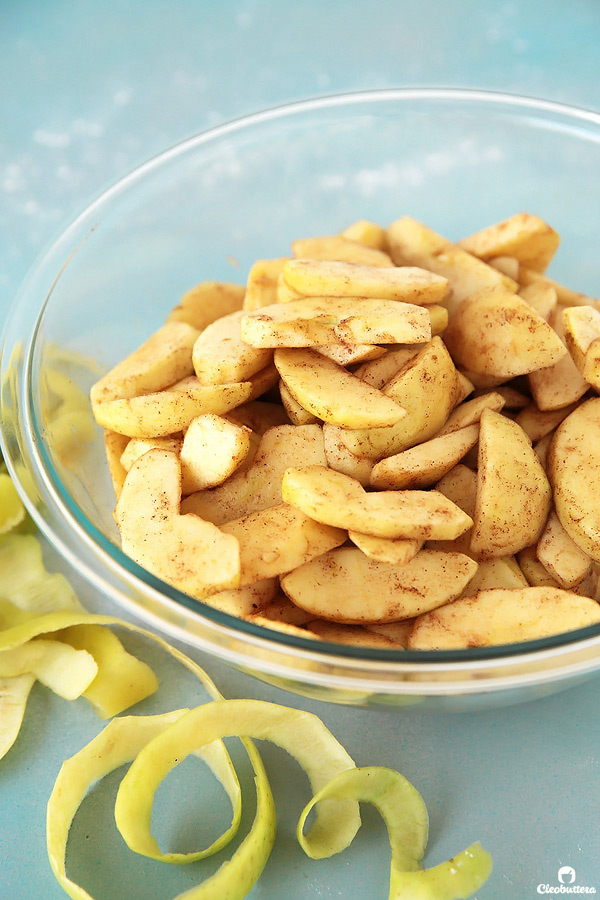
For the filling, we use Golden Delicious apples here. They are perfectly sweet, hold up really well in baking and won’t turn into mush. Brown sugar, cinnamon and salt get tossed in there too.
Now comes my favorite part…browning the butter. I LOVE this stuff guys. People need to start making browned butter-scented candles, because I could never get enough of that mesmerizing aroma.

Then goes the apple mixture. Toss it a little around that golden butter…
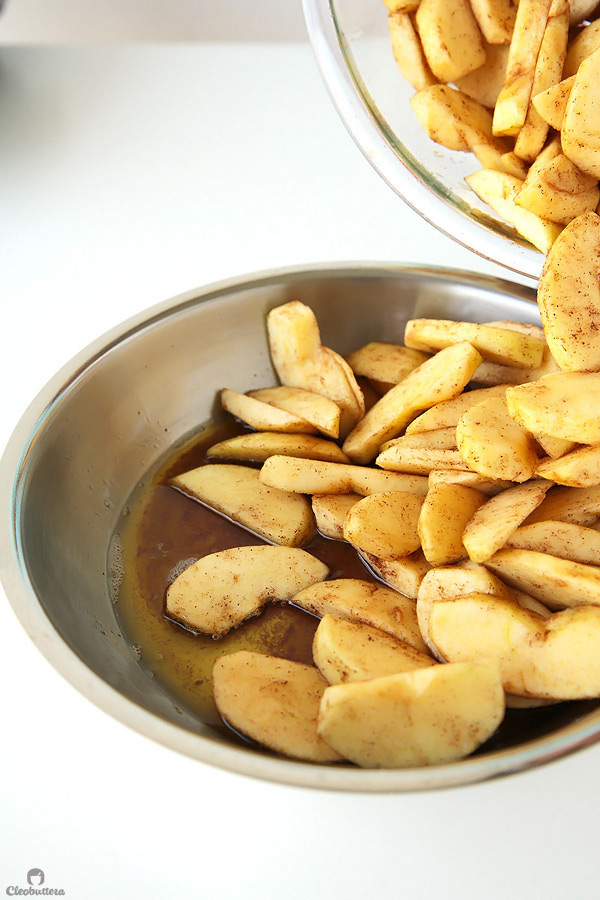
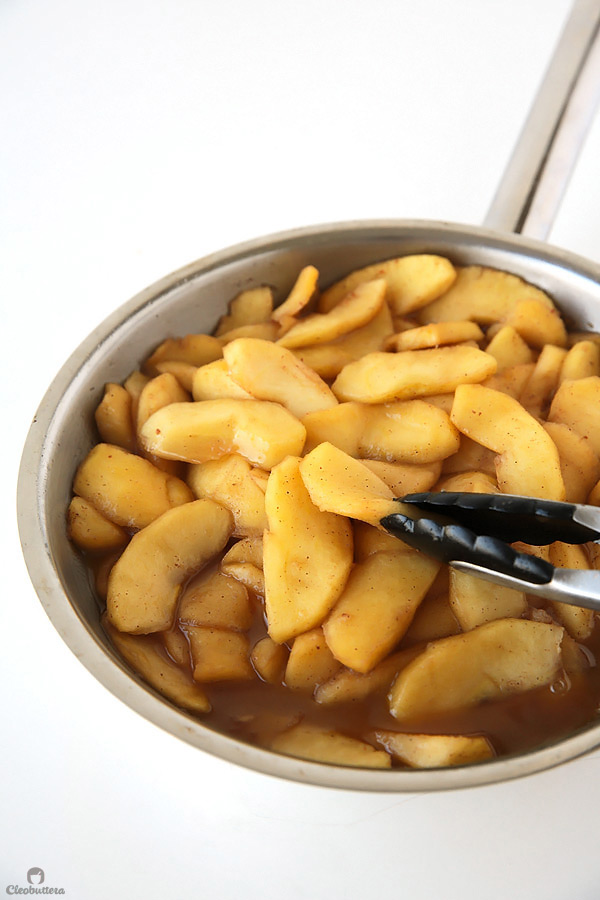
Then cover and let the apples cook, stirring occasionally, for about 10 minutes.
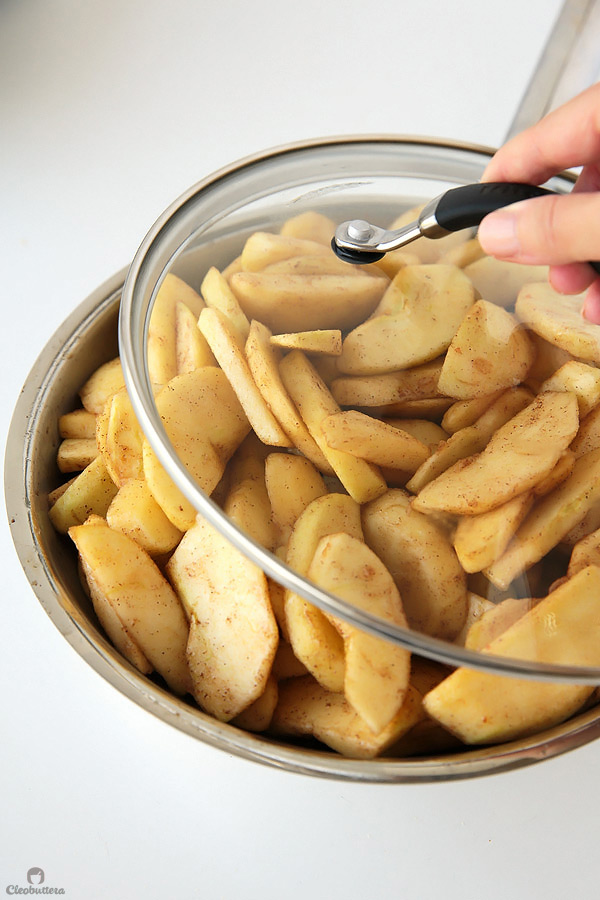
Or until the apples become slightly pliable and release their juice.
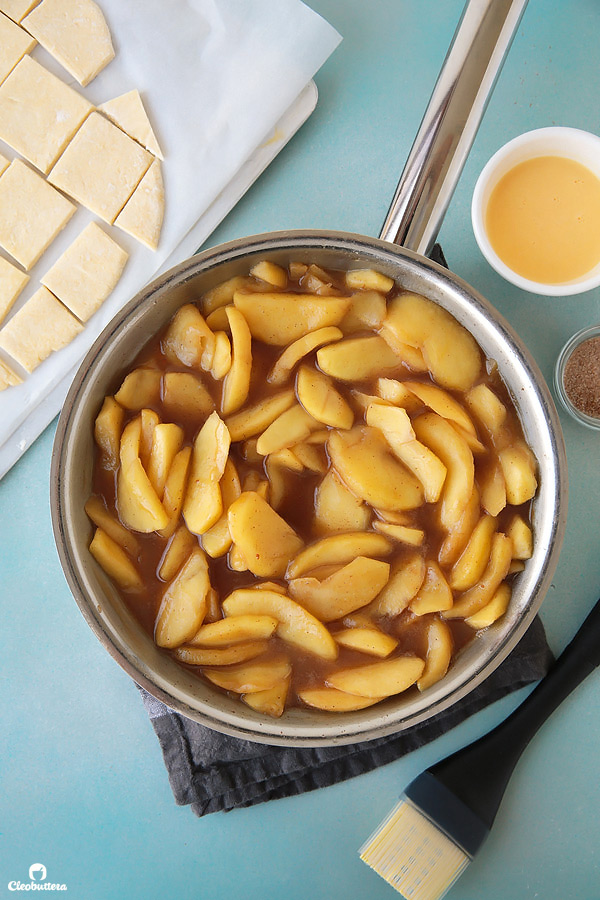
After that, stir some cornstarch and a tiny bit of lemon juice into the apple cider/reduced juice, then add it to the skillet.
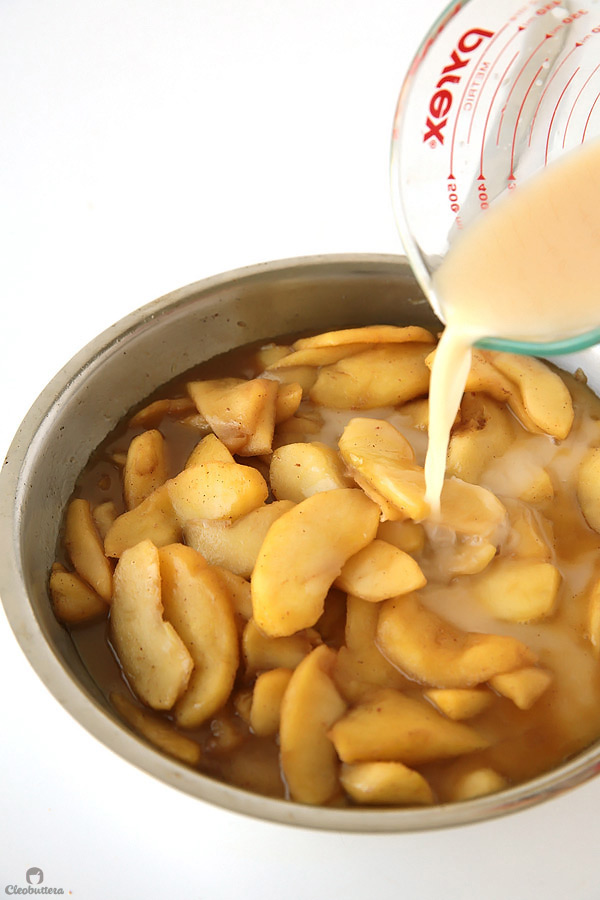
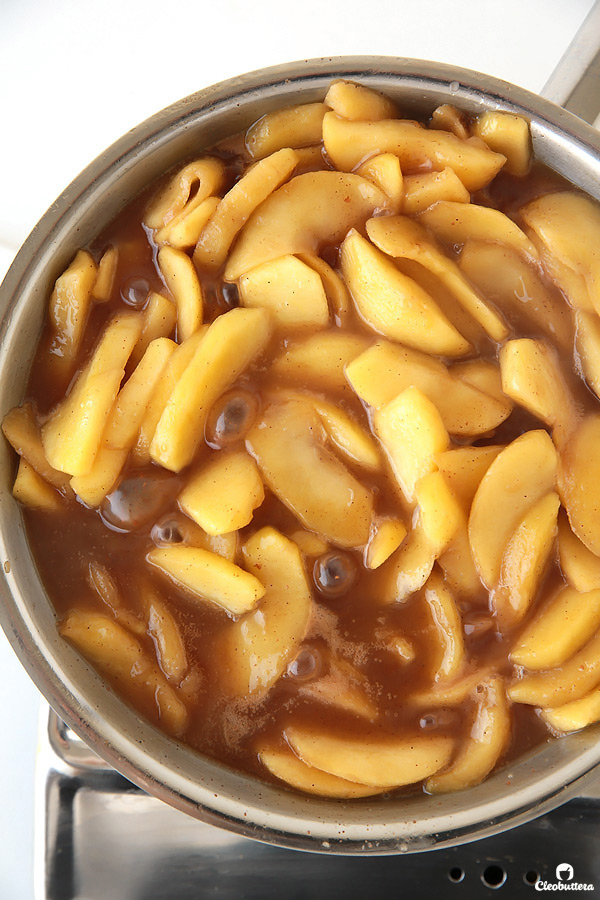
And cook for a couple of minutes until bubbling and thickened, and you find yourself dying on the inside from that wafting caramel apple smell.
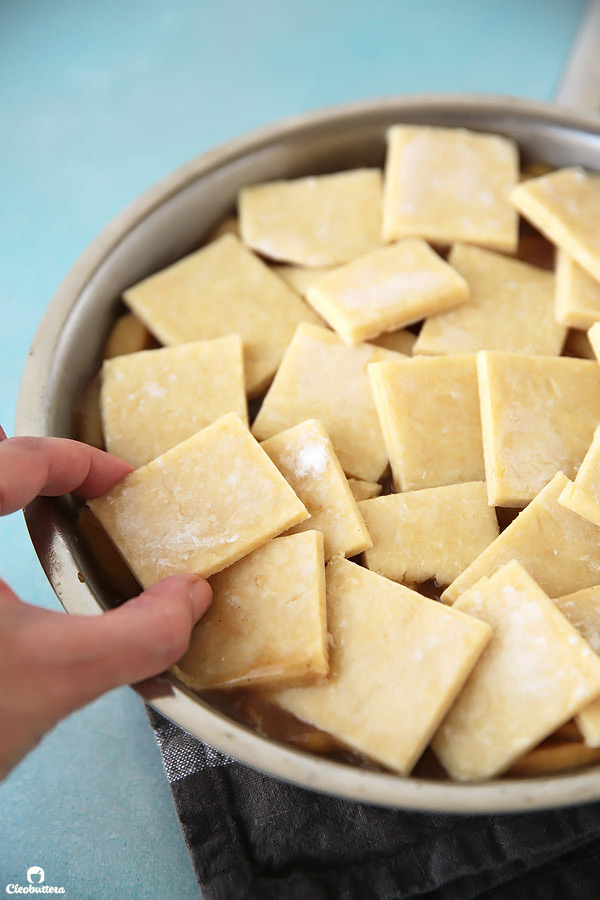
It’s now time to bring over those dough squares from the fridge, and so casually shingle them over the apples.
A little brush of egg wash…
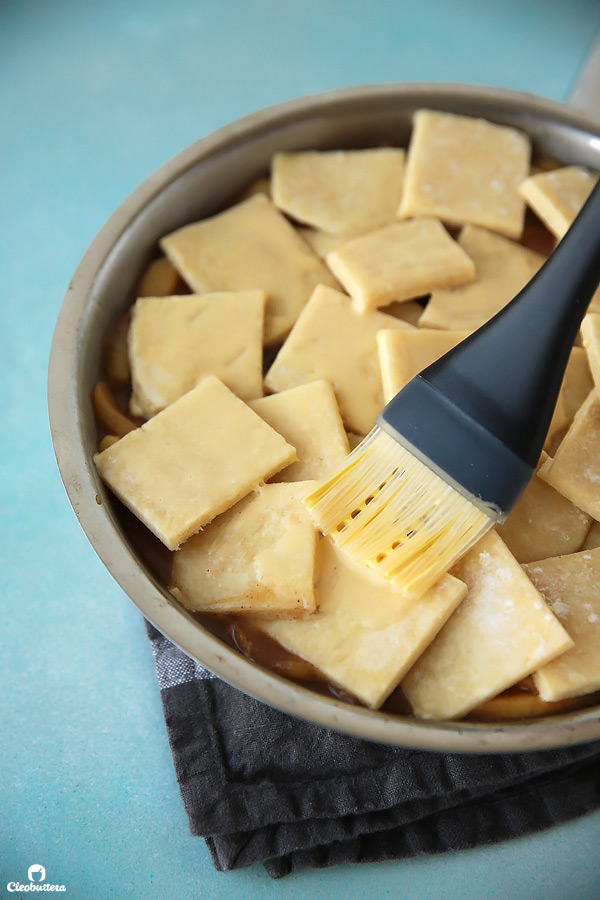
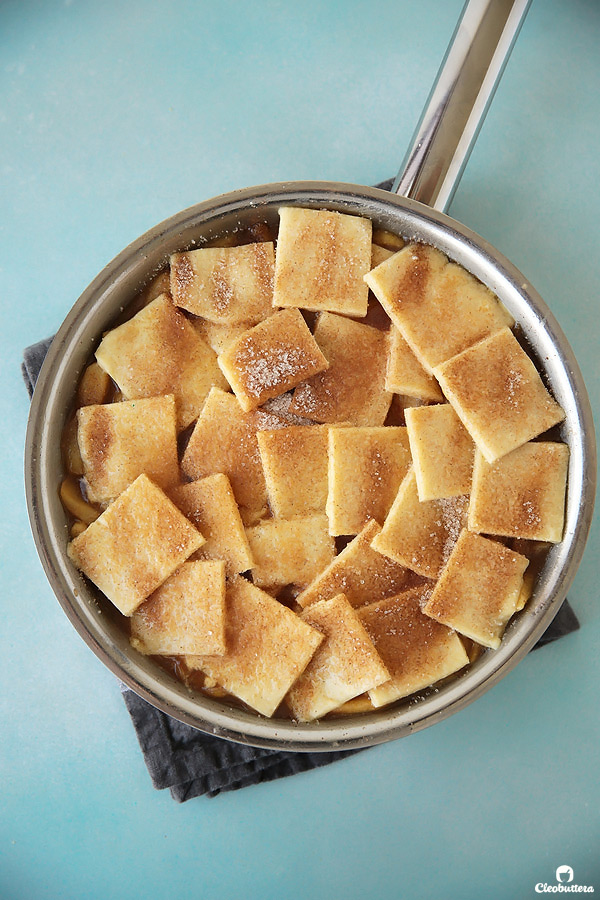
A big sprinkling of cinnamon sugar…and the pandowdy is ready for the oven.
Half way through baking, you’ll want to take the pan out of the oven, and press several times around the dough until some of the juices flood over the crust. This step of disturbing the crust, or “dowdying,” allows the juices to rise over the crust and caramelize as the dessert continues to bake. Can I hear a YUM?!
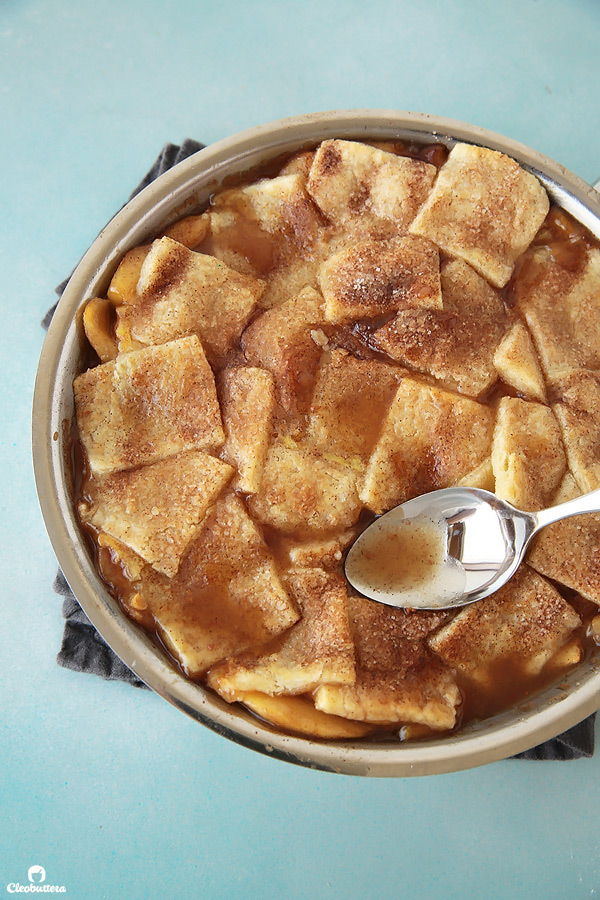
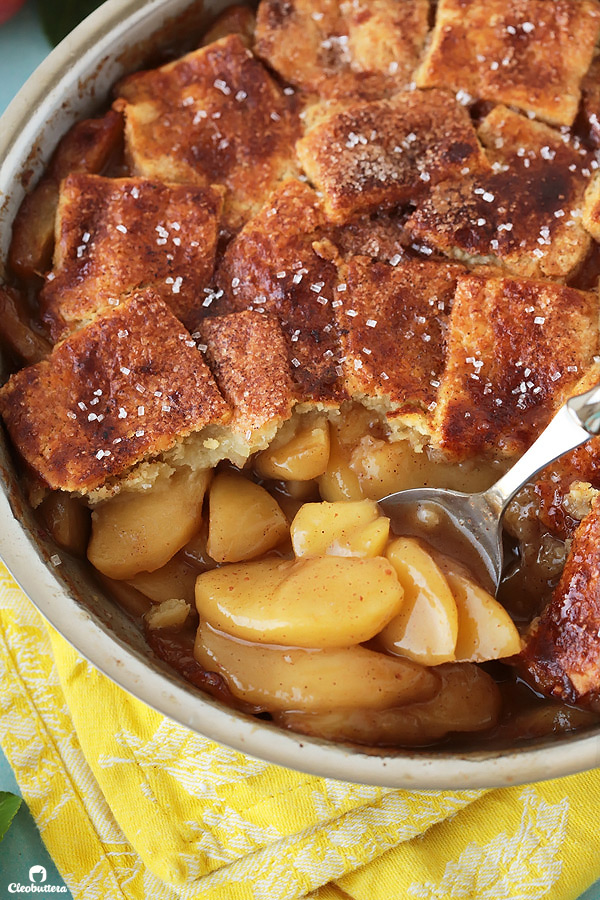
And there! Apple Pandowdy in all it saucy, juicy, crusty glory. It is advised to let it cool for 20 minutes to avoid tongue burns, but who are we kidding?! Just dig that spoon in…
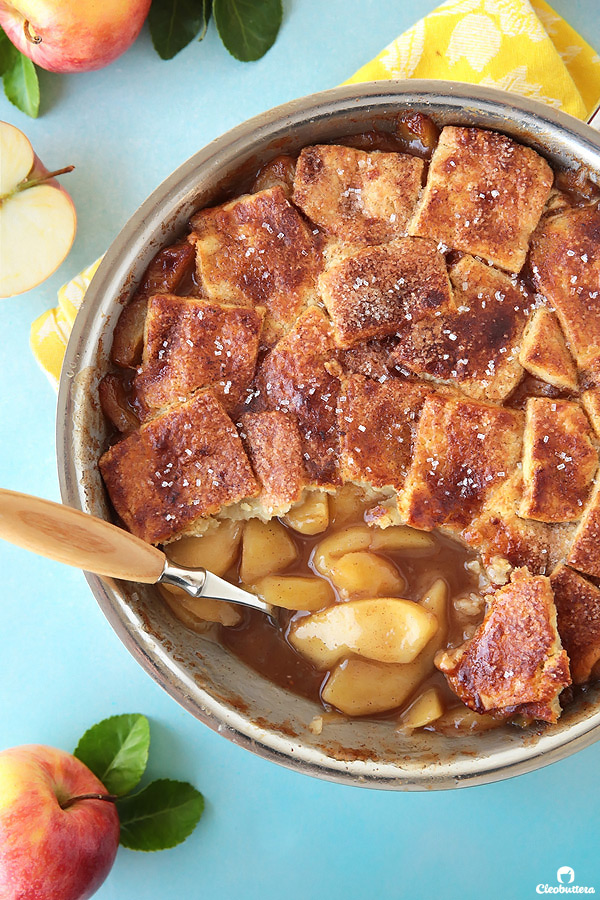
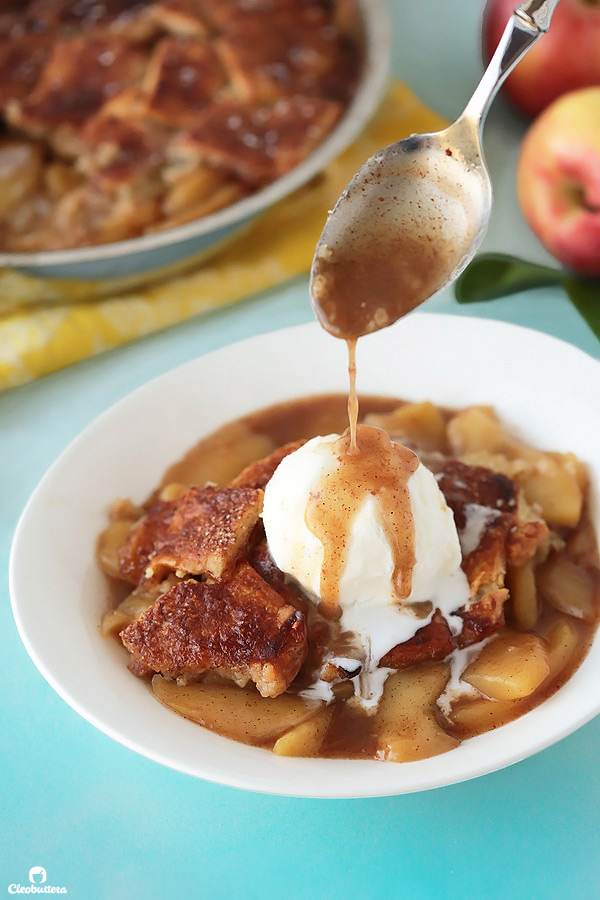
Because there’s nothing quite like warm apple “pie” straight from the oven with a big scoop of vanilla ice cream.
It may not be as pretty as a classic pie, but what the pandowdy lacks in looks, makes up for it in flavor.
Promise.
Apple Pandowdy
A simple, old fashioned skillet apple pie with a caramelized saucy filling and no fuss, crisp crust topping. Dare I say better than apple pie? Please read the NOTES section of the recipe for helpful tips and substitutes.
Ingredients
For the Crust:
- 1 1/2 cups (190 grams) all-purpose flour (preferably weighed for accurate results)*
- ¼ cup (28 grams) powdered sugar
- ½ teaspoon salt
- ½ cup (114 grams) very cold unsalted butter, cut into ¼-inch pieces and chilled
- 1 large egg
For the Apple Filling:
- 2 ½ pounds/ 1.134 kg (about 7-8 apples) Golden Delicious (sweet, yellow) apples, peeled, cored, halved, and cut into 1cm/1/2-inch-thick wedges (weight is after peeling & coring)
- 1/4 cup (50 grams) packed soft brown sugar, preferably dark
- 1 teaspoon ground cinnamon
- 1/4 teaspoon salt
- 1/4 cup (57 grams) unsalted butter
- ¾ cup apple cider or reduced apple juice if you don't have cider *(see notes below for details)
- 1 tablespoon (8 grams) cornstarch
- 1 teaspoon lemon juice
For the Topping:
- 1 tablespoon (13 grams) granulated sugar
- ¼ teaspoon ground cinnamon
- 1 large egg, beaten with 1 tablespoon heavy cream or milk
- Vanilla ice cream, for serving
Instructions
For the Crust:
- In a food processor, pulse together the flour, sugar and salt until combined.
- Scatter the butter over the top and pulse until the butter is throughly cut through the dry ingredients and the mixture resembles coarse cornmeal, about 15 pulses.
- With the machine running, add the egg through the feed tube and continue to process until the dough just comes together around the processor blade, about 12 seconds.
- Turn the dough and any crumbs onto a sheet of plastic wrap and flatten into a 6 inch/15cm disk. Wrap the dough tightly in the plastic wrap and refrigerate for at least 1 hour. (Wrapped dough can be refrigerated for up to 2 days or frozen for up to 1 month. If frozen, let dough thaw completely on counter before rolling.)
- Before rolling the dough, let it soften slightly at room temperature until malleable but still cold, 5 to 10 minutes. Roll out the dough to an 11 inch/28 cm circle between 2 sheets of parchment paper. Peel off the top sheet of parchment, and using a pizza cutter, cut the dough into 6 strips, then make 6 perpendicular cuts to form squares. (Pieces around edges of dough will be smaller.) Slide the sheet of dough onto a rimless (or inverted) baking sheet, cover with plastic wrap, and refrigerate until firm, at least 30 minutes. Meanwhile, prepare the topping.
For the Apple Filling:
- Adjust oven rack to middle position and heat oven to 200C/ 400F.
- In a large bowl, toss the apples, sugar, cinnamon, and salt together to combine.
- Melt the butter in an oven-safe 10-inch skillet over medium heat. Continue to cook, stirring and scraping bottom of the skillet with a spatula, until milk solids are dark golden brown and butter has a nutty aroma, 1 to 2 minutes. Be careful not to burn. Add the apple mixture, give it a stir to coat it with the butter, cover, and cook, stirring occasionally, until apples become slightly pliable and release their juice, about 10 minutes. Do not overcook.
- In a measuring cup with a spout (or medium bowl) whisk together the cider (or reduced apple juice), cornstarch, and lemon juice until no lumps remain. Add the cider mixture to the skillet; stirring it in to combine. Bring to a simmer and cook, uncovered, stirring occasionally, until sauce is thickened, about 2 minutes. Remove the skillet from the heat, and press lightly over the apples to form an even layer.
For the Topping:
- In a small bowl, combine together the sugar and cinnamon. Working quickly, shingle the dough pieces in a random fashion over apple filling until mostly covered, overlapping as needed. Brush the dough pieces with the egg wash and sprinkle with the cinnamon sugar.
- Bake until the crust is slightly puffed and beginning to brown, about 15 minutes. Remove the skillet from the oven, and using the back of a large spoon, press down in center of the crust until some of the juices come up over top of crust. Repeat four more times around the skillet. This step of disturbing the crust, or "dowdying," allows juices from the filling to rise over the crust and caramelize as the dessert continues to bake. Make sure all apples are submerged and return the skillet to the oven. Continue to bake until crust is golden brown, about 15 minutes longer.
- Allow to cool down slightly then serve with vanilla ice cream, spooning extra sauce over top.
Recipe Notes
- If your skillet is not heatproof, precook the apples and stir in the cider mixture as instructed, then transfer the apples to a 13- by 9-inch baking dish. Roll out the dough to a 13- by 9-inch rectangle, cut into squares, arrange and bake as instructed.
- The original recipe, uses a classic pie crust instead of a tart crust (which I use here) to make the pandowdy. I've found that pie dough produces a doughy, cake-y crust in this recipe. Must be the abundance of sauce in the filling that does that. I've successfully subbed tart dough for the pie dough here, in order to get a crisper, flakier crust; but note that it's slightly sweeter than regular pie dough. If you prefer a doughier crust, feel free to sub in your favorite single crust pie dough recipe. Store-bought pie dough is NOT recommended here as it will produce gummy results.
- If you don't have a kitchen scale to weight the flour, use the Spoon & Sweep method: Use a spoon to fill measuring cup with flour until required amount is obtained, then sweep access with the back of a knife.
- If you do not have apple cider, reduced apple juice may be used as a substitute--simmer 1 1/2 cup apple juice in a small saucepan over medium heat until reduced to 3/4 cup (about 10 minutes). Alternatively, heat the juice in a glass measuring cup in the microwave on high power until reduced (8 to 10 minutes) Just make sure, to allow the reduced juice to cool to room temperature before stirring in the cornstarch.
- What follows are some changes that I've made to the original recipe. To increase the caramel-y flavor of the apple filling, I opted for browning the butter as opposed to simply melting it, which the original recipe calls for. In return, I bumped up the butter amount by an extra tablespoon to make up for the lost moisture that has evaporated during the browning process. If you choose not to brown the butter, reduce its amount to 3 tablespoons.
- I've also used dark brown sugar instead of light for an extra boost of butterscotch-y notes. Light brown sugar is good here, but dark makes this incredible! Feel free to use either or.
- I've also doubled the amount of cinnamon because I LOVE cinnamon. You could reduce it to 1/2 teaspoon if you prefer a less pronounced cinnamon flavor.
- I've also cut the amount of lemon juice by half because we didn't enjoy how lemony 2 teaspoons made the filling. Use the full 2 teaspoons of lemon juice, if you prefer the brightness.
Pie dough recipe adapted from this Amazing Apple Tarte Tatin.
Apple filling and topping adapted with changes from Cook's Country.
Measurements Note: All recipes of this site have been developed using weight measurements. Although US volume measurements have been included for your convenience, it is highly encouraged that you weigh your ingredients using a kitchen scale to get the best possible results. Due to the sensitive nature of baking, kitchen scales are proven to yield more accurate and consistent results than measuring cups. Enjoy!
Powered by ![]()
This post may contain affiliate links.
All images and content are owned by Cleobuttera® and are copyright protected. Please do not use my images without prior permission. If you would like to republish a recipe, please rewrite it in your own words and link back to the recipe page on my site. Original recipes and creations of this site are intended for personal and home use. Commercial replication or media consumption are only allowed with a written consent and agreement with Cleobuttera owners. Otherwise it is considered a violation of intellectual property. Thank you for respecting and appreciating the amount of time and effort that goes into creating free, unique recipes that make people happy.


I have not tasted apple pie bt this Pandowdy of yours looks delish. Im salivating after seeing that last pic with a scoop of ice cream. Hope to try it out soon:)
Thank you Shakerah! Hope you love it as much as we did ?
Hello Tasbih! I’ve been eyeing this recipe since Thanksgiving and finally made it tonight to take to a dinner.
I appreciate the thought and experimentation you put into getting the taste and consistencies in your recipes just right. This one was no exception. Thoughts for my next attempt:
– The homemade tart dough was delicious and worth the extra effort. It was flaky and held up well to the yummy liquid.
– I used gala apples. I cooked them just a few short minutes but they were still soft- I’ll probably try something firmer and more tart next time if I can get it.
– More dowdying in the middle! I did the edges just fine, but pushing down in the middle started to break up my nice dough shingles, which freaked me out, and I stopped short of really getting liquid across there. I should have powered through! 😉
I needed more servings, so I used a 12″ skillet and about 1 1/2 the ingredients called for. The prep took a bit more time than I’d accounted for (11 apples to peel and core), but once everything got in the pan and then into the oven, there wasn’t the usual stress about how it was going to turn out. It was glorious! A little tart! A little gooey! Cool presentation in the pan!= Amazing tasting labor of love, served warm with vanilla ice cream
I’m definitely making this again. Thank you for yet another winner!
Hi Hannah! So happy to hear your wonderful feedback. I’m so glad you loved this recipe as much as we do. Your tips are spot on…thanks for sharing them. Definitely go for a firmer type of apple; Golden Delicious are perfect here. I was cautious with the dowdying too the first time I around, but then discovered that the dough kinda fuses bake together as it continues to bake and still ends up looking pretty. Just close your eyes and do it ??
Hi,
The recipe looks so delicious but I have never heard of a Pandowdy. What is the principle behind cutting the pastry into squares and placing on top as opposed to just rolling the pastry and placing a round of dough on top, like a regular pie?
Your advice would be greatly appreciated.
Regards from Australia,
Angela
Hi Angela:) Oh you’re gonna love this one! Shingling pastry squares over the apple filling makes for partial coverage, which promotes ventilation, preventing the apples from overcooking. It also makes it possible to press down on it so the juices from the filling flood over the top and caramelize in the oven. Hope this helps.
Thank you. I am looking forward to making this as soon as possible. Looks and sounds delicious.
I have many of your recipes earmarked….I love your blog….all the way from Australia.
Regards,
Angela
Hello Tasbih,
I had my Grandfather in the other night and I made this for pudding. It turned out amazing and tasted gorgeous unfortunately though we had an electricity trip?never mind still tasted delicious and can’t wait to some other recipes. Looking at food blogs is always torture! I feel like I just wanna grab everything out of the screen and eat it at once??
Thanx a lot
Pingback: Brown Butter Toffee Kürbis Cupcakes – Super Bilder