Amazing Apple Tarte Tatin
Move over apple pie! This french classic is infused with caramel in every bite. Made with caramelized apples and baked upside down in a bed of caramel, this tart bakes in only 20 minutes and will wow any apple pie fan!
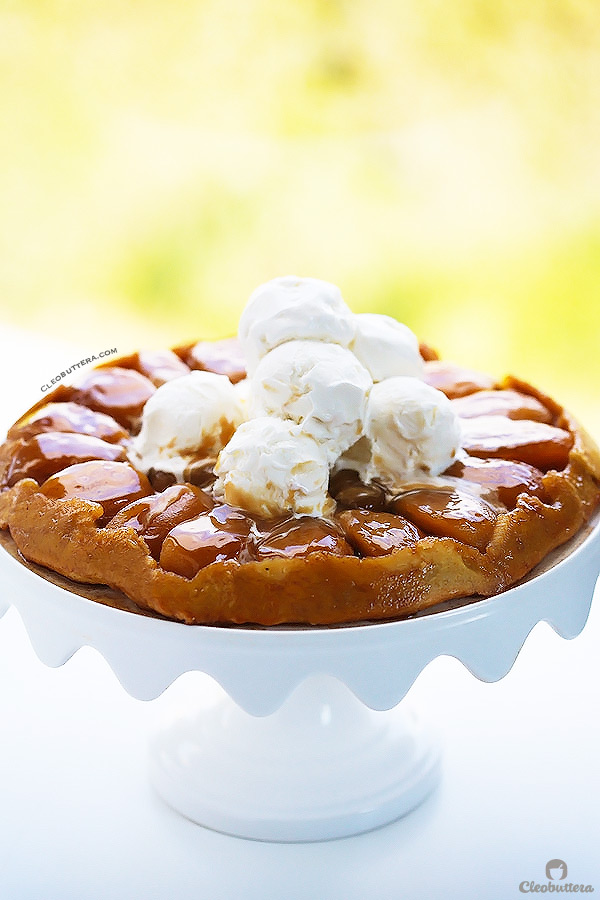
There are two kinds of people in this world: pie crust hoarders and fruit filling lovers.
This tart is for the former.
Do you tend to ruin pies for everyone else? Scraping off most of the filling, eating only the flavored bottom, then work your way all around the crust edges until there’s non left for anyone? If you just nodded twice, then this tart is for you! And me.
I’m guilty of such annoying pie-eating habits too. I’ll take a liiiiiiittle fruit with my crust thankyouverymuch. No mile-high pies for this girl right here! Unless ofcourse they’re filled with chocolate, peanut butter and caramel. Ooooh caramel. And that’s another reason why I looooooove this one.
Not only is it skimpy on the fruit, heavy on the crust (compared to classic apple pies), the apples themselves are coated with caramel, so when you get a piece of fruit in your mouth, its caramilzed…which we all know is a 1000X better than naked fruit. The caramel also flavors the crust and pools on top of it, so its like eating a caramel tart. I like to add a little cinnamon to the caramel, which is not traditional in this tart, but I mean…apples and cinnamon…how can I resist? Plus it will make your house smell incredible the whole day.
Add some vanilla ice cream over that and you’ll be heaven.
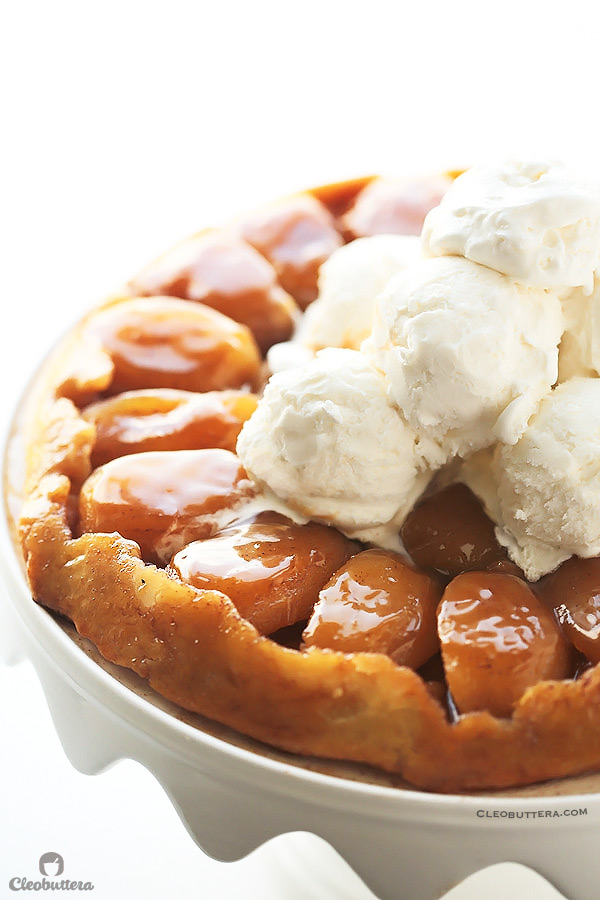
Whenever I make this and tell people I’m making Tarte Tatin. They go: Tarte whaaaaat?! They’re the ones who push my food rambling buttons and then regret asking. But for you my dear friends, I’ll give you the short version of the story behind the name:
Once upon a time, in a far away land, there lived two sisters. Am I losing you? Sorry…gonna make it fast. Promise. No, will try.
Tarte Tatin is the outcome of a sweet accident by the two French Tatin sisters (ah? the name) back in the 19th century, who ran an inn. Legend has it that one of the sisters mistakenly placed her apple tart in the oven upside down one day. Realizing her mistake a little too late, she decided to carry on and flip her dessert anyway. The result: a bed of flakey crust cradling the most glorious caramelized apples anyone had ever met.
Now enough with the talk, let’s go intentionally make this wonderful mistake.
We’ll start with the tart dough, which is beautifully tender and flakey yet so simple to make. A food processor makes this a breeze to make, but a pastry cutter or your just good ‘ol hands will do the job just as good.
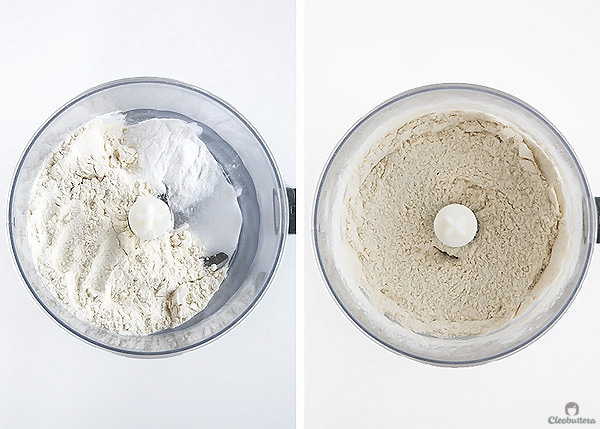
So you’ll combine flour, powdered sugar and salt in the food processor and pulse to combine.
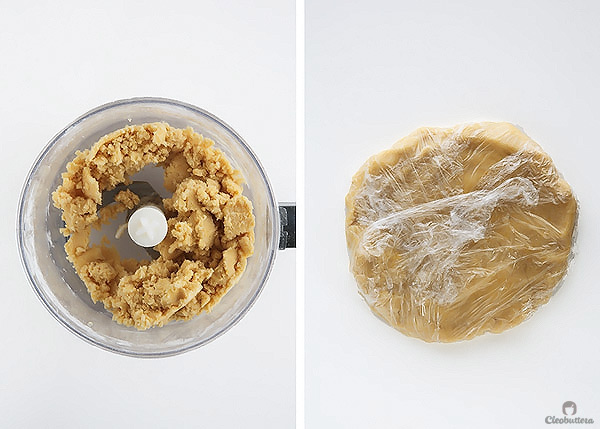
Then you’ll scatter on some reeeaaaaally cold cubes of butter (I like to keep them in the freezer after cubing them till I prepare the rest of the ingredients), then pulse several times, until the butter is all cut through. The mixture should look like really coarse cornmeal.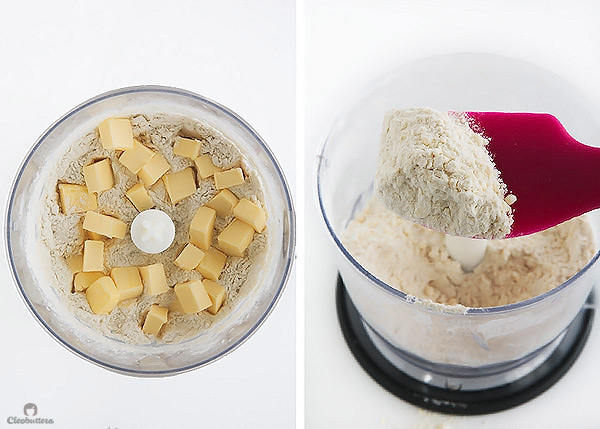
With the machine running, drop in the egg through the feed tube.
Continue processing until the dough clumps together and gathers around the blade. Turn this out on some plastic wrap, flatten into a 6 inch/ 15cm disk, wrap well then chill for 1 hour in the fridge or up to overnight.
Roll out the dough into a 14 inch/ 35cm circle on a lightly floured counter, then transfer it to a lightly floured baking sheet. Cover with plastic wrap and keep in the fridge while preparing the apples and topping. 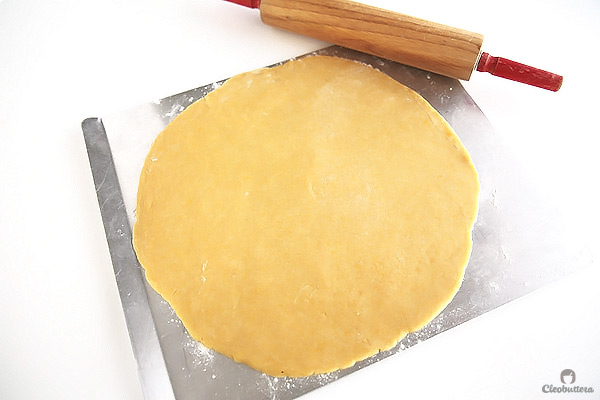
You’ll make the caramel topping by melting butter, then cooking in some sugar until its turns a light golden brown. Add cinnamon, if you want, but I think you will want.
Then arrange the apples all around over the caramel. At this point you might feel that the caramel had hardened. No worries, it will loosen up. Promise.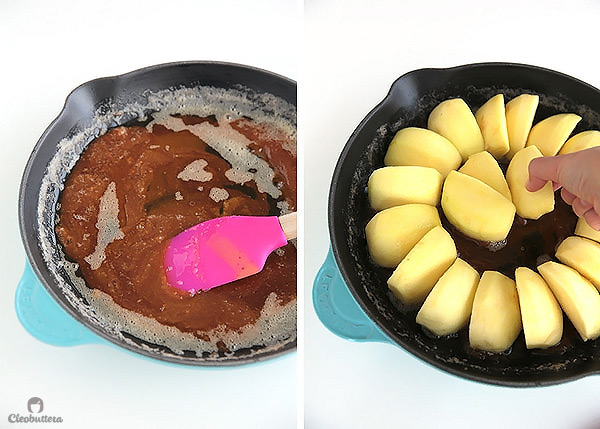
Cook for a few minutes until lightly golden, then turn on the other side. Take the time to make it look puuuurty this time because what you’ll see, is what you’ll get when you flip the tart. Cook for a few more minutes, then turn the heat off.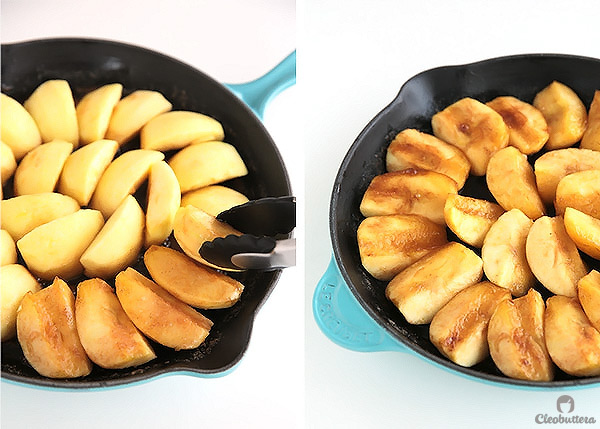
Now slide on the chilled dough and tuck in all the access hanging out to snugly fit into the skillet.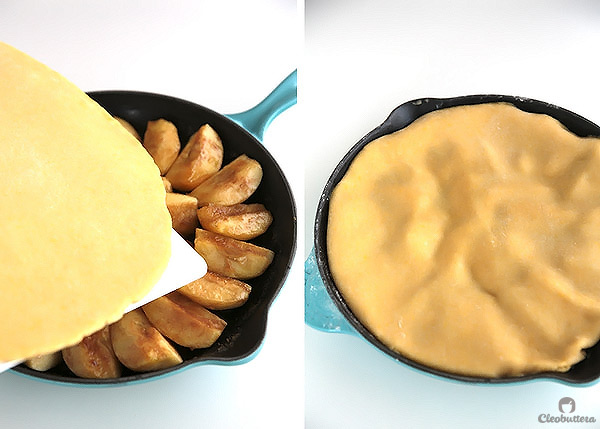
Bake until beautifully golden brown and the house smells like buttery, caramel-y, apple-y heaven.
Here’s where you’ll get to test your patience…wait 2o minutes before flipping it! Sorry:( But that rest is what helps thicken the caramel and lets it infuse the apples. If you don’t care about that…then just flip it! Yeah be a tart rebel!!!
Now time to swooooon…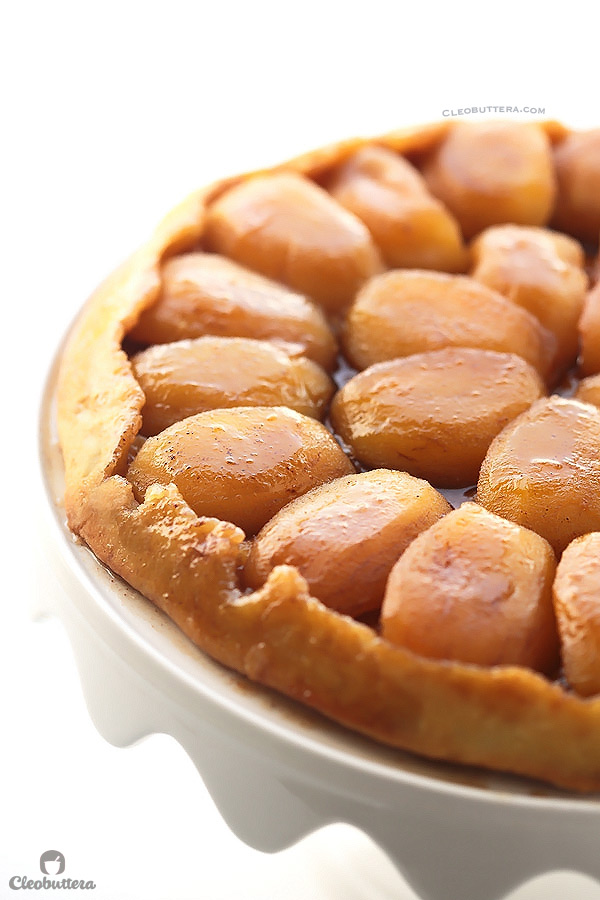
Vanilla ice cream? Ofcourse. How else?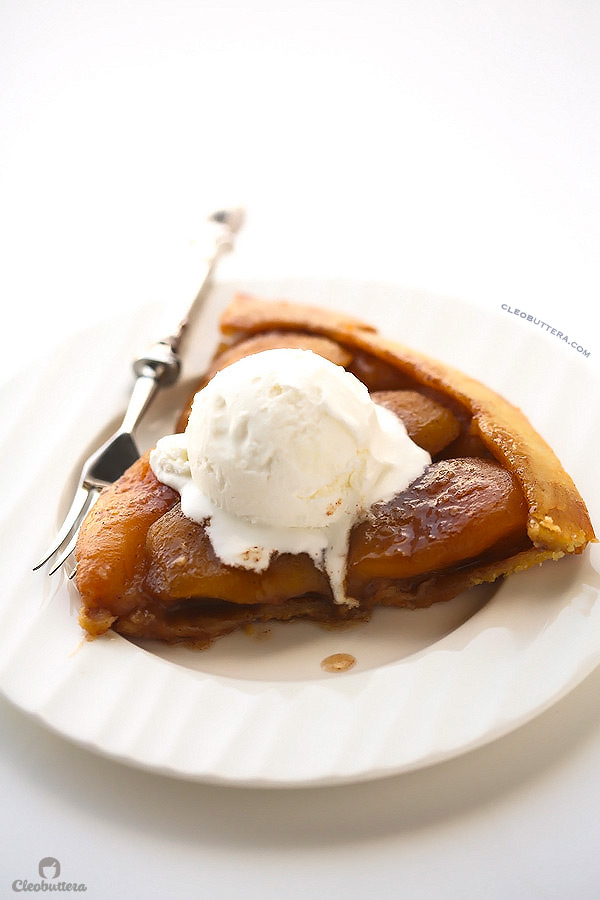
Love it, love it, love it.
My favorite apple dessert of all time. I hope it becomes your too.
Amazing Apple Tarte Tatin

Note that the tart dough needs to chill in the fridge for at least 1 hour or up to 2 days, so plan ahead. Classic tarte Tatins are not made with cinnamon, but the addition here is irresistible. Omit it if you prefer.
Ingredients
Tart Dough:
- 1 1/3 cups (6 2/3oz/ 190g) all-purpose flour
- 1/4 cup (1oz/ 28g) powdered sugar
- 1/2 teaspoon salt
- 1/2 cup (4oz/ 114g) very cold unsalted butter, cut into 1/4-inch pieces and chilled
- 1 large egg
Apples and Topping:
- 1/2 cup (4oz/ 114g) unsalted butter
- 3/4 cup (5 1/4oz/ 150g) granulated sugar
- 1/2 teaspoon cinnamon (optional)
- 5 large or 6 medium apples (2 1/2lbs/ 1 1/4kg), peeled, cored and quartered (*see note for best types of apples for baking use)
Instructions
For the Tart Dough:
- In a food processor, pulse together the flour, sugar and salt until combined.
- Scatter the butter over the top and pulse until the butter is throughly cut through the dry ingredients and the mixture resembles coarse cornmeal, about 15 pulses.
- With the machine running, add the egg through the feed tube and continue to process until the dough just comes together around the processor blade, about 12 seconds.
- Turn the dough and any crumbs onto a sheet of plastic wrap and flatten into a 6 inch/15cm disk. Wrap the dough tightly in the plastic wrap and refrigerate for at least 1 hour or up to 2 days. Before rolling the dough, let it soften slightly at room temperature until malleable but still cold, about 10 minutes.
- Roll the dough out to a 14 inch/35cm circle on a lightly floured counter. Slide the dough onto a lightly floured rimless (or inverted) baking sheet, cover with plastic wrap, and refrigerate while preparing the apples and topping.
For the Apples and Topping:
- Adjust oven rack to the upper-middle position and heat the oven to 425F/220C.
- Melt the butter in a heavy-bottomed, oven-safe 12-inch nonstick skillet over medium-high heat. Stir in the sugar and cook until the bubbling subsides and the mixture is light golden brown, about 3 minutes. Stir in the cinnamon if using.
- Remove the pan from the heat and, being careful not to burn your fingers, arrange the apples around the edge of the skillet, lifting them of their edge so that they stand up. Fill the skillet middle with the remaining apples quarters. At this point, the caramel might look like it's hardened; that OK, it will loosen up as the cooking and baking proceed.
- Return the skillet to medium heat and cook apples, turning them halfway through, until they are lightly golden and the caramel is darkly colored, about 6 minutes.
- Turn off the heat, slide the prepared dough over the apples in the skillet. Being careful not to burn your fingers, tuck the dough edges gently up against the skillet wall, so that it fits snugly into the skillet.
- Bake the tart until the crust is golden brown, about 20 minutes, rotating the skillet half way through baking so that it bakes evenly.
- Let the tart cool in the skillet for about 20 minutes (if you have the patience), so that the caramel thickens and allows the apples enough time to absorb the caramel.
- Run a small knife around the edge of the skillet to loosen the tart. Using mitts or a towel to hold the skillet bottom (if its still hot), place an inverted serving platter over the top of the skillet and gently flip the tart onto the platter. Scrape out any apples or caramel that might've stuck to skillet, and put them back into place on the tart.
- Best served warm with ice cream or whipped cream, but is still good at room temperature.
Recipe Notes
- The recipe works best with firm, fairly dry apples; avoid using very juicy apples. Granny Smith (green), Golden Delicious (yellow) and Fuji apples are all great choices. Personally, Granny Smiths are so tart for my taste, so I prefer using either Golden delicious and Fuji for their sweeter taste, but it's your call here:)
- To make ahead, the tart dough, wrapped in plastic wrap can be refrigerated for up tp 2 days or frozen for up to 1 month. Let the dough sit on the counter until malleable, but still slightly chilled, before rolling out. Once baked, the tart can be wrapped loosely with plastic wrap and kept at room temperature for up to 4 days. Warm in the oven or microwave before serving. Oven rewarming will produce a crisper crust than the microwave.
Adapted from The America's Test Kitchen Family Baking Book
Measurements Note: All recipes of this site have been developed using weight measurements. Although US volume measurements have been included for your convenience, it is highly encouraged that you weigh your ingredients using a kitchen scale to get the best possible results. Due to the sensitive nature of baking, kitchen scales are proven to yield more accurate and consistent results than measuring cups. Enjoy!
This post may contain affiliate links.
All images and content are owned by Cleobuttera® and are copyright protected. Please do not use my images without prior permission. If you would like to republish a recipe, please rewrite it in your own words and link back to the recipe page on my site. Original recipes and creations of this site are intended for personal and home use. Commercial replication or media consumption are only allowed with a written consent and agreement with Cleobuttera owners. Otherwise it is considered a violation of intellectual property. Thank you for respecting and appreciating the amount of time and effort that goes into creating free, unique recipes that make people happy.