Epic 12 Layer Chocolate Cake
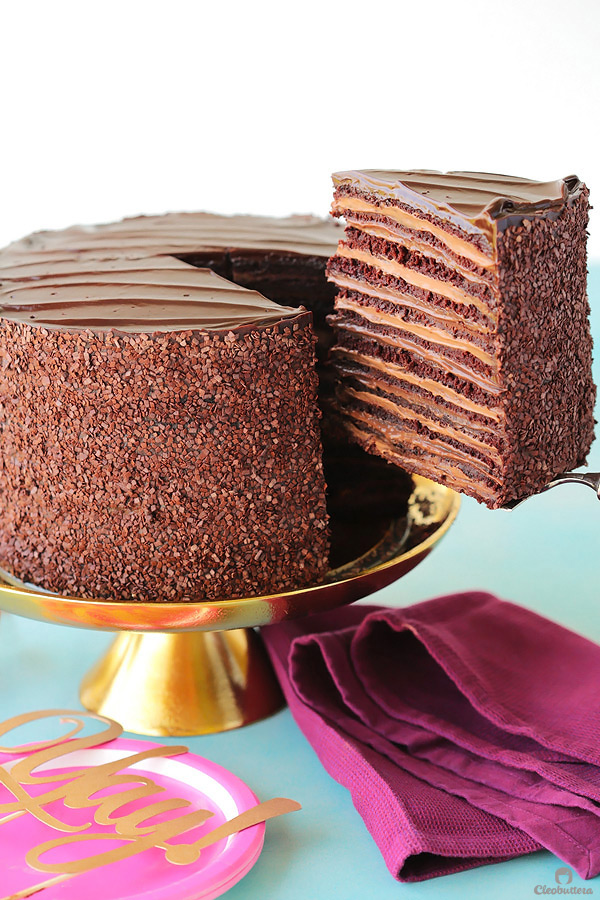
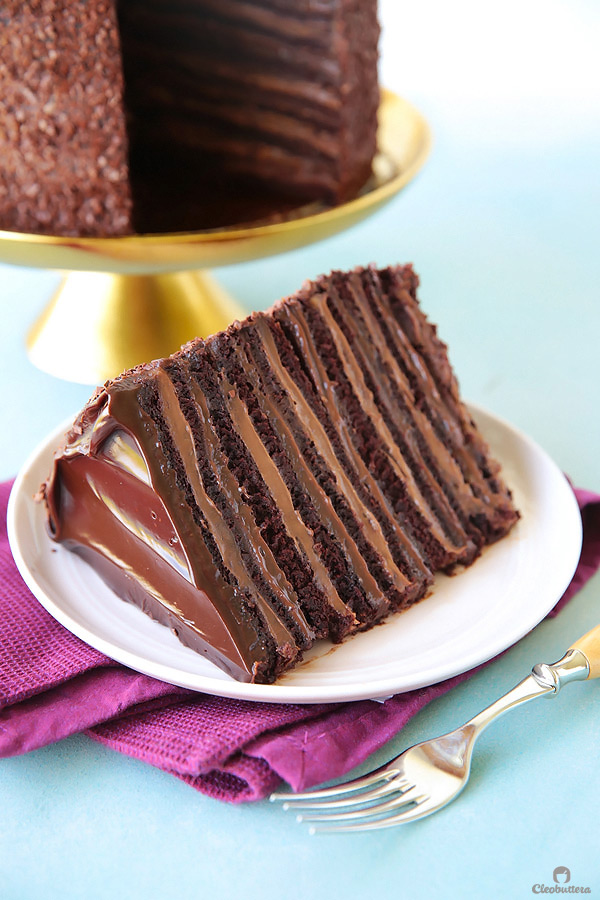
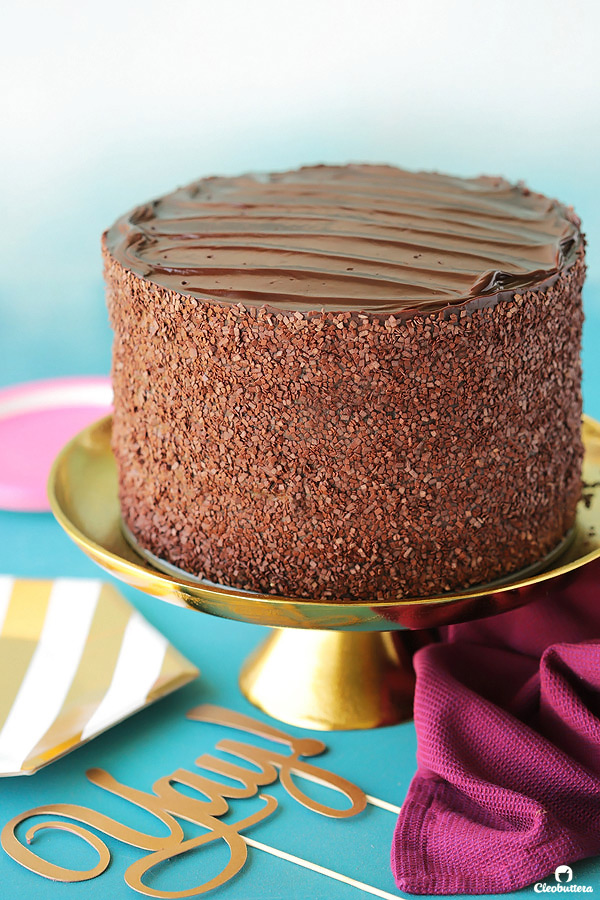
Twelve layers of chocolate cake filled with alternating layers of silky chocolate pastry cream and rich fudgy chocolate frosting. This 6-inch tall mega cake might just be the best chocolate cake you’ll ever taste.
So where do we begin here?
With how much I’ve missed you and my immeasurable appreciation for you? or by how unbelievably delicious this cake is?
By thanking you for the love, support and patience you’ve given me during my year-long blogging break? Or get emotional at the excitement and encouragement you showed when you knew that I’m coming back with more?
I have so much to say to you right now, so much to express, that if I start…I’m afraid you won’t hear the end of it.
I’m currently feeling all the feels, but can best sum it up by shouting so loudly: YAY!
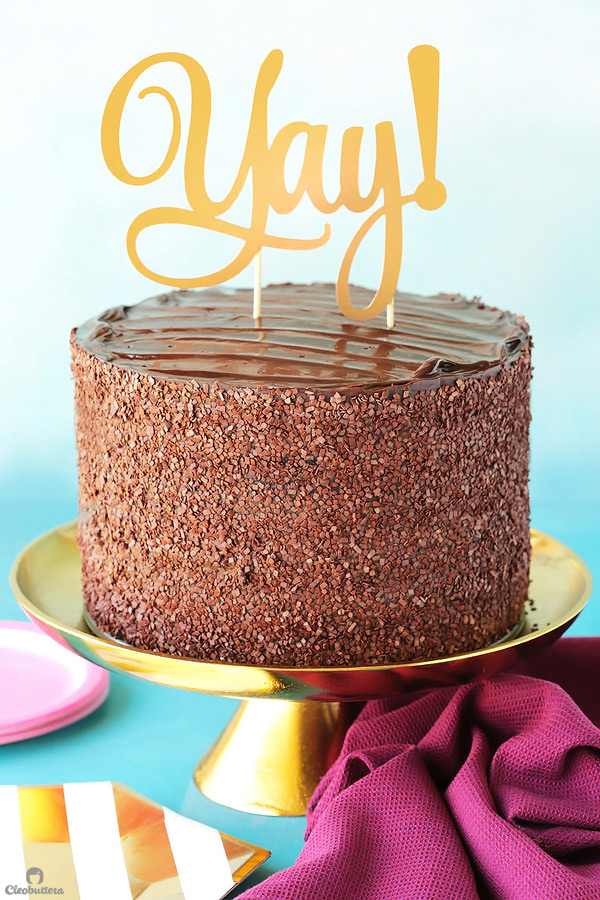
YAY! for being blessed with such incredible, understanding readers like yourself. YAY! for regained health and balance. YAY! for a new beginning and YAY! for coming back to this little corner of the internet that holds a special place in my heart. YAY! to you for visiting here again and YAY! for proof that love and empathy still exist in the world.
I don’t know about you, but I say this calls for a celebration. And what’s celebration without cake?!
So YAY! for cake!
And not just any cake. Oooooh no…The real beauty of this cake, like so many things and people in life, does not come from the outside…but it is what’s on the inside that counts.
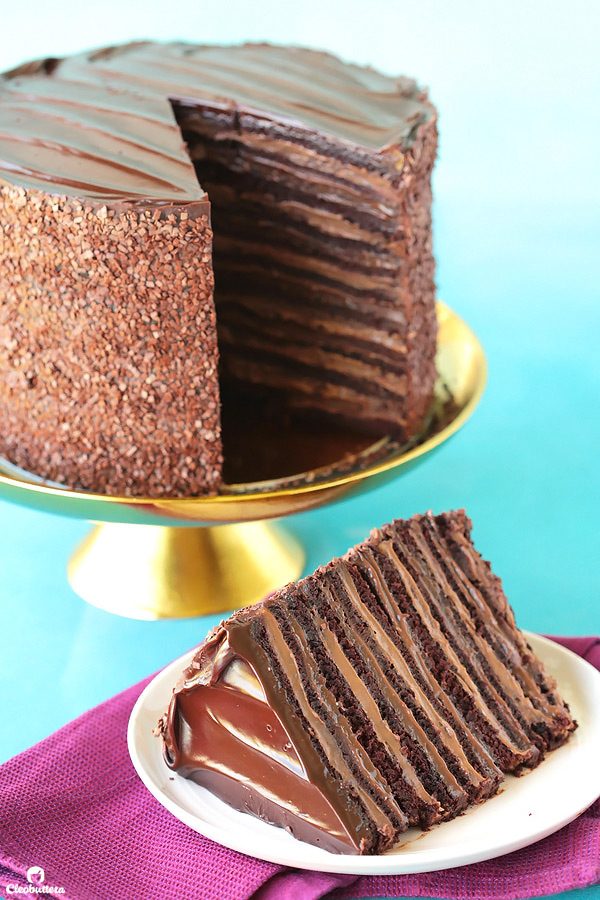
This beautiful monster is made up of 12 layers of chocolate cake and 12 layers of filling. YES! TWELVE! One layer for every month that I didn’t post on the blog! I mean I had to make up for the lost time, right?
Well, technically it’s a 24 layer cake; 12 cake and 12 filling, but I didn’t wanna call it that because it wouldn’t have been a fitting title for the situation.
It also took me all 12 months to make! LOL! Just kidding…way more actually ?
In all seriousness though, this cake is a lifetime of baking in the making. For years and years, I’ve been making, testing, eating, tweaking, and retesting chocolate layer cakes in search for that melt in the mouth chocolate bliss that we secretly dream about shoving in our mouths with our bare hands. You know…a tall chocolate cake as sinful looking as the one Bruce Bogtrotter from the movie Matilda devours in one sitting. A moist, multiple layered chocolate cake, slathered with heaps of creamy, glossy chocolate frosting, that doesn’t require a tall glass of milk to slide it down the throat.
A dosage of inspiration from this one, coupled by a strong cheat day craving and this cake was born! The one I could deem ULTIMATE! The dream chocolate cake I’ve been searching for. THIS. IS. IT. for me. My favorite chocolate cake in all the land. And I have a feeling it will become yours too.
In all honesty though, how many of you had wished of being in Bruce’s place?
This cake does not look one bit like the one in the movie, but the taste and textural experience is exactly how I’ve always imagined it to be.
- Super duper moist. I’m sorry for those who hate the word “moist” but there’s really no better adjective to describe it. I mean the cake makes a moist sound when you slide the fork into it for God’s sake, how I can possibly call it anything but. As a matter of fact, it is the moistest cake I’ve ever had, and those who have tasted it seem to agree. I have text messages that prove it.
- Very Chocolatey without tasting like dark chocolate. When developing my dream chocolate cake, I wanted to be sure that it satisfies both adults and kids alike. That means it can’t taste like dark chocolate, because 98.7% of children believe that dark chocolate comes from the devil. Yet, it can’t be lacking in the chocolatiness department either, because what chocolate lover would want that? There’s a very thin line between dark chocolate and serious chocolate flavor and more often they not, they tend to overlap. This cake however, manages to embody just the right balance that guarantees a serious chocolate punch without the bitterness associated with dark chocolate.
- Perfectly sweet. As a person with a hankering sweet tooth, you might find it surprising that I cannot tolerate overly sweet frostings. So I made it made my mission, to keep the sweetness level under control, even if the sugar amount in the ingreditent list suggests otherwise. So it is pleasantly sweet, obviously..its cake, but just perfectly so.
- Light yet rich. This is one tall cake; 6 inches to be exact! So no matter how thinly you try to slice the cake, the portion will still end up pretty big. With that in mind, I wanted to be sure that its not too rich, that one bite will put you in a food coma, yet not too light, that it feels too lean. And its just that! That rightful marriage between rich and light. Light enough that you’ll be able to finish your slice and still have some room for air, yet rich enough, to taste like a guilty pleasure.
Let’s take a better look at what makes this cake so divine.
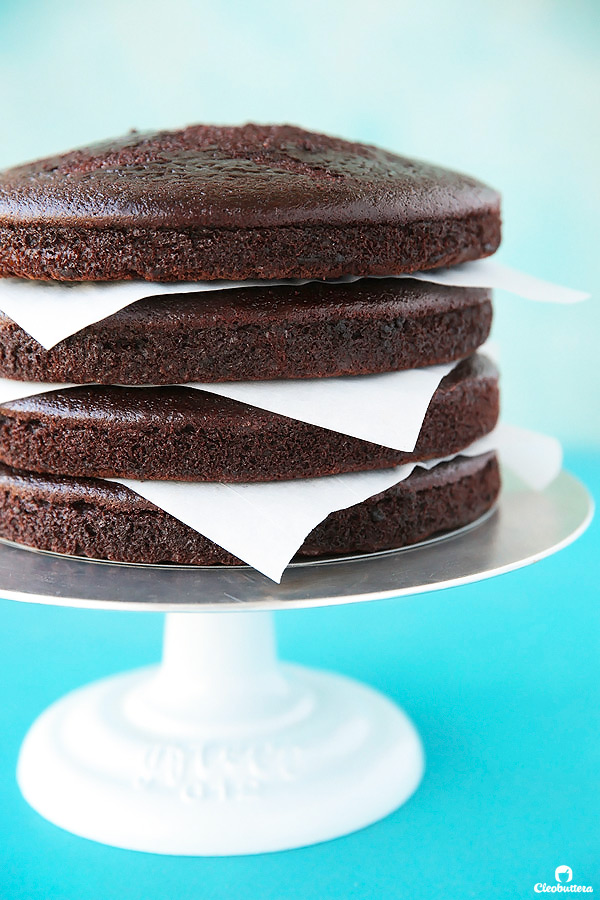
First of, we have 4 layers of fluffy chocolate cake with the softest, most tender crumb. The cake use a trio of tenderizers that ensures a moist texture; oil, sour cream and water. I’m usually a huge proponent for cakes that use butter for its fat, because c’mon its BUTTER, but there’s no denying that oil makes for the moistest cakes. And while if I’m going to eat a plain chocolate cake, I’d still prefer it to be butter based for the rich flavor it imparts, the oil based cake just works perfectly here because all the butter in the fillings make up for the lost richness in the cake. It’s a real winner and my new go-to oil-based chocolate cake recipe.
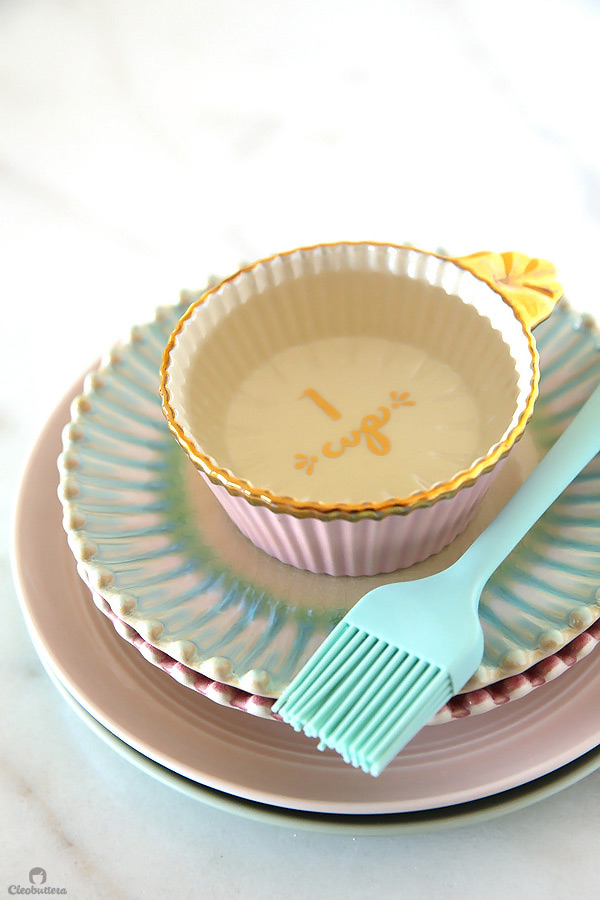
Next we have a Simple Syrup Soak. I promise, there’s something in the cup.
Each layer of cake gets brushed with that liquid magic for another dimension of moisture. It’s not that the cake needs it, as its pretty moist on its own, but it gives it that melt in the mouth quality that makes this cake so special.
Next comes a filling of silky Chocolate Pastry Cream, or custard if you will. This is the “light” element of the cake. Its barely sweet, light in texture and flavor, and tastes more of milk chocolate. When you taste it on its own, you’ll have doubts at how a filling this light in chocolate flavor can make a chocolate cake taste so chocolatey. The answer is because its balanced out with this:
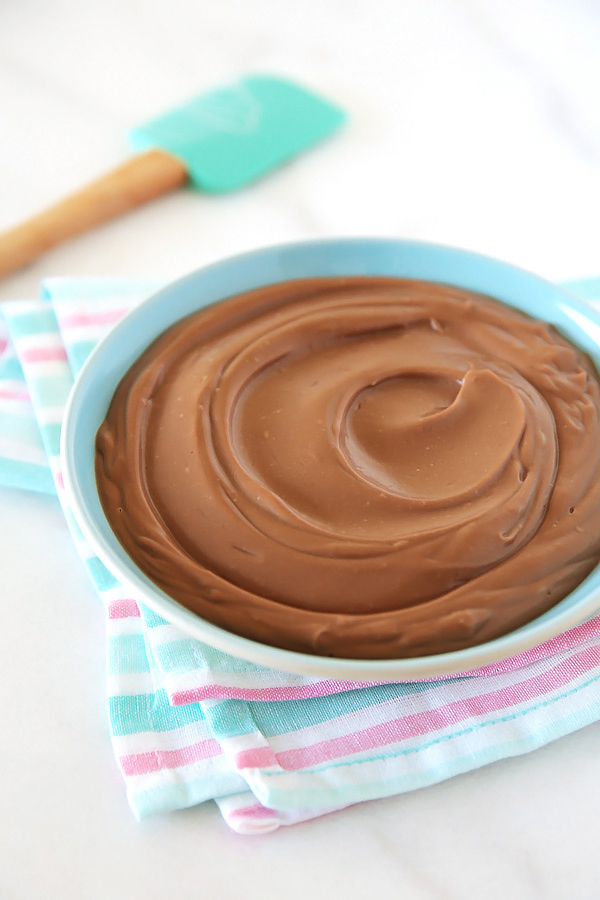
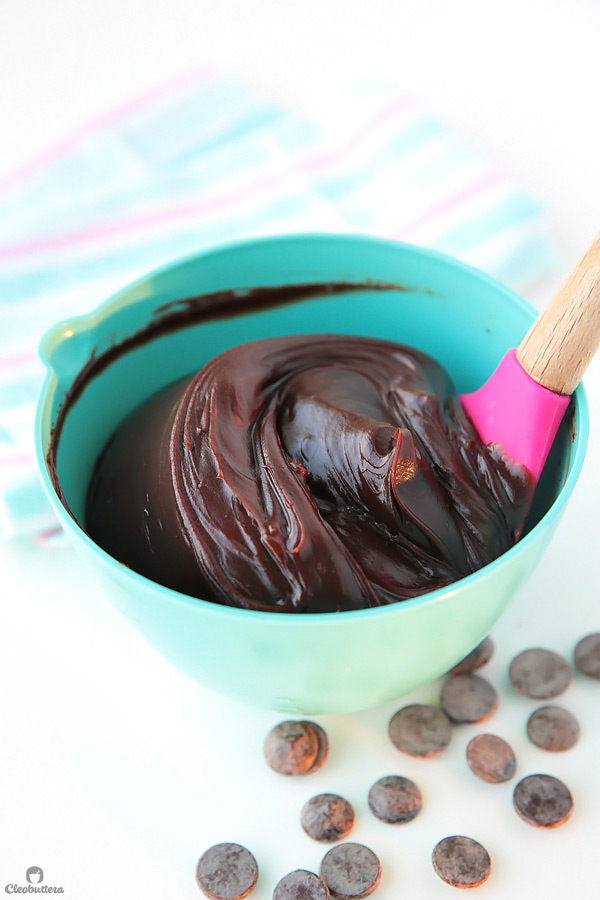
Fudgy Chocolate Frosting. This one is everything the pastry cream filling is not. Rich, super chocolatey, and very thick. The texture is smooth and velvety like chocolate ganache but the taste is exactly like hot fudge sauce. I’ve always wondered if hot fudge sauce could transform into a spreadable frosting, and the answer came to me in the form of this gloriousness.
Together, the fluffy cake, the shower of syrup, the lightness of the pastry cream and richness of fudgy frosting, make up for one irresistible cake. Now let’s take a look at how it all comes together in true Cleobuttera fashion. I hope you’ve missed the bajillion photos per post, because I can’t go less even if I tried. And I tried. And tried. But just keep failing at making short and sweet posts. Oh well…this cake needs quite a bit of explanation anyways.
Let’s me start by getting this out of the way so I don’t get comments complaining that the cake is a ton of work and that I didn’t warn you, because it is. This cake IS a project, will dirty many dishes, and if you don’t space your work well, then you’ll be standing in the kitchen all day. While difficulty is a relative thing, I’d say that this cake is not difficult but requires a fair amount of baking experience. It is a highly involved cake, but honestly, the results are well worth it. You just need to really really love whoever you’re making it for. I hope I haven’t scared you ?
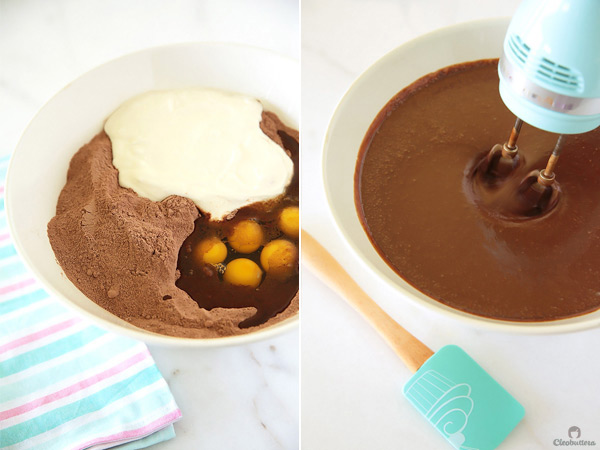
For what its worth, the cake part is dead simple. It comes together in one bowl (just be sure its an extra large bowl, because it makes A LOT of batter). You dump everything in one go then mix and you’re done.
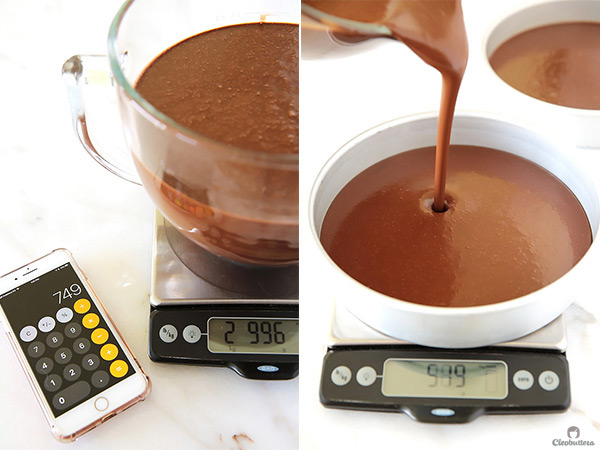
After that, you’re gonna need to divide the batter equally over 4 pans. I’ve found the best way to do that is to weigh the batter and divide that number by 4. Then all you do is pour that amount in each of the pans.
Also if don’t have 4 pans of the same size (I only have 2), you can just bake in batches. I bake 2 pans by 2 pans. You can get more information regarding that in the ‘notes’ section of the recipe.
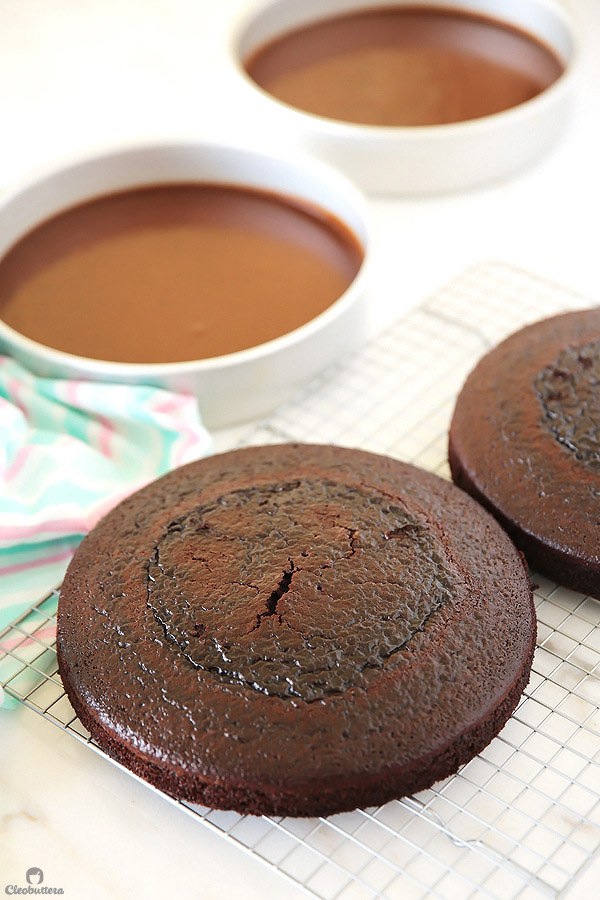
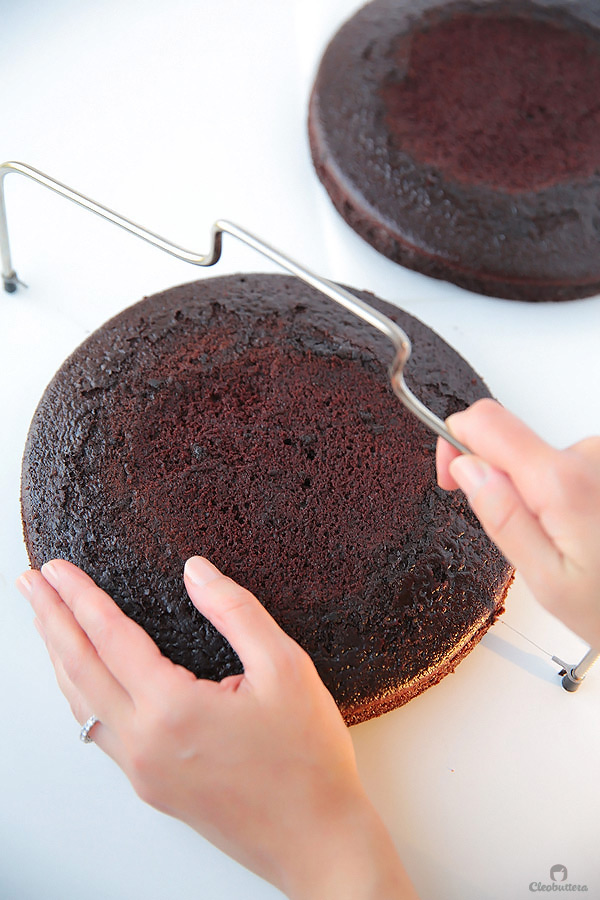
Don’t be alarmed when you see that the cakes are not very high. They’re supposed to be 3cm tall. After the cakes have nicely cooled (I actually like to pop them in the freezer to firm up a bit), slice away any domes that may have developed on top of the cake. They make for a great kitchen reward; a pat on the back for making it this far. You can now slice each cake into 3 thin (1 cm) layers. You wanna do that very carefully, so as to try and get them of even thickness as much as possible. A cake leveler like this one, makes the process much easier.
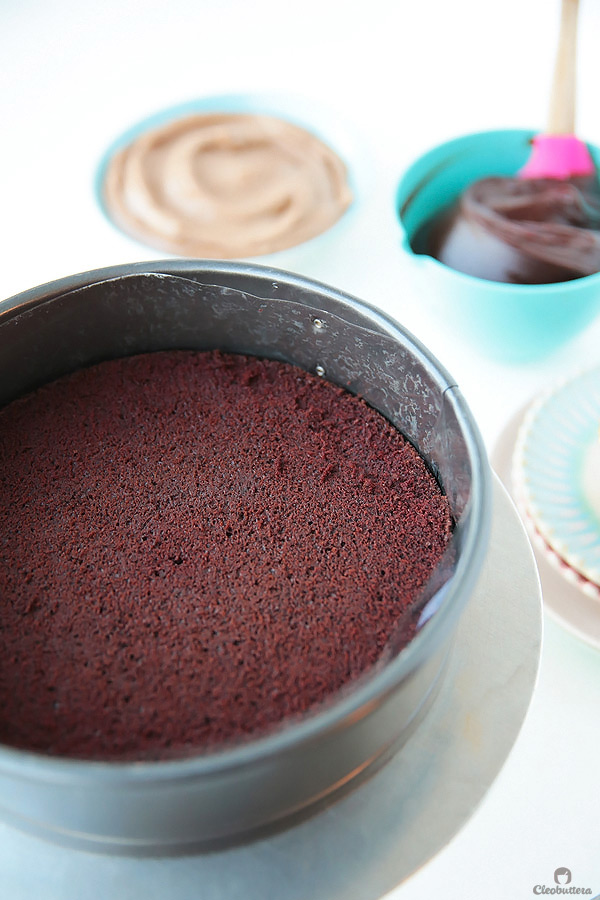
You’ll then line a cake ring or the ring of springform pan with a cake board, and line the inside with a strip of acetate or parchment paper. This will later help release the finished cake from the pan easily. The ring’s purpose is sturdy construction; I learned that trick from this video. If you’re confident in your cake building skills, you can do without it, but I like to err on the side of caution.
Place the first cake layer in there…
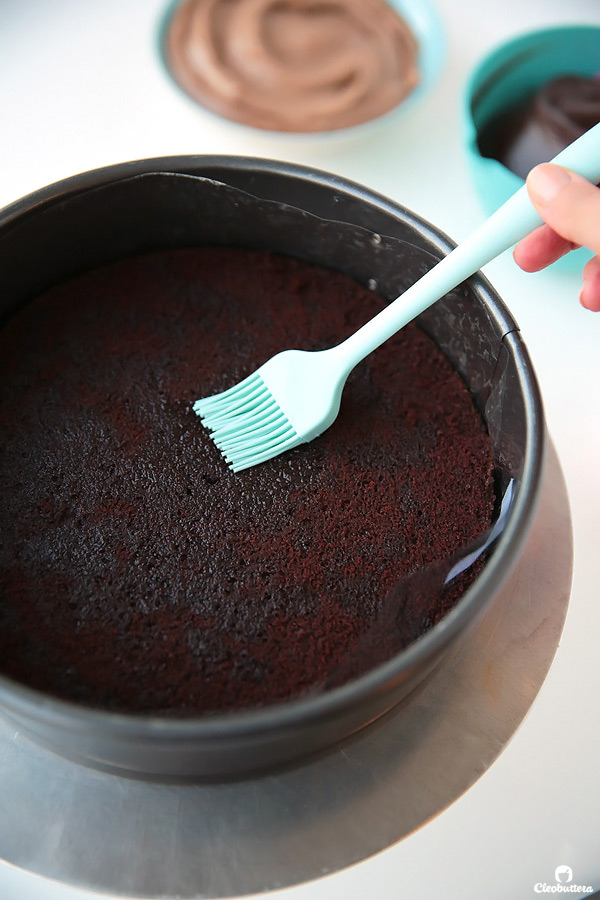
Give it a light soak of syrup…
Followed by a thin layer of chocolate pastry cream…
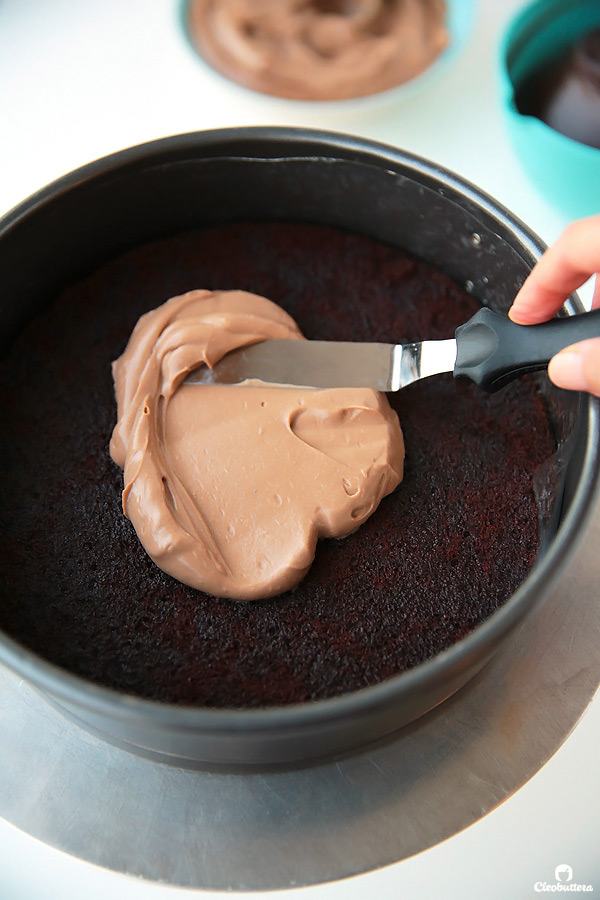
More cake, then soak (not pictured). Note that due to the fragile nature of the cake layers, it’s advised to use a round flat surface to transfer them into the ring. I use a cake lifter but a cake board does the job just as well.
![]()
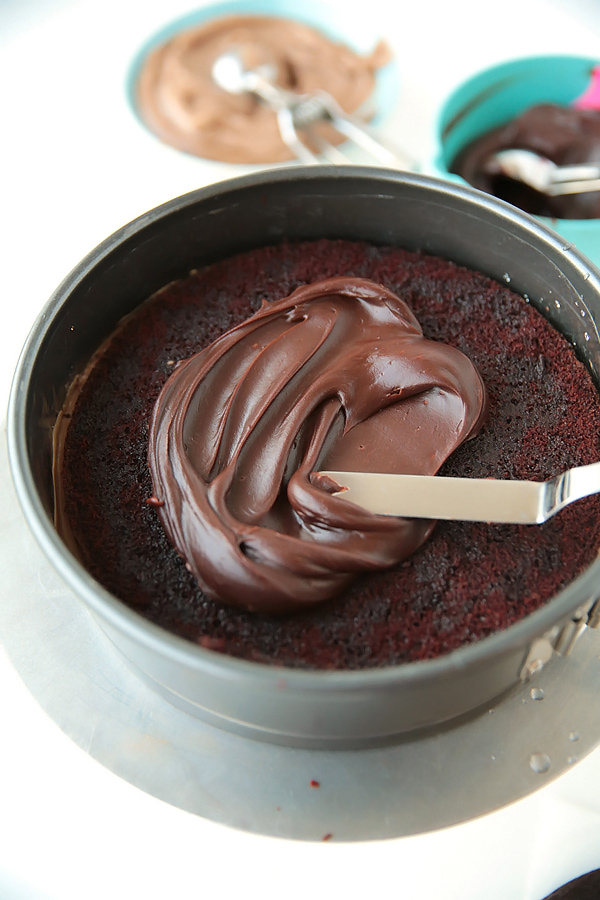
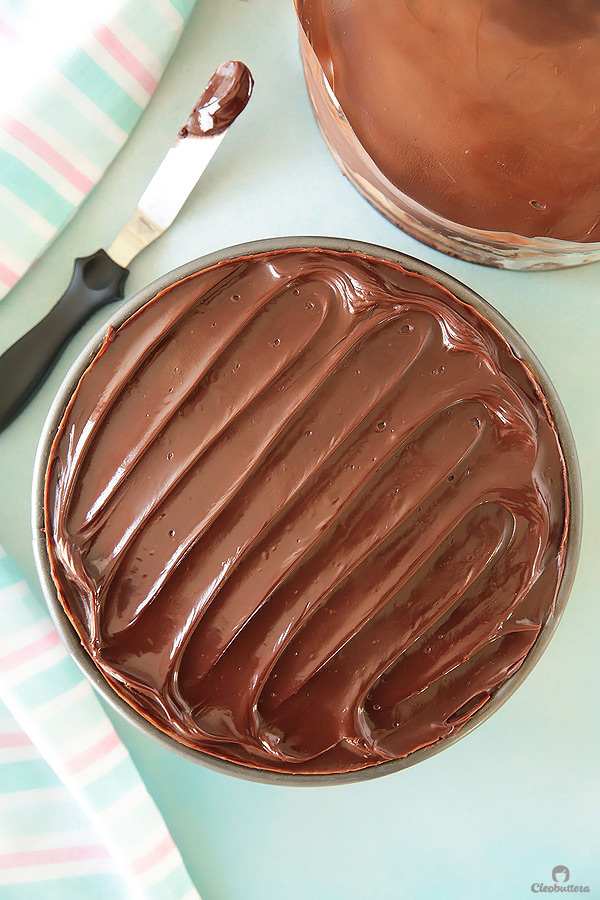
After that, comes a healthy slathering of the fudgy frosting.
You’re gonna keep repeating this layering process over and over until you end up with 2 separate cakes, each one comprised of 6 layers of cake and 6 layers of filling. Now choose the prettier one and play around with the last layer of frosting, because that’s gonna be the top that crowns your final cake. Now off to the freezer they go, to set everything in place.
When the cakes are nice and firm, you’ll get them out of the freezer, and stack the cake with the decorative swirls, on top of the smoothly frosted one. Carefully peel off the acetate.
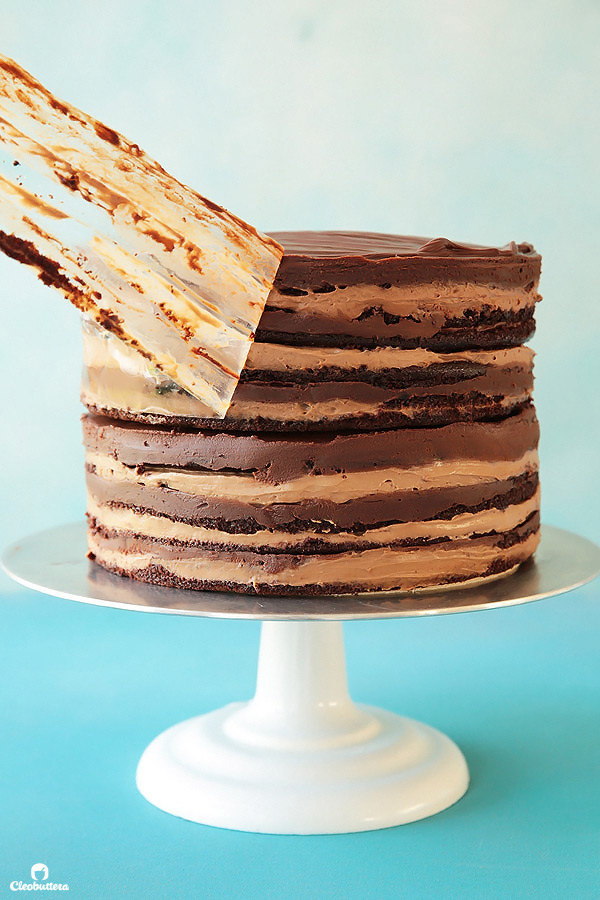
Take a moment to appreciate the different shades of chocolate, and contemplate whether you should leave it aux naturel like this and rock that trendy naked cake look, or…
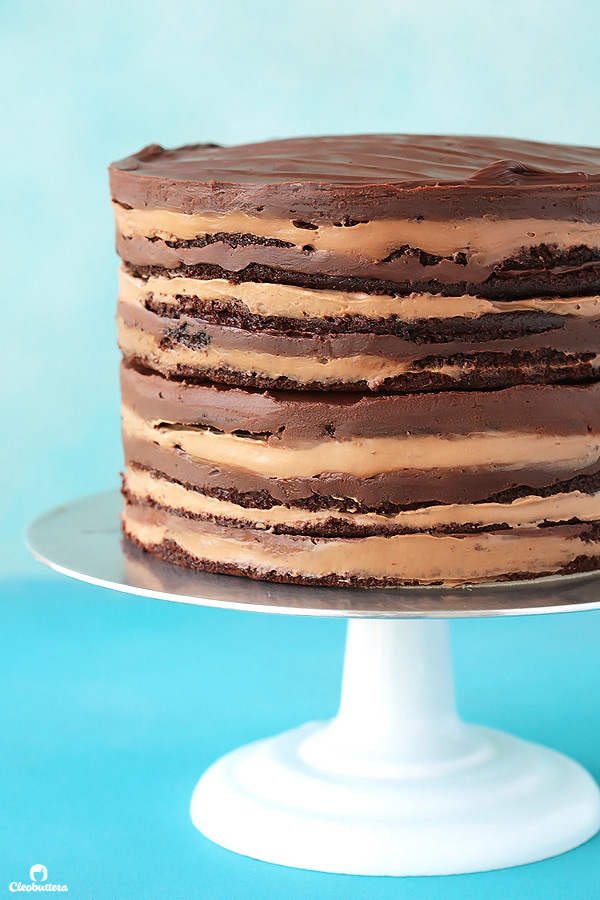
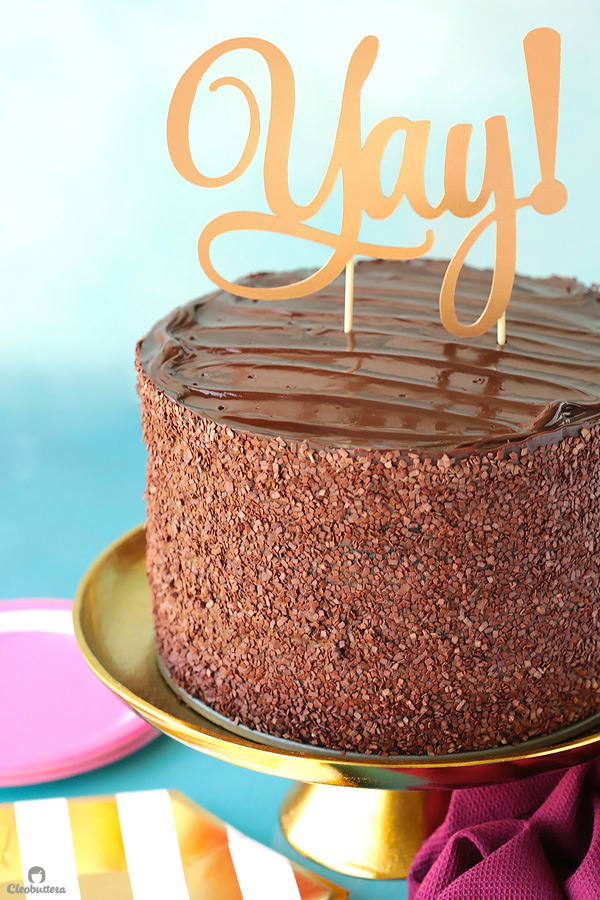
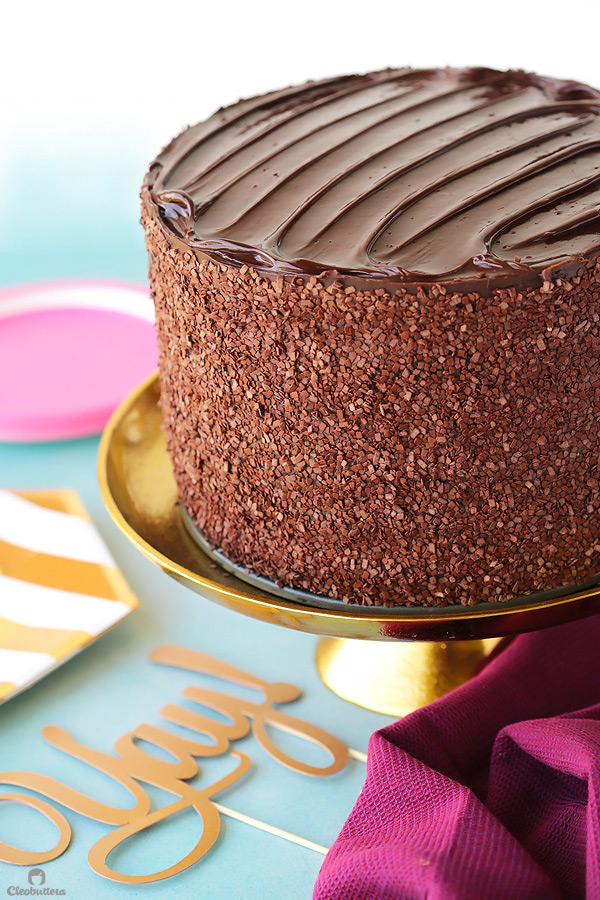
Go for a smooth finish.
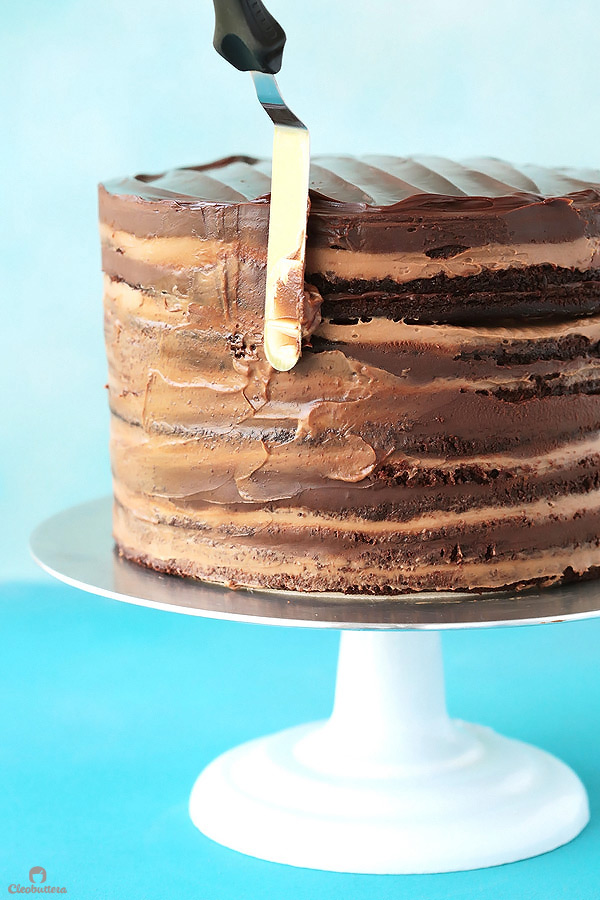
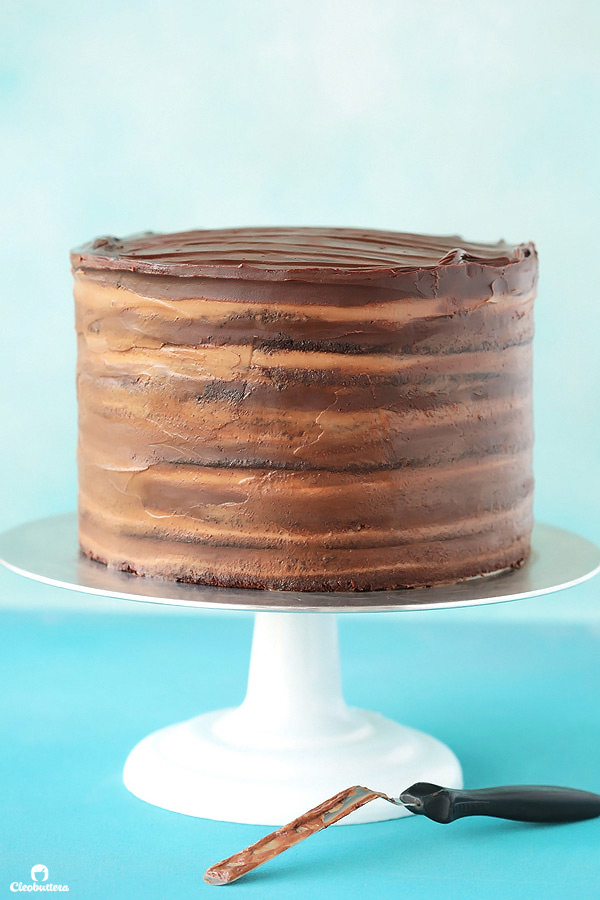
Smooth won it for me.
Then comes another big decision that you’ll have to make…shall you leave it like that, embrace its natural ombre/watercolor effect and maybe add a chocolate drip on top, or cover up the sides to add an element of surprise and make people wonder whats inside?
Cover it up it is! I opted for these chocolate flakes, aka French chocolate sprinkles that I love so much and had previously used on top of this cupcake and on the sides of these cupcakes. 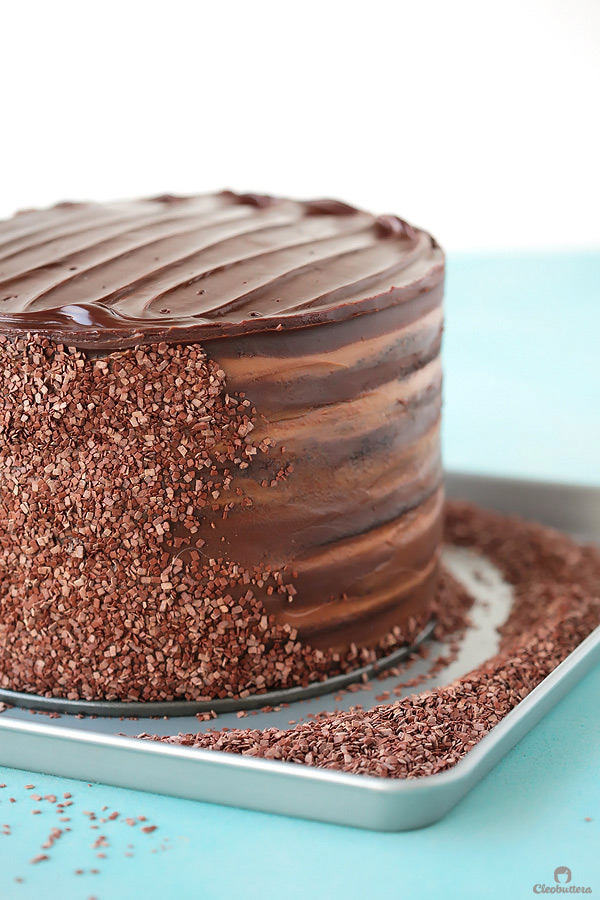
And there it is! My favorite chocolate on chocolate on chocolate cake!
Ready to be sliced into…
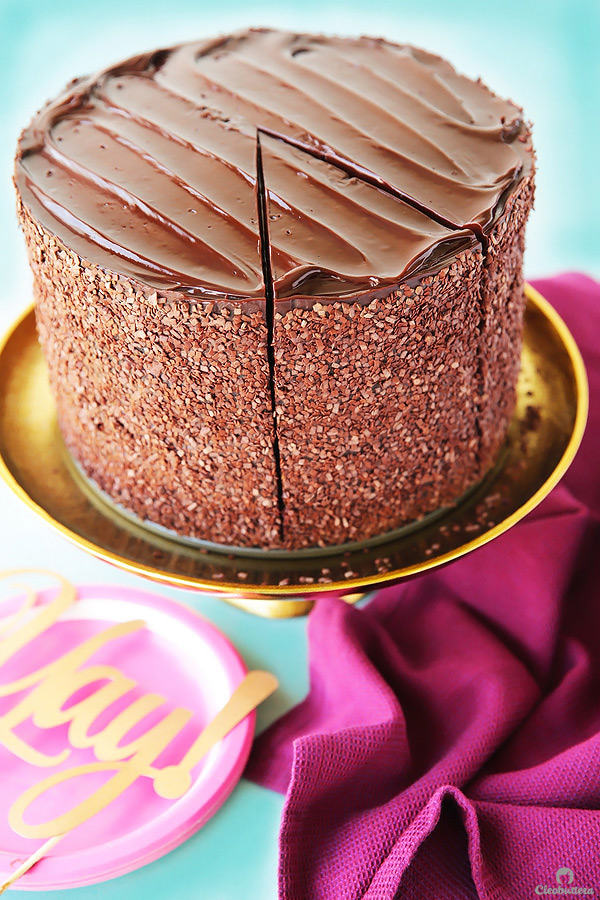
Stared at…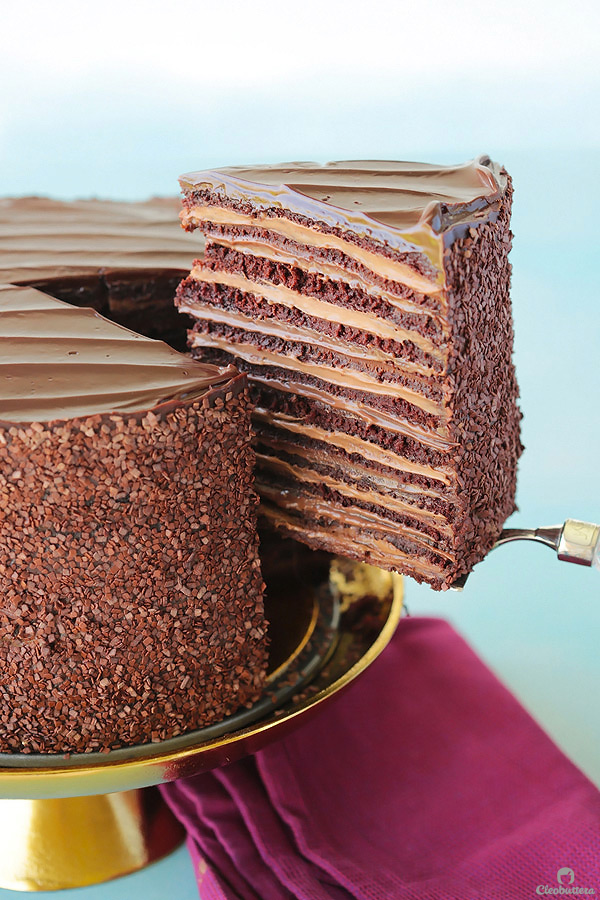
And make one chocolate cake lover, very very happy.
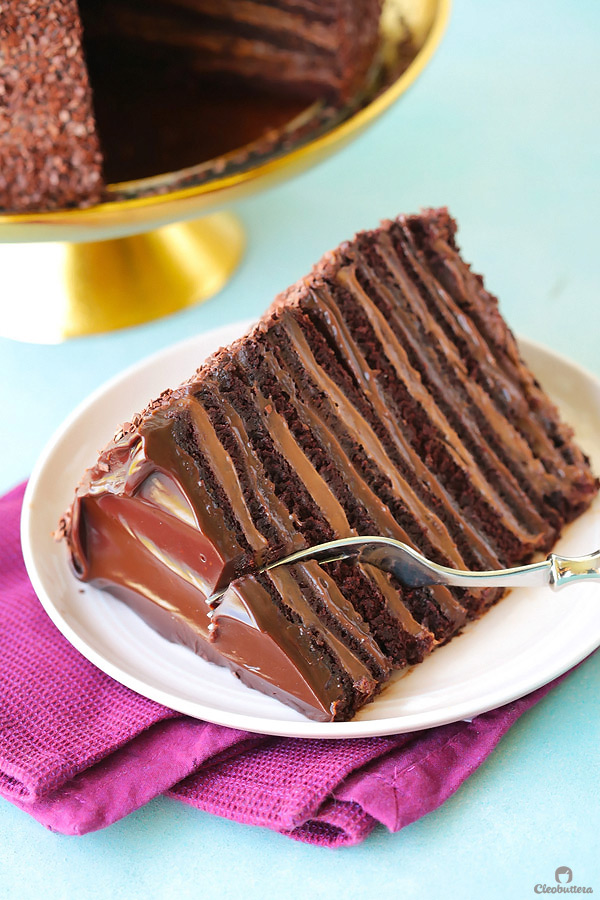
Except…that it actually feeds an army of chocolate cake lovers. Enlist me!
I hope you give this cake a try at least once, and not get intimidated by its several components and my long long instructions.
Until next time my dear friends…see you in 12 months!
Heheheeeee!
All joking aside…I promise to not disappear that long again. As I’ve opened up in this post, last year wasn’t all rainbows and cupcakes, but a lot of great things came out of it, including my deep appreciation to you, my family, my health and my life. I’m grateful for the opportunity to be able to come back here again, talk food with you and find you still eager to listen. You guys are the best for hanging in there and not giving up on me. And for that, I owe you a BIG thanks and a virtual hug.
As much as I’m excited to be back to blogging, I’m equally keen at doing it in a pace that will not take over my life the way it did before. With that said, I hope you continue to enjoy my future recipe posts in a frequency that can be best described as “relaxed.” I also hope that you stay as understanding as you’ve always been, if I go a little longer than expected without posting something new. As for me, I promise to make my sparingly spaced posts so special that it be will worth the wait, and give you only tried and true, obsessively tested recipes you could trust.
Lots of love and chocolate,
Tasbih
Epic 12 Layer Chocolate Cake
While not difficult to make, this is a multi-step, highly involved cake that requires planning ahead. Please read through the instructions and the notes in the bottom of the recipe before starting. Also check out this video to get a clearer vision of the assembly process before you begin. This is a HUGE cake that will feed a large crowd; to scale it down, please refer the notes in the bottom.
Ingredients
For the Chocolate Cake:
- 4 cups (500 grams) All-purpose flour
- 4 cups (800 grams) granulated sugar
- 2 cups (170 grams) unsweetened cocoa powder
- 4 teaspoons baking soda
- 2 teaspoons baking powder
- 2 teaspoons salt
- 5 large eggs, at room temperature
- 2 cups (452 grams) sour cream or Greek yogurt, at room temperature
- 2 2/3 cup water, at room temperature
- 2/3 cup neutral-tasting oil
- 4 teaspoons vanilla extract
For the Simple Syrup Soak:
- 1/2 cup (100 grams) granulated sugar
- 1/2 cup water
For the Chocolate Pastry Cream: (makes about 4 cups)
- 2 1/4 cup whole milk
- 3/4 cup heavy whipping cream
- 1/2 cup plus 3 tablespoons (137 grams) granulated sugar, divided
- 1/8 teaspoon salt
- 6 large egg yolks (freeze the whites for later use)
- 1/4 cup (32 grams) cornstarch
- 1/4 cup (57 grams) cold unsalted butter, cut into 4 pieces
- 4 ounces/ 114 grams finely chopped bittersweet chocolate (I used 66% dark chocolate callets)
- 1 teaspoon pure vanilla extract or 2 teaspoons imitation vanilla flavoring
For the Fudgy Frosting: (makes about 4 cups)
- 12 1/2 ounces/ 354 grams bittersweet or semisweet chocolate or a combination of both (I used 1/2 bittersweet, 1/2 semisweet)
- 1 1/4 cups heavy whipping cream
- 1 1/4 cups (250 grams) granulated sugar
- Heaping 1/4 teaspoon salt
- 1/2 cup plus 2 tablespoons (142 grams) unsalted butter, softened to room temperature
For Garnish: (Optional)
- Chocolate sprinkles, colored sprinkles, chocolate chips or chocolate curls/shavings
Instructions
For the Chocolate Cake: (Can be prepared several days in advance)
- Adjust oven rack to middle position and preheat the oven to 350F/180C. Spray (or grease) four 9-inch round cake pans with non-stick cooking spray, line with parchment paper, then spray (or grease and flour) the parchment and pans. If you don't have four 9-inch pans, use whatever amount you have and bake in intervals. You just want to end up with four equal cake layers. (*For more details on that, please refer to the NOTES below)
- In a very large bowl, sift together the flour, sugar, cocoa powder. baking soda, baking powder and salt.
- To the dry ingredients, add the eggs, sour cream, water, oil, vanilla extract and mix together using an electric mixer until well combined and smooth. Batter will be very thin.
- Divide the batter evenly among the prepared pans. A great way to do that, is to weigh the batter, and divide that number by the amount of pans used, which is 4 in the case of this recipe. Using a scale to measure, fill each pan with the resulted amount.
- Bake until the center of the cakes spring back when pressed lightly with your fingers and a toothpick inserted into the center of each cake comes out clean (a few moist crumbs attached are ok); about 25 minutes.
- Let the cakes cool in the pans on wire rack for 15 minutes. Invert cakes onto a cake board or plate and peel off parchment; reinvert cakes onto the wire rack. Allow to cool until slightly warm or at room temperature, then wrap in a double layer of plastic wrap and keep in the freezer until cold and firm but not frozen. This step is optional, but it makes the process of slicing the cakes into thin layers, cleaner and easier. Alternatively, you could keep the cakes in the freezer for up to several days. (*For make ahead details, please refer to the NOTES below)
- Meanwhile, make the other cake components.
For the Simple Syrup Soak: (can be prepared up to a week in advance)
- Combine the sugar and water in a small saucepan and heat over medium heat, stirring occasionally, until the sugar has dissolved; set aside to cool completely before using.
For the Chocolate Pastry Cream: (Can be prepared up to 2 days in advance)
- Heat the milk, heavy whipping cream, 1/2 cup (100 grams) of the sugar, and the salt in a medium heavy-bottomed saucepan over medium heat until simmering, stirring occasionally to dissolve the sugar.
- Meanwhile, whisk the egg yolks and the remaining 3 tablespoons (37 grams) of sugar in a medium bowl, until the sugar has begun to dissolve and the mixture is creamy, about 15 seconds. (IMPORTANT: Don't whisk the egg yolks and sugar together until the milk mixture is already heating, because if left together for too long, the sugar will start to cook the yolks). Whisk in the cornstarch vigorously until the mixture is pale yellow and thick, about 30 seconds.
- When the milk mixture reaches a full simmer, gradually whisk the simmering milk into the yolk mixture to temper. Don't do it too fast, or you'll risk cooking the eggs. Return the mixture to the saucepan, scraping the bowl with a rubber spatula. Return to a simmer over medium heat, whisking constantly, until a few bubbles burst on the surface and the mixture is thickened and glossy, about 30 seconds. Be careful not to cook the mixture beyond the point of a few bubbles or the mixture can start to curdle and the yolks may scramble...not fun! Turn off the heat, whisk in the butter, chocolate, and vanilla.
- Strain the pastry cream through a fine-mesh sieve set over a medium bowl. Press plastic wrap directly on the surface to prevent a skin from forming and refrigerate until cold and set, at least 3 hours or up to 2 days.
For the Fudgy Frosting: (can be prepared 1 day in advance)
- Place the chocolate in a large bowl. Heat cream, sugar, and salt in saucepan over medium-low heat, stirring occasionally, until sugar dissolves and mixture begins to simmer. It is very important to make sure that the sugar has dissolved completely, so you don't end up with a gritty frosting.
- Pour hot cream mixture over chocolate and whisk until smooth. Whisk in the butter until glossy. Cover and refrigerate until icing is firm but still spreadable, about 1 hour.
To Assemble the Cake:
- Since this mega cake is a 6-inch tall beast, it is best to treat it as 2 separate cakes that we'll later fuse into one; it will make for a sturdier construction that way. Check out this video to get the picture. Start by lining the bottom of a 9-inch cake ring or the ring of springform pan with a 9-inch round cake board. Line the inside of the ring with a strip of acetate or parchment paper. This will later help release the finished cake from the ring easily.
- If your cakes are domed, level them off by slicing away a thin layer from the top; you need the cakes to be as flat as possible. Using a serrated knife or cake leveler, as careful as you can, slice each of the 4 cakes into 3 layers of equal thickness, about 1cm each. You should end up with a total of 12 layers.
- Using a round cake board or cake lifter, transfer the bottom layer of one of the cakes inside the ring. Using a pastry brush, lightly brush the surface of the cake layer with the Simple Syrup Soak.
- Using an offset spatula or back of a spoon, spread a little over 1/2 cup of the Chocolate Pastry Cream evenly over the cake layer, all the way to the sides of the ring.
- Top with a second cake layer, then brush with the Simple Syrup Soak. Spread a little over 1/2 cup of the Fudgy Frosting evenly over the cake layer, all the way to the sides of the ring. Using up 2 of the 4 cakes, repeat, alternating layers of cake, Chocolate Pastry Cream, cake, Fudgy Frosting, brushing each cake layer with the Simple Syrup Soak. End with a smooth layer of Fudgy Frosting. You should now have 6 layers of cake and 6 layers of filling. Cover the cake loosely with plastic wrap and place in the freezer to set.
- Using another 9-inch cake ring or the ring of springform pan, repeat Steps 3 through 5, using the remaining 2 cakes and the remaining Chocolate Pastry Cream, Fudgy Frosting and Simple Syrup Soak. Top the final layer of cake, decoratively, with the last bit of Fudgy Frosting creating swoops and swirls, as this will be the top layer of the final cake. If you don't have an extra 9-inch cake ring (which I don't) carefully slide the first cake out of the ring, keeping the acetate intact, cover, freeze, and reuse the same ring to assemble the other cake.
- Freeze the 2 assembled base cakes until very firm and sturdy; 1 to 2 hours. You could even freeze it for several days (*For make ahead details, please refer to the NOTES below).
- Pop the cakes out of the cake ring(s). Gently peel off the acetate of the cake you plan to place on the bottom. Make sure the Fudgy Frosting topping on that cake, is soft enough to adhere to the top cake when placed on it. If its too cold and dry, warm through using a kitchen torch.
- Top the bottom base cake with the top base cake (the one with the pretty swirls on top). Don't forget to remove its cake board before you do! Peel off its acetate. Use an offset spatula to smooth out the sides of the cakes, fusing them together as you go, and scrapping off any excess and filling the gaps with it.
- Place the final cake on a rimmed baking sheet to catch any decoration fall outs. Cover the sides of the cake with the garnish of your choice. I used these Chocolate Flakes.
- Place the cake under a cake dome and allow to come to room temperature before serving. Timing will vary depending on how long the cake was left in the freezer. Serve at room temperature, or slightly warmed in the microwave. Leftovers will keep well chilled in the fridge in an airtight container.
Recipe Notes
Make Ahead Tips:
- It is highly recommended that you make the cake at least 1 day before serving, as it is time consuming and requires several chilling times.
- The finished cake will keep well in the fridge for 1 day under a cake dome, but leftovers will taste great for up to 3 days given that they're stored in an airtight container in the fridge. Bring to room temperature before serving or warm individual slices slightly in the microwave.
- The cake layers can be made up to several days in advance. Wrap in a double layer of plastic wrap, place in a freezer zipper-lock bag and store in the freezer until needed. Thaw slightly before slicing into thin layers.
- The filled and frosted cake bases, can also be made several days in advance and stored in the freezer until needed. Be sure to wrap them well in a double layer of plastic wrap and place in a freezer zipper-lock bag. Note that if you freeze them for that long, condensation many occur on the surface of the cake. Allow the condensation to take its time to evaporate, then dap whatever may be leftover with a smooth paper napkin.
Useful Tips:
- Don't need a cake that feeds an army? Cut the recipe in half and bake in four 6-inch pans. Alternatively, make a shorter (6-layer cake) version of the cake in the same 9-inch pans. Same delish taste. less work!
- 8-inch cake pans may also be used. It will actually slice easier because the layers are thicker, but know that your finished cake will be extra tall which may compromise stability.
- Don't have FOUR 9-inch pans, no problem! I only have TWO and make this work! To do that, weigh your batter, divide that number by 4 (which is the number of pans/layers we need). Place your first pan on the scale and fill up with batter using the amount you got on the calculator as a guide. Repeat with your second pan. Bake those 2 pans, cool slightly, invert cakes, wash and dry pans, grease and line with new parchment rounds, fill up with the remaining batter using the scale, then off to the oven they go.
- If available where you live, 3 cups of 'half-and-half' may be used instead of the heavy cream/ milk combination in the Chocolate Pastry Cream.
- Don't throw away those egg whites! Egg whites freeze beautifully and will come in handy in recipes that require egg whites only like this and this.
Cake idea inspired by Strip House's 24 Layer Cake
Cake recipe adapted from Pinch of Yum
Chocolate Pastry Cream recipe adapted from Cooks Illustrated
Fudgy Frosting recipe adapted from Cooks Country
'YAY!' Cake Topper from Favorite Things by Aya Assaf
Measurements Note: All recipes of this site have been developed using weight measurements. Although US volume measurements have been included for your convenience, it is highly encouraged that you weigh your ingredients using a kitchen scale to get the best possible results. Due to the sensitive nature of baking, kitchen scales are proven to yield more accurate and consistent results than measuring cups. Enjoy!
Powered by ![]()
This post may contain affiliate links.
All images and content are owned by Cleobuttera® and are copyright protected. Please do not use my images without prior permission. If you would like to republish a recipe, please rewrite it in your own words and link back to the recipe page on my site. Original recipes and creations of this site are intended for personal and home use. Commercial replication or media consumption are only allowed with a written consent and agreement with Cleobuttera owners. Otherwise it is considered a violation of intellectual property. Thank you for respecting and appreciating the amount of time and effort that goes into creating free, unique recipes that make people happy.


So happy to read your latest article: welcome back!!!
You spoil us with such a decadent dessert 😀
Thanks a million for the detailed recipe, tips and amazing pictures.
Thank you Maha SO MUCH! I hope you enjoy this recipe as much as we did.
my pastry cream didn’t set up it’s still runny after 24 hrs. ?
Hi Mike! Did it come to a boil as you were cooking it? Cornstarch will only be activated & do its thickening job by reaching a boil & popping a few bubbles.
i think i shut it off too early ,afraid of chocolate eggs, but i reheated it today for the heck of it and it seemed to thicken up will know tomorrow.as long as i didn’t scorch it
Hi making it for Thanksgiving here in the United States ,I will let you know how it turns out thanks again Mike
I hope it came out wonderful!
Welcome back!! This sounds DELICIOUSSSSSS!! Will try the half recipe veryyyy sooon!!
Thank you Sara! I can’t recommend making this cake enough. And yes! half the recipe is more than enough. Although when I made the full one, it disappeared in a matter of 2 days ?
AsSalaamu Alaikum. So good to see you are back. I have been following your Instagram feeds and was so excited when you finally put up this post. I was doing a happy dance in my mind:) All the best! Barak Allahu feeki.
Waalaikom Alsalam Shakirah. Thank you so much for this very festive welcome ?
O gosh! Please parcel a slice to Alexandria for me I’m drooling over here!!
Forget it! I’m gonna use this as bait to get you to visit me in Cairo ?
Welcome back, dear friend! The cake looks phenomenal and yes, well worth the wait. I appreciate all of the effort you put into your posts and the obsessive testing component that goes along with it. As I write this, I’ve just taken the 8th trial of a cake out of the oven! At this rate, it might get pushed off for yet another year as the season for it passes by
🙁 Your beautiful photography style is always a treat for hungry eyes. I hope you enjoy your return and keep the stress level low and in control. I like the phrase, “relaxed pace.” I know whatever pace they come in, your posts will always be worth the wait.
Ramona your sweet and kind comments never fail to put a huge smile on my face. Thank you for always staying in touch, your continuous support and being my favorite blogging buddy to vent with.
I know what you’re going through…batches after batches of less than perfect cakes are not fun! I’ve been postponing red velvet, yellow cakes and basbousa (Egyptian semolina cake) for these same reasons. It’s really your dedicated testing that makes your blog, one of the most reliable baking sources out there, so keep up the obsessiveness. Wishing you best of luck with your beautiful blog and life.
One of my favourite cakes !! Only had it once at a bakery in the US but never thought I will be able to make one !! Thank you for the recipe. I am sure it will taste a million times better than a store bought one . So happy you are back . Good luck ❤️
Thank you dearest Mona! It’s so cool that you had a chance to try the real deal. Do you remember the name of the bakery? I had to imagine the flavor and textures to be able to come up with a homemade version but I’m so happy with how it turned out.
Just beautiful!!! And your photography is stunning!..Cant wait to attempt it!! 🙂
Thank you so much Nasimah for your kind compliments. I can’t wait to know how it turned out with you!
looooooove the post and i’m sooo glad you are back <3
Thank you so much dear Lubna!
Marhaba!!
I don’t speak enough arbic to write how amazing this cake looks. Every single second waiting for your recipes was worth it, for sure. This cake is definately the KING of cakes. I hope one day I can make it, and i’m so glad you found your balance!!!
Look who’s Arabic is shining! That’s so amazing LaVerne! Thank you so much for your great comment and for hanging in there as I fell off of the cyber world. Can’t wait to see your take on this cake!
So good to have you back! and congratulations on the droll worthy chocolate cake post. Will definitely give it a try.
cheers from Malaysia
So amazing to be getting comments from all over the world and Malaysia in particular is a place I’m itching to visit. Thank you so much for your welcome.
I must say this is THE best, most moist, most chocolatey cake I have ever tasted! I still can’t get over it! Lucky for me though I get to taste it from the one and only Cleobuttera herself ? but it’s so sooo soooo worth the time and effort for anyone planning to give it a try! We literally stuffed our face in it! It’s sooooo moist I can never explain it, it’s a must try!
Hahahaaaa Hala wish I could share with everyone the video you sent me of you and your family stuffing your face in it ? That video made my day and was the seal of approval that this cake is blogworthy. Thank you for being my lab rat.
This cake is PERFECTION. It is literally the BEST chocolate cake that my taste buds were lucky enough to try. Usually, anything sweet is pretty nice for the first minute of indulging but then it’s followed by a sugar overdose and mixed feelings. This cake on the other hand is the perfect balance of sweetness and happiness!! I can keep on going at these twelve layers of heaven forever. It’s sweet, choclatey and moist but just enough of each to keep you drooling for more. This recipe is definitely a MUST TRY!!
Noor I’m not as good of a writer as you are, so girl I’m so tempted to copy your comment and paste it to the post, because nothing describes this cake any better. Thank you so much for your eloquent description and sweet comment, and for that my dear niece, I shall reward you with more bakes to taste test for me. So pumped you enjoyed this one!
Finally you are back ? this cake looks amazing, I will definitely give it a try.
I have a question, do you know where can I get chocolate callets and good quality baking chocolate from Egypt ?
Thank you Aya! It’s a difficult thing I know! I actually get mine in bulk from a bakery supplier. If you’re interested, please send me an email and I’ll pass over their contacts.
…And she’s back with a bang (and a glorious, glorious 12 layer chocolate cake)
Looks amazing! Question–if I wanted to make a truly dark chocolate version, what changes would you recommend?
Great question! I usually get the opposite? People are so afraid of dark chocolate, so I really appreciate it when I find someone who loves it as much as I do.
To give it a dark chocolate kick I’d do the following:
1) For the cake layers, use the darkest cocoa you could find.
2) For the pastry cream & fudgy frosting, go with at least 70% cocoa chocolate. The higher the percentage, the darker it will taste.
3) Enjoy!
Welcome back Tasbih! I’m so happy that you’re finally back to bless us all with your delicious creations. This looks absolutely stunning, and well worth the wait. Thank you for all the effort you put into your posts and recipes. It’s definitely reflected in the outcome. Simply flawless recipes that cannot be faulted. I cannot wait to try what you have in store for us.
Thank you Mariam so much! It’s always so special whenever I get one of your sweet comments. They always make my day. Can’t wait to see the wonderful twist you always add on your creations.
This chocolate cake will make me cry from its beauty
Hahahaaaa ? Noooooo my intention is the complete opposite. It’s meant to make you smile with every bite ?
Tasbih,
I wasn’t going to send in a comment since you’ve probably received many already but my heart wouldn’t let me do that. Because the truth is, I’ve missed you terribly. You and your writing style and your recipes have been an integral part of my household that I felt that it would be a betrayal of sort, to not tell you how glad I am that you’re okay and that lhamdillah you’re doing better now. God always has mercy on us. Looking forward to seeing you around these parts again and I will most definitely be making this chocolate monster soon xx
Jinan your comment is so touching. I really don’t know how to thank you or say to such kindness. You are a sweet lady with a beautiful heart & every word you means the world to me ?
Hi Tasbih,
I want to cut the recipe in half and I will be baking it in an 8 inch pan. How do I reduce the 5 eggs (for the chocolate cake) in half?
Hi Manali! I use 2 and 1/2 eggs. To measure 1/2 of an egg, crack 1 egg in a bowl, whisk it really well with a fork, then take half of it which is 25g. You can save the other 1/2 in the fridge for another use like omelettes for breakfast 🙂
oh nice!!! thanks 🙂 will let you know how it turns out!!!! *super excited already*
So I baked it over the weekend and everybody loved it!!! I had baked it for someone special and it was a big hit.
However, I know what happened “behind the scenes”
1. The cake sank after taking it out of the oven. It had a beautiful dome when in the oven, but a minute after taking it out, the centre sank by a few centimetres. So I had to slice out an ‘inverted dome’ from the top.
2. The cake was super moist. I refrigerated it overnight before slicing. But it still was very moist, because of which the frostings got absorbed and the layers did not appear distinctly.
3. The pastry cream tasted awesome but it turned out to be runny, like a syrup. I tried to thicken it with corn starch and icing sugar but it did not work.
Can you help me out please?
Hi Manali! So happy to hear it was such a hit despite the issues you ran into. Ok it sounds from your description that the cake was underbaked. If a cake doesn’t not get a chance to fully cook, it will sink shortly after it comes out of the oven. It will also, like you said, come out overly moist, almost sticky. Did you check for doneness with a toothpick in the center?
Regarding the pastry cream, I think it just needed to cook longer on the stove. Did the mixture come to a boil? As the cornstarch will only activate after the mixture has reached a full boil. Also may I please know how you measure your ingredients? I always strongly recommend using a kitchen scale as opposed to measuring cups, as it will give you the best and most consistent results. Wishing you much better results next time 🙂
Hi Tasbih,
Thanks for replying 🙂
I had checked for doneness with a toothpick and it did come out clean with a few moist crumbs. But i guess i will try baking it for a couple of extra minutes.
I stopped the heating when the milk and cream started creating a fuzzing sound.
I measured the ingredients with a kitchen scale.
Okay so I guess i’m gonna give it one more shot! Will let you know how that turns out 🙂
So last week was my birthday and I decided I was going to make my own cake this year – that way I knew I’d get exactly what I wanted. I knew right away what I was going to make since I have had this page and recipe book marked forever. OH BOY!!! What a heavenly chocolaty sinful moist delicious cake (yes I said moist ?) This recipe did not disappoint. It’s probably THE best cake I have ever made. Thanks for sharing the recipe and I know for a fact I will be making this again and again ?❤️
Jeanette your feedback means so much to me. Thank you so much for sharing your wonderful experience with this cake and happy belated birthday! I always bake my own birthday cake too; no shame lol! If anything, it shows how determined we are to get what we want. So happy this cake was a part of your birthday celebration!
i ve tried it today, was perfect and your instructions also perfect, proffesional! thank you!
So wonderful to hear that it came out really well! Thanks for your sweet comment Alexandra ?
Hi!
I LOVE this recipe. Comes out like a charm each time! I ran out of sour cream the last time, and I substituted with regular yogurt and a smidgeon of apple cider vinegar; the results? Pretty great as well!
But I prefer the dense creaminess offered by the sour cream 😉
Buttttt…. I have a small question: does this cake qualify as a chocolate mud cake? It feels so much more moist than the regular fluffy Chocolate cakes….. was just wondering!
Thanks!
Plus ai would love to share a picture of a cake I made with this cake, by pairing it with a ukrainian honey biscuit cake… but I can’t seem to figure out how to post images on these comments?
Thanks!
So amazing to get such a wonderful feedback from you Mihiri! It’s great to know that regular yogurt works just as well as sour cream. I believe you’re right; it’s more of a mud cake because all the fudginess & moistness going on. This is definitely not a typical fluffy layer cake. Although I love that too ?
Amazing Cake!! I am going to try this next week. Can this cake possible be covered with fondant for a themed event?
Thank you Aya! I hope you love it.
I wouldn’t recommend covering it in fondant. The multiple layers of fillings can make it a bit slippery & unstable. Fondant works best with cakes that are very sturdy & don’t have a lot of filling, so it can stay out.
Hi Tasbih,
Do you have any eggless version of this cake? I love this cake so much and I don’t wanna try any other eggless recipe. So is there any way to convert this recipe into eggless?
Hi Manali! Unfortunately, I haven’t try an eggless version of this cake. I found this great post/video about substituting eggs in baking, that you might find helpful. Here it is: https://www.biggerbolderbaking.com/egg-substitutes-for-baking/
Thanks Tasbih, will give it a try 🙂
It worked!!!!! i used buttermilk as a substitute and increased the baking soda a tad bit, and it came out perfectly! Thank you so so much 😀
That’s such great news Manali! So happy it worked!
Pingback: Application Architecture explained in a way your Mom will understand - Coiner Blog
I’m trying to make this cake but in the process of preparing the chocolate pastry cream I can not find at what point I should place the chocolate, help please
Hi Karla ? As mentioned in the last sentence of Step 3 in ‘to make chocolate pastry cream’:
The chocolate goes in, off heat, along with the butter and vanilla, after the pastry cream has cooked & thickened. Hope that helps!
Hello Tasbih,
Quick question:
I am also confused regarding adding the chocolate into the pastry cream. Is it expected to just melt because of the existing heat? Or should the chocolate be melted over a waterbath first then added to the pastry cream? I would really appreciate if you could clarify. I am worried about potential lumps/partially molten chocolate with hard bits.
Also just wondering, what is the effect of adding cream to the pastry cream mixture? I have seen Pastry cream mostly made with whole milk only. Whipping cream is usually added towards the end to make a Diplomat cream as opposed to a simple Pastry cream. Would like to know your point of view/experience.
Thank you for a wonderful recipe. Can’t wait to try it!
Hi Nabila! The residual heat of the pastry cream will melt the chocolate. So no need to melt it beforehand. Just make sure it’s finely chopped so it can melt easily & quickly.
Whipping cream here is simply added for for a richer taste and a more luxurious mouthfeel, you can substitute it with milk if you prefer a leaner pastry cream, but I personally think it’s perfect the way it is. Contrary to diplomat cream, the cream added here is in its liquid (not whipped) state. Hope you love it when you do get a chance to make it ?
Pingback: Täglich perfektionierter Orangenkuchen | Cleobuttera – Super Bilder
Heey,
Attempting this cake tomorrow. What can I do to replace the top most layer with white frosting?
Any good recipe for it to match the chocolate goodness?
BTW ur my to go blog for desserts. The Egyptian community in Austria loves ur recopies and appreciate it very much
Oh that’s so lovely to hear Nada! Please give them my best regards.
I think a smooth-as-silk Swiss or Italian meringue buttercream would work beautifully here and is not too sweet. I have an Italian one here, but it’s a chocolate version. If you simply omit the melted chocolate, it will be the perfect vanilla frosting.
This cake is on my ‘must do’ list. Just wondering, would it work to have thicker layers of cake? It seems to be thinly sliced and I am just concerned that I won’t be able to work with it without breaking in pieces? Or is it relatively easy to lift it? Thanks!
Hi Susan! The cake layers are a bit delicate to move around, but with the help of a cake lifter or the removable bottom of a tart pan, they are less likely to break. You can make the cake layers thicker if you prefer, by using smaller pans to bake in or just cut less layers out each cake; say 8 instead of 12.
Can someone please tell me what is heavy whipping cream? Is it fresh cream, pouring cream, Nestle cream or what?
Thanks
Hi Muslimah! It’s the liquid cream which can be whipped; fat content should be around 35%. I’m assuming that if you live in the Gulf, then that would be called Fresh Cream. Definitely NOT the Nestle/Puck canned cream.
I’m so amazing at what I saw on your blog,was searching for a nice site where I can get chocolate cake for my cousin’s wedding. Your chocolate cakes looks.
attractive and adorable. I will like to you to bake a cake for my cousin’s wedding that is coming up next month.
I’m so flattered that you like my blog and this cake in particular Teegal! So sorry for the misunderstanding but I don’t actually sell my bakes. I share my recipes to help give readers the confidence to try them at home. I hope you give a shot! Please let me know if there’s anything else that you need help with.
What’s the difference between semi-sweet and bittersweet chocolate? Can you give me the brands which you used?
I’m not sure if my pans are as deep/the depth is same as yours. How do I measure?
What do I use in replacement of a cake leveller as I don’t have one?
I really, really want to try this cake, but I’m quite nervous as well? Is the assembling part difficult?
Hi Summer! Semisweet chocolate has a cocoa percentage of around 50-55%, while bittersweet is usually between 60-75%. So basically semisweet chocolate is sweeter than bittersweet. The higher the cocoa percentage, the less sweet the chocolate is. I used either Lindt cooking chocolate or Callebaut.
If you don’t have a cake leveler, you can use a serrated knife to cut through the layers, and maybe use a ruler to measure the distance between each layer, so they come out with even thickness.
I personally don’t find the assembly difficult, and I don’t think you’ll find it too as using the cake rings really help contain things and make it stable. Wishing you the best of luck!
Attachment
Made this cake and it turned out amazing. It was the first cake that I have ever made that that didn’t come from a box!!! I didn’t need such a big or elaborate cake this time around, so i made a couple of changes, so I opted for a 4 layer- 8″ cake. I did this by cutting the recipe in half.
It looks so beautiful Crystal! I love how you’ve improvised to fit your needs. I’m so happy you liked it so much ?
Absolutely amazing ! I made it for my son’s 18th birthday and it was a huge hit! Thank you!!!
So glad it was such a hit Dominique ? Thank you for your wonderful feedback!
I made this fabulous cake for a dear friend’s 100th birthday party. It is truly the most delicious cake I have EVER tasted (by far!!) Thanks for this very special recipe for a very special occasion! Mums the woud, but I’m doing the smaller version for my daughter’s surprise birthday dinner. I’m going to attempt to adjust the recipe to be gluten free. I’ve had success with some Southern Living recipes adaptations, so wish me luck.
Oh WOW! That’s so amazing to hear! Happiest 100th to your friend ? The people around you are lucky to have you in their lives because this cake is one heck of a project ? I’m really glad you loved this cake so much and found worth the effort. Happy early birthday for your daughter!
Good day! I am not a rich guy but like to travel a lot with my friends, and want to see all the beauty of the nature. Our last visit were in Berlin. There are beautiful places and nice truly people. But, are you searching for writing company to buy homeworks online? Worry no more and ask writers for assistance. Our authors will finish your essay papers in the proper format and structure the assignments well according to your college guidelines. If you would like to get more needful info, simply click on this webpage.
Hello,
Can I use icing sugar instead of granulated sugar in the fudge sauce. It does not dissolve easily. Will it give me the same result. Thanks
Pingback: 24 Layer Chocolate Cake Recipe - 24 Layer Chocolate Cake | Chocolate Cake Recipe Topped ...
Hello
Please can I divide the chocolate fudge frosting into 2?
Thank you