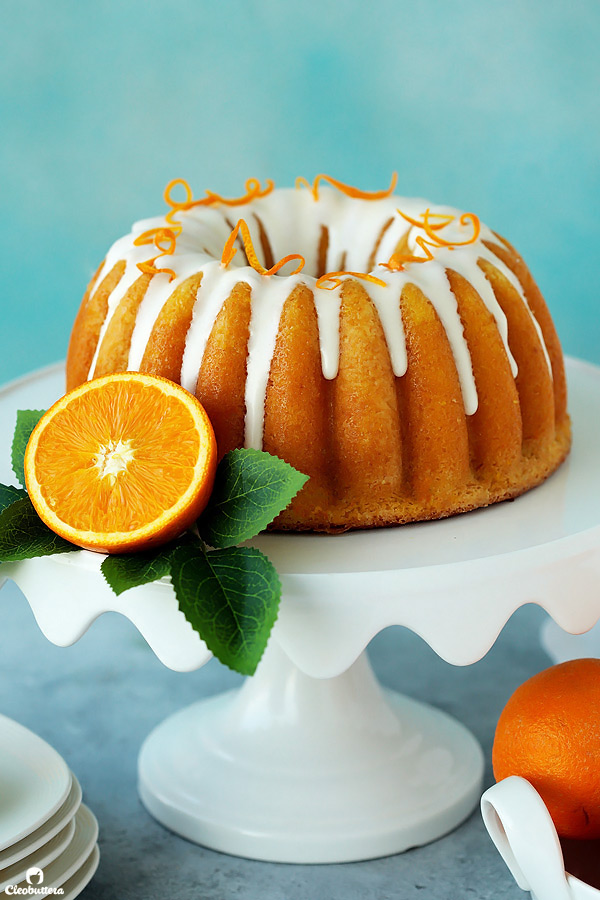
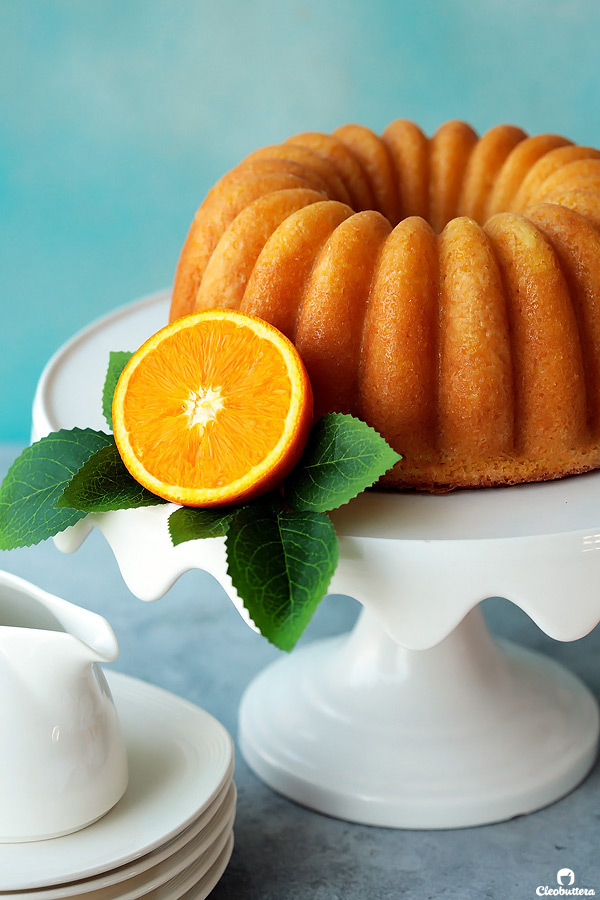
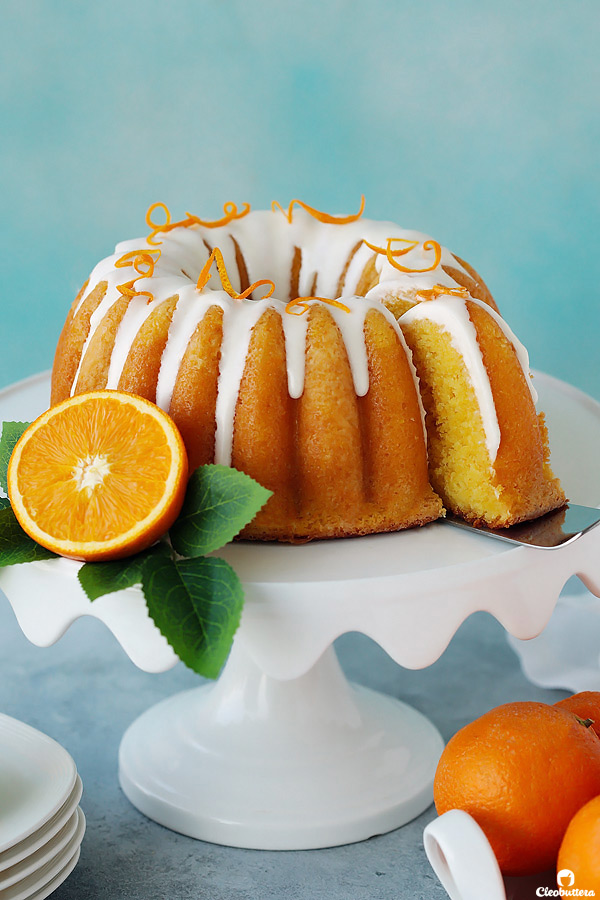
Perfected Everyday Orange Cake
Soft and fluffy orange cake with a tender crumb, melt-in-the-mouth texture, and bright orange flavor. Leave it plain for a simple, everyday snack, or drizzle with cream cheese glaze to turn it into dessert.
This cake recipe was purely developed for YOU, with no interest in it for myself.
That is…until I tasted it.
Amidst my usual cravings for chocolate, caramel, peanut butter, cinnamon, lemon and more chocolate, there has barely been any room for orange flavored things. So naturally, I’ve never been intrigued to bake with it.
But a lot of you guys have been asking if I’ve got a solid orange cake recipe up my sleeve and I just hated giving ‘no’ for an answer. Others were curious, if they could substitute the lemon in this much-loved Lemony Lemon Cake with orange and I honestly wasn’t sure.
But it wasn’t until a sweet reader DMed me on Instagram and made me promise to come up with “a simple, everyday orange cake, like the ones we grew up eating…but better” that triggered my buttons. I’m a sucker for nostalgia…what can I say. AND! a good challenge.
The thing is though…I think we were the only Egyptian household that never had orange cake laying around its counter. My mom was all for making marble cake on a weekly basis, which I think is the reason behind why chocolate runs in my veins. Orange cake on the other had…never made an appearance.
The orange cakes I’ve sampled at my friends’ and cousins’ houses were actually quite nice in flavor, and had a down-to-earth simplicity to them that made them an easy-going, everyday snack. Plain and unadorned, perhaps with just a light dusting of powdered sugar, it was ready to greet impromptu guests who dropped by and treat kids after a long day at school. The orange flavor in this type of nostalgic cake is not overpowering, and has a pleasant scent of vanilla which I love, but it was the texture that I remember was off-putting. The crumb being coarse and not as moist as we’ve come to love cakes, is probably why I was never interested in making orange cake.
But now that I am…I knew I wanted to build on the familiarly good flavor, and give the texture the makeover it deserves.
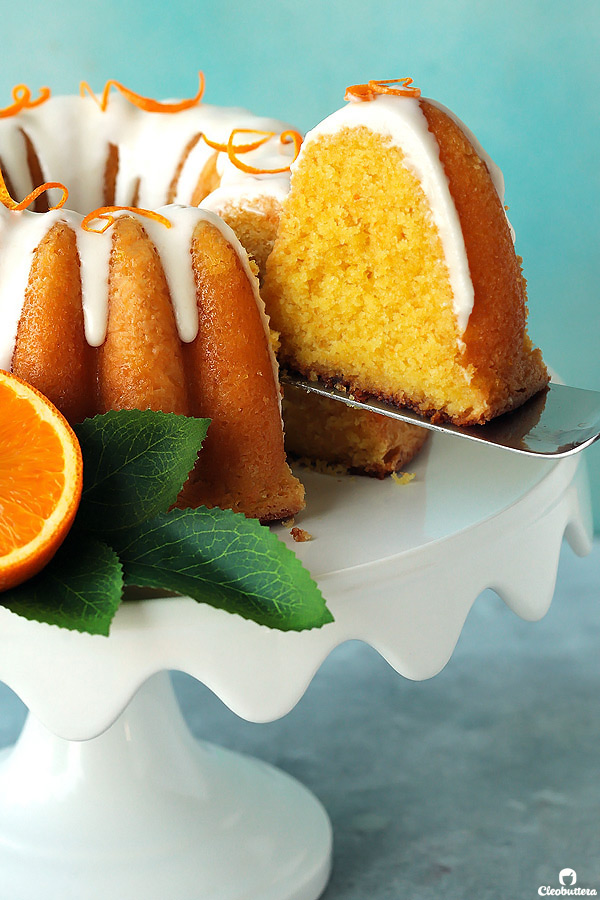
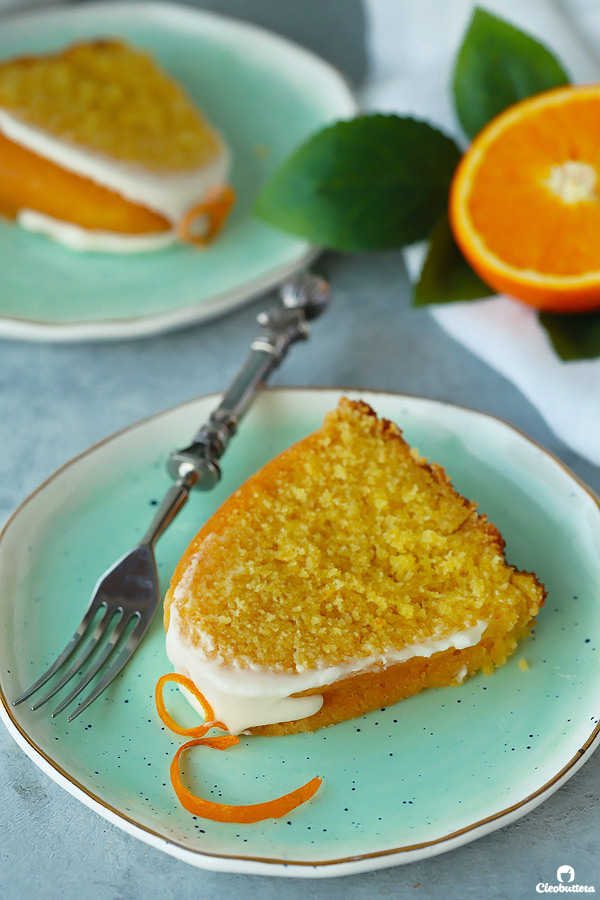
THE RESULT: A super soft and fluffy cake with a tight, but tender crumb, melt-in-the-mouth texture, a bright orange flavor with a perfect balance between sweet and zesty, that is just as good glazed, as it is left plain.
It is everything I had hoped for and more. I was literally moaning the first time I took a bite of it. It’s that good!
Simple, soft, tender, fluffy, flavorful and slices like butter. A serious upgrade from the orange cakes we grew up on.
And have I mentioned that it’s mmmmmmmmmoist?! That dreaded word that a lot of people hate. Sorry guys, but there’s no better way to describe it.
Now let me show you the ins and outs of this cake and what makes it one of the best orange cake recipes you’ll likely find on the internet.
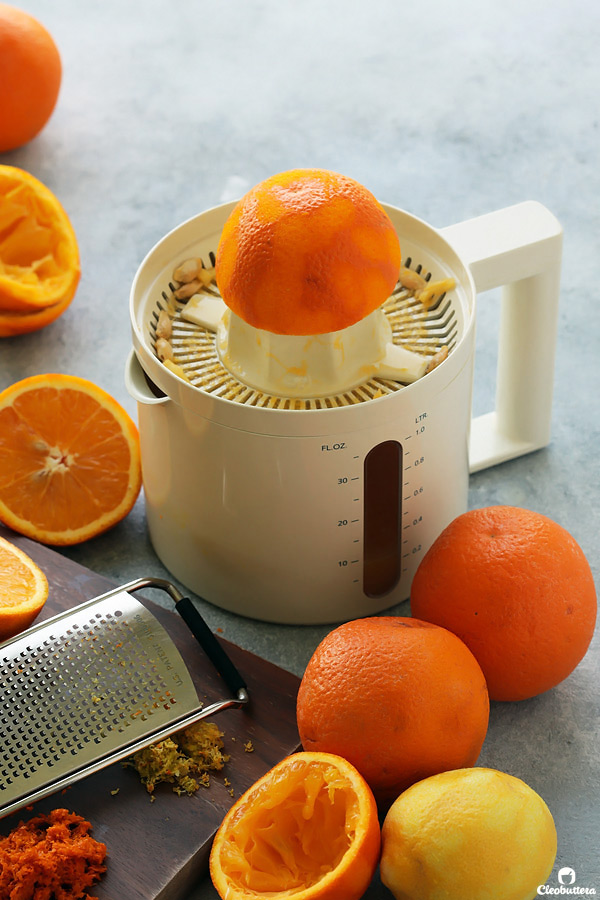
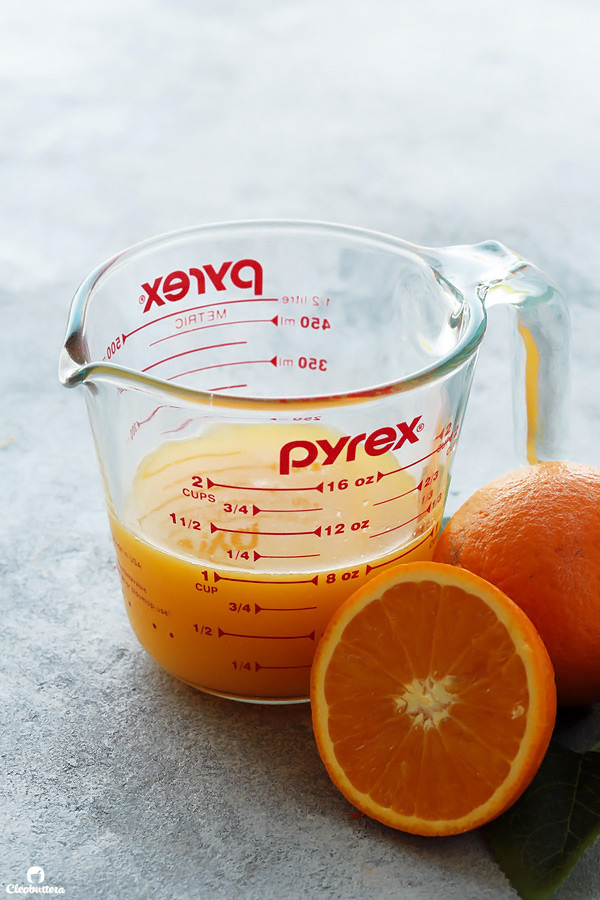
For an assertive orange flavor that shines beautifully into the cake, we’re going to be using both the zest and juice of fresh oranges. But that’s not only it! We’ll also be adding a tiny bit of lemon zest, which adds another dimension of citrus. I’ve found that orange zest alone, yields sort of a flat, one-dimensional citric note, while lemon brightens things up without making the cake taste lemon-y.
When zesting your fruit, make sure to only get the orange (or yellow) part and avoid the white layer which tastes very bitter.
I tried making this cake with oil as opposed to butter, as per traditional recipes, but the flavor was just…’blah’ for the lack of a better word. Due to the neutrality of oil, the cake tasted of nothing but orange and lacked interest and depth. So I quickly knew that butter was inevitable for the sake of flavor. It adds rich, buttery notes that nicely compliments the citrus ones. And do I really need to convince you that butter tastes better than oil?!
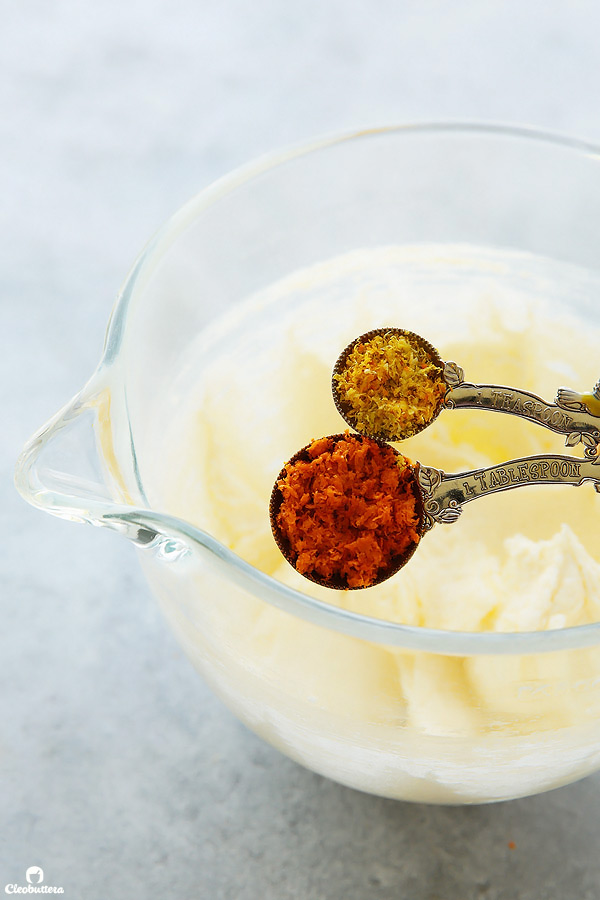
So we start the cake by creaming together the butter and sugar along with the 2 zests to release their flavor oils.
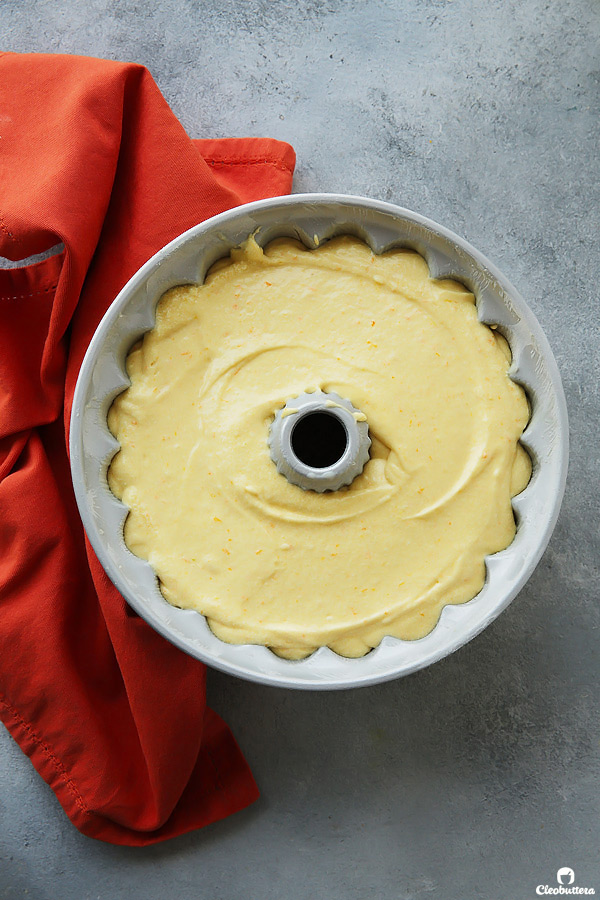
(Note: I doubled the batter here to fill this pretty 10-cup bundt pan, so you’ll notice that some of the amounts in the pictures, are more than those mentioned in the recipe. Sorry for the confusion. I later found out that the result of the doubled recipe turned denser than the original recipe I was testing with. For that reason, I don’t recommend doubling the recipe, unless you prefer dense cakes.)
After mixing in the eggs, comes my favorite cake moisturizing ingredient of all time: sour cream. I use it in most of my cake recipes and that is due to its magical ability to give unparalleled moisture and tenderness to cake, while adding a tangy flavor that offsets the sweetness. I just love what it does to cake.
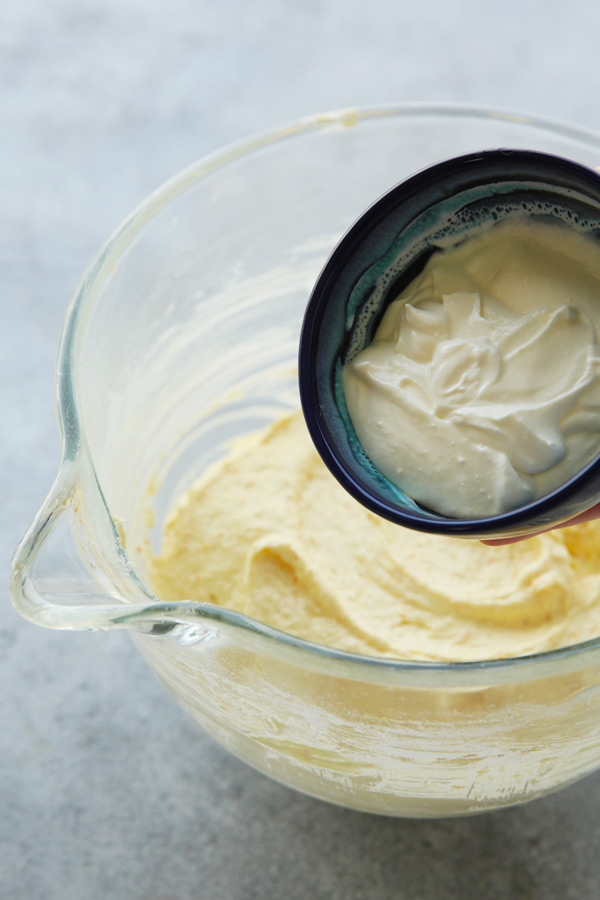
However, if you don’t have sour cream and/or would like to increase the orange punch of your cake, you could omit it and sub in more orange juice. I tested it both ways and personally prefer the orange juice/sour cream combo for the tangier notes it lends and for that ever-so-slightly extra moisture it adds.
No worries though…if you do choose to go with the ALL orange juice option, it will still turn out very moist and fabulous; it will just lose the tangy dimension that sour cream adds.
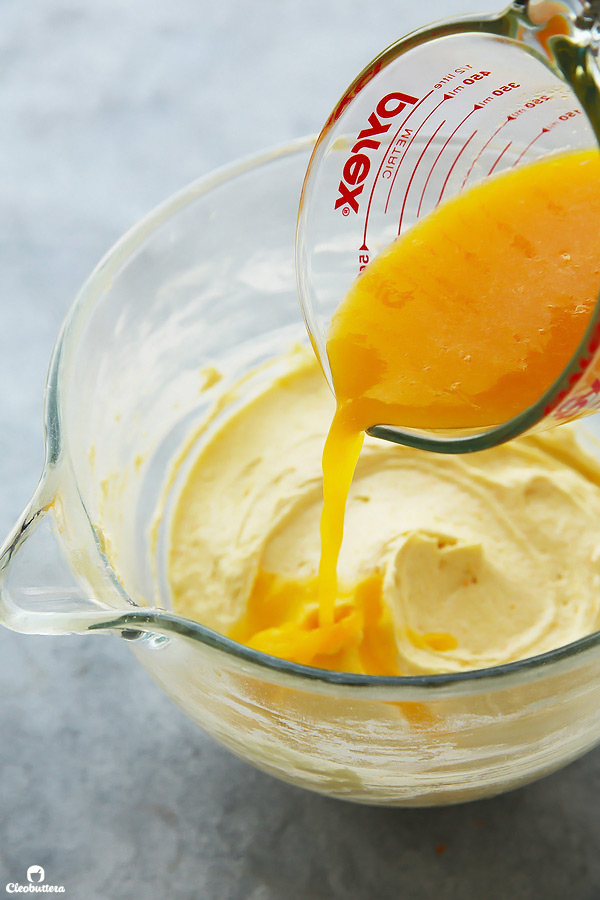
Either way, you’ll get one finger lickin’ good batter…
So when mixing the batter, we alternate between the orange juice and the dry ingredients. You’ll notice that I’ve used cornstarch (aka cornflour) along with the all purpose flour in the dry ingredients. That is a trick I love using whenever I want to produce a fork tender cake. Cornstarch lowers the protein content of the flour, so it doesn’t develop as much gluten, and in return makes for a finer crumbed cake. The cornstrach/flour combos sort of replicates the results of using cake flour, which I know many of us don’t have access to. If accessible to you, you can most certainly sub the cornstrach/flour for cake flour.
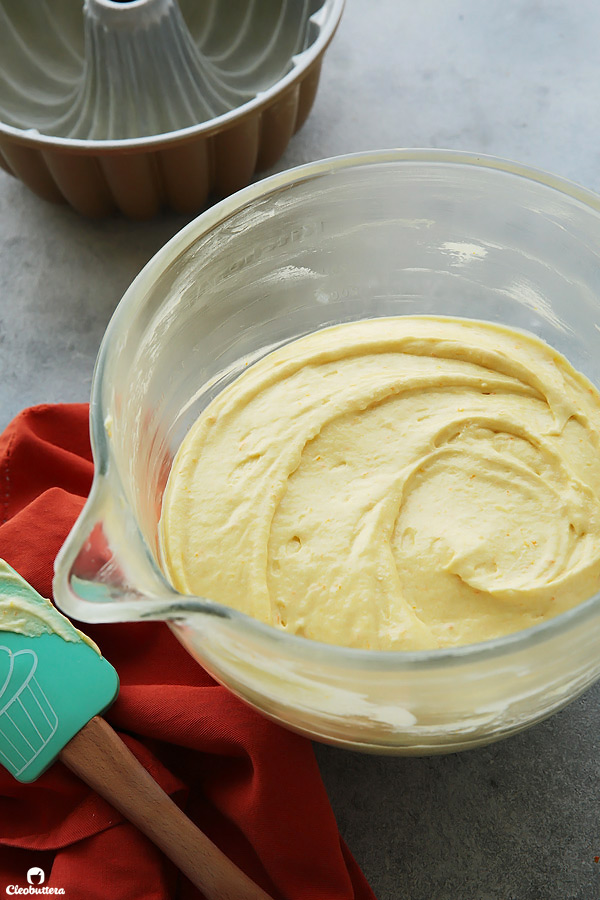
Now pour it into your pan before licking it all off…then bake and be prepared for your entire home to smell like oranges.
While still hot, you can choose to brush it with an orange syrup for an added layer of orange flavor, and a little extra moisture, but trust me…the cake won’t suffer one bit without it. It took me a while to decide whether I want it in the recipe or not, as the difference with and without is minimal. For some reason though, I think it’s better with it by just a hair. So feel free to skip this step if you’re all about simplicity.
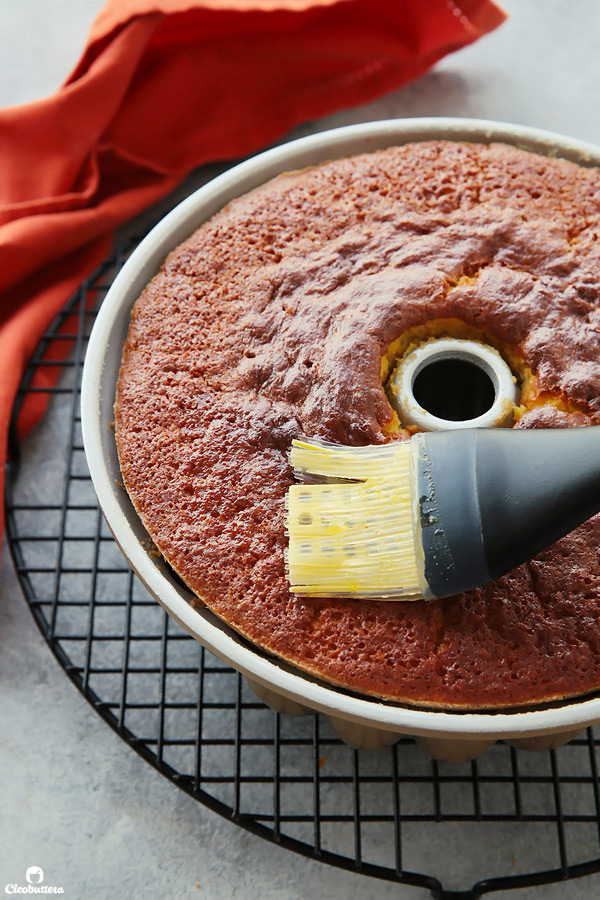
But if you’re like me and don’t mind complicating things for that little extra oomph…then go for it and brush the top as well while you’re at it.
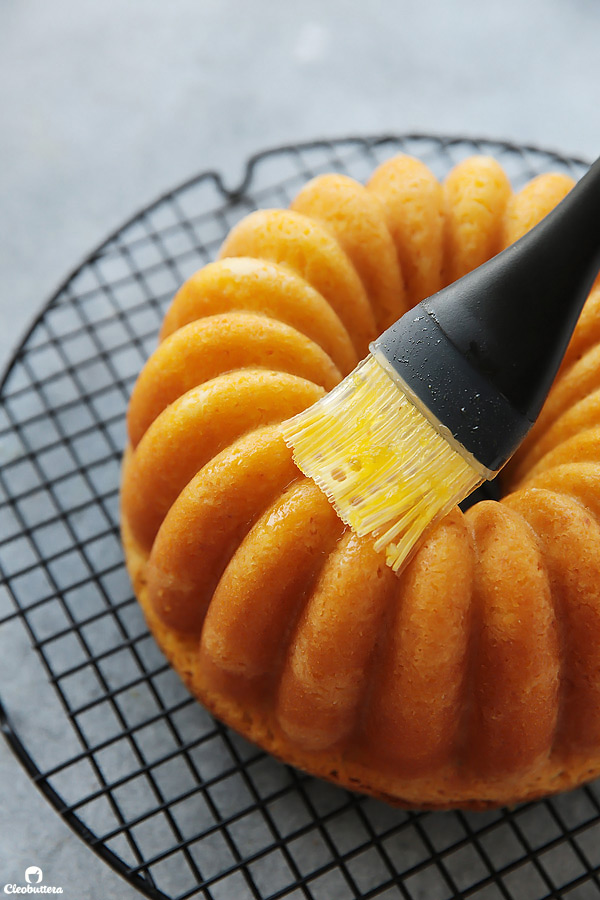
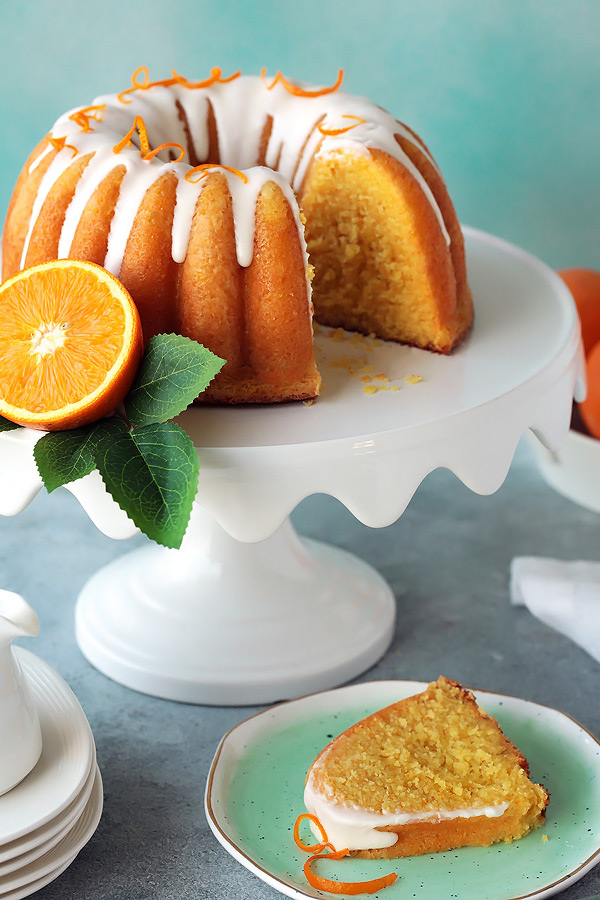
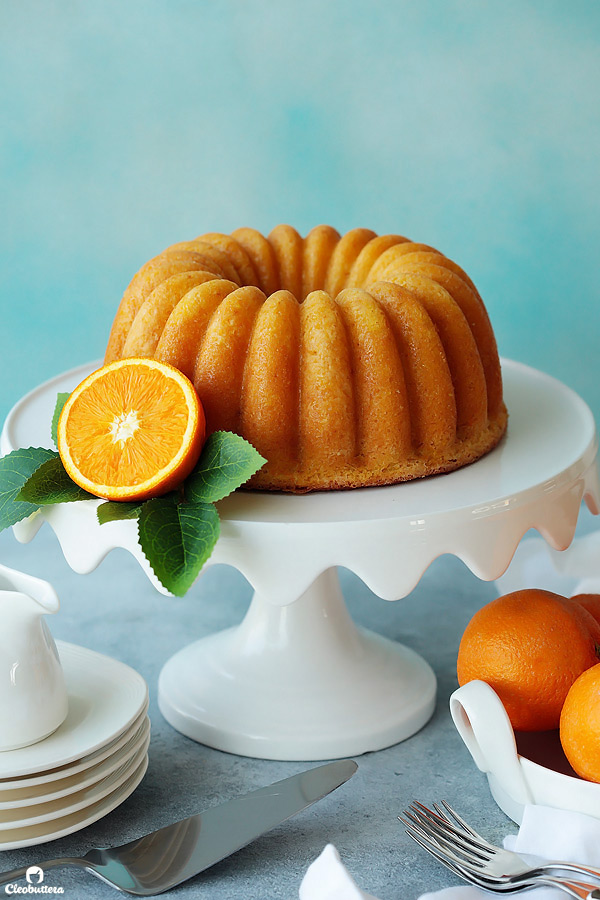
And ta-da! A perfectly simple, everyday orange cake that awaits your fork to dig in. FYI…its heavenly while still warm.
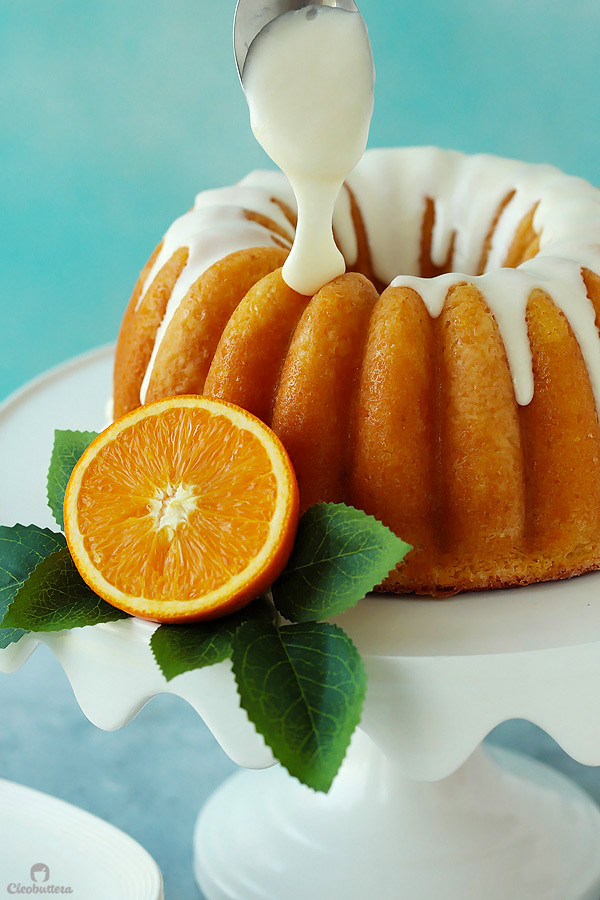
If you’d like to dessert-ify the cake, wait for it to cool, then drizzle with this amazing cream cheese glaze.
As much as I prefer its humbling taste without the glaze, I can’t deny that it makes it more picture perfect.
So yes…this cake is dedicated to all my wonderful readers who honor me by putting their trust in my recipes.
What began as a testing object driven by recipe requests, has now become my newly found cake flavor of choice. I’m now Team Orange with the rest of you! So thank you for pushing me out of my flavor comfort zone.
Perfected Orange Bundt Cake
Soft and fluffy orange cake with a tender crumb, melt-in-the-mouth texture, and bright orange flavor. Leave it plain for a simple, everyday snack, or drizzle with cream cheese glaze to turn it into dessert.
Ingredients
For the Cake:
- 1 1/3 cup (160 grams) all purpose flour (preferably weighed for accurate results)*
- 3 tablespoons (20 grams) cornstarch*
- 1 1/2 teaspoon baking powder
- 1/4 teaspoon baking soda
- 1/4 teaspoon salt
- 1/2 cup (114 grams) unsalted butter, softened to room temperature
- 3/4 cup plus 2 tablespoons (175 grams) granulated sugar
- 1 1/2 teaspoons (3 grams) orange zest (may be increased for a stronger orange flavor)
- 1/2 teaspoon lemon zest (optional, but recommended)
- 2 large eggs (100 grams), at room temperature
- 1/2 teaspoon vanilla extract (or 1 teaspoon if using imitation vanilla flavoring)
- 1/4 cup (57 grams) sour cream*, at room temperature
- 1/2 cup (118ml) freshly squeezed orange juice (may be increased to 3/4 cup (177ml) for a stronger orange flavor. Omit the sour cream if doing so)
For the Orange Syrup: (optional, but recommended for added moisture & deeper orange flavor)
- 2 tablespoons freshly squeezed orange juice
- 1 1/2 (18 grams) tablespoons granulated sugar
For the Cream Cheese Glaze: (optional)
- 2 tablespoons (28g) cream cheese, softened (I used 4 squares of Kiri)
- 3/4 cup (85g) powdered sugar
- 1 to 2 tablespoons heavy cream
Instructions
To Make the Cake Batter:
- Adjust oven rack to lower middle position and preheat the oven to 350F/180C (325F/160C if using a dark pan).
- Generously grease and flour (or spray with a non-stick cooking spray) a 6-cup bundt pan* (*see note). Set aside.
- In a medium bowl, whisk together the flour, cornstarch, baking powder, baking soda and salt. Set aside.
- In the bowl of a stand mixer fitted with a paddle attachment (or in a large bowl and an electric hand mixer), beat the butter on medium speed until creamy, about 1 minute.
- With the mixer running on medium-low speed, gradually add in the sugar, followed by both orange and lemon zest. Raise the speed to medium-high and continue beating together until lightened up in both color and texture; 4 to 5 minutes. The color should turn very pale (almost white) and texture should look fluffy.
- Add the eggs, one at a time, beating well after each addition. Add in the vanilla and sour cream, mixing until well incorporated.
- On lowest speed, add in one-third of the flour mixture and mix until mostly combined. Add in half of the orange juice and lightly stir until almost mixed in. Continue with adding another one-third of the flour mixture, followed by the remaining orange juice and ending with the last third of flour mixture. Mix until just combined and a smooth batter forms. Do not overmix. With a rubber spatula, give the batter one good, final stir to make sure that everything is well incorporated. Transfer the batter to the prepared pan and smooth the top.
- Bake for 25 to 30 minutes, or until the center of the cake springs back when lightly touched, and a wooden skewer inserted between the tube and sides comes out clean or with a few cooked crumbs attached.
- Transfer the pan to a wire rack and cool slightly. Meanwhile, make the orange syrup, if using.
To make the Orange Syrup:
- In a tiny saucepan over very low heat, bring together the orange juice and sugar to a simmer until the sugar is dissolved. Remove from the heat once it reaches a simmer. Using a thin skewer, poke tiny holes all over the cake. Brush the surface of the cake with about one-third of the syrup. Let the cake cool in the pan for 10 minutes, then invert onto a serving platter. Brush the top and sides of the cake with the remaining syrup. Allow the cake to cool slightly before serving, or wait until its barely warm before glazing (if using); at least 40 more minutes.
To make the Cream Cheese Glaze:
- In a medium bowl, whisk the cream cheese until smooth. Add in the powdered sugar, and whisk together until no longer lumpy. Whisk in enough heavy whipping cream to get the mixture to a thick, yet pourable consistency.
- Pour the glaze all over the cake then give it enough time to set. Garnish with strands of orange peel, if desired.
- Cut into slices and serve. Store leftovers in an airtight cake dome at room temperature for 3 to 4 days.
Recipe Notes
- This recipe makes a small bundt, enough to fill a 6-cup bundt pan, which is different from what is shown in the pictures. I doubled the batter for the pictures to fill up this 10-cup bundt pan, because let's be honest...it's a looker and I wanted to use it so bad. I later found out that the results of the doubled recipe turned out a lot denser than the original recipe I was testing with. For that reason, I don't recommend doubling the recipe, unless you prefer dense cakes. If you don't have a 6-cup bundt pan, you may use the more traditional 10-cup bundt pan (like that shown in the pictures), but note that it will be shorter in height, yet equally delicious. Alternatively, a 9" round cake pan or 8" square pan may be also be used, yet baking time may vary. With that said, the bundt pan in the pictures is by Nordicware.
- Weighing ingredients, especially flour, is ideal in baking due to its consistency. If you don't have a kitchen scale to weigh the flour, use the Spoon & Sweep method: Use a spoon to lightly fill measuring cup with flour until required amount is obtained, then sweep access with the back of a knife.
- Cornstarch is used in combination with all-purpose flour in this recipe to imitate the results of cake flour, which produces a finer and more tender crumb. Cake flour could be hard to find in some countries, so this trick works like a charm. If you have cake flour on hand, feel free to use that instead of the all purpose flour/cornstarch combo. You will then need to use a total of 1½ cups (180g) cake flour.
- If you don't have sour cream and/or would like to increase the orange punch of your cake, you could omit it and sub in more orange juice. I tested it both ways and personally prefer the orange juice/sour cream combo for the tangier notes it lends and for that ever-so-slightly extra moisture it adds, but it's still amazing with the ALL orange juice option.
- The orange syrup adds another layer of orange flavor, and a little extra moisture, but the cake won't suffer without it. It took me a while to decide whether I want it in the recipe or not, as the difference with and without is minimal, which is way I kept it optional. Personally, I think it's better with it by just a hair. So feel free to skip this step if you're all about simplicity.
Recipe is a Cleobuttera Original.
Measurements Note: All recipes of this site have been developed using weight measurements. Although US volume measurements have been included for your convenience, it is highly encouraged that you weigh your ingredients using a kitchen scale to get the best possible results. Due to the sensitive nature of baking, kitchen scales are proven to yield more accurate and consistent results than measuring cups. Enjoy!
Powered by ![]()
This post may contain affiliate links.
All images and content are owned by Cleobuttera® and are copyright protected. Please do not use my images without prior permission. If you would like to republish a recipe, please rewrite it in your own words and link back to the recipe page on my site. Original recipes and creations of this site are intended for personal and home use. Commercial replication or media consumption are only allowed with a written consent and agreement with Cleobuttera owners. Otherwise it is considered a violation of intellectual property. Thank you for respecting and appreciating the amount of time and effort that goes into creating free, unique recipes that make people happy.


Thank you for this and I will be trying it but would point out that at point 6 you state to transfer to the prepared pan. This is before flour and juice are added! A typo error I presume. I love your recipes and look forward to trying this one.
Thank you so much Sharon for the heads up. It is indeed a typo. I meant to add it at the end of step 7, but mistakingly placed it in step 6. I’ll fix it once I return home.
I’m really happy you enjoy my recipes & hope you love this one just as much ?
This orange cake is the next in my kitchen. Your recipes are awesome, and the marble cake is my go-to weekly cake. Then I just saw the sticky toffee pudding, will try that one too. Thank you for sharing good recipes!!
Aaaawwww thank you much Camila! It really makes my day to know that you’re enjoying the recipes of the blog! Sticky toffee pudding is one of my all time favorites…I hope you love it as much as I do! And if you like that marble cake, then you’re gonna love this one, as it has the same tenderness.
Wow! Will be trying this soon! Have a few questions-
1. If I dont have a bundt pan, can you please comment on the baking time if I use a loaf pan?
2. Can I use this recipe tomake cupcakes instead?
3. Can you suggest a way to make an orange n chocolate marble cake?
Thanks!!
HI Sneha! Hope you love this one. To answer your questions:
1. Baking in a loaf pan will most probably take longer to bake, but I can’t tell for certainty how much longer since I haven’t tried it for this recipe. I recommend to start checking around 30 minutes then add an extra 5 minutes, if its still not baked through and so on.
2. Although I haven’t tried this recipe as cupcakes, I do believe it should work just fine. I encourage you to go for it!
3. I have a marble cake recipe on the blog that is so popular! I suggest using it’s chocolate marble portion of the recipe and work it into this one.
Happy baking!
Thanks for the response Tasbih! One follow up question on the marble cake that I want to try – If I want to use the 6 cup bundt cake pan, how should I reduce reduce the quanty of the orange and chocolate batters?
It’s my pleasure Sneha. The batter makes enough to fill a 6-cup bundt pan, so make the recipe as is, but only about 1/2 of the chocolate paste recipe. Enjoy!
Okay, so I’ll make only half of the chocolate paste recipe, and use this orange batter to max it into, and make the chocolate batter. Correct? Sorry about the multiple questions, but I love the combination of orange and chocolate, so want to try this marble cake!
Don’t say that! I actually really enjoy questions and comments, so keep them coming! And yep…you make half of the chocolate paste and mix it with 3/4 cup of orange batter. Would love to know how it turns out once you try it!
Wooooow.. it’s the tastiest orange cake I’ve ever ate ??
Really glad you loved it so much ?
Hi Tasbih, for sure I will follow you with this orange cake.
I have the small non stick bundtcake. Just to make sure for baking you said I use the lower than the middle rack oven.
You inspire me by making things look easy.
You love what you do and it shows.
Hi Lily! Love hearing that you’re interested in making this cake. I hope you love it!
The oven rack is adjusted to the lower-middle position…so not smack in the middle and not on the lowest; just in between.
Enjoy 🙂
Hello, I came across this recipe and want to make it today! I have a question please, I want to double the recipe but I don’t want to double the butter, sugar or eggs. Can I keep those the same and just add more Greek yogurt? And if so, how much please?
Yeah I made this cake this morning and it’s delicious! It took about 4 oranges to get the amount of zest and after I used the required amount of juice I had a lovely glass of freshly squeezed orange juice. One tip I came across some time ago regarding using cornflour and flour is to sift the two ingredients five times so that the two are evenly distributed, adding the baking powder, baking soda and salt at the last sift. I used a nine inch round loose bottom cake pan and lined it with baking parchment. Baked at 160 fan on the lowest shelf and it took around 28 minutes. I checked it at 25 minutes and it just needed the extra three minutes. The syrup really lifted the flavour and it’s delicious and moist. Thank you for this recipe.
Yay Sharon! So happy to know that you enjoyed this cake! Thanks for the flour/cornflour sifting tip. Though I’m usually too lazy to sift that many times, I can imagine how even fluffier all the sifting will make the cake. I’ve got to try it!
Hi! Loved it, the cake it’s awesome! Aldo I glazed it with a combination of lemon, orange zest and orange juice with confectioners sugar, a lighter version and combines very well with the cake. Thank you so much!! 🙂
Can I sub the sour cream with yogurt?
I’m sure you can as I have often used Greek yoghurt when I don’t have sour cream when making cakes.
Hi Zubaydah! I agree with Sharon…the best substitute for sour cream is Greek yogurt. Although I also tested this recipe with buttermilk instead of sour cream and it worked pretty well too.
Happy baking!
Heyy girl this cake looks fab! I’m with you though on not having orange cake as the everyday cake growing up, chocolate all the way! 🙂
I’m curious, what do you use for buttermilk? we only get KDD buttermilk during Ramadan…
Hey Linda! Thanks hon! I hope the chocolate lover in you approves of this one…I know it turned me into a fan of orange cakes now ?
In Egypt, I use a popular buttermilk brand called Juhayna & it’s actually labeled Rayeb. In other Arab countries, buttermilk (rayeb) is called ‘Laban.’ In Canada, where I spend a big chunk of the year, I use Neilson brand labeled just ‘buttermilk.’
Hi! Quick question about the mixing.
Should I use the paddle attachment throughout or just for creaming the butter and sugar? I just got stand mixer so I’m trying to learn how to use it. I’ve always just used elbow grease. Haha
Hi Tasbih
The recipe looks really interesting. Just one question, can I substitute egg with any other ingredient.
Thanks
Thank you Shipra! I’m so sorry but I personally don’t have experience with substituting eggs in baking. However, I think this article would really help you out to do so.
Hello, i was wondering about the heavy cream brand that ur using in the glaze please
WoW! this cake looks so good. Can I skip without using sour cream or what can I substitute it with ?
Thank you Sik! Yes…you could either omit the sour cream all together & increase the orange juice by 1/4 cup (will make it more orange-y) or use Greek yogurt or buttermilk instead. You can find more information regarding substituting sour cream in the ‘notes’ section of the recipe. Enjoy ?
This recipe is wonderful. I don’t normally bake cakes because I have such unpleasant history with it (failure to execute and ended up with dense cakes). Decided to try this one and didn’t regret it one bit! I know you said not to double it, but maybe I can make it twice and only add the flour after the butter and eggs mixtures are done. The family couldn’t get enough of it! Also it came out pretty short in my bundt cake pan since it’s a small cake recipe.
Still, I’m so glad I attempted this cake. Thank you for the recipe! Will repeat for sure!
Hello!! This cake is awesome. Just came from the oven, and it is almost gone. It is indeed a small recipe (didn’t double it, perfect for a small family). The ingredients were measured by weight, and I found it to be very appropriate for the balance of flavors and sweetness. The cake came out beautiful and delicious, exactly as expected (based on the perfect marble cake of yours that I love). Just skipped the glaze. I ended up reducing the sugar down to 170g as I didn’t have so much sugar and needed it for other things, including the syrup (I trusted the orange juice to be sweet enough to compensate, and it was all right). Used full fat sour cream and cake flour. Baked for precisely 30 minutes. Great recipe. The orange flavor is not overpowering, and there is no citrus aftertaste. The texture is light and is not crumbly. The ratio sugar/orange juice for the syrup is also excellent. Again, thank you for sharing it. I hope other readers will love it too. No need to change anything. That’s our new favorite, and will bake it again soon!
Oh my goodness Camila this is the best review ever! Love how detailed and throughout it is, but what I love even more is how much you loved it! That makes me so happy and makes all the recipe testing worth their while. Thank you so much for taking the time to write your wonderful feedback!
Omg that cake is super delish!!! I made an ugly orange cake last winter that went straight to the bin, and since then had no courage to try. But this cake of yours is unbelievable. Perfect in every way!! Thank you. This was my redemption orange cake to my family LOL. I just switched sugar with honey but I put a little more for the sweetness. And did the syrup just as u said.
That’s so amazing to hear Sara! And redemption orange cake…lololoool! Good for you for showing them your true baking skills. Im happy the recipe worked just as well with honey…that’s so good to know.
Hello Tasbih,
Can we substitute butter with oil? Have heard that oil based cakes are softer . Is it true ?If so how much oil would you recommend ?
Hello Thahseen! So sorry for my late reply…I have no idea how I missed your comment. I promise it was unintentional.
To answer your question, yes oil is known for producing soft cakes but at the expense of flavor. I’m honestly not a fan unless it’s in something heavily flavored like carrot cake for example, where the butter flavor won’t shine through anyway. But in lightly flavored cakes like this one, where depth of flavor is helpful, I prefer butter, otherwise all I can taste is oil. I also like the fluffier results that the process of creaming butter and sugar together creates. I have not tested this particular recipe with oil, but I have tried similar ones that call for oil, and the texture and flavor cannot even compare. What I can assure you of, is that this cake is already insanely soft from the addition of orange juice and sour cream, so oil is definitely not needed.
I just baked this orange cake, and once again it is delicious, you really have a gift for this and my whole trust for this christmas and new years dinners, I will definitely make one of your recipes
I’m so touched by your comment Claudia! Your trust means everything to me. I hope my recipes continue to make you happy and never let you down.
can I use vegetable oil instead of butter?
Hi Nada! I have not tested this particular recipe using vegetable oil, so I can’t really tell for certainty. However, I did try other orange cake recipes that use oil instead of butter, and honestly, the texture and flavor do not even compare to that made with butter. My guess would be that oil will technically work, but you won’t get the optimal taste and texture. If you can, I highly suggest making it with butter for the first time around just so to get an idea of how it’s supposed to be like, then experiment with oil in future trails. If you do, we’d love to know how it turns out! Best of luck!
Attachment
I baked this cake yesterday and turned out good and delish..thank you for the receipe..def keeper..i used normal round tin..
I’m really happy to hear that you enjoyed the cake Anis! It’s so good to know that it works in a round pan just as well. Beautiful photo…thanks for sharing!
So I have been binge making all your recipes and came across this stunner .. I am planning to make it ASAP and would like to know how do u prep your bundt pans, Is it butter only or with flour added as I don’t see any specs of flour on that beauty! I have a 10 cup bundt so I need to be doubling the recipe right? Would that still end up being denser? I know it’s too much to ask but I wish you could post more recipes we want to see more middle eastern bundt cake recipes using pistachios and all the rich flavors .. I can flow ur recipes blindly coz given the food nerd that you are, I know how extensively you would test before posting it here 🙂 that’s one reason I get greedier for trying more of your recipes!
Hahahaaa Muhsina you’re awesome? Thank you for all this and above all, thank you for your trust. I hope you’re enjoying all the things you’ve been making from the blog. To prepare my bundt pan, I almost always use a baking spray with flour in it such as Pam. When I don’t have any on hand, I grease it with either butter or shortening, then dust it with flour.
With Ramadan coming up, you’ll sure be seeing a lot of Middle Eastern recipes. That’s when I focus the most on Middle Eastern sweets, as its traditional in Egypt. Pistachio bundt cake is an amazing idea! I’ll sure add it to the list of all the things I want to bake and share with you guys. Thanks for your suggestion.
After extensive research for an orange bundt I settled on making this cake and it was the best decision I made!!!!!! It turned out beautifully and everyone at the party RAVED about how moist and perfectly orange it tasted. I added Grand Marnier to the glaze and decorated it with roses. I doubled the recipe for a larger size bundt pan like you have pictured and it worked great. It was definitely not too dense. The one little thing I did different was to wisk all my wet ingredients together separately and then alternate adding wet and dry to the mixer. Worked great.
Could this be made with lemon juice/zest instead of orange do you think????
I love the recipe so much that I would love to use it again and substitute lemon juice and lemon syrup.
YAY! I cannot even describe my happiness to hear that this orange cake hit the spot! I’m also really glad that you didn’t find the doubled version too dense. I have wonderful lemon bundt cake recipe that always gets rave reviews. However, if you’d still like to convert this one into a lemon version, here’s what I’d do:
Omit orange zest & increase the lemon zest to 1 tablespoon, if not more.
Increase sugar by 1 or 2 tablespoons, because lemon juice is less sweet and more sour than orange.
I’d love to know how it turns out if you do give it a try. Best of luck!
Thank you so much for the tips! I might just have to find an excuse to try both versions!
so delicious!! the instructions couldn’t be more perfect. I will make this again and again…and again!
This is such a delight to hear Lizzy. So happy you love this recipe so much ?
I made this cake for the first time, and for some reason when I added the sour cream the mixture and I dont know why as I made sure all ingredients were at room temperature. I also found that the cake was quite dry and not moist even with the added glaze. Have I done something wrong? I weighed all the ingredients properly.
Sorry for the typo…
I meant the sour cream made the batter split.
Hi Lara! It’s normal for some cake batters to split once you add additional fat to it. However, it should come back together into a smooth batter once you add in the final amount of flour. As for the dryness, if all the ingredients have been weighed accurately and no substitutions have been made, then it might be due to over-baking. Just be sure to bake juuuuuust enough for a skewer to come out with a few moist crumbs attached, any longer and this (or any) cake will dry out.
Your work seems to be great. Continue the great effort!!
Thanks Floranet!
Hello there,please,do you put cooking spray + flour inside the bundt pan before putting in batter to bake?
Or how do you do yours?
Can it be take out off easily ?
Looking forward for your answer please ?
Hi Sandra! I use a non-stick cooking spray that contains flour in it such as Pam. There’s no need to add flour, if the spray contains flour.
My son wants an orange layer cake with chocolate frosting for his birthday. Will this orange cake hold up with 2 layers of a 8 inch round with chocolate ganache frosting. Do I double the amount for 2 cakes ? Please reply. His birthday is in 3 days.
Oh no! So sorry Runa. I don’t know how I missed your comment. Please accept my apologies. I know it’s too late for that, but the answer to your question is yes. This recipe will make one 8-inch layer cake. So you can double it to make 2 layers.
It looks so delicious. Can you tell me How to make cream for the cake.
Thank you Anu! May you kindly clarify which cream you’re referring to?
Wow I always wanted to bake an orange cake. I am just a learner now, has only baked chocolate and vanilla cakes & cupcakes. I am so happy to have found your blog. I am drooling over the pictures. I want to ask you that is it possible to make this cake EGGLESS?
Thanks for this beautiful blog I am definitely going to try all Arabic sweets too.
Thank you Priya! I hope you enjoy this cake when you do give a try. Unfortunately, I have no experience in egg-free baking, so I’m uncertain of any substitutes as i haven’t tried them myself. I’ve once read that you can substitute a water and flax seed mixture or bananas for the egg though. Worth reading more about.
Hi..I did try out your orange cake.the flavour was really good.but the texture turned out to be not fluffy.the cake did not rise after baking.is it because if the Butter?
Hi Nasreen! No dear butter shouldn’t cause this cake to turn out dense. If it didn’t rise then it’s probably due to either the baking powder or baking soda being too old, or the butter and sugar weren’t beaten long enough to aerate the mixture. Hope this can help you achieve a fluffier cake, the next time around.
AMAZING! thanks for sharing this Unique recipe. It looks delicious. I will definitely try this cake on my mothers birthday. It will take off easily?? I’m a little worried about it.
Thanks!
Happy birthday to your sweet mom Ritika! Yeah sure it does release well, as long as you make sure to prepare your pan well. I like to use a non-stick baking spray with flour in it such as Pam.
One of my favorites on your blog…turns out perfect every single time. However, just 2 questions; First, the batter color doesnt go to the “almost white” stage.. it stays yellowish (orange juice and orange zest effect). Is that normal? Tastes good though.
Oranges are now somehow sour now.. will the cake still taste good if i use not so sweet oranges? Should i compensate with more sugar perhaps?
Thanks!
Sorry Noha for seeing your comment so late. I’m so happy you love this cake so much! The color of the cake batter depends on the color of the butter and oranges used. I wouldn’t worry about the color as long as it tastes great! I don’t see a need for adding extra sugar when the oranges are sour.
This cake is still in the oven, not yet tasted and I know I will never make it again. It is SO much fuss and the bake time is wrong. I have had this cake in the oven for 45 minutes and its not looking very inviting. Nope. No matter how great it tastes when it finally cooks, It’s not happening for me again.
I’m sorry to hear that you weren’t a fan of this cake. Please let me know if there’s anything I could help you with so you could end up with the same great results as most other reviewers did.
I noticed that the 1/2 cup butter & the weighted measurements of 114 grams are off by 1/4 cup. Just trying to verify which is the correct amount. 1/2 cup/76grams OR 3/4 cup/114 grams?
Thank you for the recipe. Can’t wait to see how this turns out! 🙂
Hi Robert! Thanks for your comment. To clarify 1/2 cup butter (1 US stick) is equal to 4 ounces, which converts to 114 grams. So it’s correct as written in both units. In any case, it’s always best and safest to weigh your ingredients using a kitchen scale, so when in doubt…I encourage you to go by weight. I always weigh my ingredients in baking for maximum accuracy. Hope you love it ?
Made it doing the syrup part but not the cream cheese. An absolute keeper of a recipe. Full flavoured, tender crumb, easy to bake. Perfect recipe. Will be making it often.
I’m really happy you loved it so much Kavita! Thank you so much for your amazing feedback ?
Just made this now….it is superb…I didn’t add the cream cheese icing…could be served slightly warm with vanilla ice cream…
Attachment
A humble picture …
It’s gorgeous Mim! I’m happy to hear that you enjoyed it ?
Attachment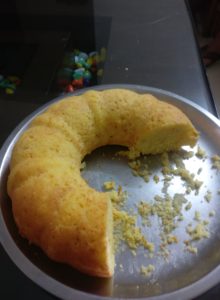
Hello Tasbih!
I have baked this today for my husband’s birthday. It was amazing! It was fluffy, tender and perfect. I reduced sugar to 150grams. I used the orange syrup. I used Indian yoghurt(just a note for others. It’s easily available here. )
It’s a keeper. One of the best ones. Thank you. I can’t wait to try your other recipes. I have tried many orange cake recipes but this one was the best.
It was not as golden as everybody’s but it might be my oven.
That looks so beautiful and crumb on that cake is perfection! It’s wonderful to hear that you loved it so much.
1 and one third cups all purpose flour is equivalent to how much cake flour
Hi! According to King Arthur Flour’s ingredient weight chart (my go-to), cake flour and all purpose have the same volume and weight. So 1 1/3 cup all purpose flour should measure the same as cake flour. However, for the most accurate measurement, I highly recommend using a scale to weigh your flour; it removes all the guesswork and produces the most consistent results.
HEYYY!
I am from India and I picked up this recipe a couple of months ago and I have probably made it 8 times till now, IT IS THAT FAB <3
But i have been facing a little problem in my last 2-3 batches. Upon adding eggs, the batter fluffs up really well, but as I add the buttermilk {in india we substitute sourcream with buttermilk (half milk + half yoghurt)}, my batter curdles and doesnt combine that well until i start adding the flour.
This didnt happen in the starting batches of the cake. the curdling makes the batter lose much of its leavening due to creaming.
PLEASE HELP 🙁
Hi Amrita! SO happy to hear that you love this recipe so much! Are you sure your dairy and eggs are at room temperature? From your description, it sounds like they might have been cold when you added them to the batter.
Made the same mistake today! The yogurt I used was directly from refrigerator, it curdled but came together when I added the flour. In the oven now, fingers crossed 🙂
Hope it still turns out amazing!
Hey, what if i want make mango bundt cake instead of orange one using this same recipe? Can i substitute orange juice with mango puree, skip on the zest, add mango extract instead of vanilla ? Would it work?
Thankyou so much! the texture and crumb are perfect.
I tried the recipe in a 9x4inch loaf tin and baked it for 42minutes. The top was flat and the cake texture was not exactly how it comes out in a bundt pan, but quite dense. But i know the texture of the batter in this loaf was perfect as i baked two cupcakes out of it and they had the most perfect crumb!
Please help! sorry for asking so many questions but i LOVE THIS RECIPE, and want to perfect it!
Hi Amrita! This is normal so don’t worry. Higher cakes almost always tend to turn out much denser and less fluffier than shorter ones. That’s why I advise against doubling the recipe for a bundt pan unless a dense cake is preferred. I’d suggest you go back to using a bundt cake or even a square or rectangle pan, so the cake can have more space to fluff up and turn our airy.
OMG i just did what you have written exactly and it was so delicious and iam so happy thank you for sharing it is my first time to make a successful cake.
Really happy to hear that it turned out so good for you Marina! Thank you for that amazing feedback.
Attachment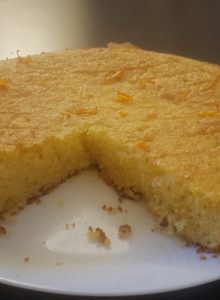
Thanks for the Recipe. I didn’t add sour cream still it taste too good.
super moist and very rich in taste.
Ooooh nice ?? So happy you loved it Sumera!
Hi! I baked this cake, it tasted out of this world but when I inverted the Bundt pan, my cake didn’t come out in one piece. Why did that happen? I didn’t weigh the ingredients but used the cup measurements as suggested.
It’s great to hear that you loved the way it tastes Fouzia! Sounds like you might just need to grease and flour or spray you bundt pan really well. Another thing to keep in mind, is to give the cake enough time to cool in the pan before you invert it, as it is very tender while its still hot, which could cause breakage. Better luck next time ?
Thank you for showing metric weights and measurements! 🙂
It’s my pleasure! I believe that weighing ingredients in baking should be the only way to go. It’s been a game changer for me.
Hello
Can I use yogurt instead of sour cream ?
Full fat Greek yogurt is the best substitute for sour cream and should give you great results ??
Hi. What can I use if I don’t have heavy cream for the icing? I have half and half, whole milk, whole plain yogurt available now.
Hi Nura! Both half and half and whole milk will work just as well. Enjoy ?
I have been looking for a perfect ( according to my taste of course- my kids loved this one and asked me to make it again) orange cake and unfortunately this isnt it. The one i tried previously with white chocolate was better. But it wasnt perfect either. I keep looking and trying. Thank you amway.
I’m happy your kids liked this one. Hope you find your definition of perfection ?
I followed it as per the recipe and it came out AMAZING. The sugar was a bit much, maybe my preference is lesser sugar. But it tastes divine. Thank you!
Yay! So wonderful to hear that it turned out so well Lakshmi ?
I am just going over to my mom and dad’s house to pick fresh oranges, I hope the make the cake this evening! Can’t wait. Thanks for sharing.
I hope it turns out wonderfully Susie!
Attachment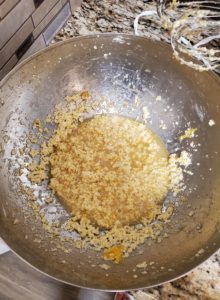
Hi, when I mix orange juice with in the batter of eggs, sugar and butter. The entire mixture got separated. I dont understand why because in the picture it shows very well incorporated batter. Any reason why would this happen,?
HI Bareera! Were your refrigerated ingredients like butter, eggs or orange juice, cold by any chance? If ingredients are not at room temperature, then separation is likely to happen. In any case, once you start to add your dry ingredients, it should start to come together and look homogeneous. Room temperature ingredients will bake up better than a cake that was made with cold ones though. I hope yours turns out beautifully in the end.
Do you think this cake would bake alright in an angel food cake pan? It looks beautiful in a bundt pan but i’m trying to replicate the orange birthday cake my friend’s mom used to bake him many decades ago.
I wonder if i’d need to double the recipe and if i did it might be too heavy to rise up the sides of an angel food cake pan. What do you think? thank you.
Hi Pat! SO sorry for my belated reply. Sure! An angel food pan should work perfectly here. Yes…definitely double the recipe, and I wouldn’t worry about it turning out too dense, because this type of pan has a bigger surface area than a bundt.
Hi Tasbih. Do you add orange food colouring to get the colour so bright or is it just natural?
Thanks
Hello dear! No food coloring in here. All the color is coming from the juice and zest of the orange. I think this will differ depending on the type of orange used, as well as the season.
Thank you so much! Looking forward to when you’re back to blogging.
P.S In the crème brulee, if I don’t have any vanilla pods/extract, can I omit it?
Thank you! I’d recommend using some kind of flavoring, to cover up for the eggy flavor. Vanilla powder, orange peels, lemon zest, cinnamon sticks, star anise…just about anything would work.
If I use lemon zest, how much would I need to put?
And if I use cinnamon sticks, how much?
would cinnamon powder work? If so, how much?
Sorry for the unlimited questions 🙂
It’s my pleasure. It really depends on how strong you’d like the flavoring to come through. So probably about 1tsp for a mild lemon flavor & about 1 tablespoon if you want it stronger. Same with the cinnamon sticks; 1 to 2 should do the trick. Sure you can use cinnamon powder. Start with a tiny amount, taste the mixture then add more according to your preference.
One last question…….hopefully
Will putting lemon zest in the dessert cause a lemon flavour?
If so, what can I put that will give a vanilla sort of flavor?
Honestly can’t think of anything that will give a vanilla flavor other than vanilla itself ? Any vanilla product will do…powder, extract, beans, etc.
Lol, I had too high hopes??
So if I don’t want a lemon flavor, I better stick to the cinnamon, right?
Yes ?
I’m completely out of all vanilla. Just recently both my vanilla extract and powder got finished. Gotta stock up soon
I made it!! Got vanilla powder in time and I’m so glad I did- you can’t beat the vanilla flavour. It’s delicious and I love it. Exactly my type of dessert.
I was surprised at how quick and easy it is to make (ahem, NOT counting the 6 hours cooling and chilling). However I decided to cut some corners and skipped the step of caramelizing sugar on the top and decided to leave it plain. Who cares? It’s just as delicious. It’s a fabulous recipe, thanks so much?❤️
Amazing! I’m happy to hear that you managed to get your hands on some vanilla. They’re worth it here.
Pingback: An orange cake for an afternoon of thinking – smartwaydesign
Just made this cake and I added Cointreau to the syrup. Tastes fantastic. Also my house smells gorgeous! Will definitely make again.
Woooohoooooo! Always so wonderful to hear Ellie! Glad you loved it.
I modified this recipe slightly by adding a cup of dried cranberries to the batter and instead of the cream cheese frosting did a Grand Marnier butter cream. Absolute HEAVEN!! Thank you so much for posting this recipe. It made our night!
That sounds amazing! I’m really happy you enjoyed the cake so much.
Attachment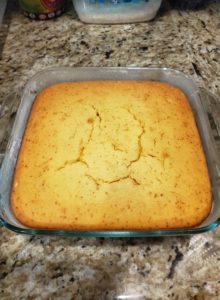
Patience is a virtue that I lack 🙂 cake came out of the oven looking beautiful and I just didnt read (or overlooked) the instruction to let it cool down a bit before glazing. Glazed one side, turned over, glazed other and when I turned it back the top of the cake stuck to the plate, leaving a big hollow. I was making it for a friend’s birthday so it had to look pretty. I made some dark chocolate ganache and smothered it on the cake and topped it off with a few glazed oranges. Not the best looking but its mine 🙂 This is my first cake in 15 years I think. Thank you for inspiring!
Well that’s a pretty amazing job for the first cake in 15 years! Hope your friend loved every bit of it.
Now pour it into your pan before licking it all off…then bake and be prepared for your entire home to smell like oranges. (NOT RECOMMENDED)…..Uncooked eggs
Hahahaaaa! Yep! Willpower is a virtue I need to work on ?
Hello there, this cake looks and sounds yummy so I’m planning on trying this recipe out today!
Although I am a super novice baker without a mixer so I will be hand mixing it with a wisk. Any advice for me to make sure the cake turns out as yummy as it looks?
Thanks!
Doreen
Hi Doreen! My biggest advise is to take your time with mixing the butter and sugar together. Use a wooden spoon or rubber spatula to cream them together until the color changes to offwhite and feels fluffier. This should take 5 to 10 minutes.
Enjoy ?
Hi, this is very nice! Full of fragrant orange flavour and very moist. Love every bit of it!
Thank you LS! I’m happy you liked it ?
Hi Tasbih,
Absolutely love your work! I did have a question for you. I recently moved to Dubai from Chicago and I’ve been looking for vanilla bean paste which I can’t find ANYWHERE here. I use the paste (since it’s more expensive) for special gathering or a special dessert. Do you use vanilla essence or Paste? If yes, what brand? Would really appreciate your input.
MAde this cake today. and it was oh-my-gosh delicious!!! thank you for the amazing recipe! the cake was gone in less than 12 hours!!! Amazing!!
Bon appetite Vilma! I’m glad you liked it so much ?
Hi Vilma! Thank you so much for your sweet words.
I use vanilla essence for most applications because it’s the only variety readily available in Cairo too. However, I do buy a stash of paste and beans whenever I travel abroad and save them for recipes where I really want the vanilla flavor to shine. I really like Neilson Massey. Not sure if there’s a Williams Sonoma in Dubai or not, but if there is, you should be able to find it there. I’d also recommend checking at Tavola; I think they’re the go-to place for baking supplies in UAE. If not, there’s no easier place to shop than trusty Amazon. Lucky for you, UAE residents don’t get charged for customs. I think ?
HI Tasbih,
I appreciate your response, thanks for that 🙂 Yeah, I used to use Neilson Massey as well in Chicago and no, it’s not in Tavola (WIlliams Sonoma’s store front here). I had checked. Looks like I’m going to be making the vanilla bean paste myself. Now to source some wholesale affordable beans… sigh…
Again, great job on the site and recipes! You should be proud, this is some great work 🙂
Cheers,
Vilma
Hello,
I had never tried an orange cake before and after making this recipe I understood that I have been completely missing out. I will never use a different recipe. The only thing I changed is that I used tangerines instead of oranges because I was out and used a little lemon juice. It was really really good and my entire family enjoyed it, especially my four year old brother who kept saying it was “bomb”
Thank you !
Oh I can imagine how tangerines would be wonderful here! So happy it was such a hit!
Is the written recipe for a 10 cup bundt pan or do I need to double the recipe for a 10 cup bundt pan? It looks delicious!
Hi Lisa! The recipe is written for a 6-cup bundt pan. You can still use a 10-cup pan, but the cake will turn out short, or you can double the recipe for a tall 10-cup bundt. Enjoy ?
Attachment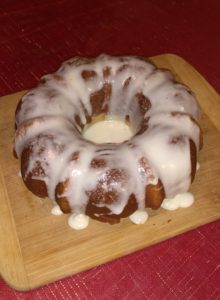
I loved this recipe! It was my first time baking and I did a pretty good job thanks to you.
This looks DEEEELISH!
Hello Tasbih! Just found this recipe and was wondering what type of oranges you’d recommend i use? Really want to try this recipe sounds so yummy!
Hi Jessica! I like oranges that lean towards the sour side, so I use either naval oranges, or oranges that are specified for juicing. Any type of oranges will work well here, depending on the flavor profile you like. Enjoy ?
Attachment
I love orange cake and to find this amazing recipe was a highlight! I think finding your blog is <3! I made the cake a while ago and today I made your fluffy zaatar rolls and I cannot stop munching on them. So good! Thank you for all the yummy recipes and cannot wait to try more.
This looks so flawless Mariam! I’m really happy you loved it so much ?
Thank you for sharing the recipe…I am.baking this cake second time today and love the taste and flavours of this cake
I’m really happy you like it so much Pavitra ?
Absolutely loved your cake.
I didn’t consider any of the toppings because first off, all I wanted was an orange cake recipe that I could go back to again…and again. This one is truly it. My family loved it. I substituted the sour cream with double cream plain yoghurt and used a regular circular pan. I also have an abundance of cake flour and so did not need to use cornstarch. My next bake will go all out with the toppings.
I would like to consider a modification with almond flour. Would this work well? Thanks!
LOVE hearing that Busisiwe! I’m really happy you love it so much ? I think almond flour would taste really nice here. If you do experiment with it, you might need to decrease the amount of butter a bit, as almonds are high in fat.
I made this cake. Did not have Bundt Pan. Made it in a loaf tin. It was fabulous. It has become my favourite. please can you suggest substitution for egg. Many in India are vegetarian.
Yay! SO excited to hear that you loved it Gauri!
So sorry though but I personally don’t have experience with substituting eggs in baking. However, I think this article would really help you out to do so.
Thanks. Loved your measuring spoons. They are so beautiful. Where can I get them.
Thank you Gauri! I got them from the gift shop at Springridge Farm in Milton, Canada.
I made this cake and it did not look like any of the pictures and there was no hint of orange flavor. Will not make this again.
Appreciate you sharing it with the people that love it, though.
I also tried making your chocolate chip muffins, which I will not make again as well.
I will keep trying you recipes in hopes that one will work for me.
Thank you Toni for your feedback. Wishing you better luck with other recipes ?
I made this cake today for a friend’s birthday. It was perfection!
So glad you loved it Sharon!
I got it into my head that I needed to make an orange cake. I’ve never had one, but it sounded sweet and refreshing. I wandered about the internet and finally came upon your recipe. I live in New Mexico at 7,000 feet above sea level, so I needed to adjust for altitude, but I used this page: https://bakingnaturally.org/high-altitude-baking-adjustments/ and started checking at 22 minutes, with a final baking time of 34 minutes. It came out just as you describe.
The house smelled beautiful when it was baking, and the completed cake is moist and delicious. I did not add the syrup, and only put a little of the glaze on. Today, a day later, it may even be better. Thanks!
That’s amazing Laura! Looking hearing that it came so well for you. Thanks for sharing your high altitude modifications; I’m sure they’ll be helpful for so many ?
This cake looks amazing! Question for you… I only have jumbo eggs in the fridge. Can I use them? Do I need to reduce the amount of egg white or yolks? Thanks!
Thank you Carol! You’re going to need to reduce from both the yolk and white. You need 100 grams of whole eggs. So you can do that by whisking 2 eggs together really well until homogenous, weigh them, then remove the excess until the weight reaches 100 grams. Best of luck ?
Hello, I want to make it eggless… please suggest the substitute 🙂
Hi Surbhi! I’m so sorry but I personally don’t have experience with substituting eggs in baking. However, I think this article would really help you out to do so.
Sooo delecious, i used sour cream and it was really perfect, i ‘ll do it again and again, but sure will try other recipes too, thank you.
Really happy that you liked it so much Nayla! Thank you for your wonderful feedback ?
I made the cake just as written. It was fabulous!! Thank you for sharing this recipe with us
It’s my pleasure Carol! So glad you liked it ?
Hello, tried this cake and absolutely loved the flavour , however as I didn’t have sour cream added the extra orange juice and the cake just stuck to the pan . We ended up scooping it out with spoons and eating it . Any suggestions for my second attempt ?
I have been dreaming about it and really want to try again . Can I use hung curd as a sub to the sour cream?
Hi Harshaeta! So sorry that it stuck in the pan. I don’t think however, that it’s due to replacing the sour cream with more orange juice, as I made myself this way and had no issues flipping it out of the pan. I think you just need to coat your pan generously with non-stick baking spray or butter and flour to ensure that it comes out with no damage.
As for substituting sour cream, I’m not really familiar with curd as we don’t have it where I live, but if it’s something like yogurt, then sure. In general, full fat Greek yogurt is the best substitute for sour cream.
Attachment
Thanks for a lovely recipe ❤️
So pretty DF! I’m happy you enjoyed this recipe ?
This recipe is wonderful. I don’t normally bake cakes because I have such unpleasant history with it (failure to execute and ended up with dense cakes). Decided to try this one and didn’t regret it one bit! I know you said not to double it, but maybe I can make it twice and only add the flour after the butter and eggs mixtures are done. The family couldn’t get enough of it! Also it came out pretty short in my bundt cake pan since it’s a small cake recipe.
Still, I’m so glad I attempted this cake. Thank you for the recipe! Will repeat for sure!
Oops I’m sorry I might have commented on another commentor’s post! My apologies. Didn’t realize I haven’t reached the end of the comments posts. ? Forgive me.
I’m so happy you’ve achieved cake success with this recipe ????????
Doubling it is perfectly fine. It’s just that putting so much batter in the pan, bakes up denser that if you put half as much. So the mixing of double the recipe is not the issue, it’s the amount of batter in the pan that causes the denser texture. If you like denser cakes, then you should still enjoy the doubled amount.
Hi i am going to bake this cake today to send to my father-in law tomorrow so I wanted to ask what is the best way to store it so it stays fresh and moist?
Hi Sahar! Happy birthday to your dad. It keeps really well in an airtight container or cake dome at room temperature. Do not refrigerate as refrigerating dries out butter-based cakes. If you’ll add the glaze, then I’d recommend making the glaze tomorrow as it contains cream cheese which can spoil at hot temperatures. Enjoy ?
Thank you so much for the recipe! Made it for my son’s birthday – topped it with chocolate ganache and chocolate mirror glaze and garnished with candied orange peel. It was simply delicious and a party winner! Will be maki go it again!
Oh WOW! You chocolate additions sound incredible. I’m sure it took it over the top ?
I tried this with a French T45 pastry type flour and found it to be delicious, but very tender, almost too tender and it just falls apart. Will try beating it a little more once all the flour is added next time to activate more gluten. Also might add another 40g of flour of that doesn’t work. Otherwise, the flavor is fantastic and I love the taste. The glaze really makes a difference and I would recommend using more zest in the cake . Also subbed plain Greek yogurt for the sour cream. Thanks for the recipe!
Really happy you liked it so much C! I wish we have this type of pastry flour in Egypt. I love fall off the fork tender cakes…but I know what you mean how that can be a problem ?
Attachment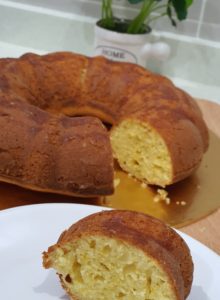
Followed as closely as i could every step except for the cream cheese glaze. Turned out so beautifully. Thank you.
It looks so amazing Beatriceh ?
Just finished a slice of this orange cake that I made today and it was deliciousness. Followed the recipe to the bone and it was perfect! Can’t wait to make it again
I just wanted to ask if you have tried prepping the cake batter night before and baking it the next day? Thoughts please
I love hearing that you liked it so much Meera! Unfortunately I haven’t tried preparing the batter the night before with this one. I have, however, tried it with these muffins and it worked beautifully. Not sure how the orange cake batter will react to an overnight rest without testing it out first to be honest. If you do give it a try, please let us know how it turned out.
I will be trying it soon just to see how it goes when prepared overnight. I will let you know!
Hi, can we replace the sour cream with Greek yogurt?
Sure!
I’m SOO glad I found your blog! I made this cake yesterday and it was so well received by my family. There’s this tea cake we love to have from a local bakery here and I always envied how fluffy and moist their cake is. I love baking and I’ve tried so many recipes but nothing has been as amazing as this!! I finally achieved the super moist and fluffy texture and it even tasted so much like that tea cake (though they use artificial flavors but this is so much better coz it’s natural) my dad actually said it’s even better than the local bakery’s tea cake and it’s just melting in his mouth! I’ve been reading all the recipes on your blog for the past hour and a half! Let me just say, thank you for putting such amazing recipes out here for everyone to try! I’m sure there’s a truck load of effort that goes into recipe testing and photography! I’m already excited to try out all your other recipes!
A couple of questions, can I use store bought orange juice that has no sugar? Does this work only in a Bundt pan? I mean is there a reason Bundt pans are used? I always thought it was just for the appearance. I baked mine in a super old Bundt pan I had lying around but it’s very small so I had to pour the extra batter into some cupcake mounds which turned out just as great but, if I were to make it all in one 8 inch round pan would that work?Also, if I double the recipe but split it intwo pans will the cake still be denser?
Attachment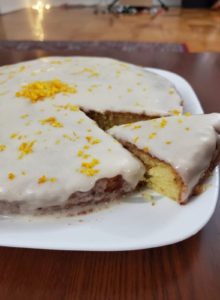
Hi Tasbih, I just wanted to say that your recipe is simply the best! I’ve tried Orange cakes before but have never been satisfied with any of the results. I was searching long and hard for a perfect recipe and I’m happy to say that I found it 🙂 I doubled up the orange syrup and added to the cake to get a sweeter orange juice feel. Made this for my anniversary and my husband really loved it. Used cake flour instead of
all purpose flour/cornstarch combo and it was heavenly. Thanks a million!
p.s. Used a 9*2 round cake pan for 30 mins at 325F.
Thanks for the easy ORANGE CAKE recipe. keep updating
Regret making this recipe without reading the notes. Used a normal size bundt tin and ended up with a terribly flat cake. Like, how was I supposed to know that the cake tin used in this recipe was THAT small? ?? Flavour-wise, it was okay, but the appearance was way too flat. Should have doubled the portion! ?
And my kitchen smells orangey!!! Loved the recipe, a no fail recipe. Started baking again after six years and this was my chosen recipe. Although I hate the smell of eggs in cakes ,this one didn’t give me a hint of eggs. I am happy to have found your page . I love all the photographs in your blog. Drool worthy recipes and write-ups. Keep baking and inspire us.
Attachment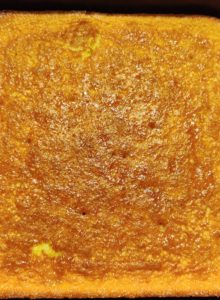
Here are few pics
Attachment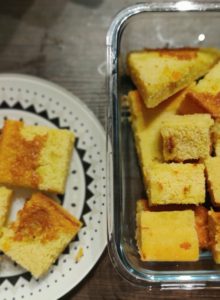
And one more. While tossing the pan I made a mistake hence bit of brown layer got stuck on the pan with the syrup.
great work man. keep updating
That looks divine! Sounds like a perfect dessert for summertime! Will definitely try this recipe out as the temps start rising…
Thanks for the easy ORANGE CAKE recipe.
As much as I prefer its humbling taste without the glaze, I can’t deny that it makes it more picture perfect.
I’ve made this cake twice, its amazing. me and my family loved it . I will surely use this recipe again.
Very good. Enjoyed it. Helped use up lots of oranges. Mine was a little dry but I probably baked it 5 minutes more than I should.
Pingback: مع قهوة الصباح أو شاي المساء.. إليك وصفة كيك البرتقال - السبق
Pingback: مع قهوة الصباح أو شاي المساء.. إليك وصفة كيك البرتقال – منظمة إعلاميون حول العالم
Pingback: Orange cake recipes. Soft and fluffy - singlerecipe.com
Thank you very much for your recipe. After reading your orange cake prescription and recipe I had to go right away to my kitchen to bake this orange cake. Smell fabulous, amazing and so delicious and moist! Thank you!
Hi, it’s an amazing cake, but it broke when I was taking it out the tin, was I too rough when I was hitting the tin to get it out? It taste so good, will try it again.
This is a great recipe. (Five Stars!) I needed to make this lactose-free so I used a butter substitute and a lactose free yogurt. I made one in a mini bundt cake pan (4 cups) and 4 smaller snack size cakes. I opted not to put the syrup or glaze on to save on calories. They are moist and full of flavor. I will definitely make them again!
Hey, Tasbih amazing and easy recipe. I made a single loaf with half the ingredients and as a result we are enjoying the lovely cake with tea while I am also writing this post ?
Fabulous!! My very picky 10 yr. old son said he doesn’t like anything orange. I asked him to just take one bite and he actually used the word DELICIOUS! Thank you!
Attachment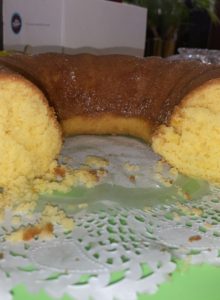
Best orange cake I ever baked! The recipe was very easy to follow. Thank you for making us happy! ☺️
Can I replace the cornstarch with same amount of arrowroot flour?
Can I replace the cornstarch with same amount of arrowroot flour? Thank you!
Attachment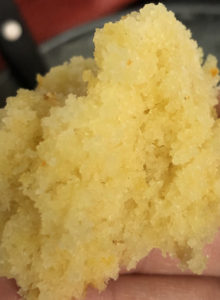
I made this recipe for my landlords for Christmas and in the rush of getting it on the plate for them a bit was left behind so naturally I tasted it and ohhh myyyyyyy goooooood!!!!! It is the BEST recipe EVER!!!!! I am going to make another one for a friend who invited me for Christmas and will be taking a picture of the final result but attached is a pic of the piece that was left behind so you can look at that SPONGINESS and it’s amazing bc it’s the spongiest cake ever AND it crumbles perfectly. I literally texted my boyfriend saying I pity the baker at my wedding because idk how anything will ever top this.
Now on to my experience making it:
• So I didn’t do the glaze bc my landlords are older and older people can be iffy about sugar and I didn’t do the moistening part bc time.
• Maybe it’s my oven but I have a black solid rack so I set it at 160ºC and 20m in it wasn’t even close to being done so I set the temperature to 180º and after a total baking time of 45m the cake was finally done. It was very slightly golden, a lot less than the pictures others are posting (mainly because I didn’t want to hold up my landlords any longer), but it was the best choice! I think it cooking slowly maybe at a lesser temperature kept it from drying up? Idk but it worked out for the best.
• I couldn’t find find oranges so I used one clementine and half a lemon for the zest. The orange juice was freshly squeezed and natural, but I had to buy a 0.5L bottle so I eyeballed it. When I went to pour the batter it was a bit more solid (?) than in the pictures in the recipe, yet still VERY fluffy.
• The recipe was very easy to follow and (apart from not being able to precisely measure the ingredients bc life) I followed the steps to a T.
Anyway, my mouth is watering so I’m gonna get back to making a SECOND ONE. Thank you so much for the recipe!!!! <33333333333333
The adds are very dumb, specially when you try to print and the recipe comes out blank or with the add. The ads come right in front of the recipe.
Attachment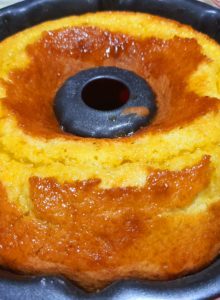
Hi! I just finished making my very first orange bundt cake 🙂 thank you for the recipe. I haven’t tasted it yet but looks and smells really good.
awesome delicious cake! very moist 🙂
but it took 55mins at 160C since was using dark baking pan.
will definitely bake this cake again, thanks for the honest recipe 😉
This is my go to cake and is always a crowd pleaser! Quick Question: How can adapt this recipe to make another flavor cake? Like if I want to make a vanilla flavor cake – What will I add instead of the orange juice ?
Appreciate your help!
Amit
A great guide. You shared very wonderful article with us. Thank you for sharing it. Really love this reading.
Stunning Writing!! Keep up the good work.
The recipe is so delicious. Thank you so much.
What an incredible moist cake! 5 stars easily. I made three other recipes before I found this one ! The orange flavor is perfect but I have one caution…it says 1/2 cup or 118 ml…. be sure you don’t mistake this for grams because a 1/2 cup of orange juice has a mass greater than 118 grams….if it were water they would be the same. So use 1/2 cup volume! This recipe is a keeper!
i’ve made this cake twice now because me and my family loved it so much! I’m saving it in my fav cake recipes for sure! thank u for developing such delicious recipes.
Fatima, Iraq