Mini Cheeseburger-stuffed Buns
This pull apart stuffed bread makes a crazy good party and game food! Bite-sized cheeseburgers encased in the softest and fluffiest mini buns, are too fun to eat and so delicious. Plus…recipe VIDEO included!
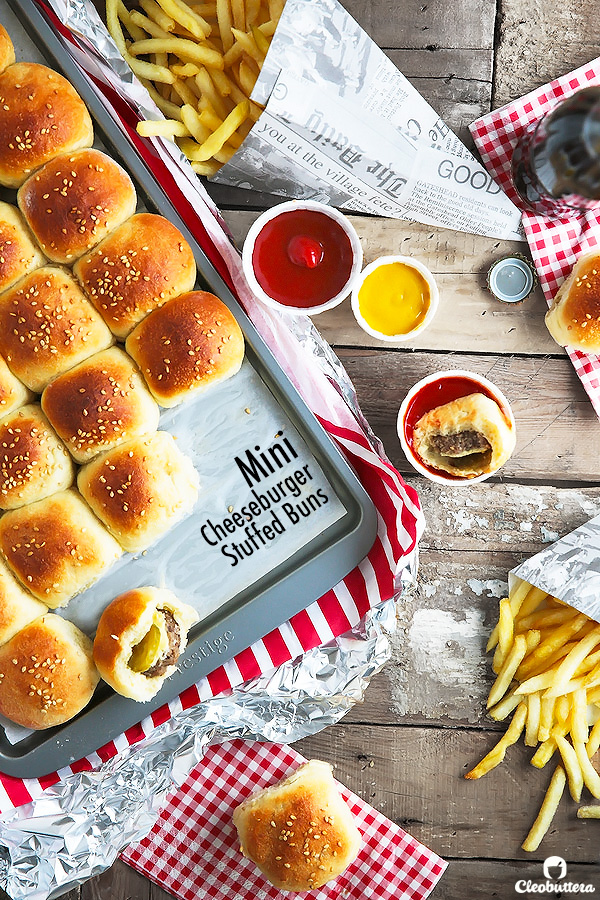
You know that saying: It’s not what is outside but its what is inside that counts?
Yeeeeeeaaaah, well its kinda the case here.
Only that the outside is just as good.
Soft and fluffy mini buns with the most unexpected surprise ever! Cheeseburgers you guys…pickles and all!
I’m all about stuffing delicious stuff into other delicious stuff. I just love it when something looks so innocent and unassuming and then when you bite into it, BAM! Hits you with an unexpected but most pleasant burst of flavor.
I mean these Nutella stuffed cookies have been rocking everyone’s tastebuds.
But there are also these Oreo-stuffed Chocolate Chip Cookies. They’re ridiculous!
And how can I ever forget about these Molten Nutella Pops. It’s what started it all. My lucky charm.
But after stuffing these Heavenly Crescent Rolls with ooey gooey mozzarella, it got me excited for another savory filled carb.
Cheeseburgers were the answer.
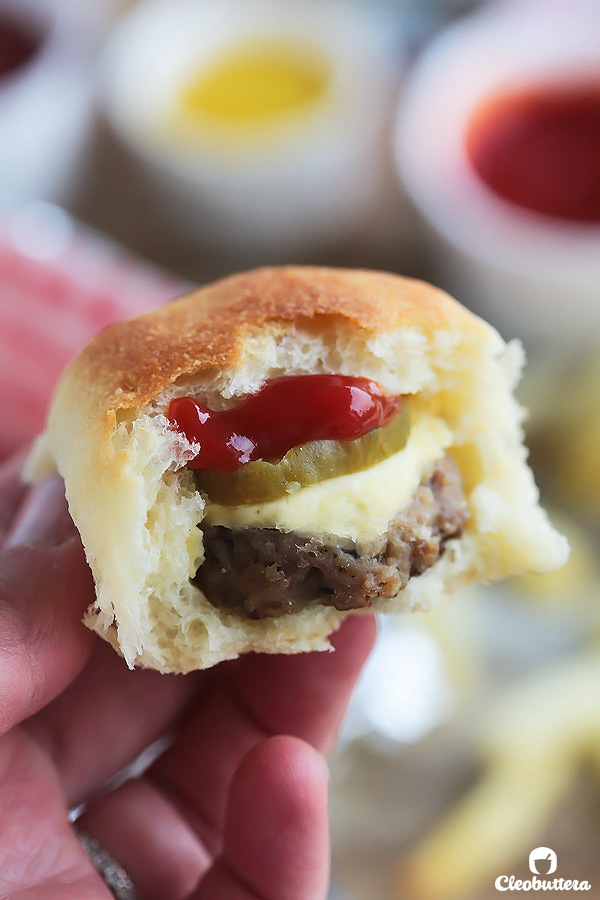
And that’s when my new food obsession was born. LOVE. IT!
Just the perfect size for pulling, dipping in ketchup and popping in the mouth. Then repeat.
The filling here is a simple yet perfect miniature cheeseburger with pickles. But you shouldn’t stop right here. Go crazy and add in whatever your burger-lovin’ heart desires.
The bun itself is the best I’ve ever baked or tried. It’s light and soft beyond belief, fluffy and moist, yet hefty enough to hold up all those burgers and yummy fillings. It’s adapted from Cooks Illustrated, so you know it’s gotta be good. Love these guys.
The secret ingredient to making them so tender and moist, is this:
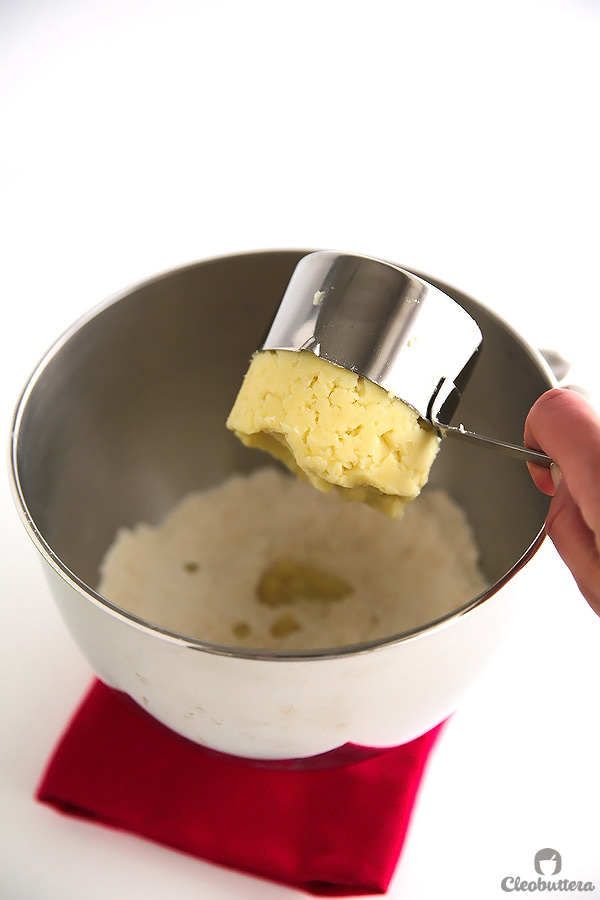
Yup! Mashed potatoes go right into the dough making THE perfect potato buns. The starches in potatoes have magical powers that dilute the gluten-forming proteins, which makes it softer, moister, and more tender.
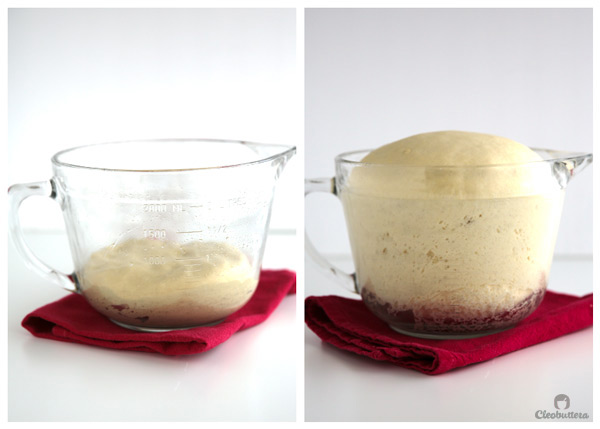
After the mashed potatoes get mixed in there with the dry ingredients and we add in a few more things like an egg, a little of the potato cooking water and butter, we let it rise. I noticed that it rose a lot faster than your typical bun or roll dough. So 30 to 40 minutes are all you need.
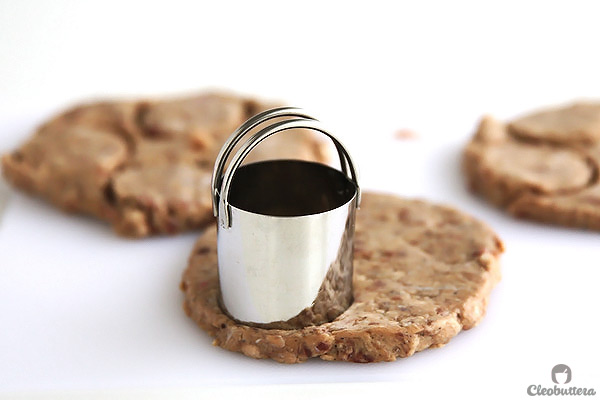
While the dough is rising, prepare your burgers. Get storebought or homemade burger patties, then using a 1 3/4inch cookie cutter, cut mini burger rounds. (I found that semi-frozen patties are the easiest to cut)
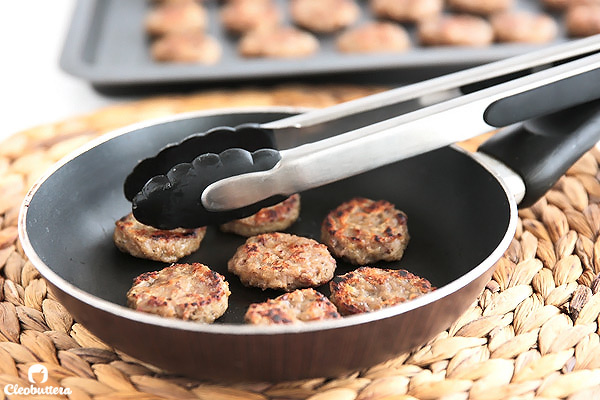
Then cook to the doneness of your liking. Do NOT undercook thinking they’ll continue cooking in the oven, because they won’t. Trust me, I ended up with raw burgers when I did that.
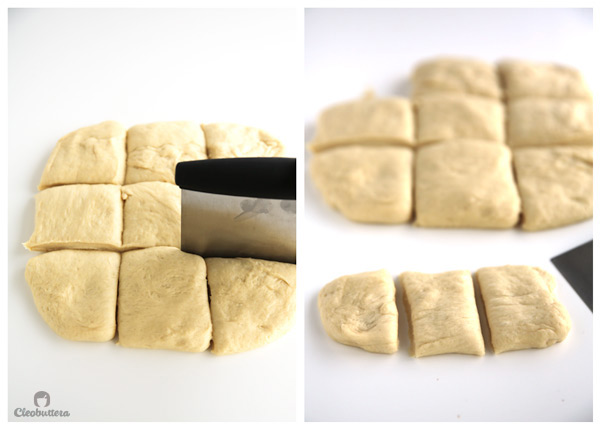
After the dough has risen, turn it out on a working surface. Pat into an 8 inch square of even thickness. Then cut into 9 equal pieces (3 rows by 3 rows), then cut each piece into 3 more pieces. You should have 27 pieces. Cover the dough pieces with plastic.
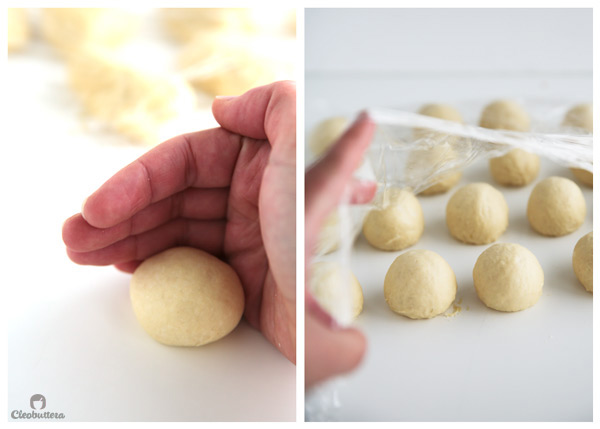
Working with one piece at a time, while the other pieces are covered, roll into a smooth, taut ball. Repeat with all the pieces, then let them rest for 15 minutes covered with the plastic.
It’s burger assembly time!
Pat down each dough round into a flat disk, then top with pickles, then cheese, then the burger. It looks upside-down now, but we’ll turn it on the other side later.

You’ll then gather up the dough over the filling, pressing the dough onto itself to seal. Flip to the other side (see I told you its coming), then place onto a parchment lined baking sheet.
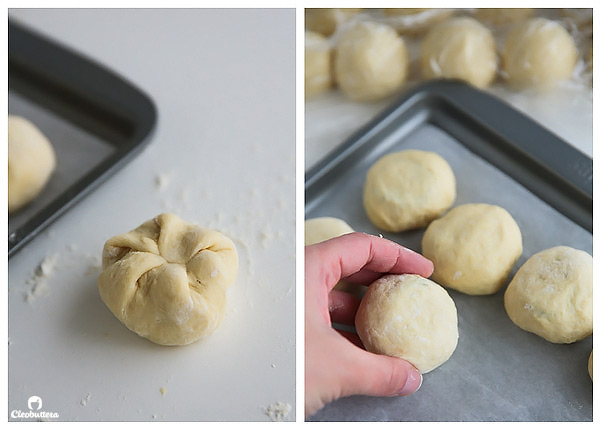
Cover loosely with plastic wrap and let it rise until doubled and touching each other, another 30 to 40 minutes.
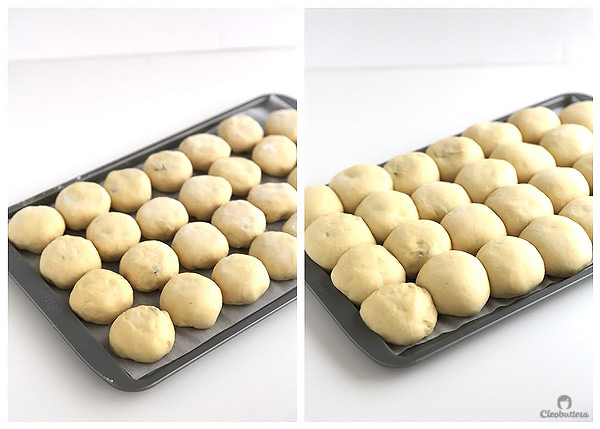
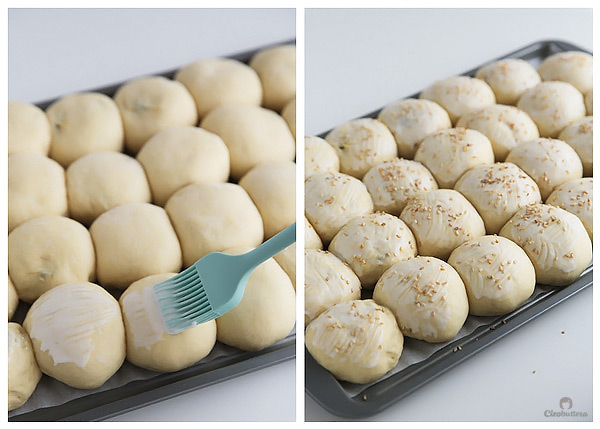
Brush with a little heavy cream, sprinkle with sesame if you want and bake it in the oven until deep golden brown, 10-13 minutes.
Now call out your friends and family, gather around these beauties and spread out your condiments. I’d like to remain under the belief that fries are a condiment, thankyouverymuch.
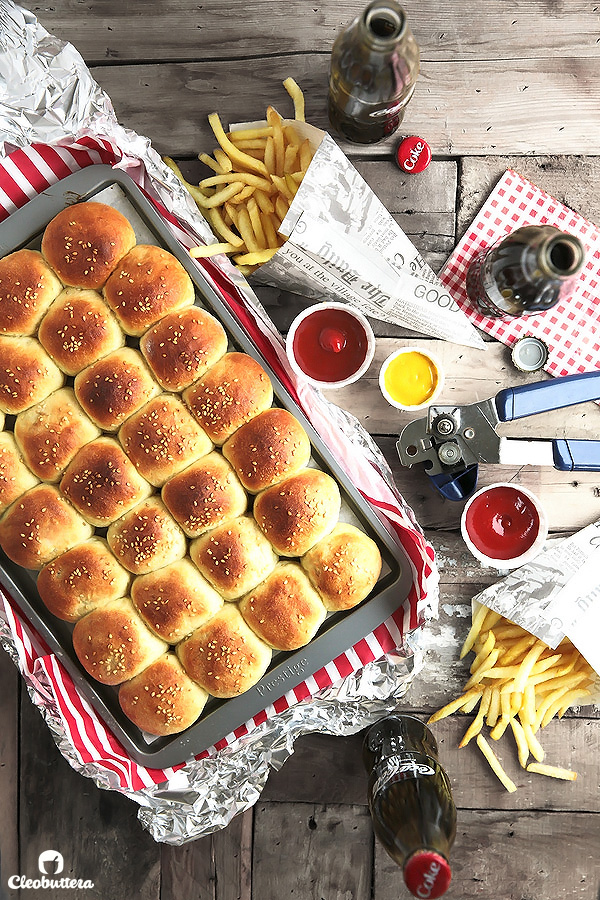
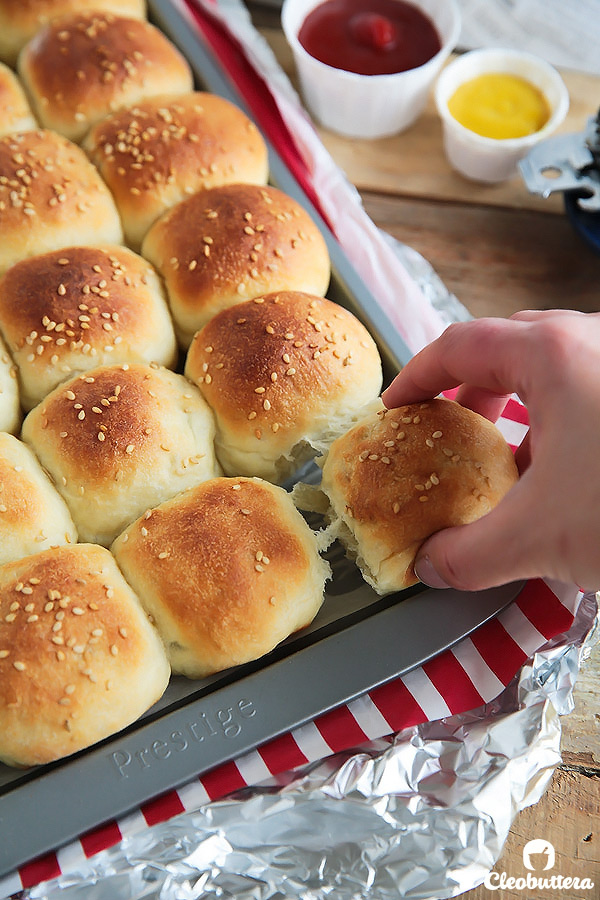
I just love it when rolls get that stringy things when pulled. It’s like a little extra insurance that they gonna be oh so tender and moist.
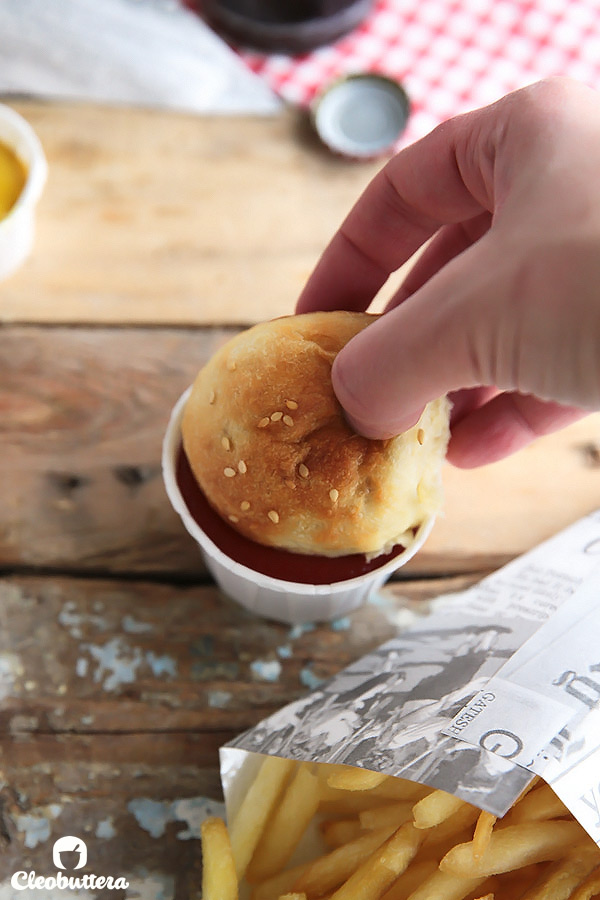
Now dunk that squishy-soft roll into ketchup.
Take a bite, then act excited that there’s a cheeseburger tucked inside, as if you didn’t know.
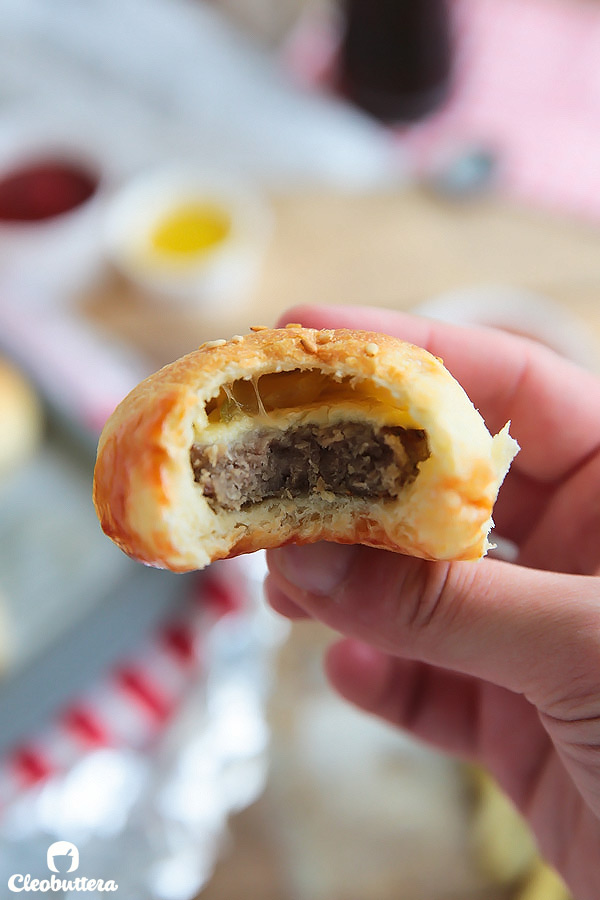
Yum-O!
Wanna see another look at exactly how they’re made?! Check out the video below!
Mini Cheeseburger-stuffed Buns

This pull apart stuffed bread makes a crazy good party and game food! Bite-sized cheeseburgers encased in the softest and fluffiest mini buns, are too fun to eat and so delicious. Plus…recipe VIDEO included!
Ingredients
For the Buns:
- 1 pound (450 grams) russet potato, peeled and cut into 1-inch pieces
- 2 tablespoons (1oz/ 28g) unsalted butter, cut into 4 1-inch pieces
- 2 1/4 cups (12 1/3oz/ 350g) flour (preferably bread flour, but I used all purpose)*
- 1 tablespoon (12g) granulated sugar
- 2 teaspoons instant or rapid rise yeast*
- 1 teaspoon salt
- 1 large egg
- 1 egg beaten with 1 tablespoon heavy cream, for brushing on rolls
- 1 tablespoon sesame seeds (optional)
For the Filling:
- 6 uncooked burger patties, (mine were 3 1/2oz/100g each, 4 1/2"/11 1/2cm in diameter), semi-frozen are easiest to cut
- 7 slices of American or burger cheese, each quartered into 4 equal squares
- 27 slices pickles
- Ketchup, mustard and favorite condiments, for serving
Instructions
For the Buns:
- Place potatoes in medium saucepan and add water just to cover. Bring to boil over high heat; reduce heat to medium-low and simmer until potatoes are cooked through, 8 to 10 minutes. You'll know they're done when a sharp knife goes through the potatoes without any resistance.
- Transfer 5 tablespoons of the potato cooking water to a small bowl to cool. Drain the potatoes, reserving aside a few more tablespoons of the water in another small bowl; you might need them later.
- Return potatoes to the saucepan and place over low heat. Cook, stirring occasionally, until any surface moisture has evaporated and the potatoes look dry, about 1 minute.
- Remove from heat. Process potatoes through ricer or food mill or mash well with potato masher. Measure 1 very firmly packed cup (8oz) of potatoes and transfer to a medium bowl. Stir in butter until melted. Reserve any remaining potatoes for another use.
- In the bowl of a standing mixer (or a large bowl if kneading by hand) whisk together the flour, sugar, yeast and salt.
- Add warm potato mixture to flour mixture and work it in with hands until well combined (some large lumps are OK)
- Add the egg and the reserved 5 tablespoons of potato water; mix with dough hook (or wooden spoon) on low speed until dough is soft and slightly sticky, 8 to 10 minutes. The dough will start out looking very dry and tough and having a hard time getting kneaded, but it will soften and get stickier as the mixing progresses. When finished kneading, the dough should stick to the bottom of the mixing bowl but clears out the sides and feel tacky. If the dough feels dry and not tacky to the touch, add a little bit of the extra potato water to soften it up.
- Shape the dough into a ball and place in a lightly oiled container, flipping and turning once to get it well oiled. Cover tightly with plastic wrap and allow to rise in a *warm place until almost doubled in size, 30 to 40 minutes.
- Meanwhile cut and cook burgers, as directed below.
- Turn out the dough onto work surface, dusting with flour ONLY if dough is too sticky to handle comfortably. Pat gently into an 8inch square of even thickness. Using bench knife or chef's knife, cut the dough into 9 equal piece (3 rows by 3 rows). Separate pieces and cover loosely with plastic. Working with one piece at a time, while the rest is covered, cut each piece into 3 pieces, ending up with 27 (1oz) pieces. Return all pieces under the plastic to prevent dough from drying out.
- Working with one piece of dough at a time and keeping remaining pieces covered, form dough pieces into smooth, taut rounds. (To round, set piece of dough on unfloured work surface. Loosely cup hand around and, without applying pressure to dough, move hand in small circular motions. Lightly dust fingers with flour if dough sticks to hands).
- Cover rounds with plastic and allow to rest for 15 minutes.
- Line 17X13inch baking sheet with parchment paper. On a lightly floured surface, firmly pat down each dough round into a flat disk. Place a slice of pickle in the center, followed by a cooled mini burger, then top it with the quartered slice of cheese.
- Gather up the dough on top of the filling, pressing the dough over itself to seal. Turn upside down then place on the prepared baking sheet, seem-side down. Repeat with the rest of the dough.
- Cover loosely with plastic and let rise at room temperature until almost doubled in size and the buns' sides touch one another, 30 to 40 minutes. While the rolls rise, adjust oven rack to middle position and heat oven to 425F/220C.
- Brush rolls gently with heavy cream and sprinkle with sesame seeds if using.
- Bake rolls until deep golden brown, 10 to 13 minutes, rotating baking sheet halfway through to ensure even brownness. The tops will feel hard at first, then will soften up after a few minutes.
- Transfer baking sheet to wire rack and let cook for 5 minutes. Then transfer rolls from baking sheet to wire rack to avoid soggy bottoms.
- Serve warm with your favorite burger condiments.
Preparing the burgers:
- Using a small round biscuit or cookie cutter (1 3/4inch or 4 1/2cm in diameter), cut 4 rounds in each burger patty. Gently gather up the remaining scraps of meat into a large patty, and cut more rounds from it. You should end up with 27 mini burger patties (I was able to get my 27 rounds from 5 1/2 burgers, but amounts will vary according to the size of the patty)
- Cook the mini burgers on a nonstick skillet to the doneness of your liking. They will NOT continue cooking in the oven. Let cool before stuffing in the buns.
Recipe Notes
- The original recipe uses bread flour instead of all purpose. Bread flour is difficult to find where I live, so I used all purpose flour with great results. If you have access to bread flour, use 2 1/4 cups (12 1/3oz) instead of the all purpose.
- Make sure you use 'instant or rapid rise' dry yeast here and not 'active.' Instant yeast is designed to get mixed right away with the dry ingredients without having to activate it in a warm liquid. If you follow the same directions using 'active' yeast, the dough won't rise and you'll end up with thin, dry rolls. If active dry yeast is all you could find, then you're gonna need to dissolve it first in the warm potato water with a 1/4 teaspoon of sugar, before proceeding with step 1 of the recipe.
- I used Pakmaya brand for these rolls, but Venoise is another favorite of mine. Just look for the word 'instant.'
- To create a warm environment for rising, turn the oven to 200F/93C before working on the dough, then turn off the oven after about 10 minutes. You could now use it as your warm place to rise your dough in. If the oven feels too hot, leave the oven slightly ajar. Works like a charm:)
- You can most definitely make the dough completely by hand. You'll just get a little arm workout, which means you're allowed to eat more rolls:)
Burger Buns recipe adapted from Cooks Illustrated
Measurements Note: All recipes of this site have been developed using weight measurements. Although US volume measurements have been included for your convenience, it is highly encouraged that you weigh your ingredients using a kitchen scale to get the best possible results. Due to the sensitive nature of baking, kitchen scales are proven to yield more accurate and consistent results than measuring cups. Enjoy!
This post may contain affiliate links.
All images and content are owned by Cleobuttera® and are copyright protected. Please do not use my images without prior permission. If you would like to republish a recipe, please rewrite it in your own words and link back to the recipe page on my site. Original recipes and creations of this site are intended for personal and home use. Commercial replication or media consumption are only allowed with a written consent and agreement with Cleobuttera owners. Otherwise it is considered a violation of intellectual property. Thank you for respecting and appreciating the amount of time and effort that goes into creating free, unique recipes that make people happy.
