Luxurious Nutella Tart
This tart is what Nutella dreams are made of. Layers of a hazelnut tart shell, candied hazelnuts, silky Nutella ganache filling and a shiny Nutella glaze, makes this one luxurious treat for the tastebuds.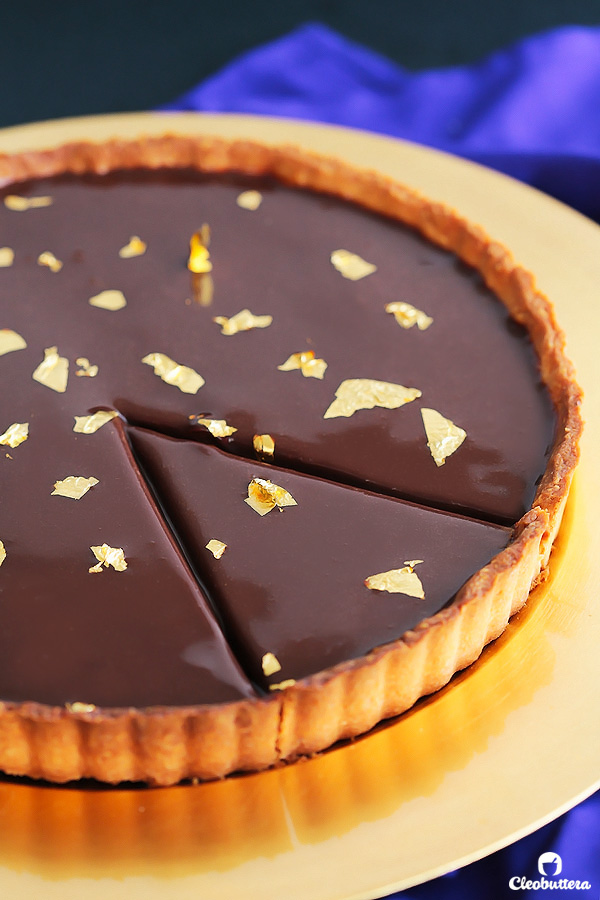
World Nutella Day is just around the corner! February 5th, you guys, and I’ve been itching for it for soooo long.
Can you blame me?
It’s the perfect excuse to make even more Nutella treats without apologizing for it.
You see..this blog is only about 2 1/2 months old and I already have 4 Nutella recipes on it. This is 20% of ALL the recipes.
And this is actually me trying to hold back and resist turning this blog into a Nutella overload.
I’ve been trying to vary things around here, you know…to have something for everyone, but deep down, all I wanna do is post Nutella recipes.
Whenever I start brainstorming recipes, Nutella is the first thing that jumps into my head. So yeah. I admit it. I’m madly in love.
So while everyone else is preparing for Valentine’s Day, I’ll be here celebrating my love for that good ‘ol Italian jar of goodness, that never seizes to make me happy. And we’re starting with this:
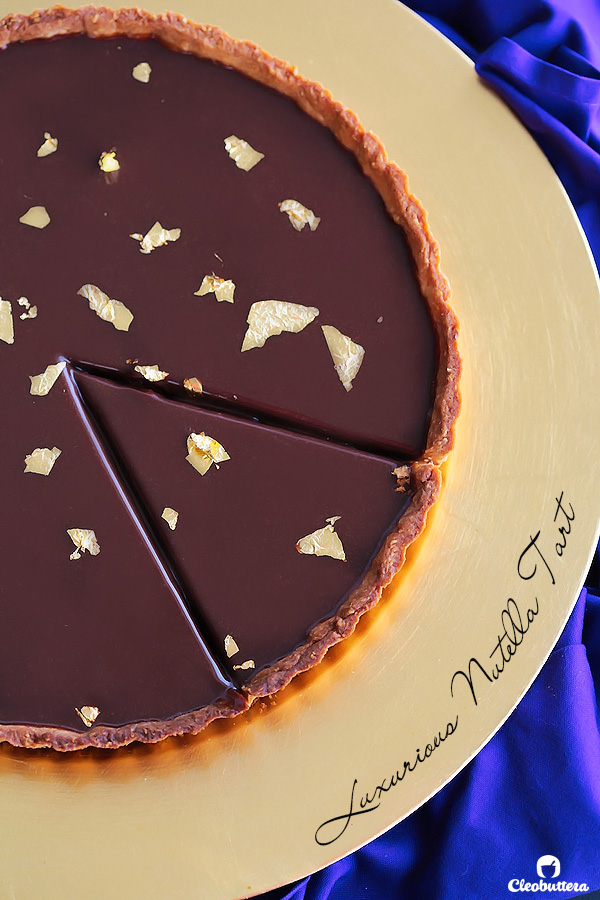
This thing of beauty screams Nutella flavor. Every bite is a chocolate-hazelnut explosion in the mouth. It will somewhat remind you of those delicious Ferrero Rochers. Nutella lovers will be transported to cloud number 9 eating it.
It has so many contrasting textures and the chocolate-hazelnut flavor comes through from different elements, giving the tart so much depth and dimension.
The pie is rich, and small slivers will go a long way, but its definitely not an overkill. It’s quiet dreamy actually. Luxurious is the right word.
I mean, it does contain a huge glob of this after all:
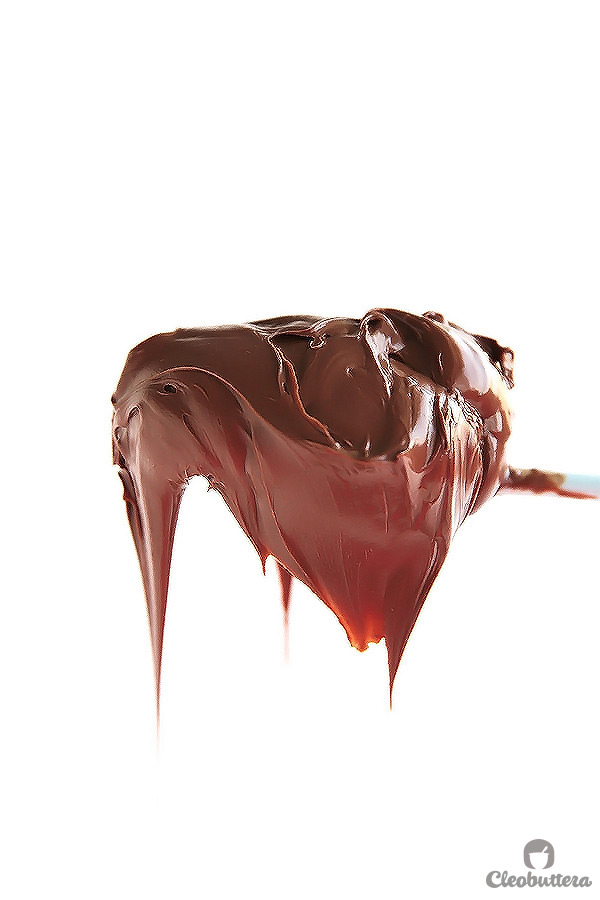
Were you expecting anything less?
Because…what’s a Nutella dessert without LOTS of Nutella?
But worry not my friends, the Nutella is not just blobbed on from jar to crust. It is diluted with some heavy cream and fortified with a little bit of chocolate and butter, which makes it more of pie filling material. I like to think of it like a ganache, only with Nutella. Which is even better.
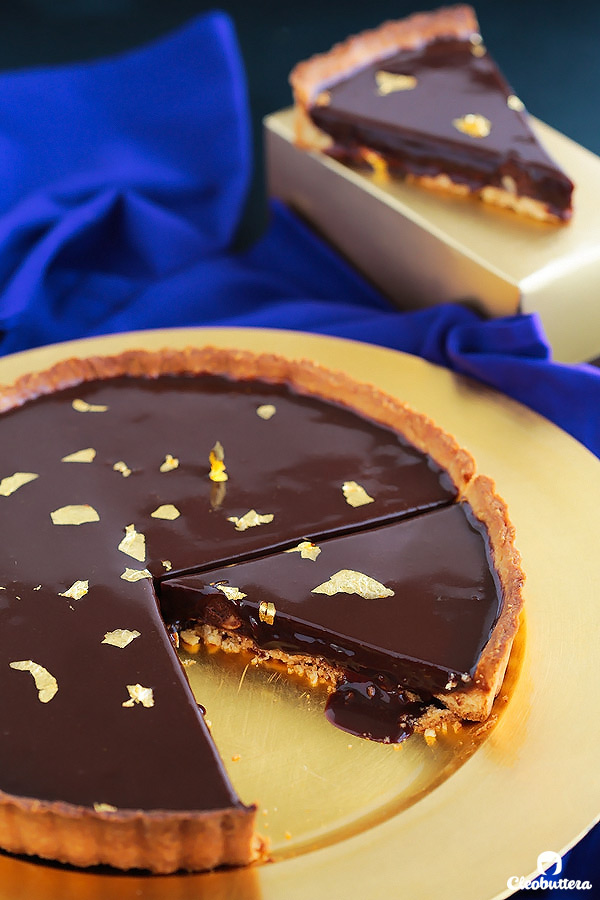
The tart starts off with a fragrant crust made from ground hazelnuts in place of some of the flour, which helps bring forth that chocolate-hazelnut flavor we’re after, and it tastes waaaaaaaay better than a plain tart shell….booooring.
Then the crust is topped with candied hazelnuts that take 2 minutes of your time to make, but adds such a pleasant crunch.
Then comes that silky, creamy filling that holds all Nutella. It might not even make its way to the tart, because you’re gonna end up eating so much of it right from the bowl.
The tart is then finished off with a glaze made from thinned Nutella that adds a beautiful sheen. This is completely optional and I used to make the tart without it in the past, but I’ve always felt the the tart has a very dull, matte look, so I decided to add this on for a prettier finish. If you decide to use it, know that it will make the tart sweeter, yet Nutella-ier.
Don’t be fooled into thinking that this tart is complicated. It’s really quiet easy to make and the great thing about it is that it can be made in advance. Details for that is down in the recipe.
Let me show you how simple it is:
For the tart shell, you’re going to ground up some toasted hazelnuts with confectioners’ (powdered) sugar in a food processor, until it’s finely ground like this:
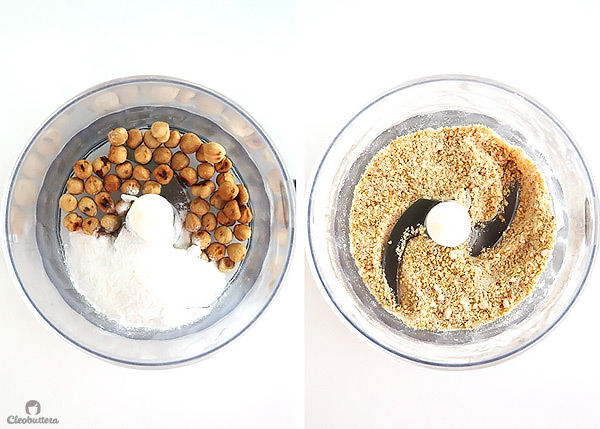
Then you’ll add in the flour and salt and pulse until combined.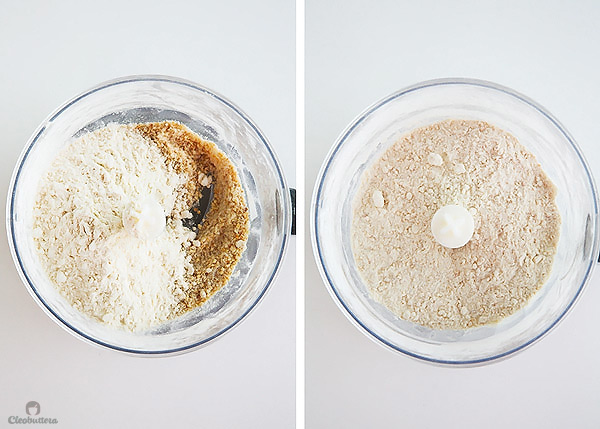
Scatter on those really really cold pieces of butter and give it a few pulses, until the butter gets well incorporated. DO NOT OVER WORK IT! A few pea-sized pieces of butter in there is OK.
*Tip for keeping the butter cold: Dice the butter first thing before making the dough and keep it in the freezer while preparing the rest of the ingredients.
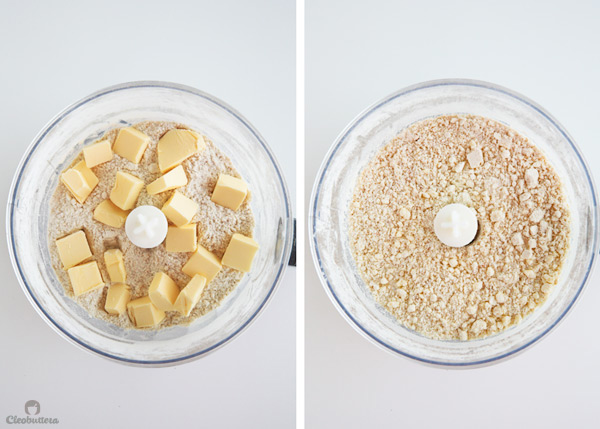
With the machine running, drizzle an egg whisked with vanilla extract into the feed tube of the food processor. Continue mixing until the dough comes together in a shaggy mass around the blade.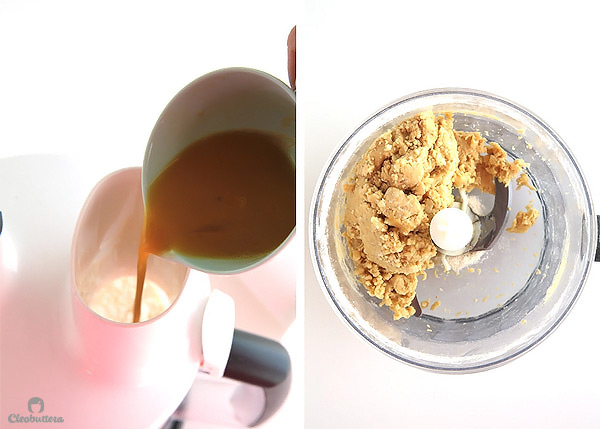
Turn out the dough on to plastic wrap, gently gathering it together, then flattening it into a 6-inch disk. Wrap well, then refrigerate for 1 hour or 2 days.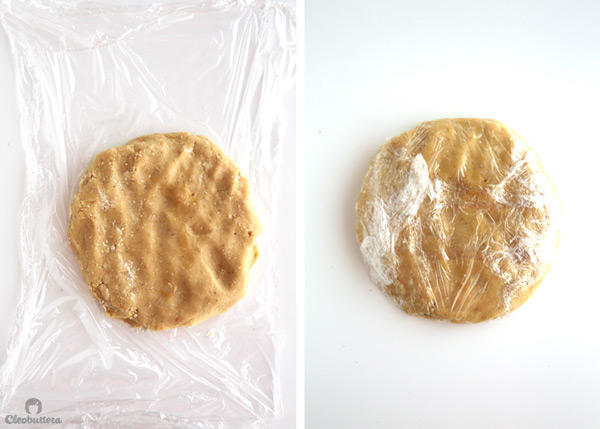
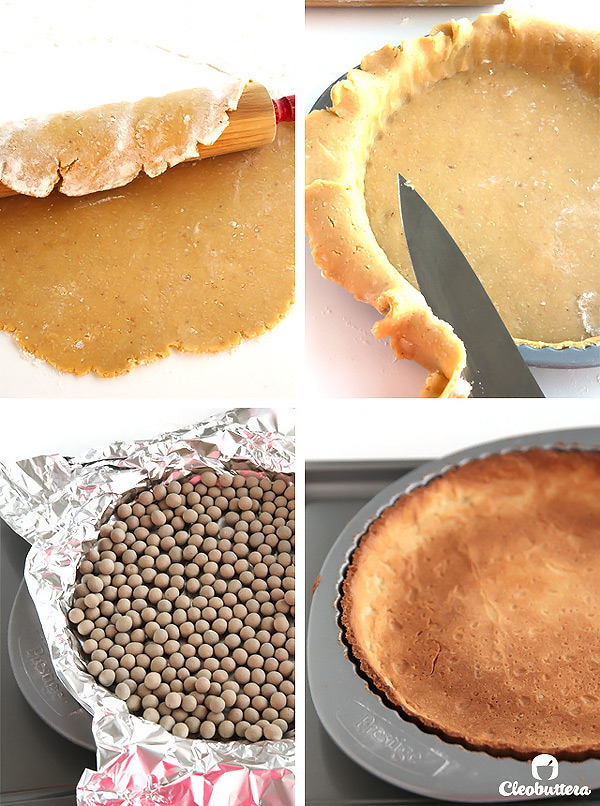
After the chilling time is over, roll the dough out into an 11-inch circle. Loosely roll it around the rolling pin, then slide on to the tart pan (with a removable bottom), fit it well, then trim off the access. Use the access dough scraps to press on to thin areas. Then you’ll cover it well and place in the freezer for 30 minutes.
Take it out of the freezer. Line the tart with a double layer of foil, fill with pie weights or dried beans, rice, pennies, whateves. Bake it off until golden, remove the pie weights, then bake a little bit more till it cooks through and evenly golden brown.
While the tart shell is cooling, make the candied hazelnuts. So easy, just chopped hazelnuts and a little sugar, heated on medium heat until the sugar melts and caramelizes around the hazelnuts. Let it cool completely then sprinkle it on top of the crust. Filling time! Bring the cream to a simmer, take it off the heat, then add the chocolate and butter. Cover for 2 minutes until the chocolate starts to melt, uncover then whisk until smooth.
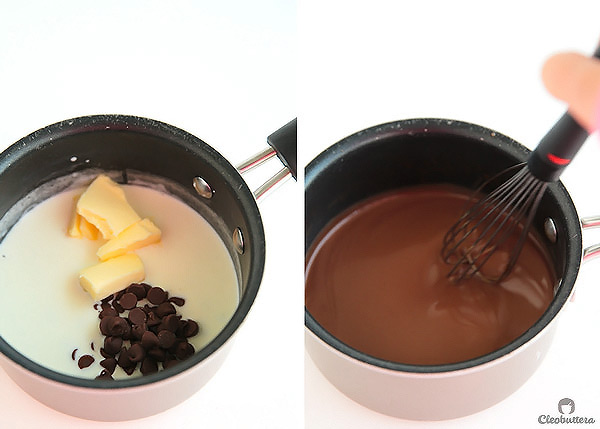
Here comes our STAR ingredient! Nuuuuuuuuuttella. Come on, plop it in! Yup! Then whisk whisk whisk until smooth and luscious.
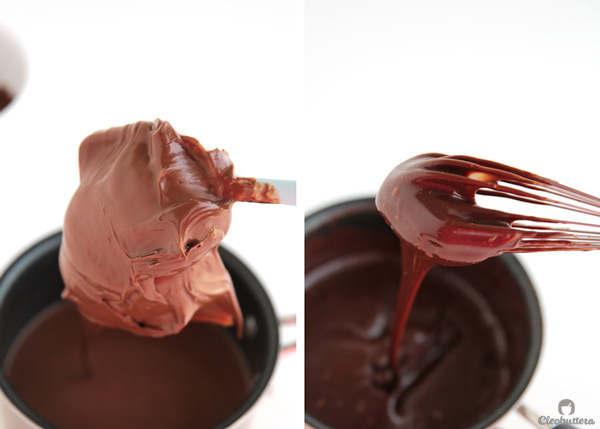
Ooooooohhhh! Here comes my favorite part…moment of silence please…..
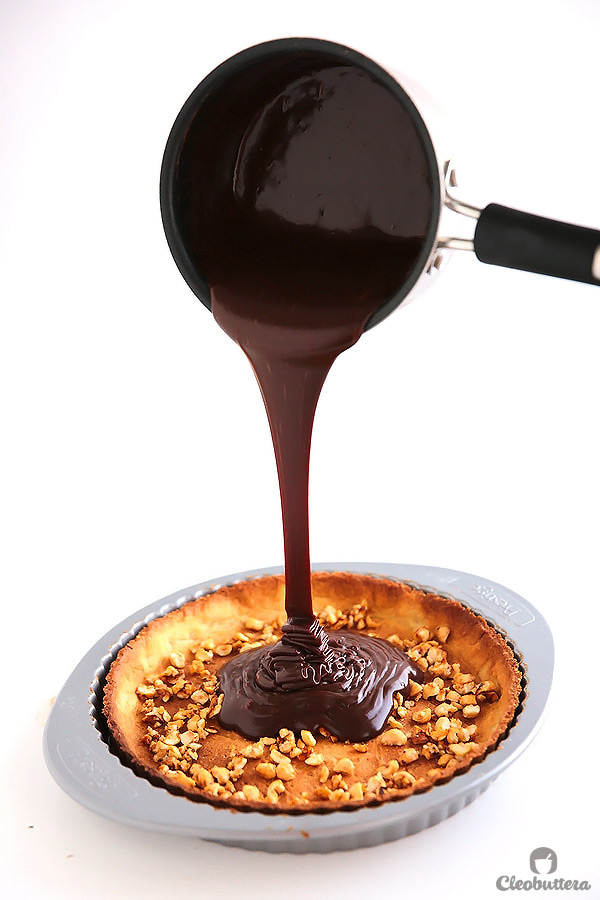
Oh yeah! Pour it aaaaall up…then lick the saucepan clean.
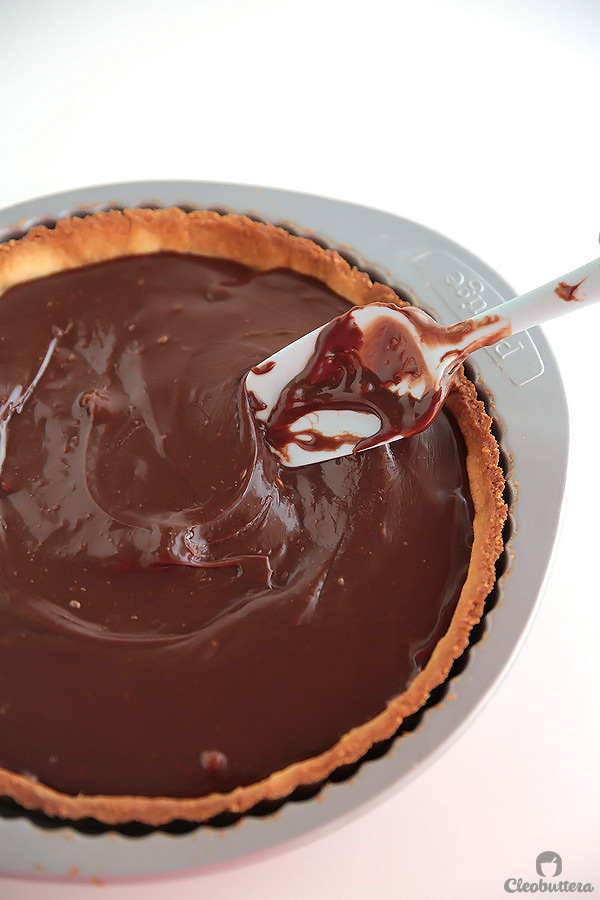
Then spread it out with a spatula so you could lick that too.
Cover and chill until set, about 2 hours or up to 1 day. I know…the wait! Torture!!!
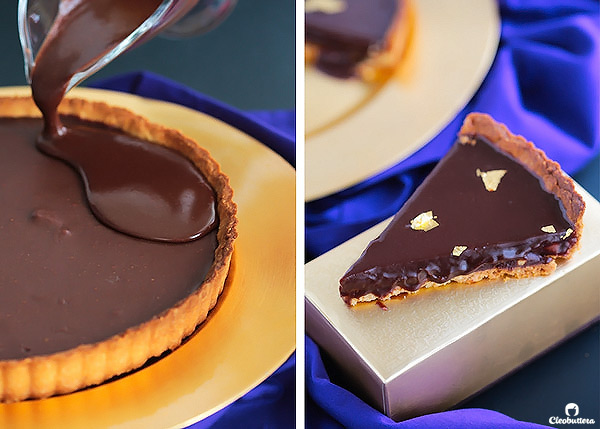
You see that matte finish of the pie on the left? Yeah? Good. So if you’re okay with that, then you’re ready to dig in. But if you’re finicky like someone I know (ahem), then make the Nutella glaze. Its just Nutella and a little milk; so no biggie. Pour it all over, add some garnish like more hazelnuts, Ferrero Rocher, ooooooh sea salt flakes, or some gold leaf for that luxurious feel.
Nooooooow you could dig in.
ENJOY TO THE MAX FELLOW NUTELLA LOVERS!
Luxurious Nutella Tart

This tart is what Nutella dreams are made of. Layers of a hazelnut tart shell, candied hazelnuts, silky Nutella ganache filling and a shiny Nutella glaze makes this one luxurious treat for the tastebuds.
Ingredients
For the Hazelnut Tart Shell:
- 1 large egg
- 1/2 teaspoon vanilla extract
- 1/2 cup (2oz/ 57g) hazelnuts, toasted
- 1/2 cup (2oz/ 57g) confectioners' sugar
- 1 cup (5oz/ 142g) all-purpose flour
- 1/8 teaspoon salt
- 5 tablespoons (2 1/2/ 71g) unsalted butter, cut into 1/4-inch pieces and chilled
For the Filling:
- 1/4 cup (1 1/4oz/ 35g) hazelnuts, coarsely chopped
- 2 teaspoons granulated sugar
- 1/2 cup heavy cream
- 1/3 cup (2 oz/ 57g) semisweet chocolate chips or chopped from a bar (see note below)*
- 2 tablespoons (1oz/ 28g) unsalted butter, softened
- 1 1/4 cup (13oz/ 369g) Nutella
For the Glaze (optional, but gives a beautiful sheen to the filling)
- 2 tablespoon Nutella
- 1 tablespoon whole milk
Instructions
For the Hazelnut Tart Shell:
- Whisk the egg and vanilla together in a small bowl; set aside.
- Process the hazelnuts and sugar together in a food processor until finely ground, 8 to 10 seconds.
- Add the flour and salt and pulse to combine.
- Scatter the butter pieces over the top and pulse until the mixture resembles coarse cornmeal, about 15 pulses.
- With the machine running, add the egg mixture through the feed tube and continue to process until the dough just comes together around the processor blade, about 12 seconds.
- Turn the dough onto a sheet of plastic wrap and flatten into a 6-inch disk. Wrap the dough tightly in plastic wrap and refrigerate for 1 hour or up to 2 days.* Before rolling the dough out, let it sit on the counter to soften slightly, about 10 minutes.
- Roll the dough out to an 11-inch circle on a lightly floured counter, loosely roll around the rolling pin, lift, then carefully fit it into a 9-inch tart pan with removable bottom. Trim access dough using a sharp knife to make a clean edge. Use access dough scraps to press into any weak, thin areas.
- Set the tart on a large plate and freeze the tart shell for 30 minutes.
- Adjust oven rack to middle position and heat oven to 375F/190C.
- Set the tart pan on a large baking sheet. Press a double layer of foil into the frozen tart shell and over the edges of the pan and fill with pie weights or dried beans, uncooked rice or pennies.
- Bake until the shell is golden brown and set, about 30 minutes, rotating the baking sheet halfway through baking.
- Carefully remove the weights and foil and continue to bake until it is fully baked and golden, 5 to 10 minutes longer.
- Transfer the baking sheet to a wire rack and let the tart shell cool on the baking sheet while make the filling.
For the Filling:
- Cook the hazelnuts and sugar together in a medium nonstick skillet over medium heat, stirring constantly until the nuts are golden and caramelized, about 1 minute. Remove the nuts from the skillet and set aside in a small bowl to cool.
- Bring the cream to a brief simmer in a saucepan over medium-high heat. Off the heat, stir in the chocolate and butter, cover the pan, and let stand until the chocolate is mostly melted, about 2 minutes. Gently stir the mixture until smooth. If the mixture looks grainy with bits of chocolate, reheat it gently over low heat, whisking constantly until completely smooth.
- Stir in the Nutella. It will be clumpy and difficult to stir at first, but then it will smooth out as the stirring progresses.
- Sprinkle the cooled candied hazelnuts over the bottom of the tart shell, breaking up any clumps.
- Pour the chocolate filling evenly over the nuts, cover tightly with plastic wrap, then refrigerate the tart until the filling is firm, about 2 hours or up to 1 day.
- Uncover the tart, then pour on the glaze (if using, instructions below) and tilt the pan to cover the top completely. Smooth out with a spatula if needed.
- To serve, remove the outer metal ring of the tart pan, slide a thin spatula between the tart and the tart pan bottom, and carefully slide the tart onto a serving platter. Serve cold or at room temperature.
For the Glaze:
- Whisk together the Nutella and milk until silky smooth. If the Nutella hasn't completely dissolved at the point, then heat in the microwave for 10 seconds and whisk again.
Recipe Notes
- The original recipe calls for bittersweet chocolate in the filling, which I did not use because I knew it would be too dark for my tasters. I used semisweet chocolate instead, which most of us found to be the perfect balance of sweetness, but the little ones detected dark undertones. I then tried using milk chocolate instead, and while it hit the spot with the little ones and those with "child-like tastebuds," the grown ups found it too sweet. So choose the chocolate of your preference; milk, semisweet, bittersweet or a combination of 2, all work just fine in this recipe.
- The glaze is not a part of the original recipe, yet I added it to give the tart a much needed shiny finish. The tart will taste great with or without it. Just note that the glaze will add an even more Nutella flavor but will also make the overall tart sweeter. If using the glaze, I recommend staying away from milk chocolate in the filling and sticking to semisweet or bittersweet to balance out the sweetness.
- The tart dough, wrapped tightly in plastic wrap, can be refrigerated for up to 2 days or frozen for up to 1 month. If frozen, let the dough thaw completely on the counter before rolling it out.
- The tart dough can be made ahead. The baked tart shell can be cooled completely, wrapped tightly in a plastic wrap, and stored at room temperature for up for up to 2 days. Once filled and chilled, the tart can be wrapped loosely with plastic wrap and refrigerated for up to 1 day.
Hazelnut Tart Shell & Filling adapted from The America's Test Kitchen Family Baking Book
Measurements Note: All recipes of this site have been developed using weight measurements. Although US volume measurements have been included for your convenience, it is highly encouraged that you weigh your ingredients using a kitchen scale to get the best possible results. Due to the sensitive nature of baking, kitchen scales are proven to yield more accurate and consistent results than measuring cups. Enjoy!
This post may contain affiliate links.
All images and content are owned by Cleobuttera® and are copyright protected. Please do not use my images without prior permission. If you would like to republish a recipe, please rewrite it in your own words and link back to the recipe page on my site. Original recipes and creations of this site are intended for personal and home use. Commercial replication or media consumption are only allowed with a written consent and agreement with Cleobuttera owners. Otherwise it is considered a violation of intellectual property. Thank you for respecting and appreciating the amount of time and effort that goes into creating free, unique recipes that make people happy.
