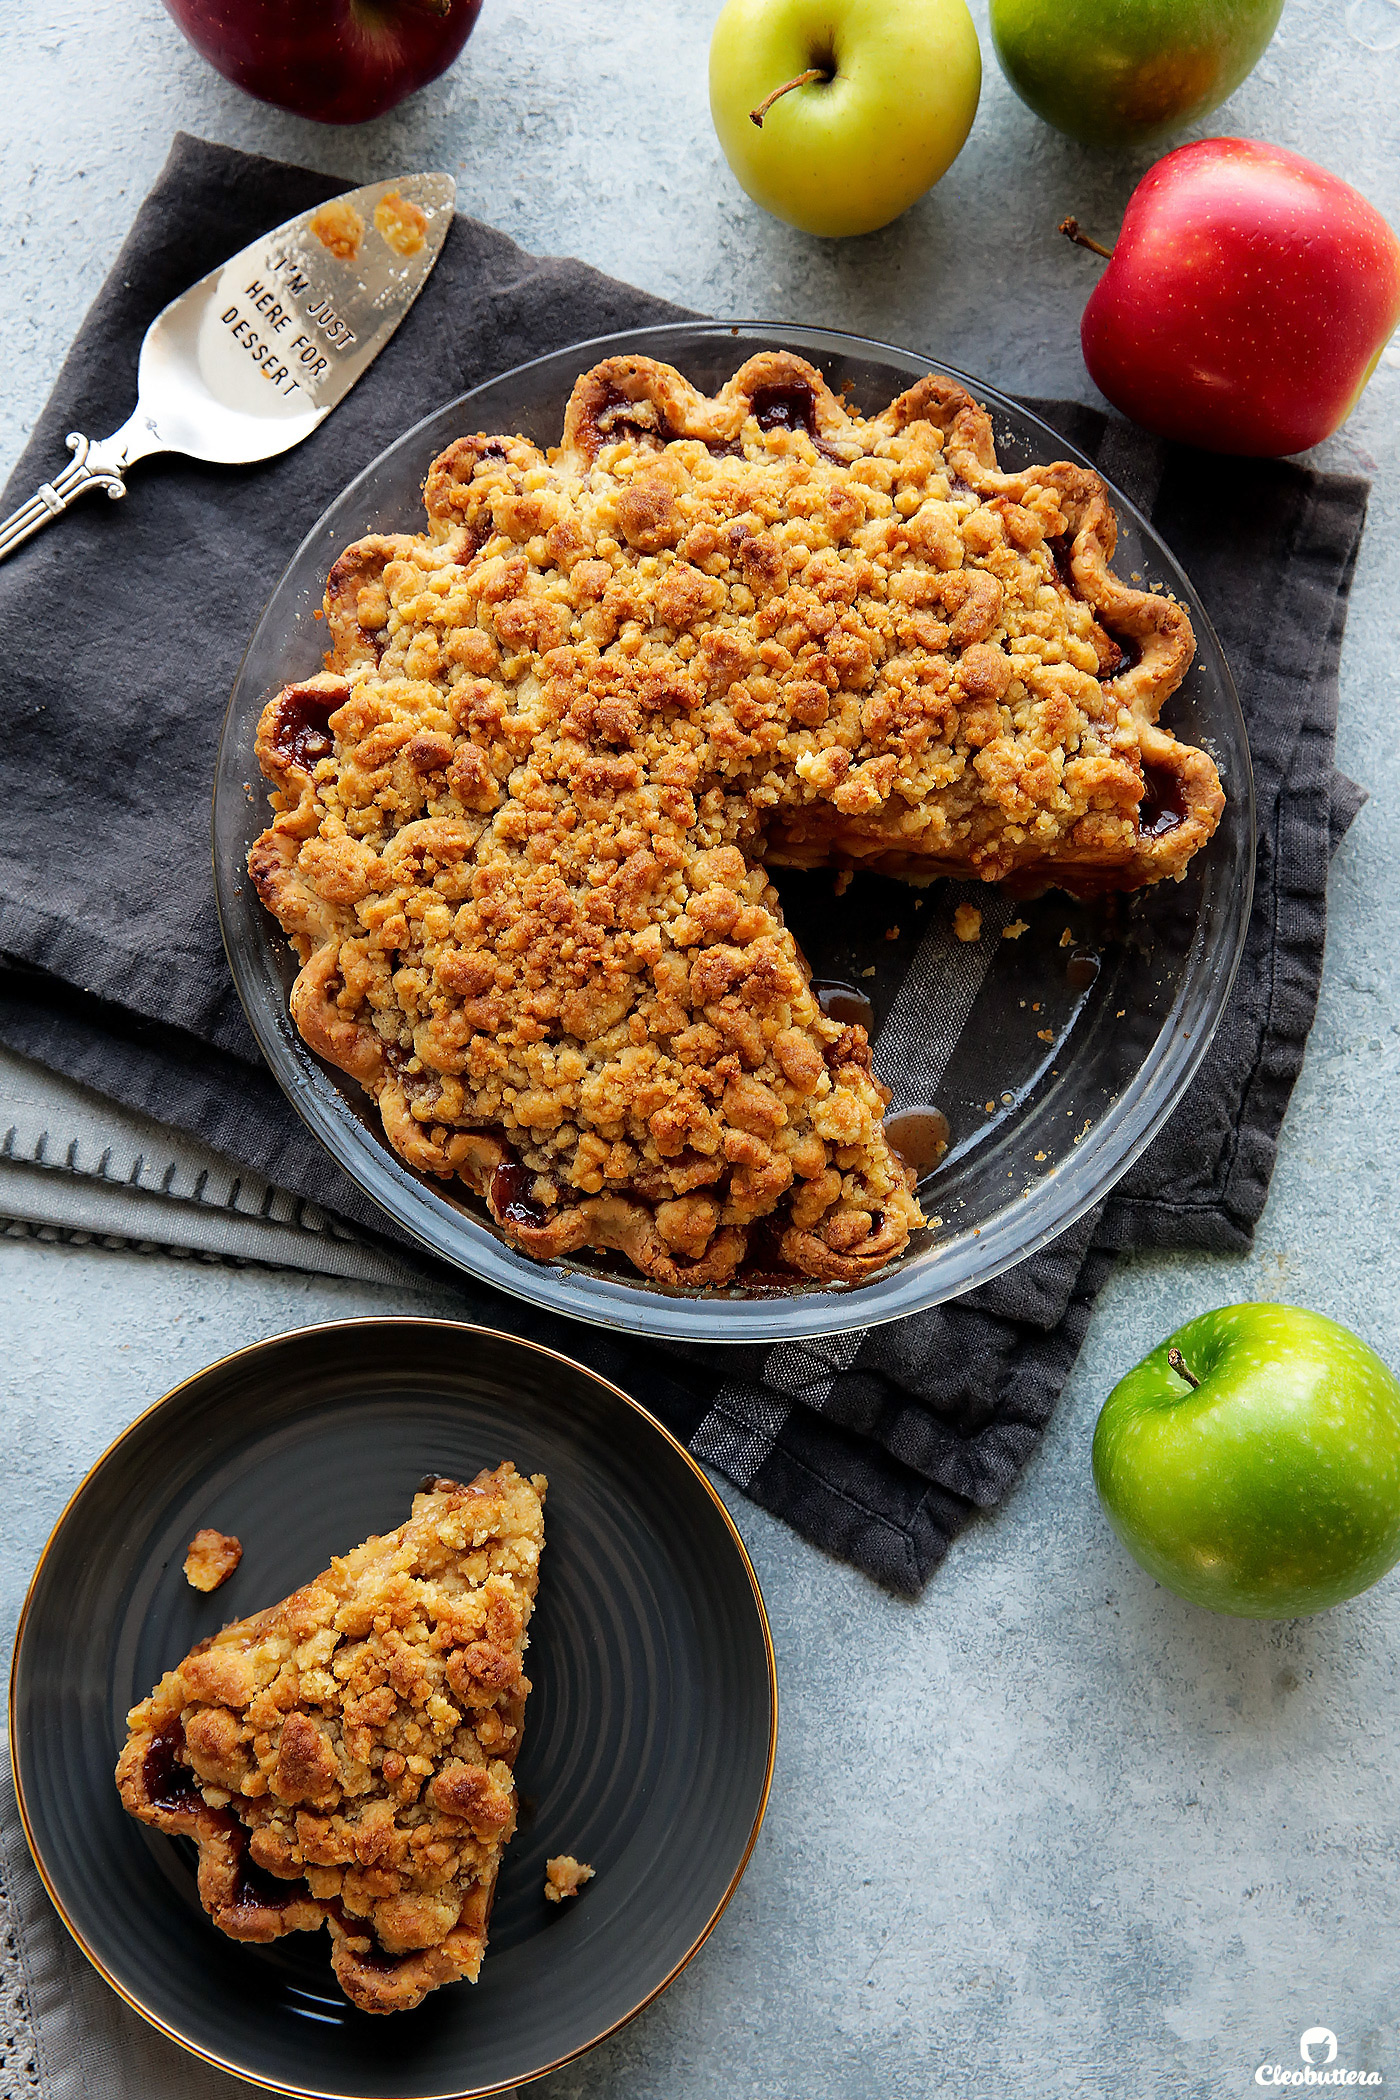
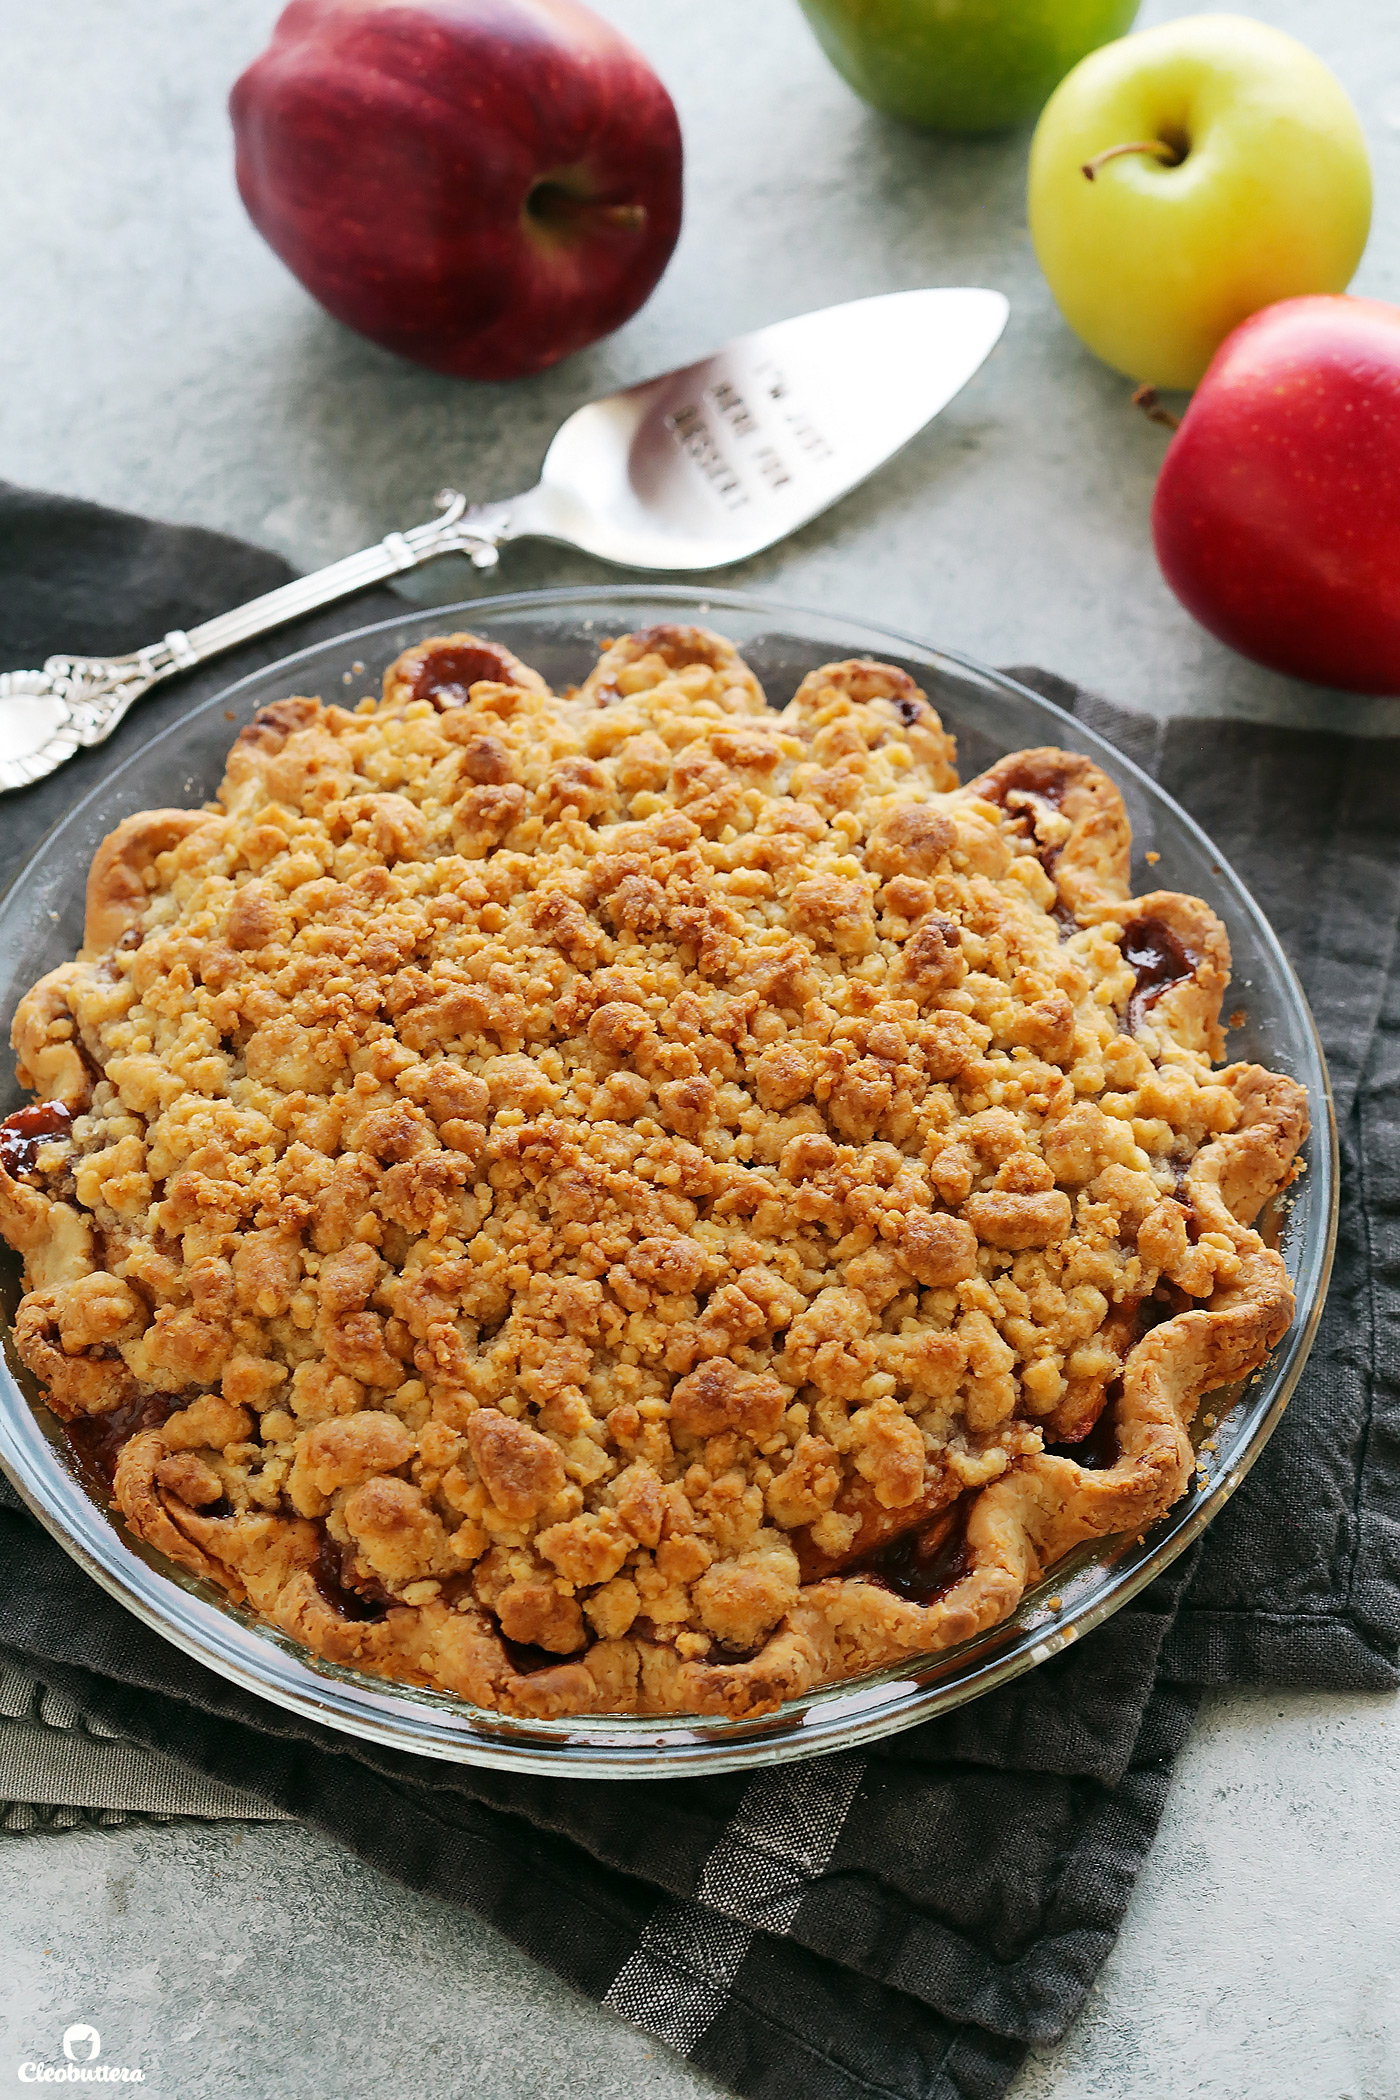
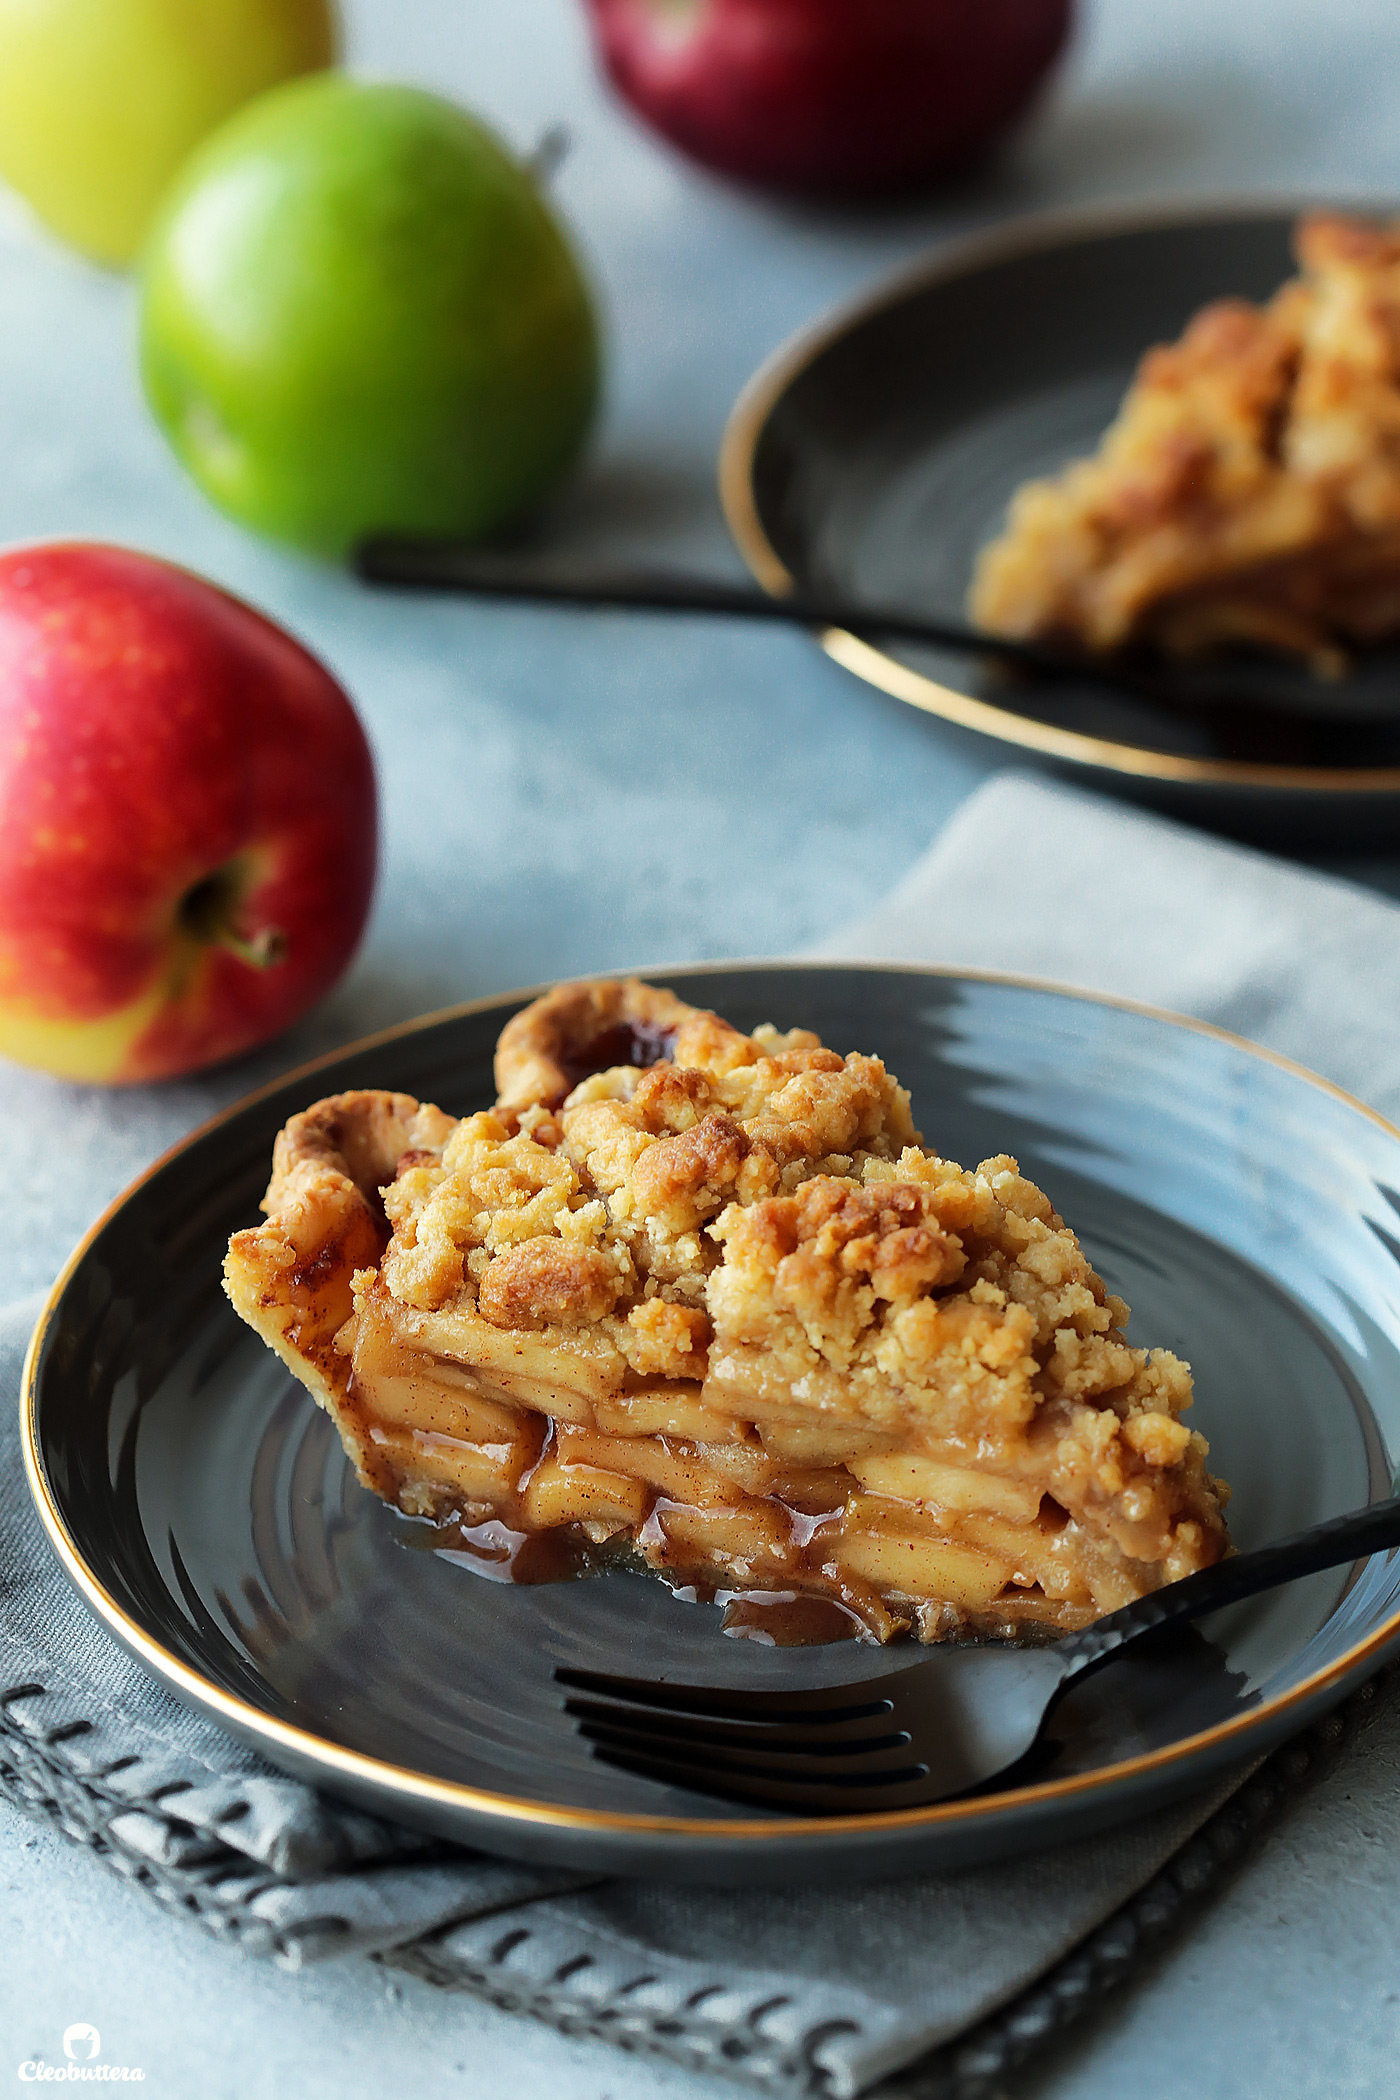
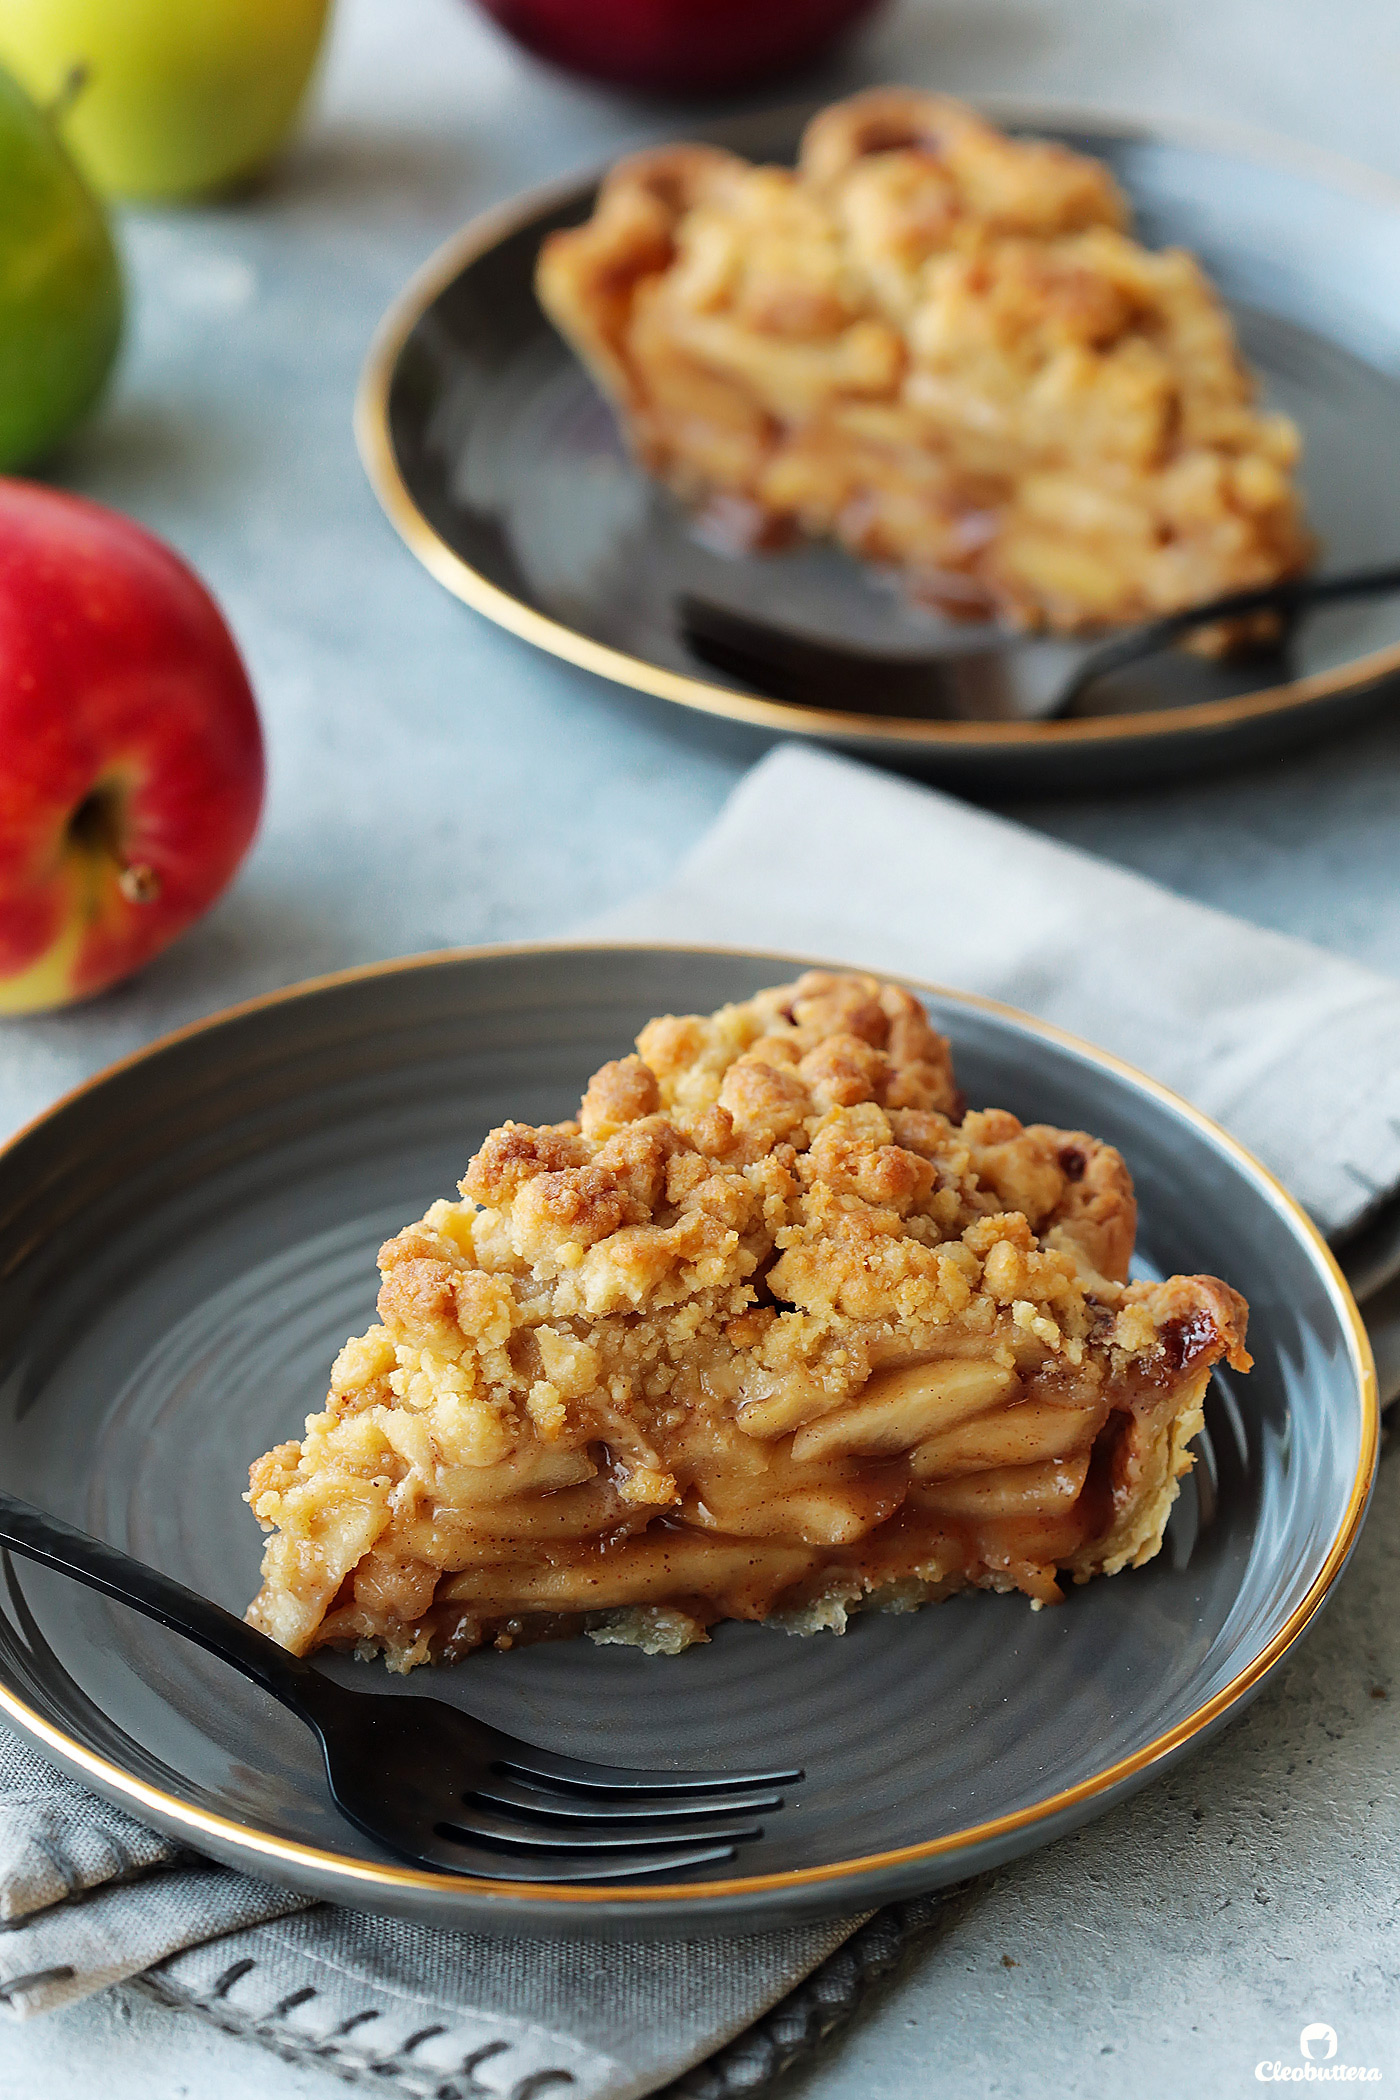
Apple Crumb Pie
Super flaky crust, warmly spiced, saucy apple filling, crunchy crumb topping…this is apple pie perfection right here! A few tricks ensures a crisp, well-browned bottom crust that is never, ever dense or soggy.
Please tell me I’m not the only one who thinks that apple pie is not “as easy as pie.”
As a baking enthusiast & self proclaimed pastry nerd, it’s safe to say that I’m pretty confident around the oven. Challenging recipes excite me and complex ones fuels my passion. Throw a Russian Honey Cake that takes 3 days to prepare & you’ll find me elbow deep in batter. Gimme a towering 12 layer chocolate cake recipe & I’ll welcome it with open arms.
As much as I enjoy making simple, care-free pastries that whip up in no time, I just LOVE taking on more difficult baking projects with multi-step instructions, intense level of involvement and days to prepare. Love it! Well as long as it’s worth it in the end ofcourse.
But for some reason, that seemingly “simple” apple pie, that tends to be the least of most bakers’ worries, has been one of those things that has perplexed me for years.
It’s not that I think it’s difficult to make. It’s just that I never actually made one that came out the way I had imagined.
I wanted a pie that’s warmly spiced, with a saucy apple filling, and caramel notes in every bite. I wanted this to sit on a flaky crust that is as crisp and well-browned on the bottom, as much as it is around the edges. I wanted it sweet enough to satisfy my sweet-tooth, but not cloyingly so to be able to take on a large scoop of vanilla ice cream and extra drizzles of caramel sauce.
What I usually end up with is a soggy, doughy bottom crust swimming in a soupy, bland apple filling that tastes like unexciting applesauce more than anything else.
Sure…some trails were much better than others, but non was able to check off every attribute on my wishlist.
So for the longest time, I avoided making them like the plague and turned to other apple pie variations like this Amazing Apple Tarte Tatin and Apple Pandowdy to curb my wildest apple pie cravings.
Until my mom, whose favorite dessert in the world is apple pie, asked me to make her a classic one. That’s when I decided it was time to toss any predisposed feelings I had for the dreaded pie and revisit it with an open mind.
And let me just tell you…I’m so glad I did!
I took everything I learned from my previous pie experiences and translated it into a pie that I couldn’t be happier about. Apple pie connoisseur-mom approved!
Super flaky, tender crust ✔️
Well-browned bottom, that is never dense or soggy ✔️
Flavorful, saucy apple filling with hints of caramel ✔️
Sweet but not overly so ✔️
No waiting required. Can be eaten hot, straight from the oven, because who likes cold apple pie?! ✔️
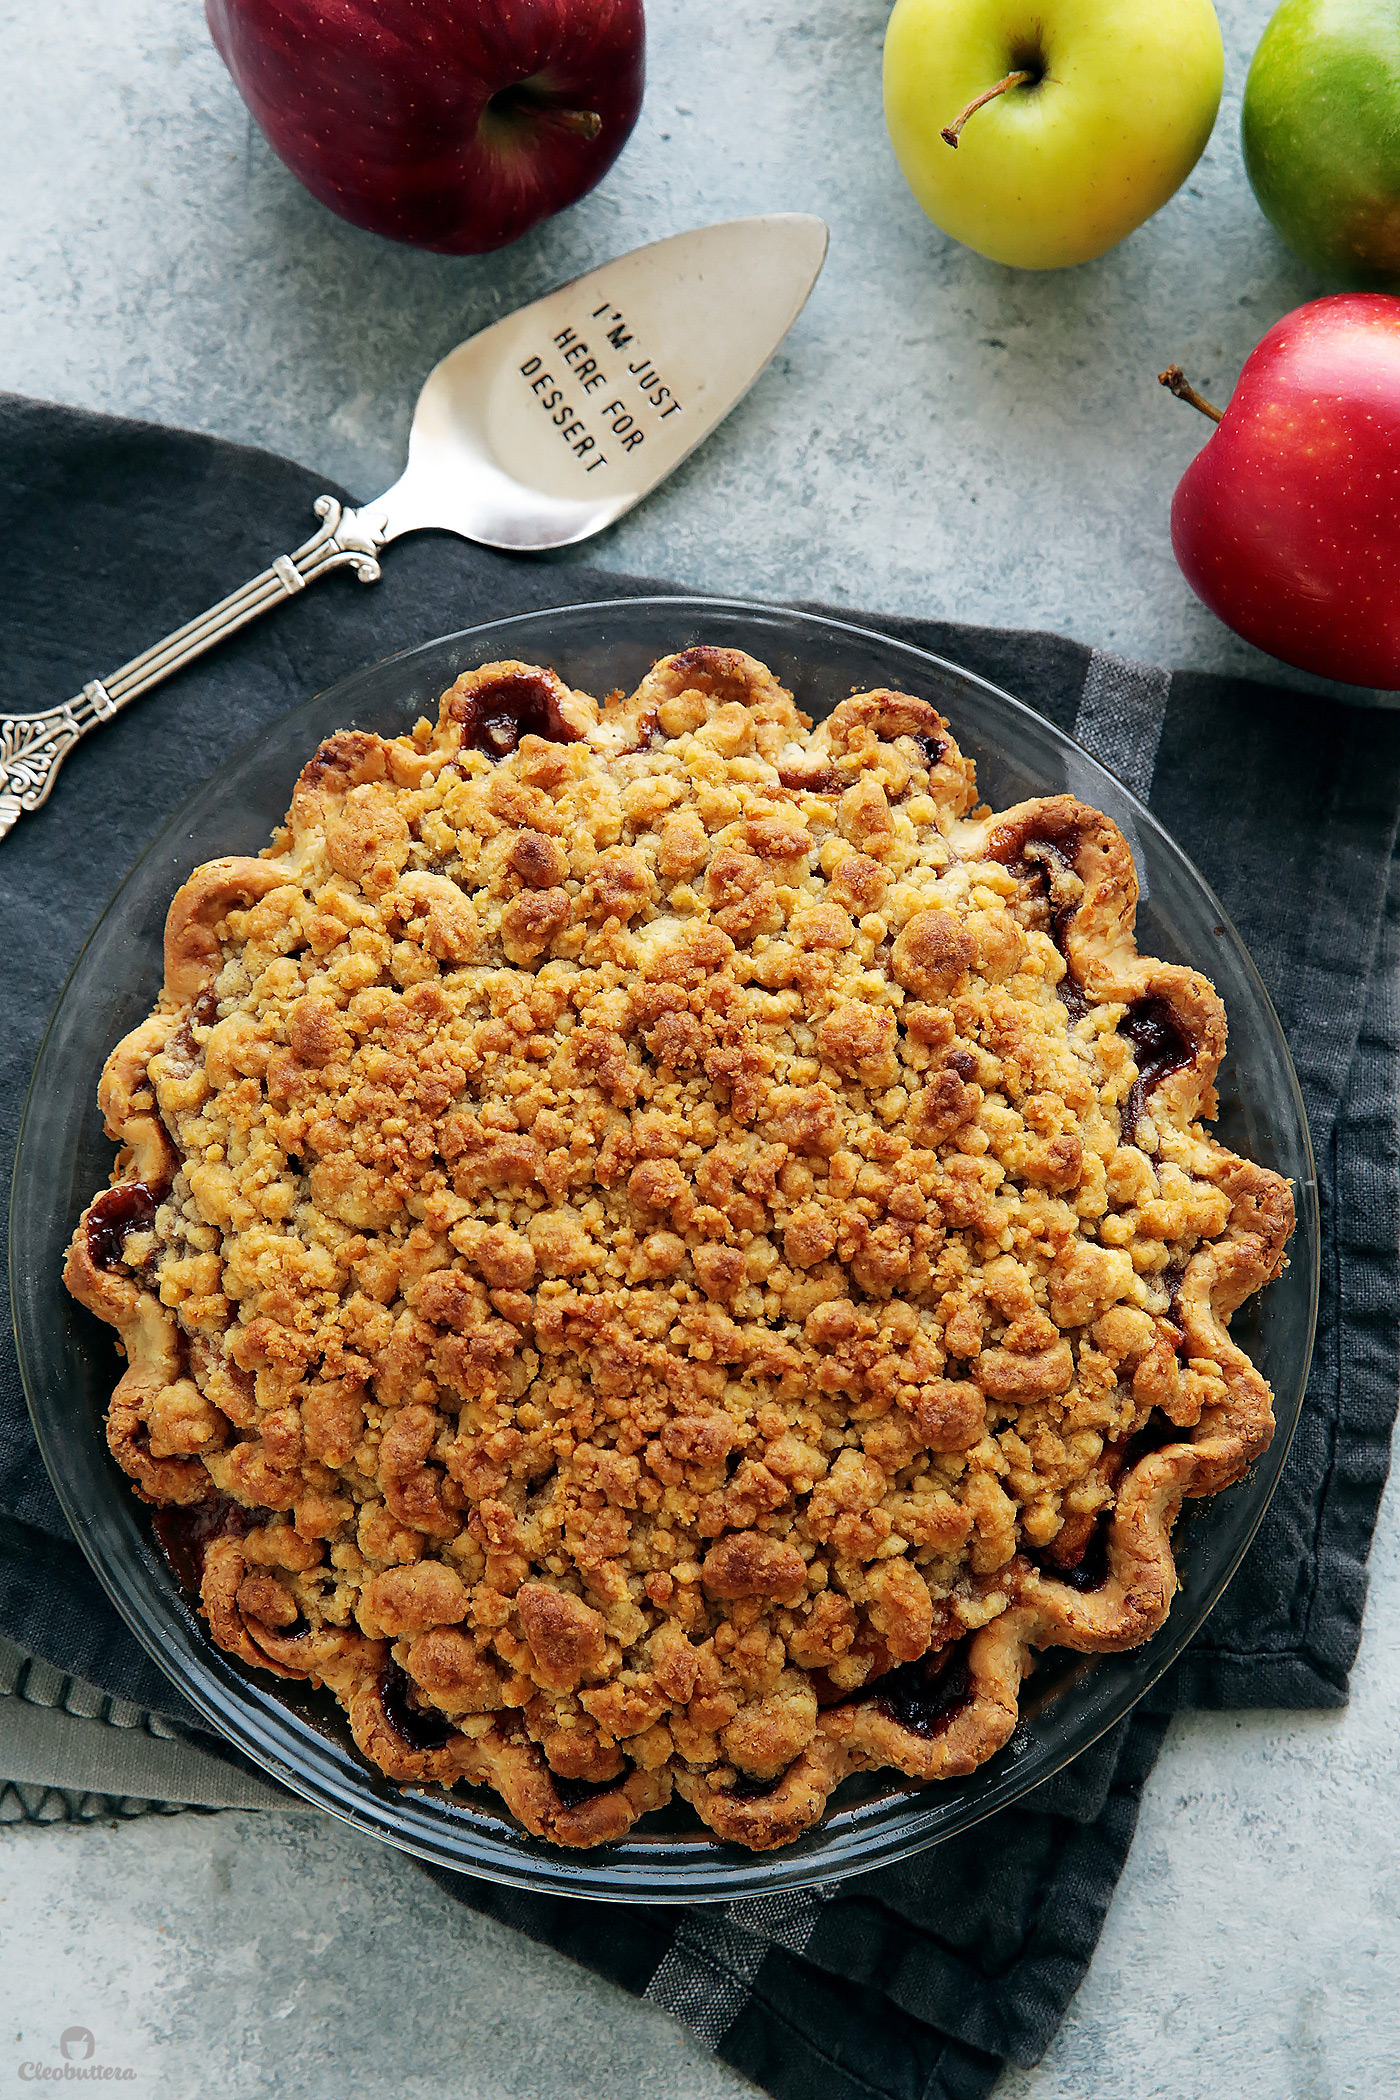
A bonus thick layer of crunchy crumbs…well, because it’s one of life’s greatest pleasures ✔️
This recipe was approached with ONE main issue in mind:
- The crust that always ends up soggy no matter what I do to it. (It’s my pie pet peeve).
It was all I could think about. I knew that if I could solve this problem, the rest will follow.
Right off the bat, I knew I had to branch beyond the old fashioned way of making apple pie -raw apples tossed in sugar, spices and thickener, and placed over raw pie dough- because I tried it several times in the past and it never worked for me. From the juices that exude from the apples as they bake, wetting the bottom of the crust, to the apples that come out crunchy even after an hour of baking.
Here’s the thing. Juiciness in pie is a great thing, but too much juiciness in one of the culprits of fruit pies.
Bakers and cookbook authors have popularized 2 ways to manage this issue:
- Macerating the apples. “Marinating” the apples with the sugar and spices for several hours, allows the fruit to give off it’s juices before baking. The juices are then either reduced over the stovetop to evaporate most of its moisture and thicken its consistency or some sort of thickener like flour or cornstarch is added to it. This technique helps control the amount of moisture going into the pie shell
- Precooking the apples. Sautéing the apples in butter beforehand, also allows for all the juices to come out, which puts you in full control of how you want to tackle it. Some would discard that super flavorful juice (seriously??!!) to ensure a dry filling that won’t sog the crust. While others would further cook the juices with a thickener for a saucier consistency.
After trying both methods, I must say that I’m in favor of precooking the apples.
Not only does this step allows you to control the consistency of the juices going over the crust, but also:
- Sautéing the apples in butter heightens, caramelizes and concentrates its flavors.
- You can literally see how thick the filling is before pouring it over the crust, which is always assuring.
- It gives you a chance to taste the filling, and adjust the sweetness and spices to your liking. So there are no surprises or second guessing yourself…what you see in the skillet is what you’ll get in the baked pie. Did I mention that I added apple juice to the mixture? A flavor bomb trick that I learned from Apple Pandowdy.
- Because the apples are fully cooked before the baking process, it eliminates the chance that they might come out crunchy or underbaked by the time the rest of the pie is fully baked.
Wait…won’t the precooked apples overbaked and turn to mush as they cook again in the oven?
NOPE!
When the apples are gently heated, their pectin turns into a heat-stable form that prevents them from cooking further in the oven. That is of course given you abide to 2 rules; 1) Maintain a medium to medium-high heat while cooking them, and 2) be sure to cool the filling COMPLETELY before adding it to the crust. The great thing about this step though, is that it can be prepared in advance, which streamlines the process later!
Now that I was able to get the apple filling as tender, flavorful, saucy and thickened as I wanted it to be. It was time to direct my attention to the crust itself.
We just can’t have a great pie without a great crust, so I was bias to an all-butter crust from the beginning, because hello flavor! After lots of recipe testing, I landed on a recipe gem. It is the flakiest all-butter pie crust recipe I’ve ever come across. It tastes like croissant and feels like a richer version of puff pastry. It’s crazy delcious and it’s the only pie crust recipe I’ll be using from now on.
Because this crust is like nothing I’ve ever made or tasted before, I dedicated a special blog post for it here.
Normally, you can just pile in the cooled apple filling over the raw pie dough, bake it off and end up with a crisp, well browned bottom, but because I chose to top my dream pie with crumbs, things had to take a left turn.
Since crumbs and pie crust bake at different rates, the crumbs finished baking before giving the pie crust bottom a chance to fully bake and take on some nice color.
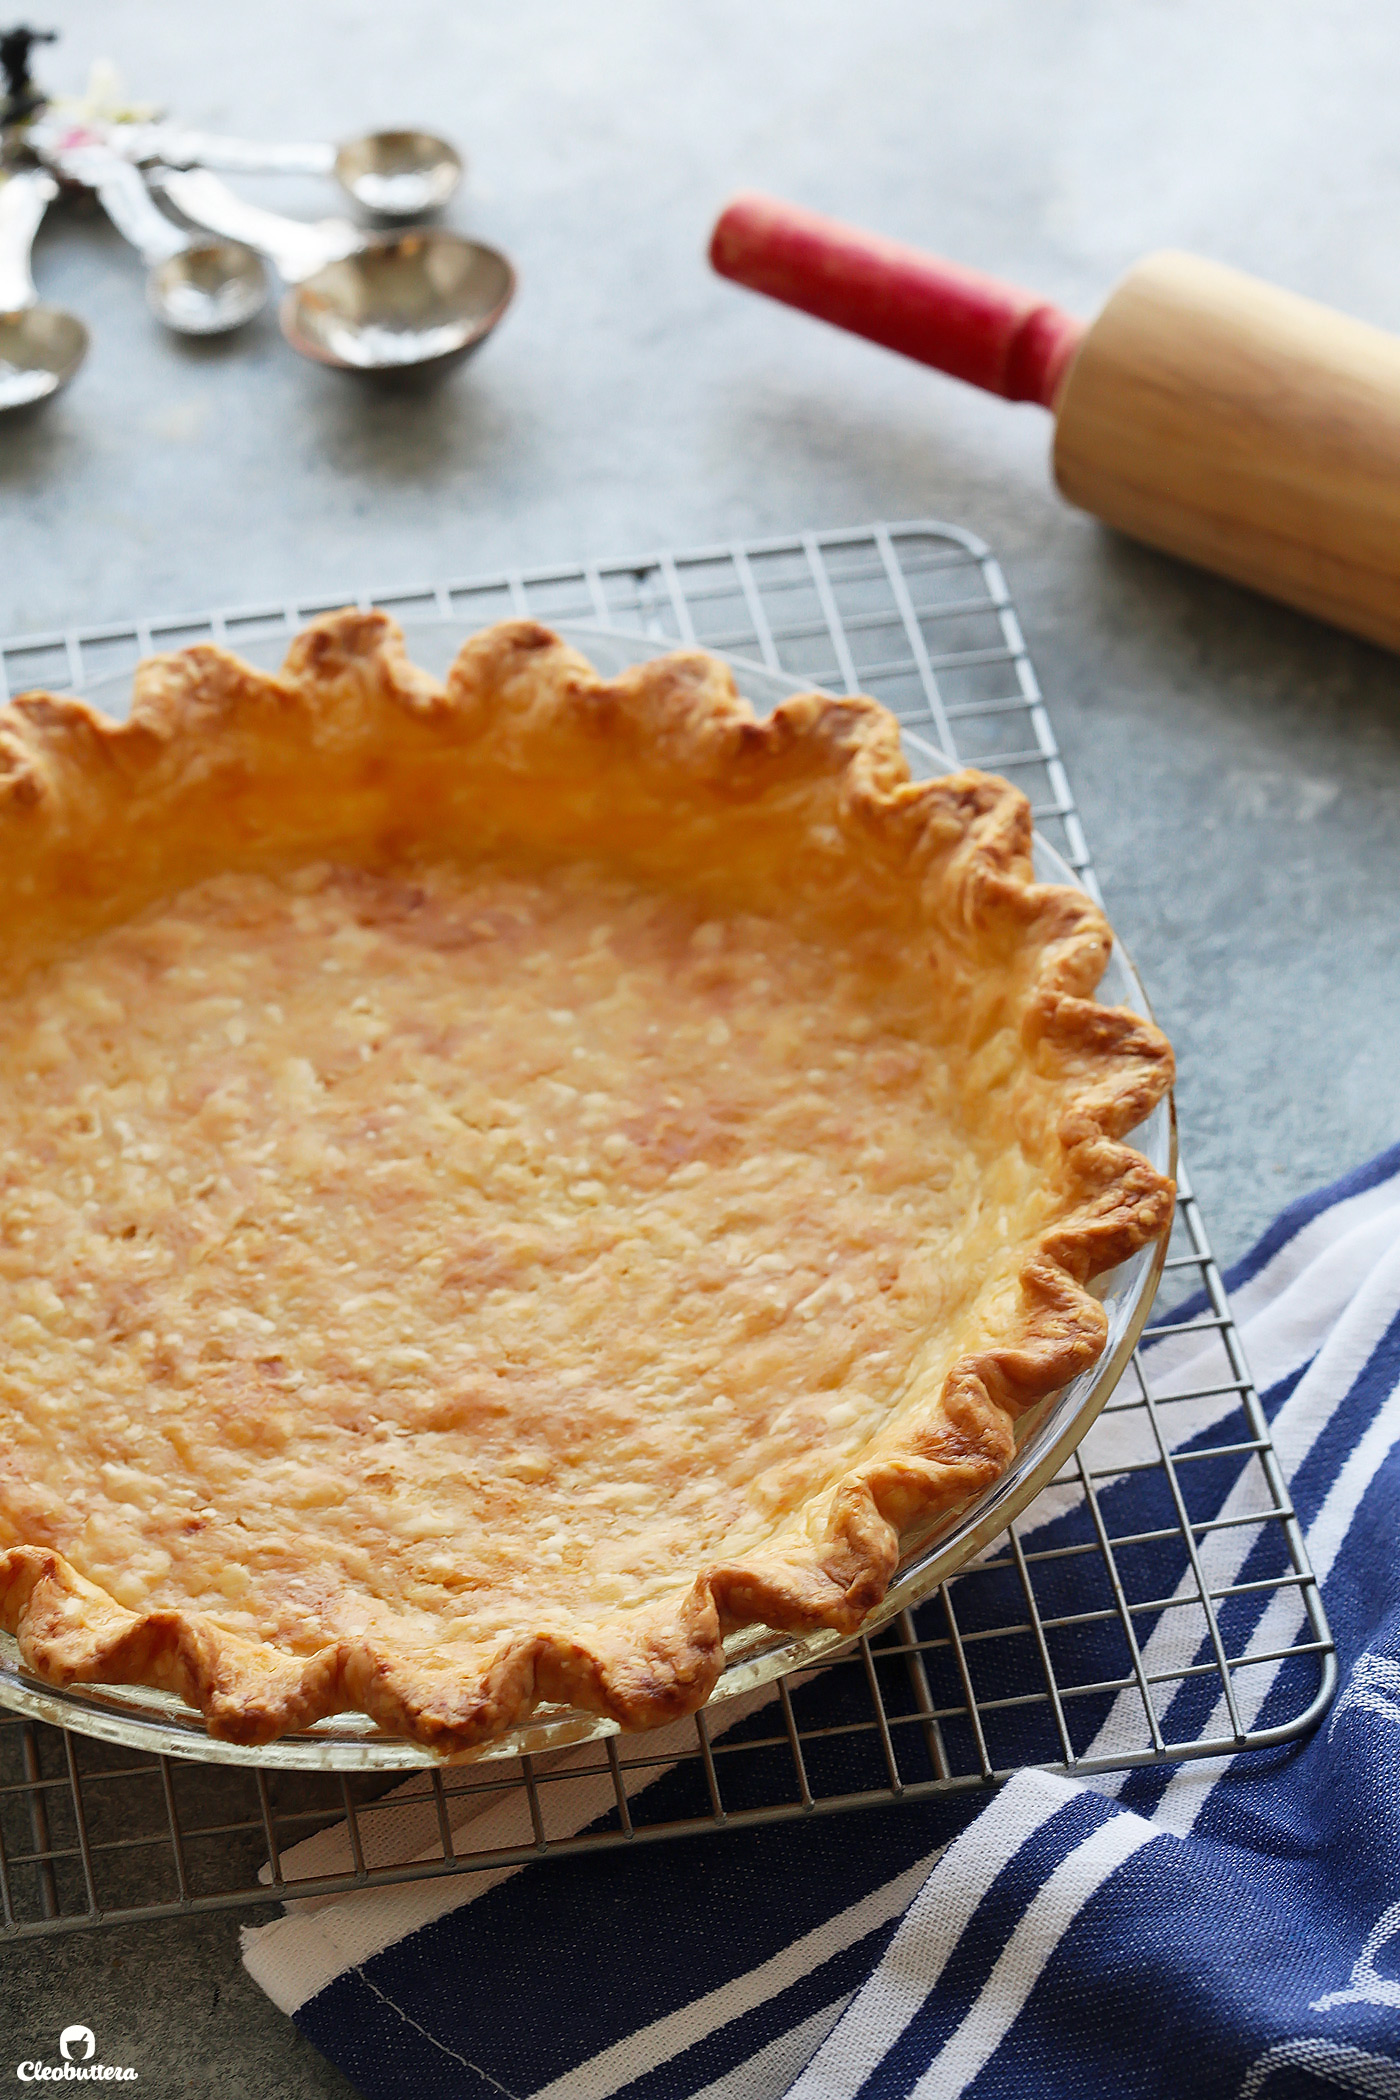
The solution? Give the pie crust a head start and partially bake it!
I know it sounds like I’m complicating stuff, and I probably turned off several of you away by now…but I promise, the end result is worth the extra effort.
Parbaking is when you partially bake the crust before filling it, to help ensure the crust is fully baked by the time the filling (or in this case, the topping) is cooked and comes out nice and crisp. Just another extra insurance that we’ll end up with a crisp, flaky bottom. I told you that ending up with a crisp crust was all I could think about.
It’s just a little sacrifice we have to make, so we can have those golden clusters of crumbs in our lives. Trust me…it’s the best part.
So…now that I’ve talked your ears off, let’s get to making some ridiculously good apple pie!
How to make Apple Crumb Pie?
We’re going to start be preparing that crazy flaky pie crust dough I was waxing poetic about earlier. You can find the recipe details and a step-by-step tutorial here. While the dough is chilling in the fridge, you can go ahead and prepare the filling.
The filling starts with the right kind of apples.
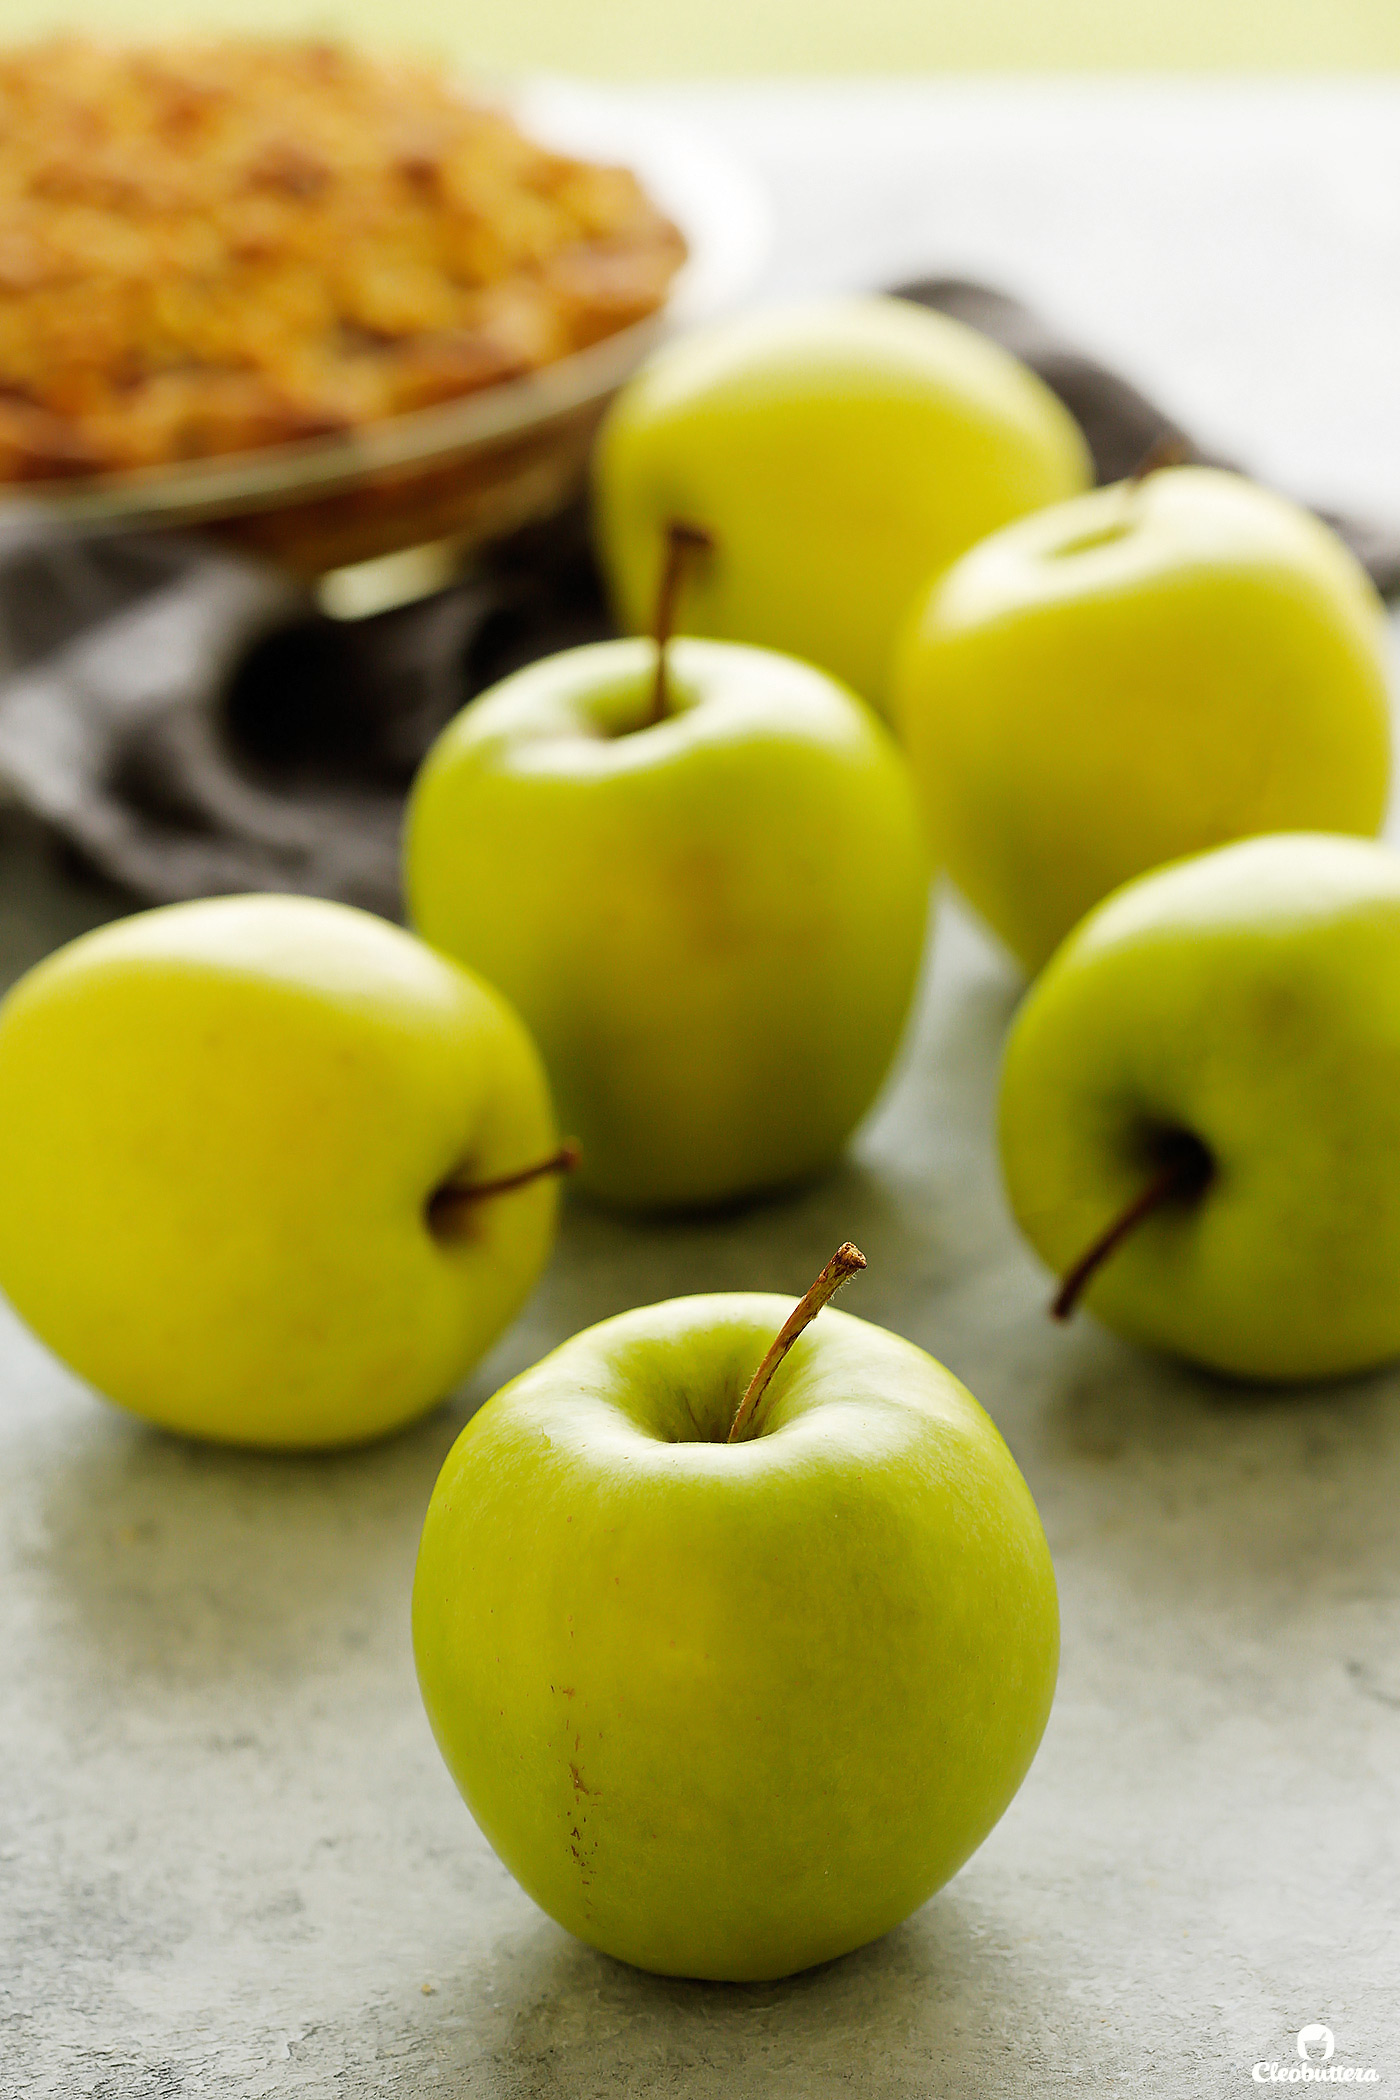
The best “baking apples” are those that keep their shape and don’t cook down to mush. I love using those greenish yellow variety that is unlabeled here in Egypt. It has a great balance of sweet and tart flavors, that tastes like a cross between Granny Smith and Golden Delicious. A combination of sweet and tart apples tastes best here, so you can choose you favorite kind that meets that flavor profile or a combination of two kinds.
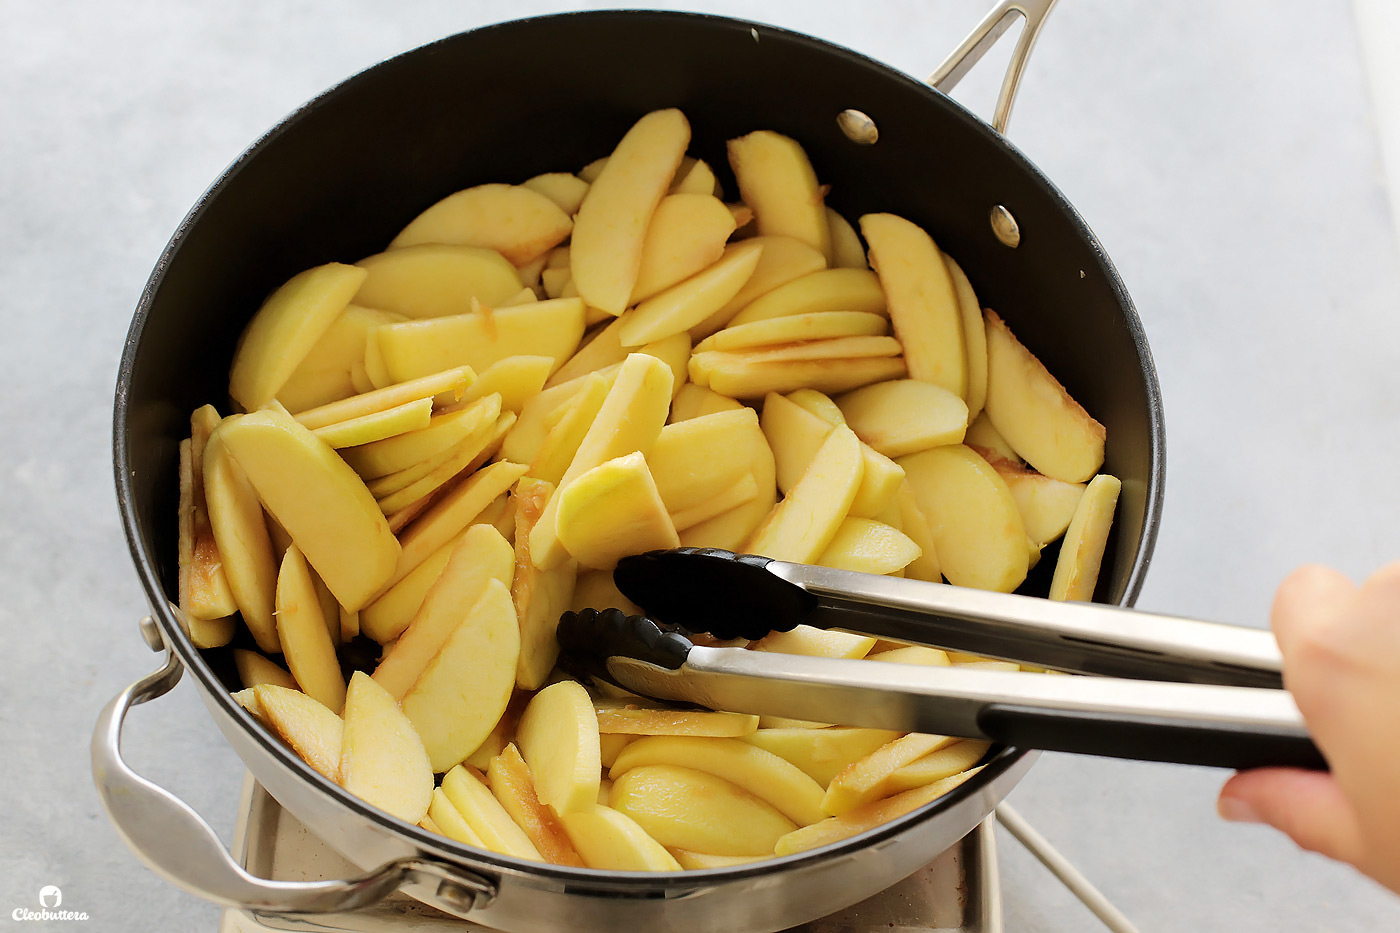
You’ll want to cook the apple slices in butter until beginning to soften, and release their juices, about 5 minutes.
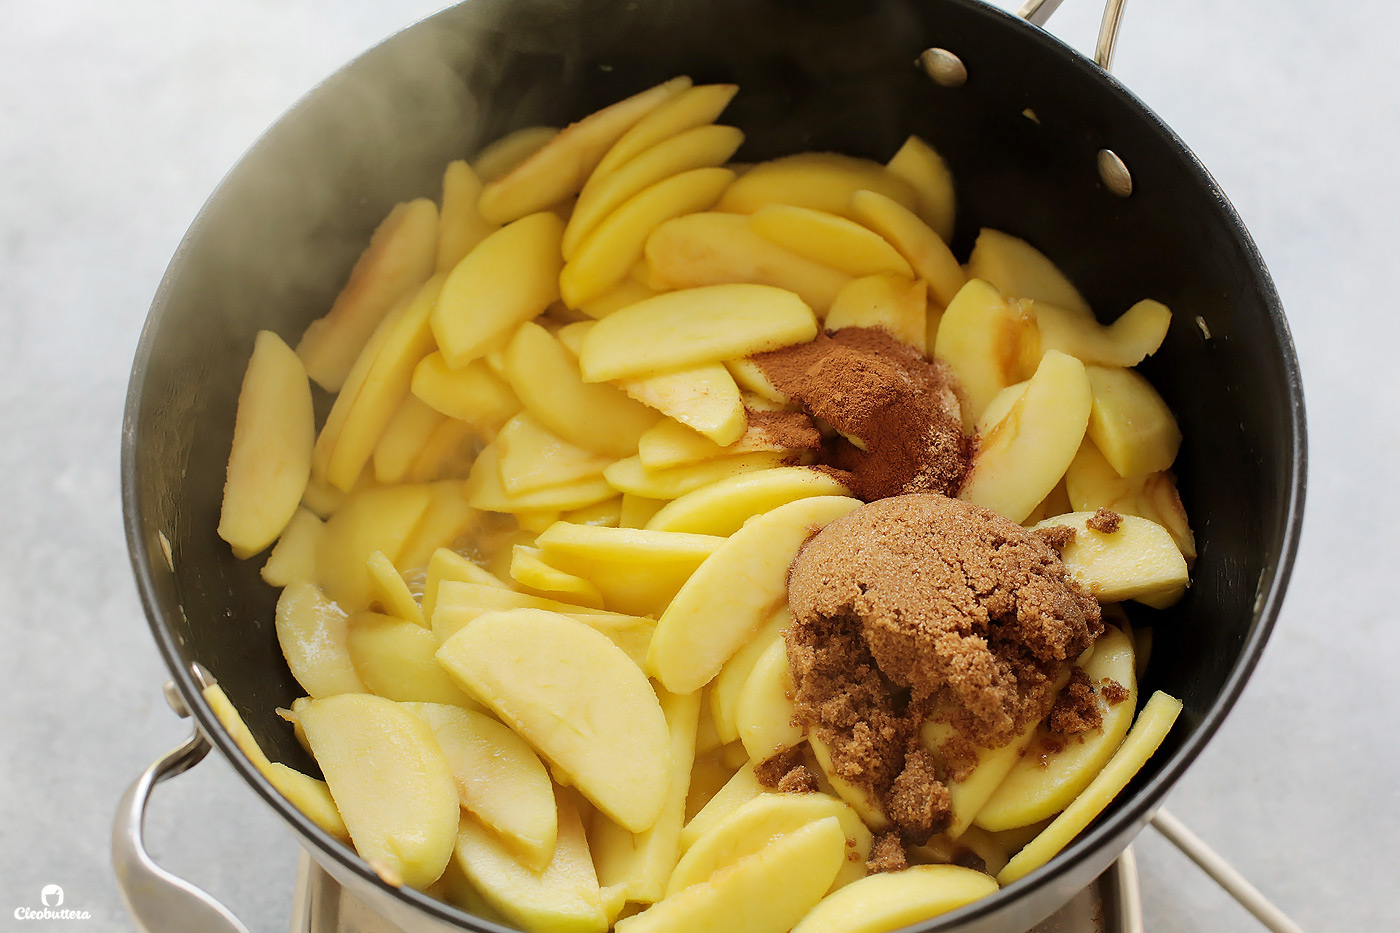
Then you’ll stir in brown sugar (hello caramel flavor!), cinnamon (apple’s best friend) and nutmeg (wakes up the apple flavor) and cook until fragrant, about 30 seconds.
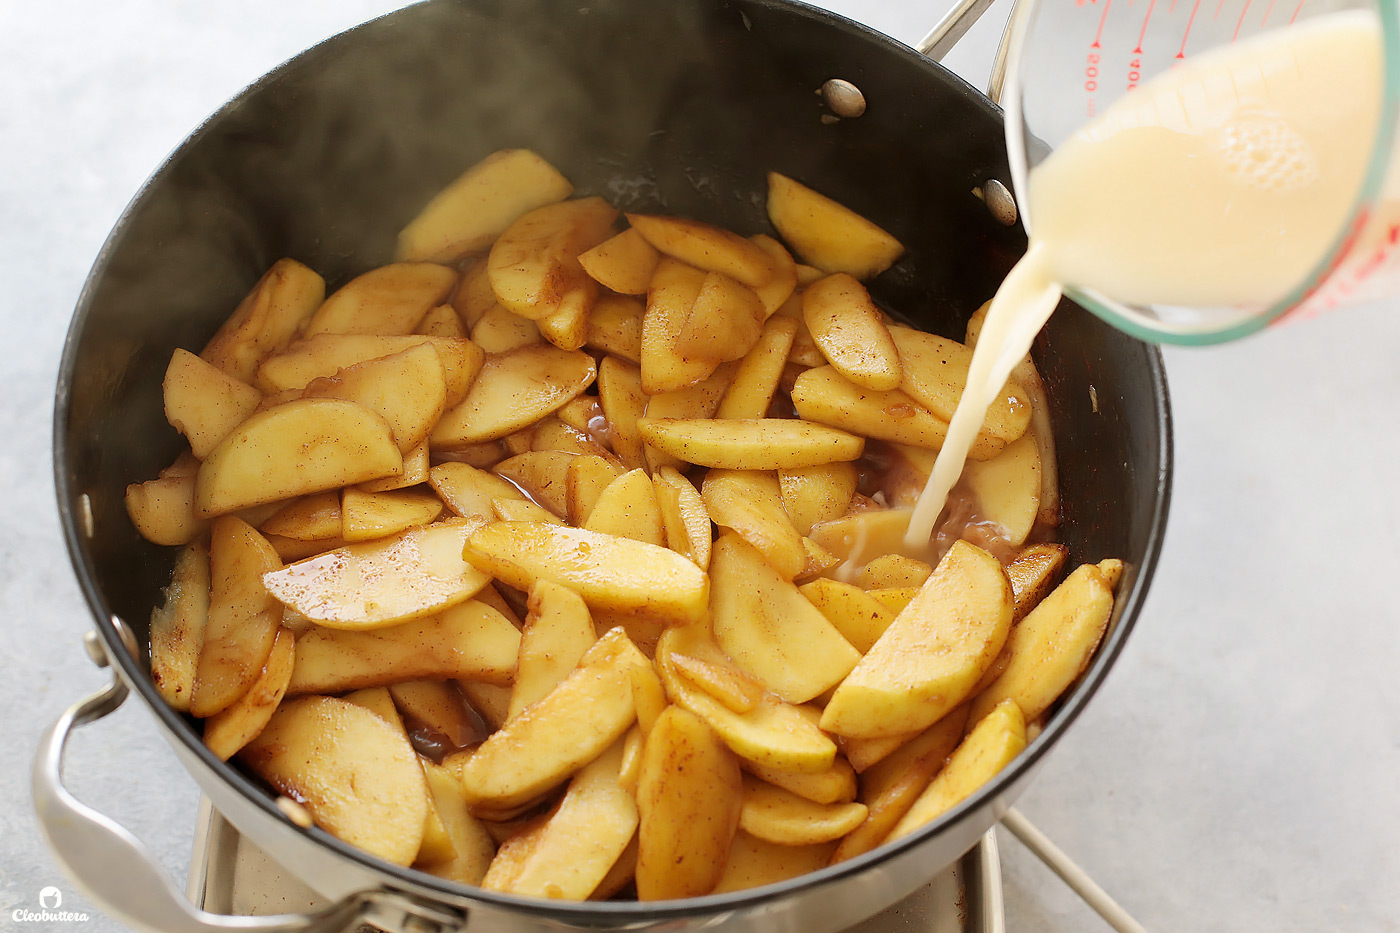
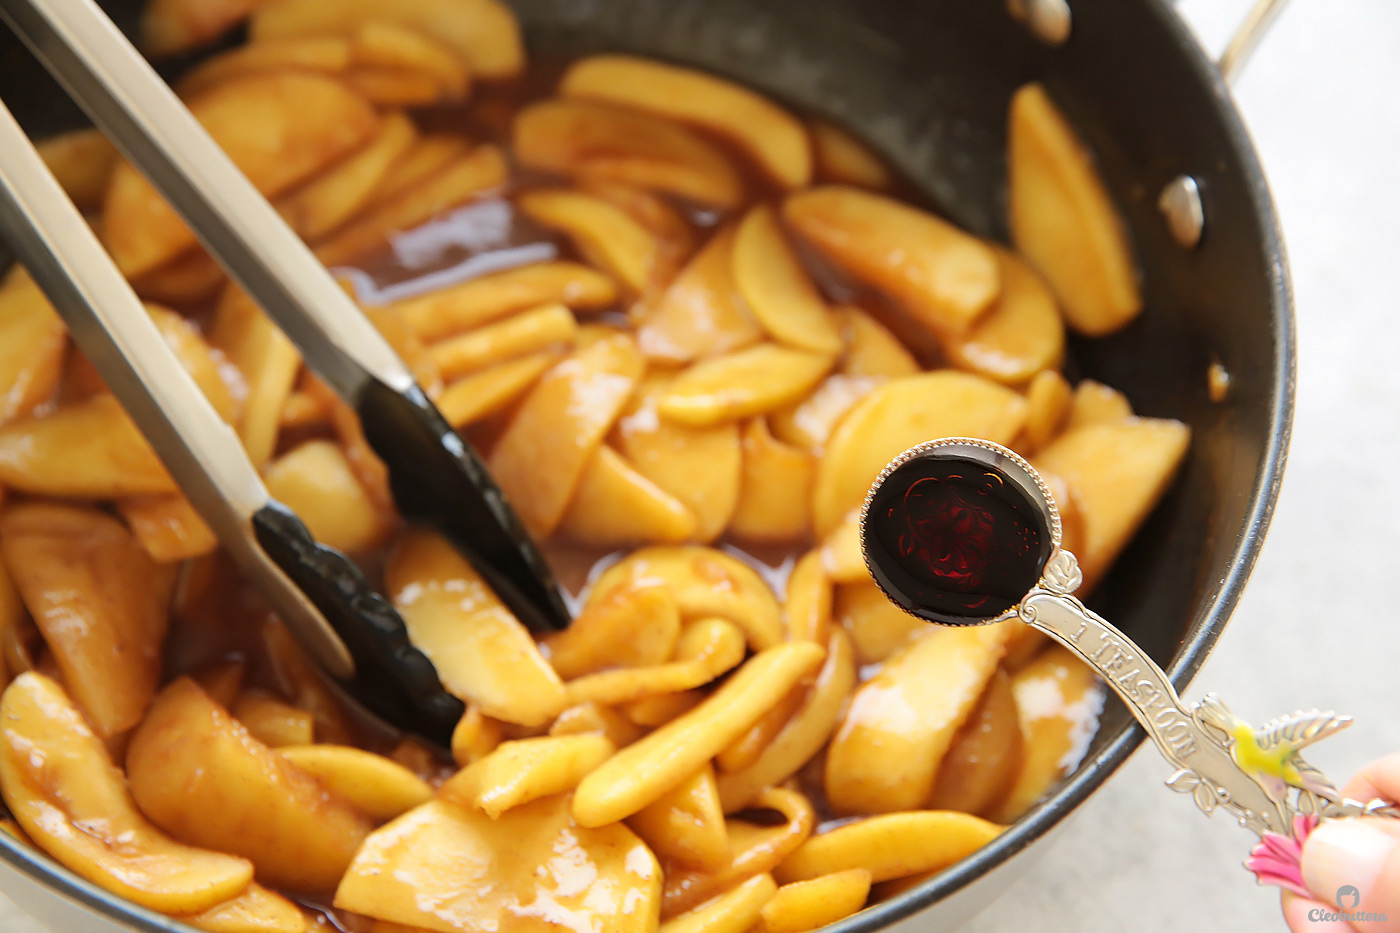
Things are gonna get saucier and yummier, at which point you’ll add a mixture of cornstarch, apple juice (or cider) and water. This will both flavor, thicken and add more sauciness to the filling.
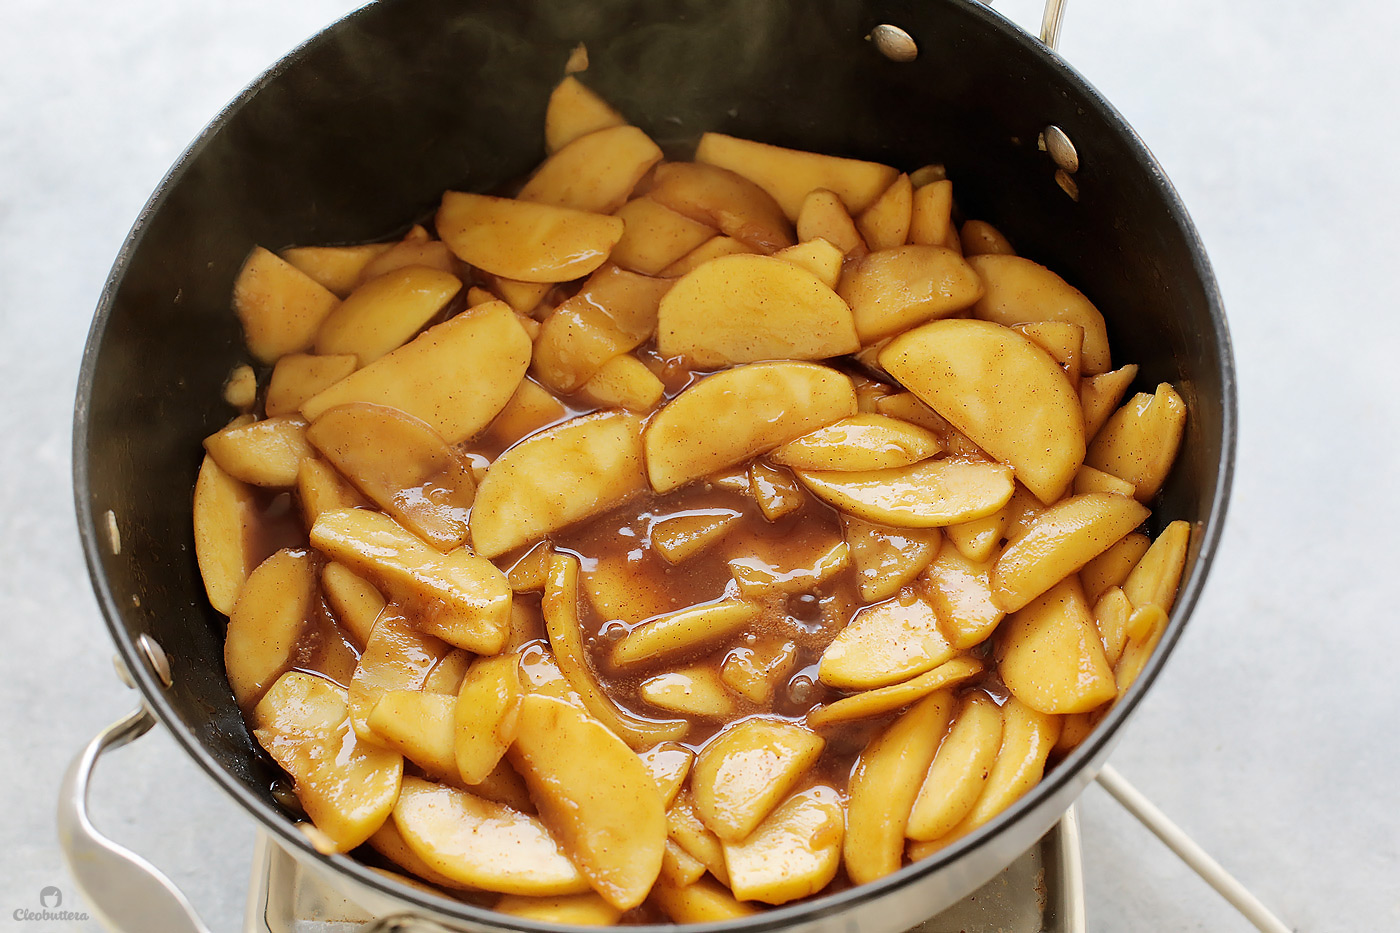
Allow it to bubble and thicken for a couple of minutes. At this point, you’ll want to be sure that the apples have reached the doneness of your liking, because they won’t cook any further, even after baking in the oven. You’ll also want to taste it and adjust the sugar, salt and spices to your liking. This is your pie, not mine…get it to taste the way you love.
Here’s a little secret ingredient that I encourage you to add: Vanilla! You won’t taste it but it will add a little touch of magic that I just can’t put my finger on.
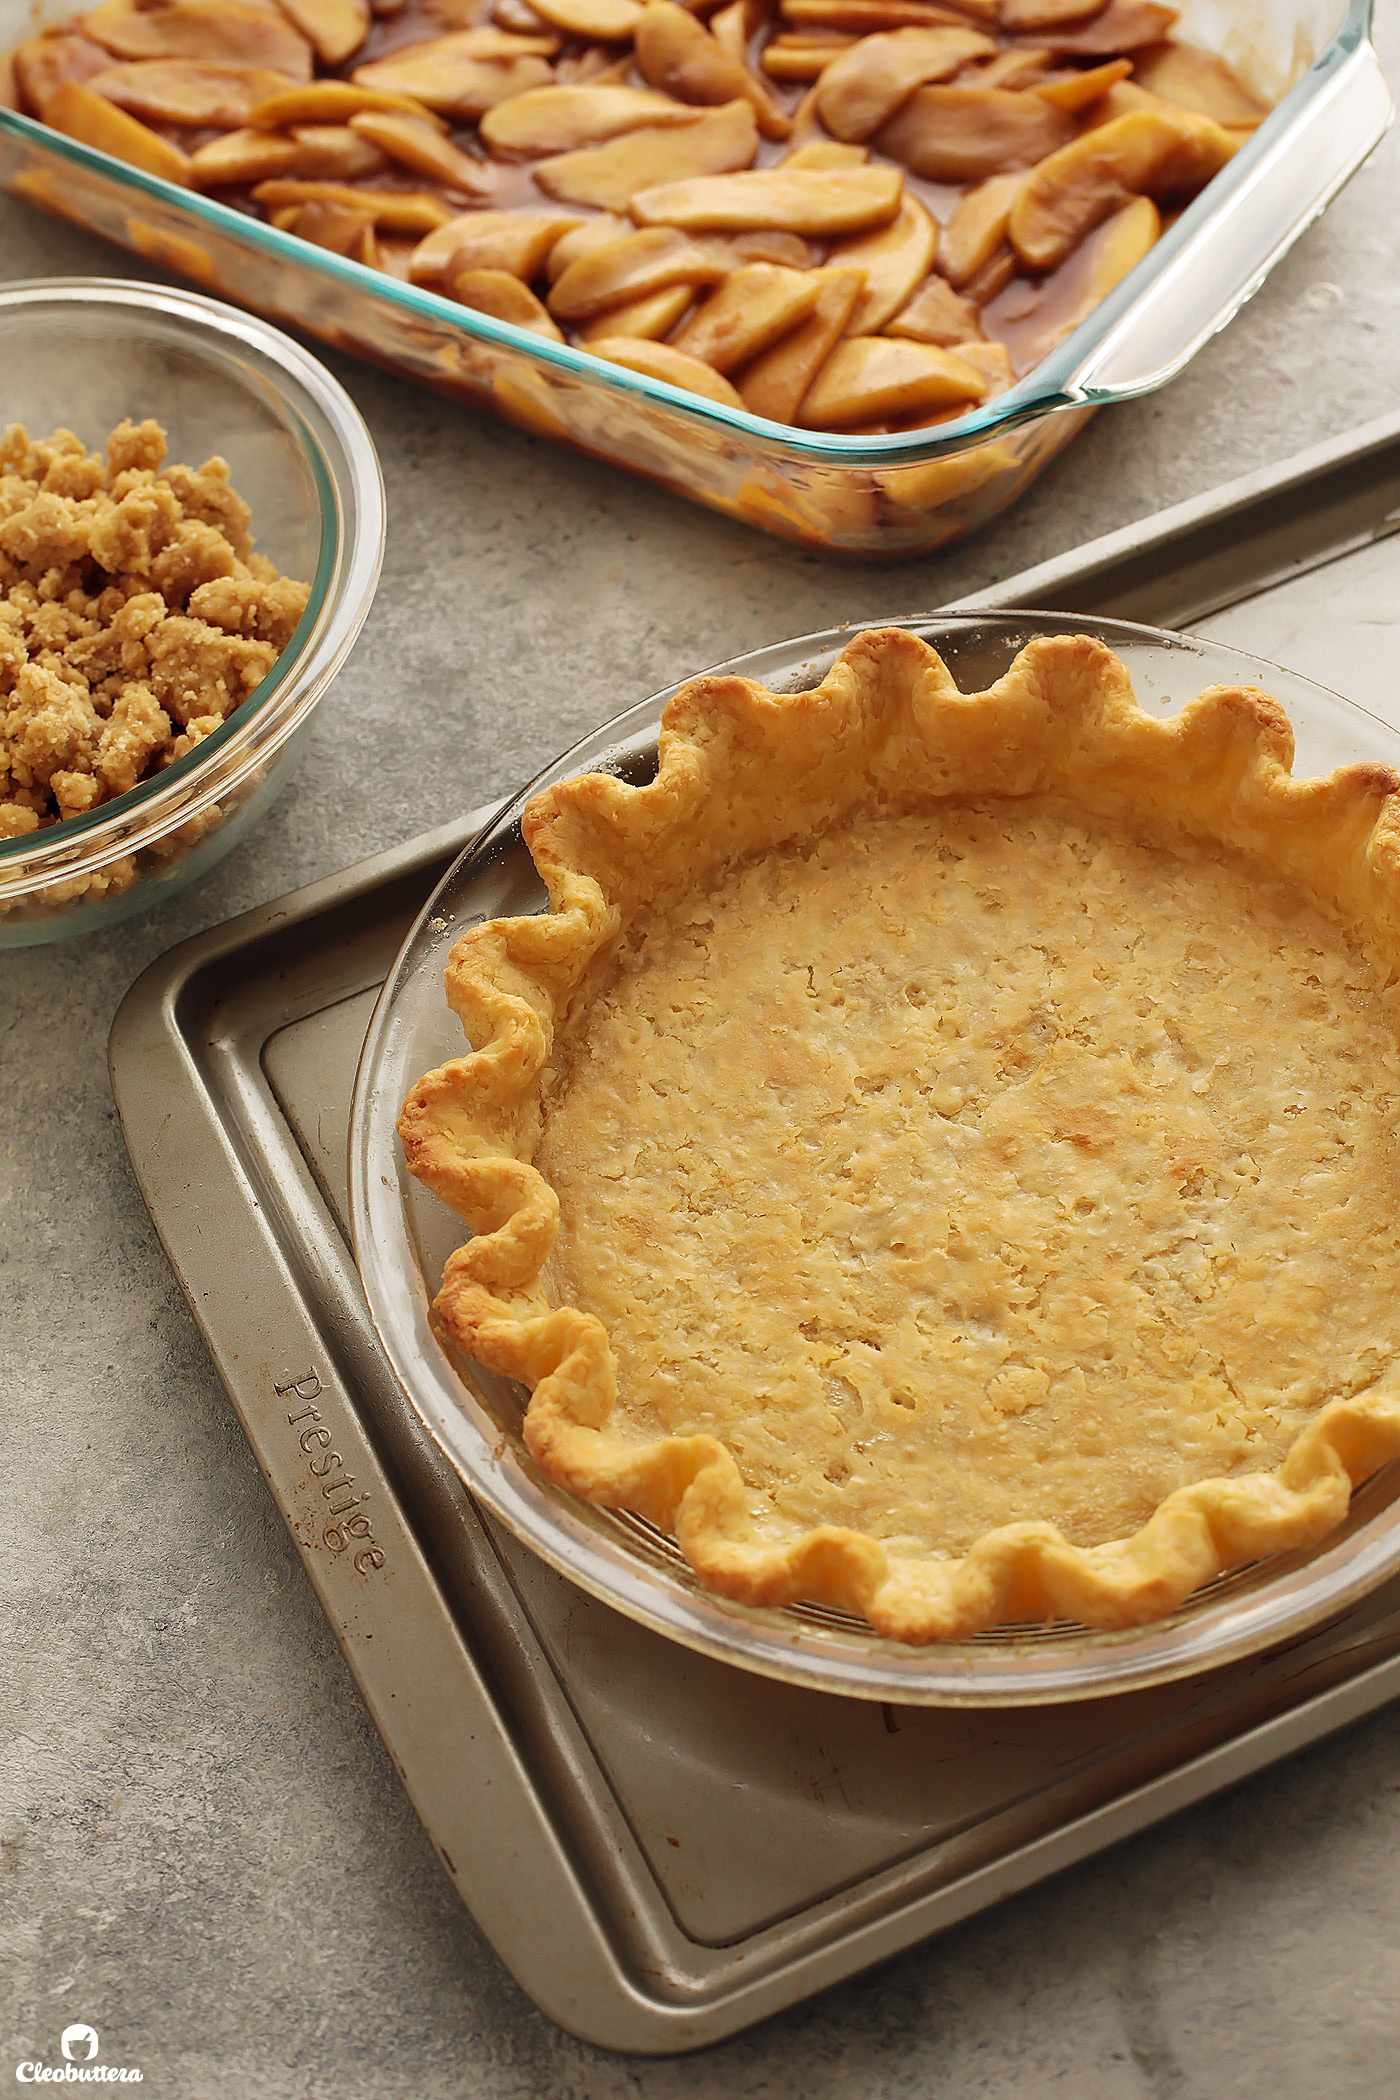
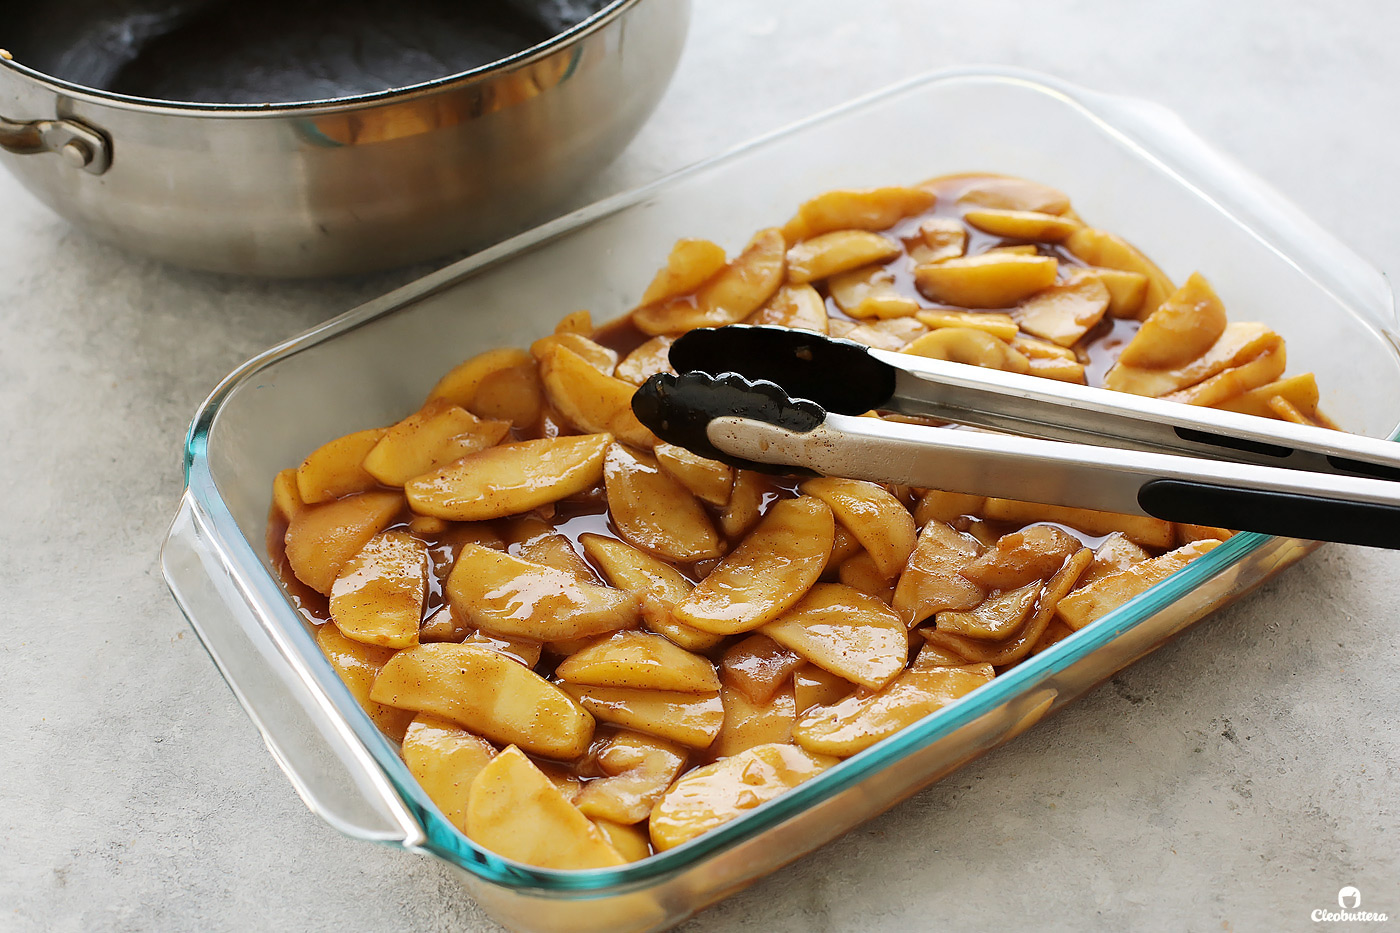
Lastly, you’ll transfer that glorious apple filling to a baking dish and allow it to cool while you make the topping.
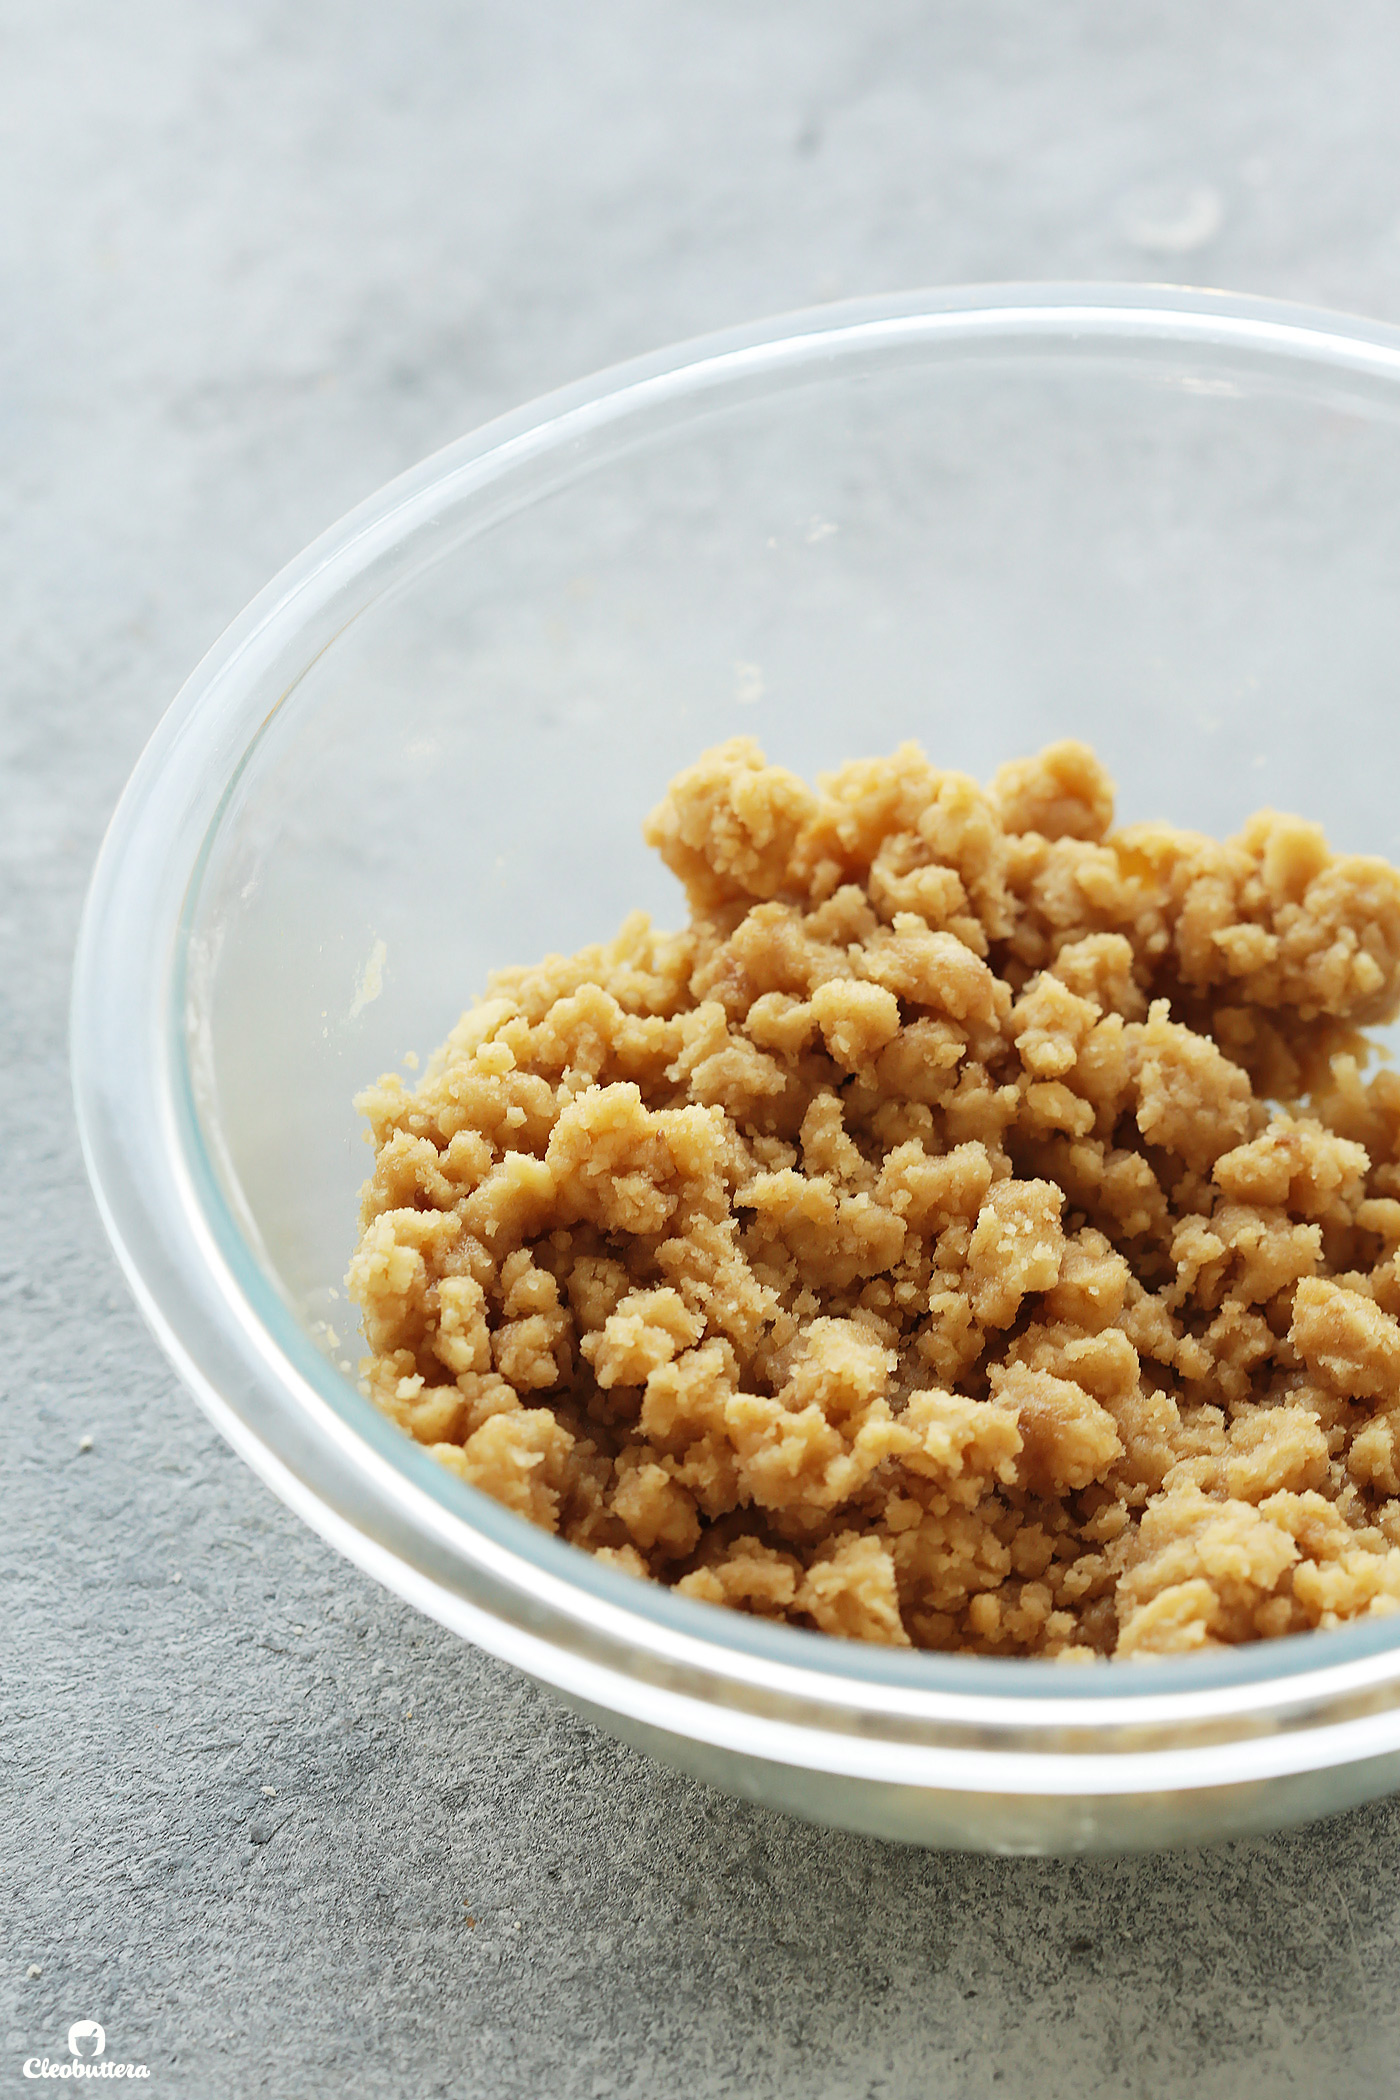
So easy! Melted butter, brown sugar, flour and salt all go in a bowl…
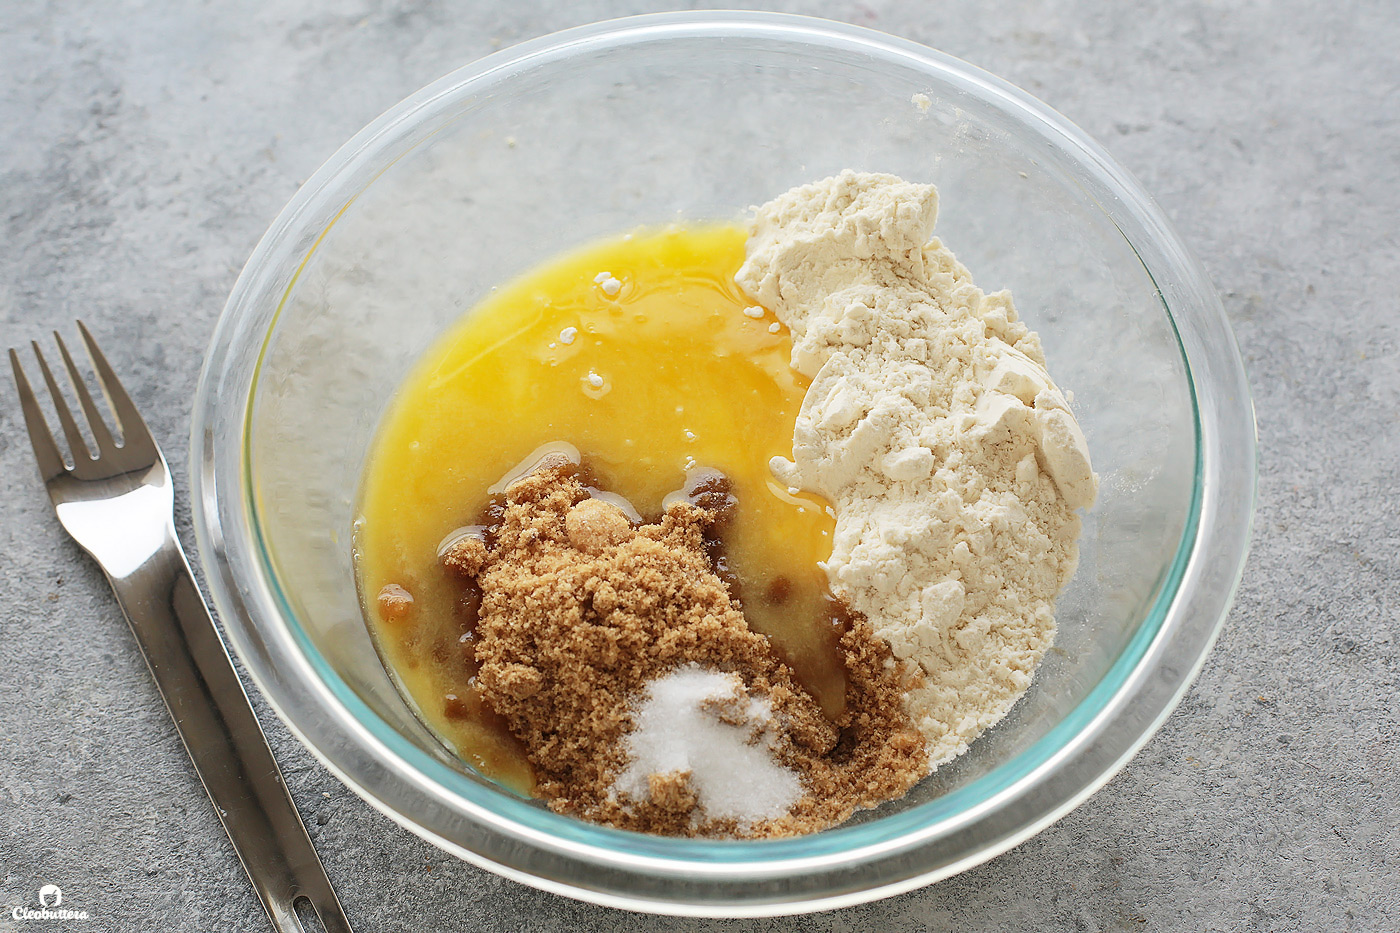
And stirred with a fork until clumps form. That’s it!
Meanwhile, par-bake the pie crust dough. You can learn exactly how to do that over here!
Now let’s assemble the fruit of our labor…literally.
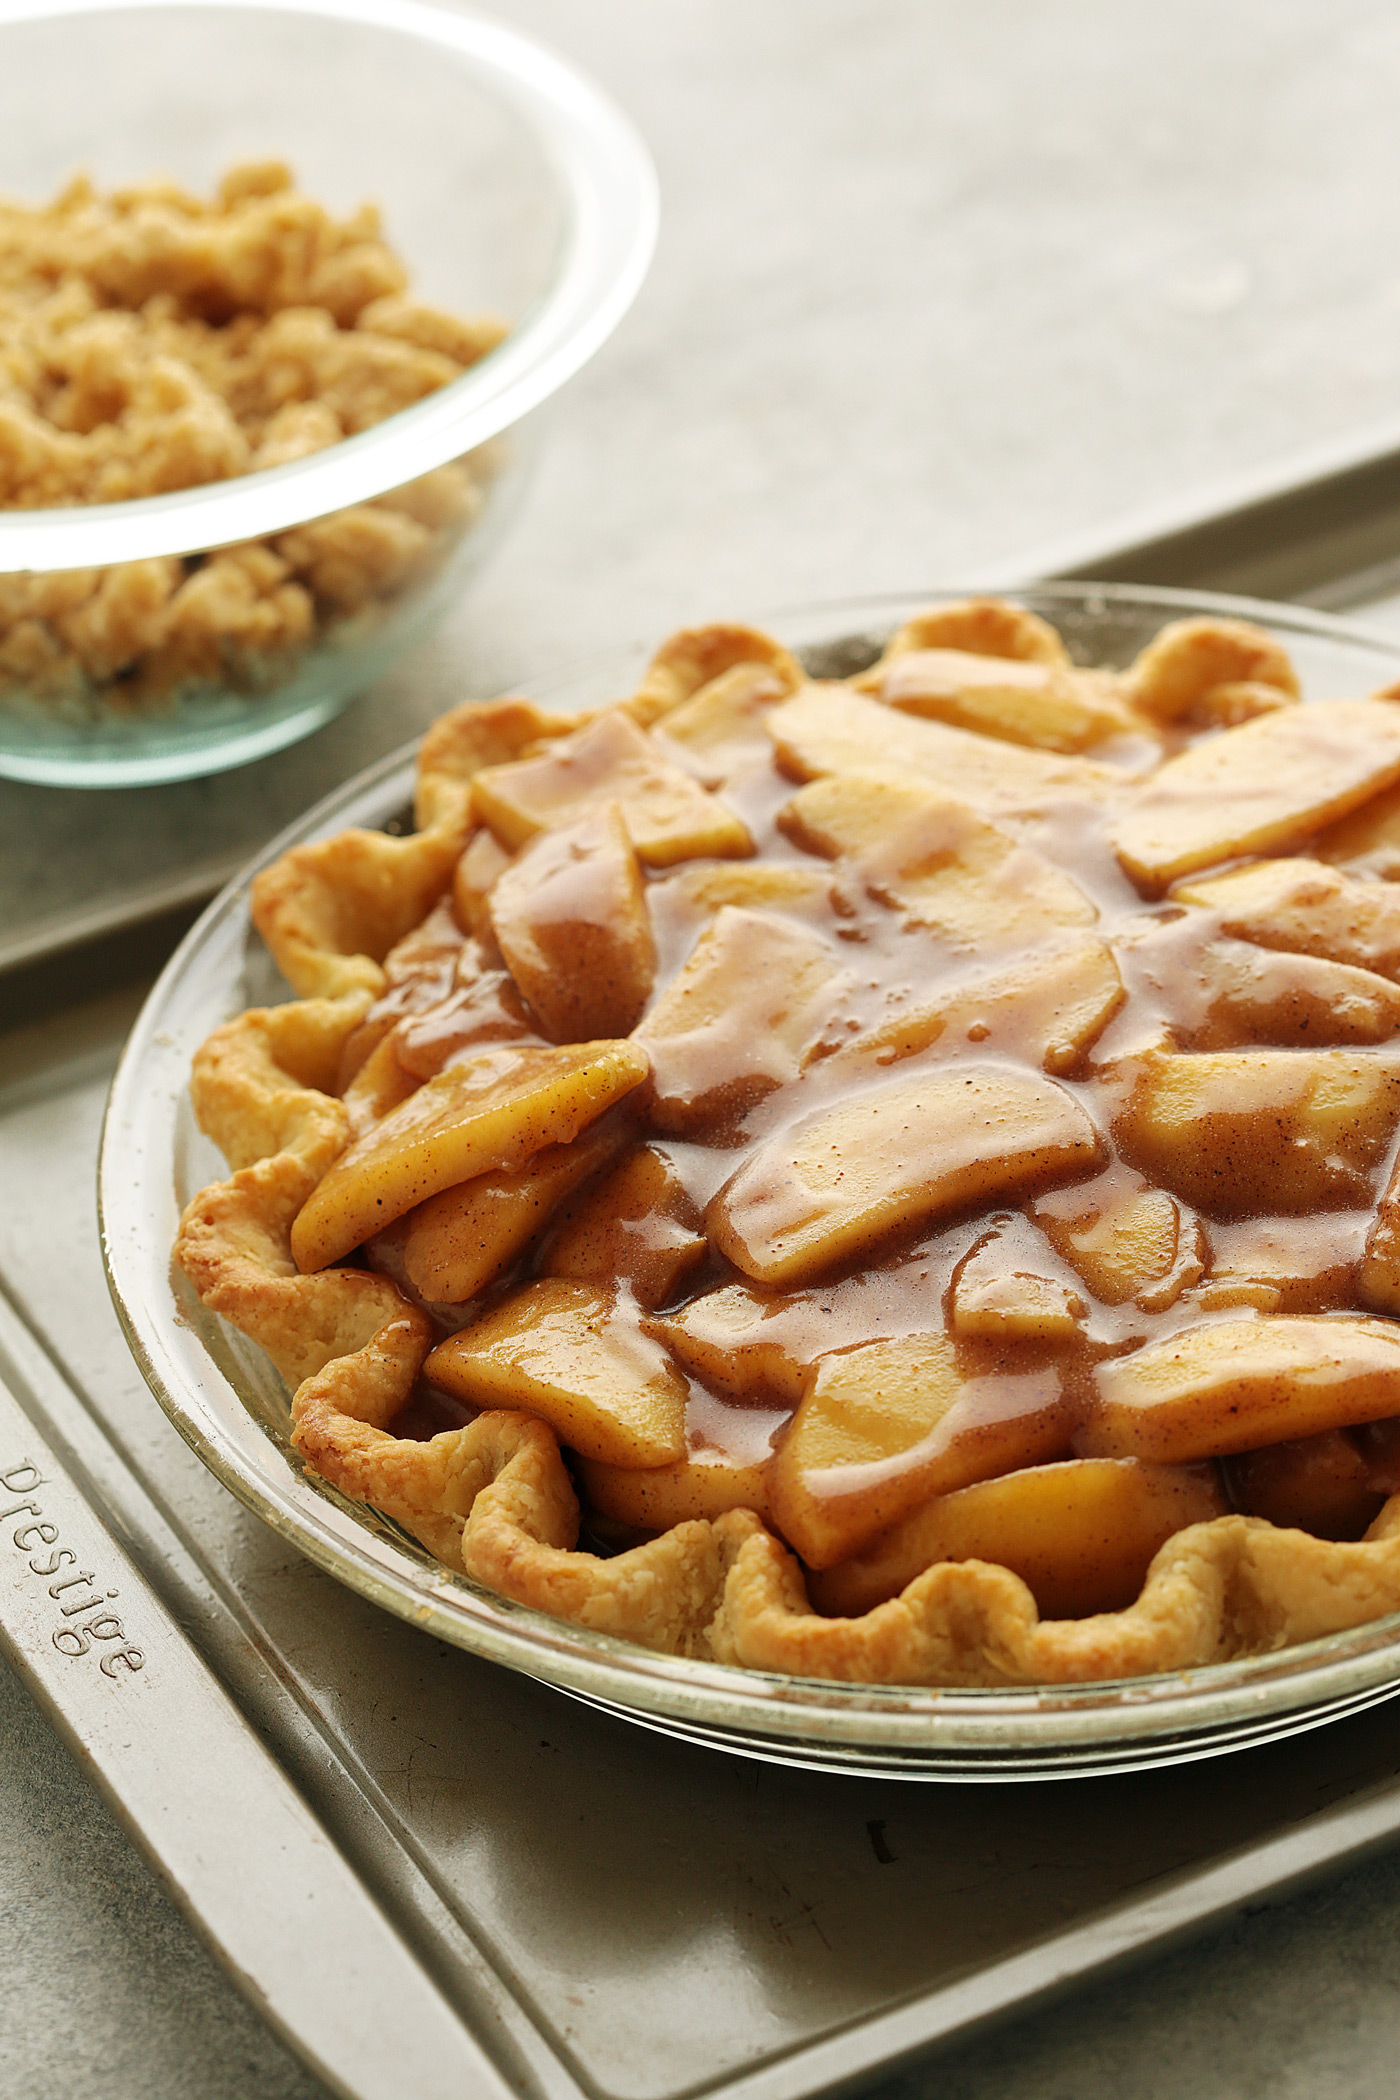
You’re going to grab your hot par-baked crust; no need to let it cool…
Then pile it up with all the goodies!
And bake until gorgeous!
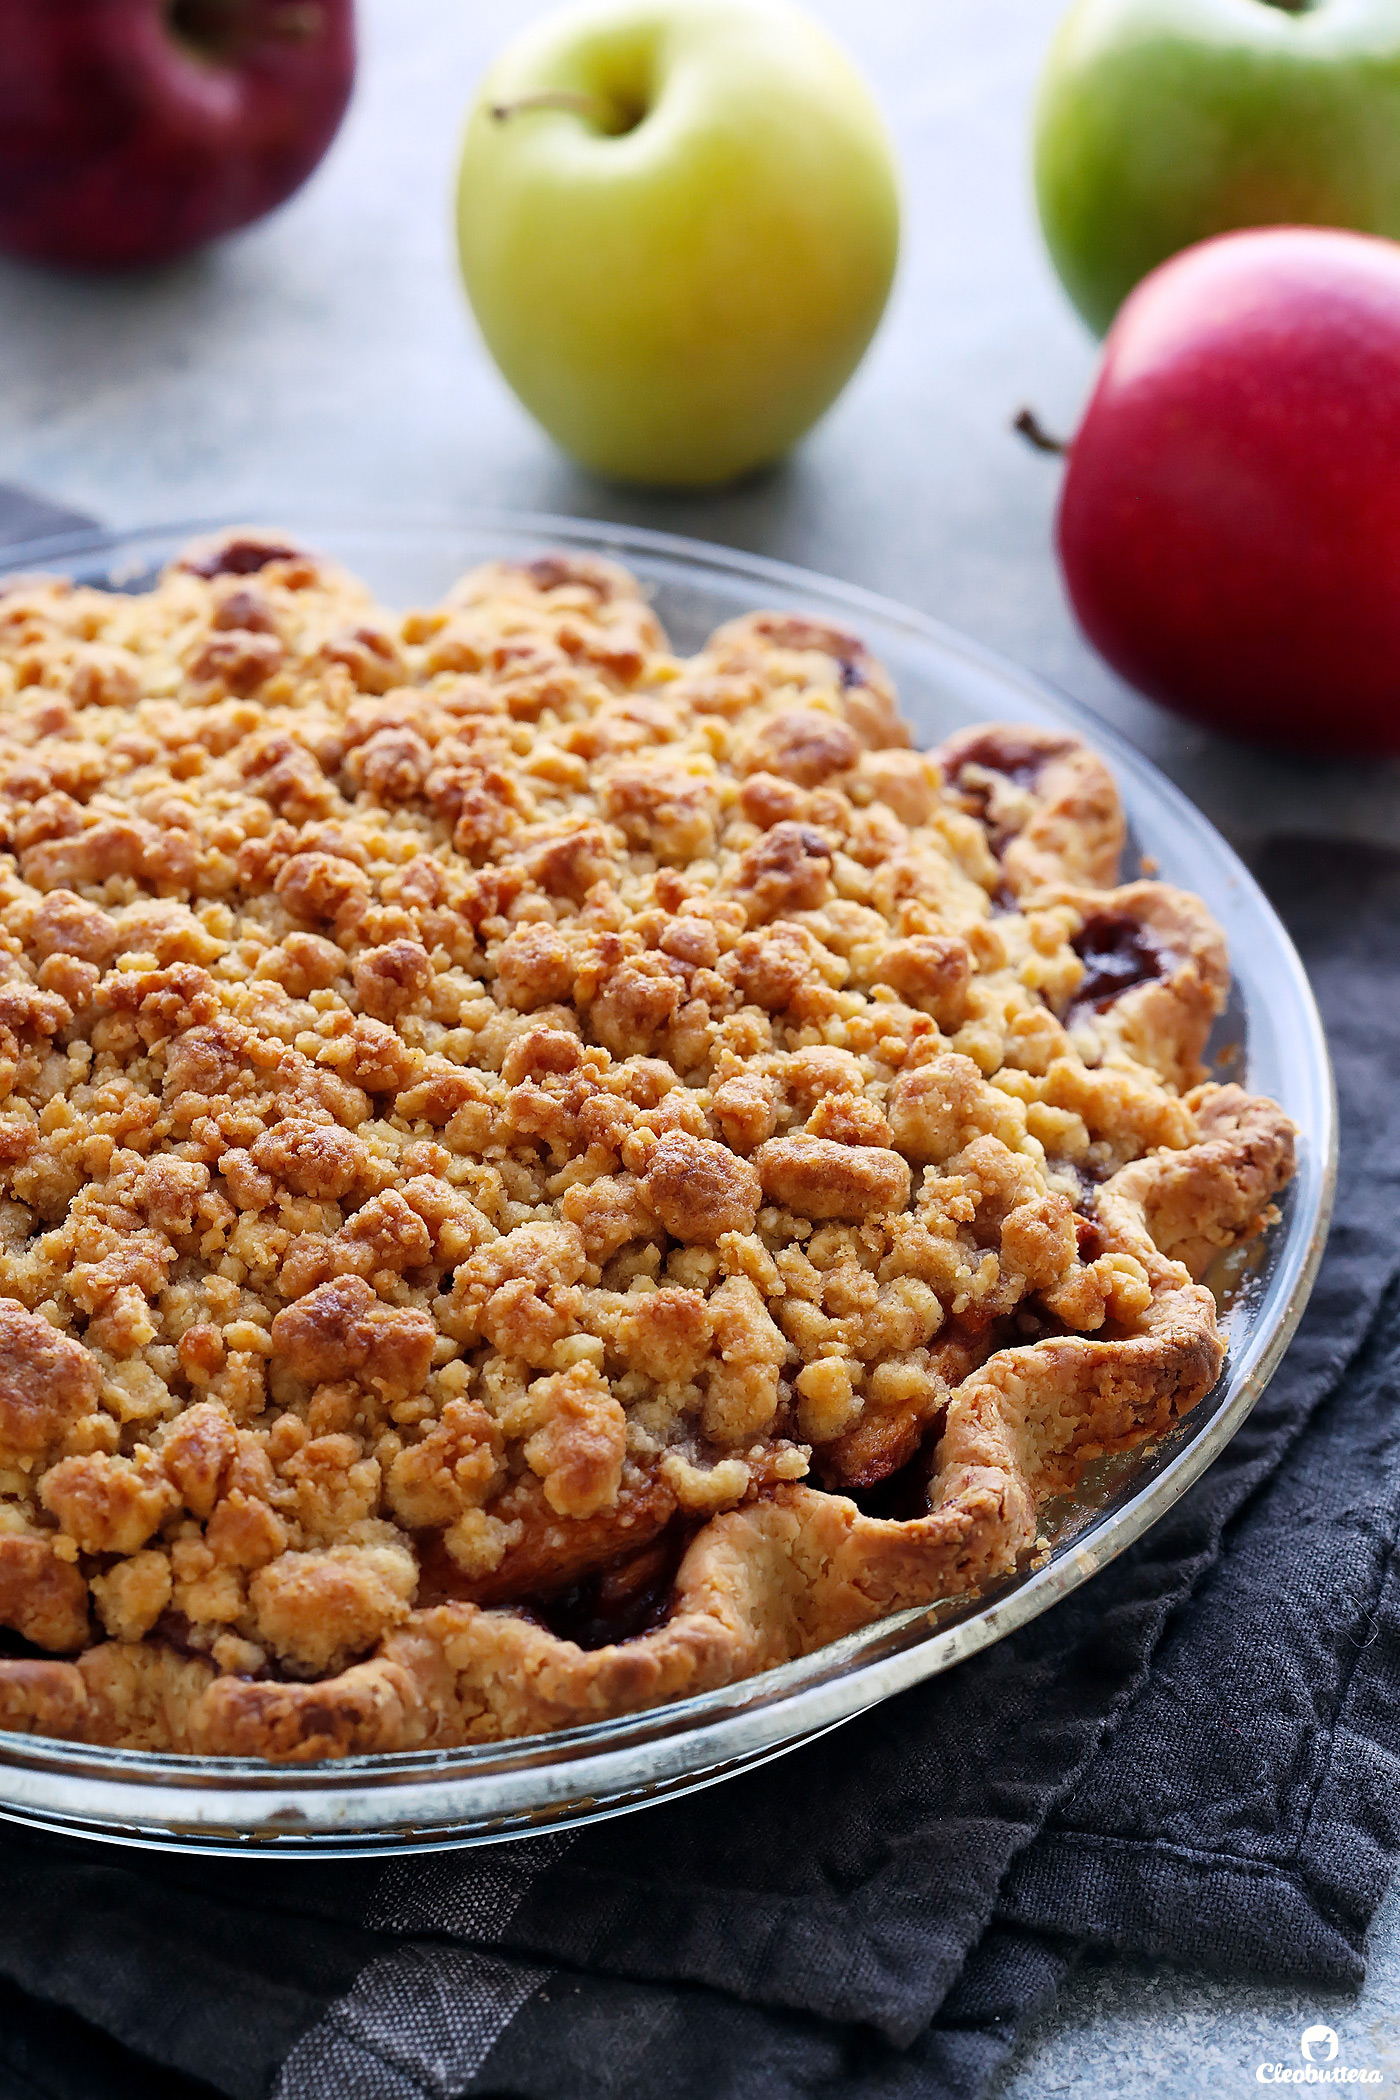
Now remember…the apple filling is fully cooked, the crust is almost baked through, so the pie is really just going in the oven to bake the crumbs! This will take about half an hour or so. You just want to get the crumbs as golden as possible and heat the filling through. A bubble or two in the filling, is a telltale sign that it’s hot enough.
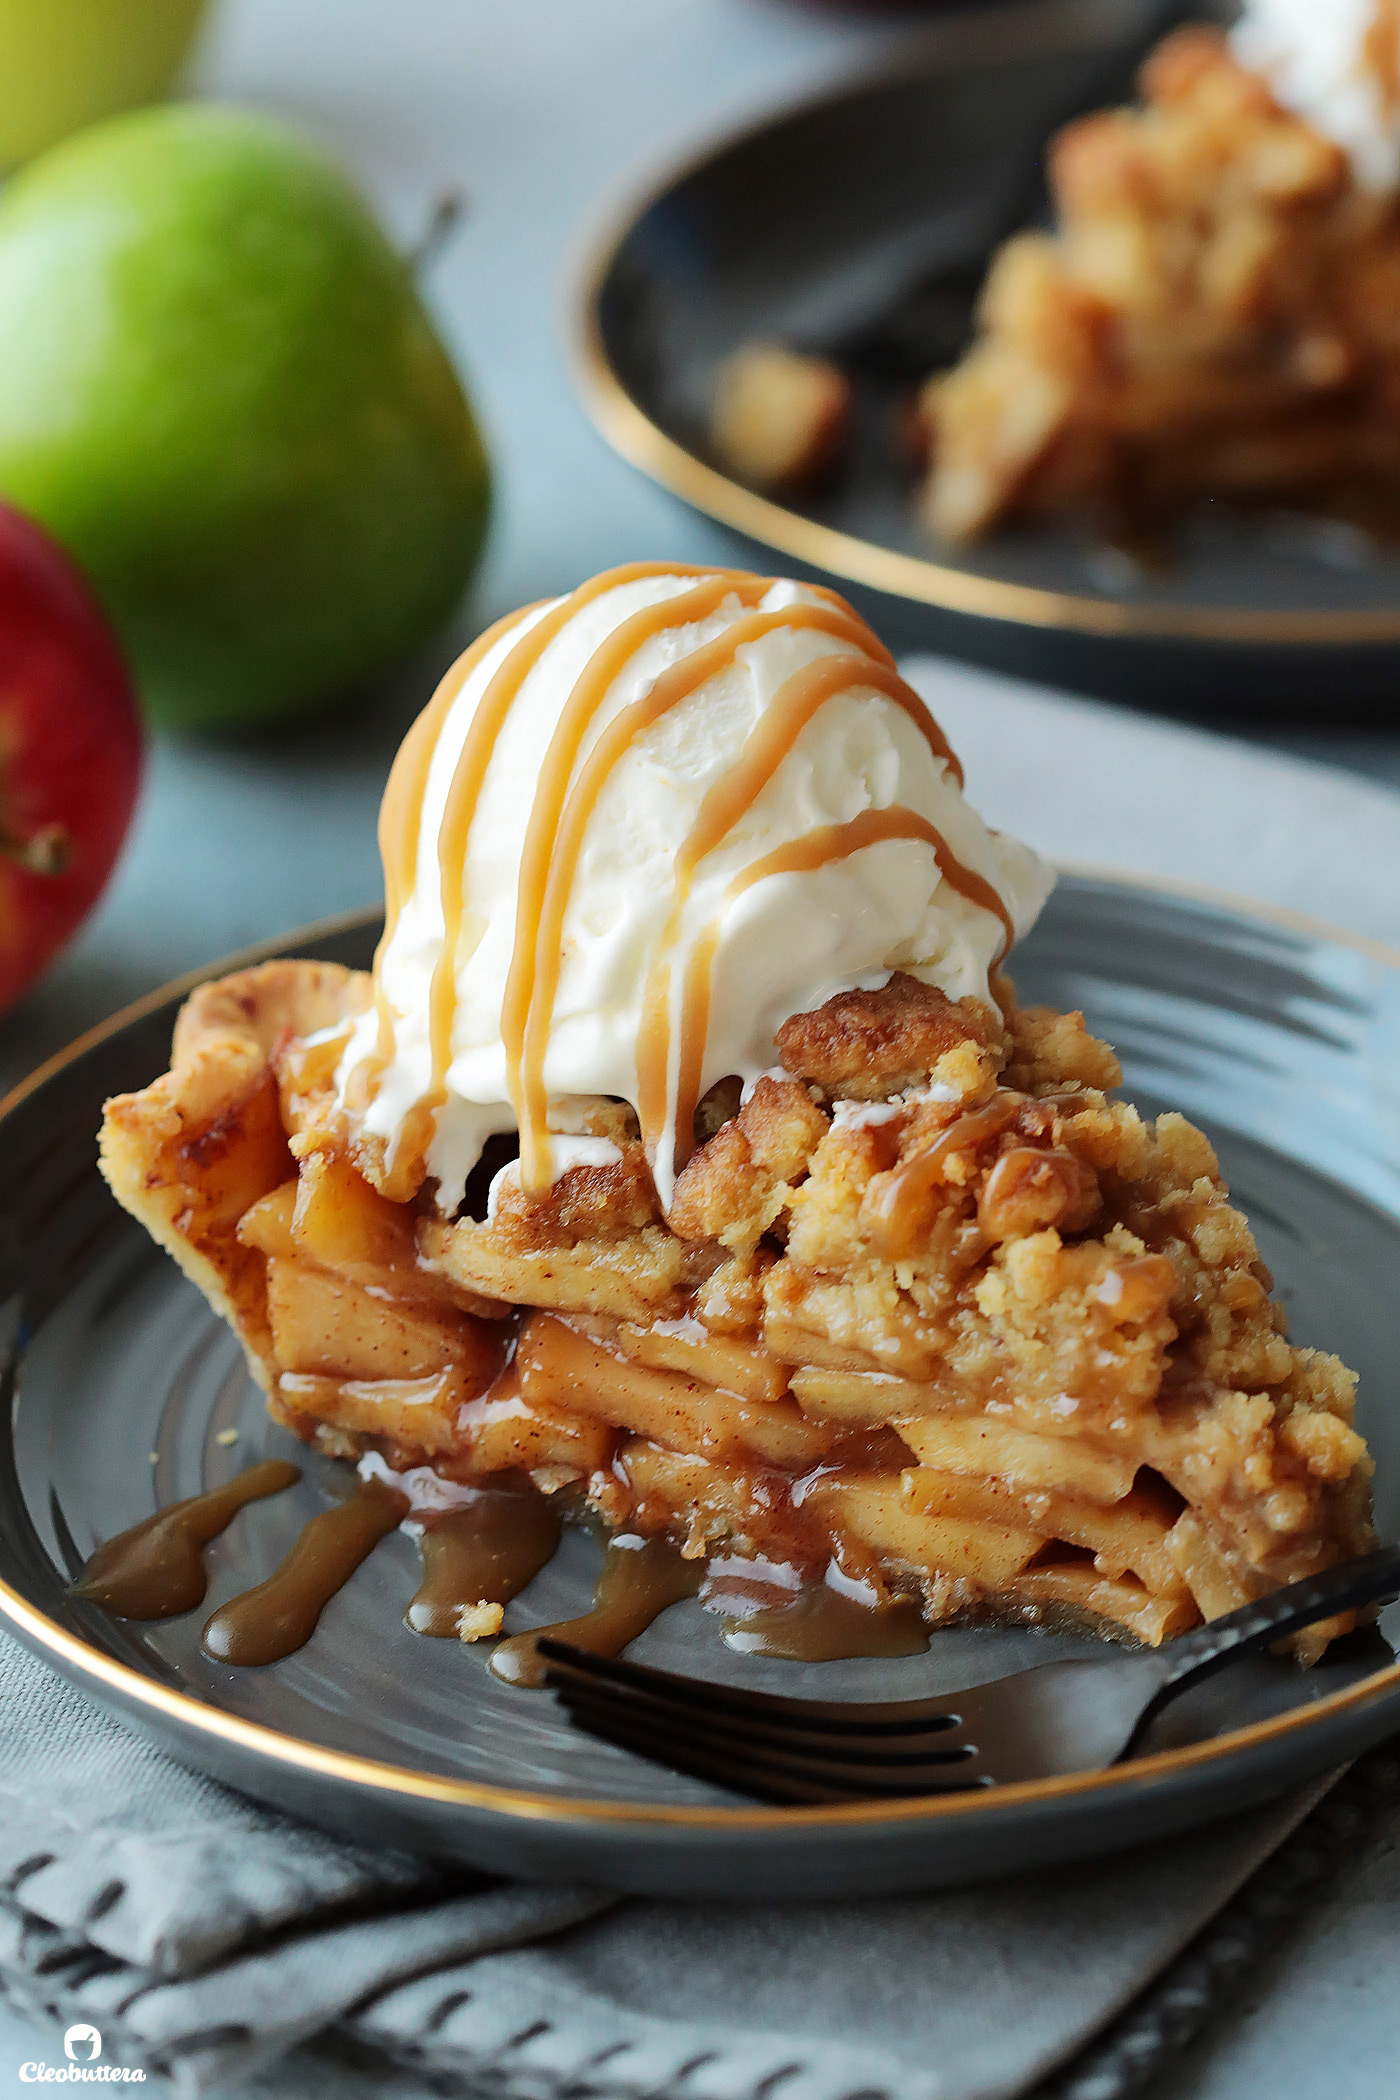
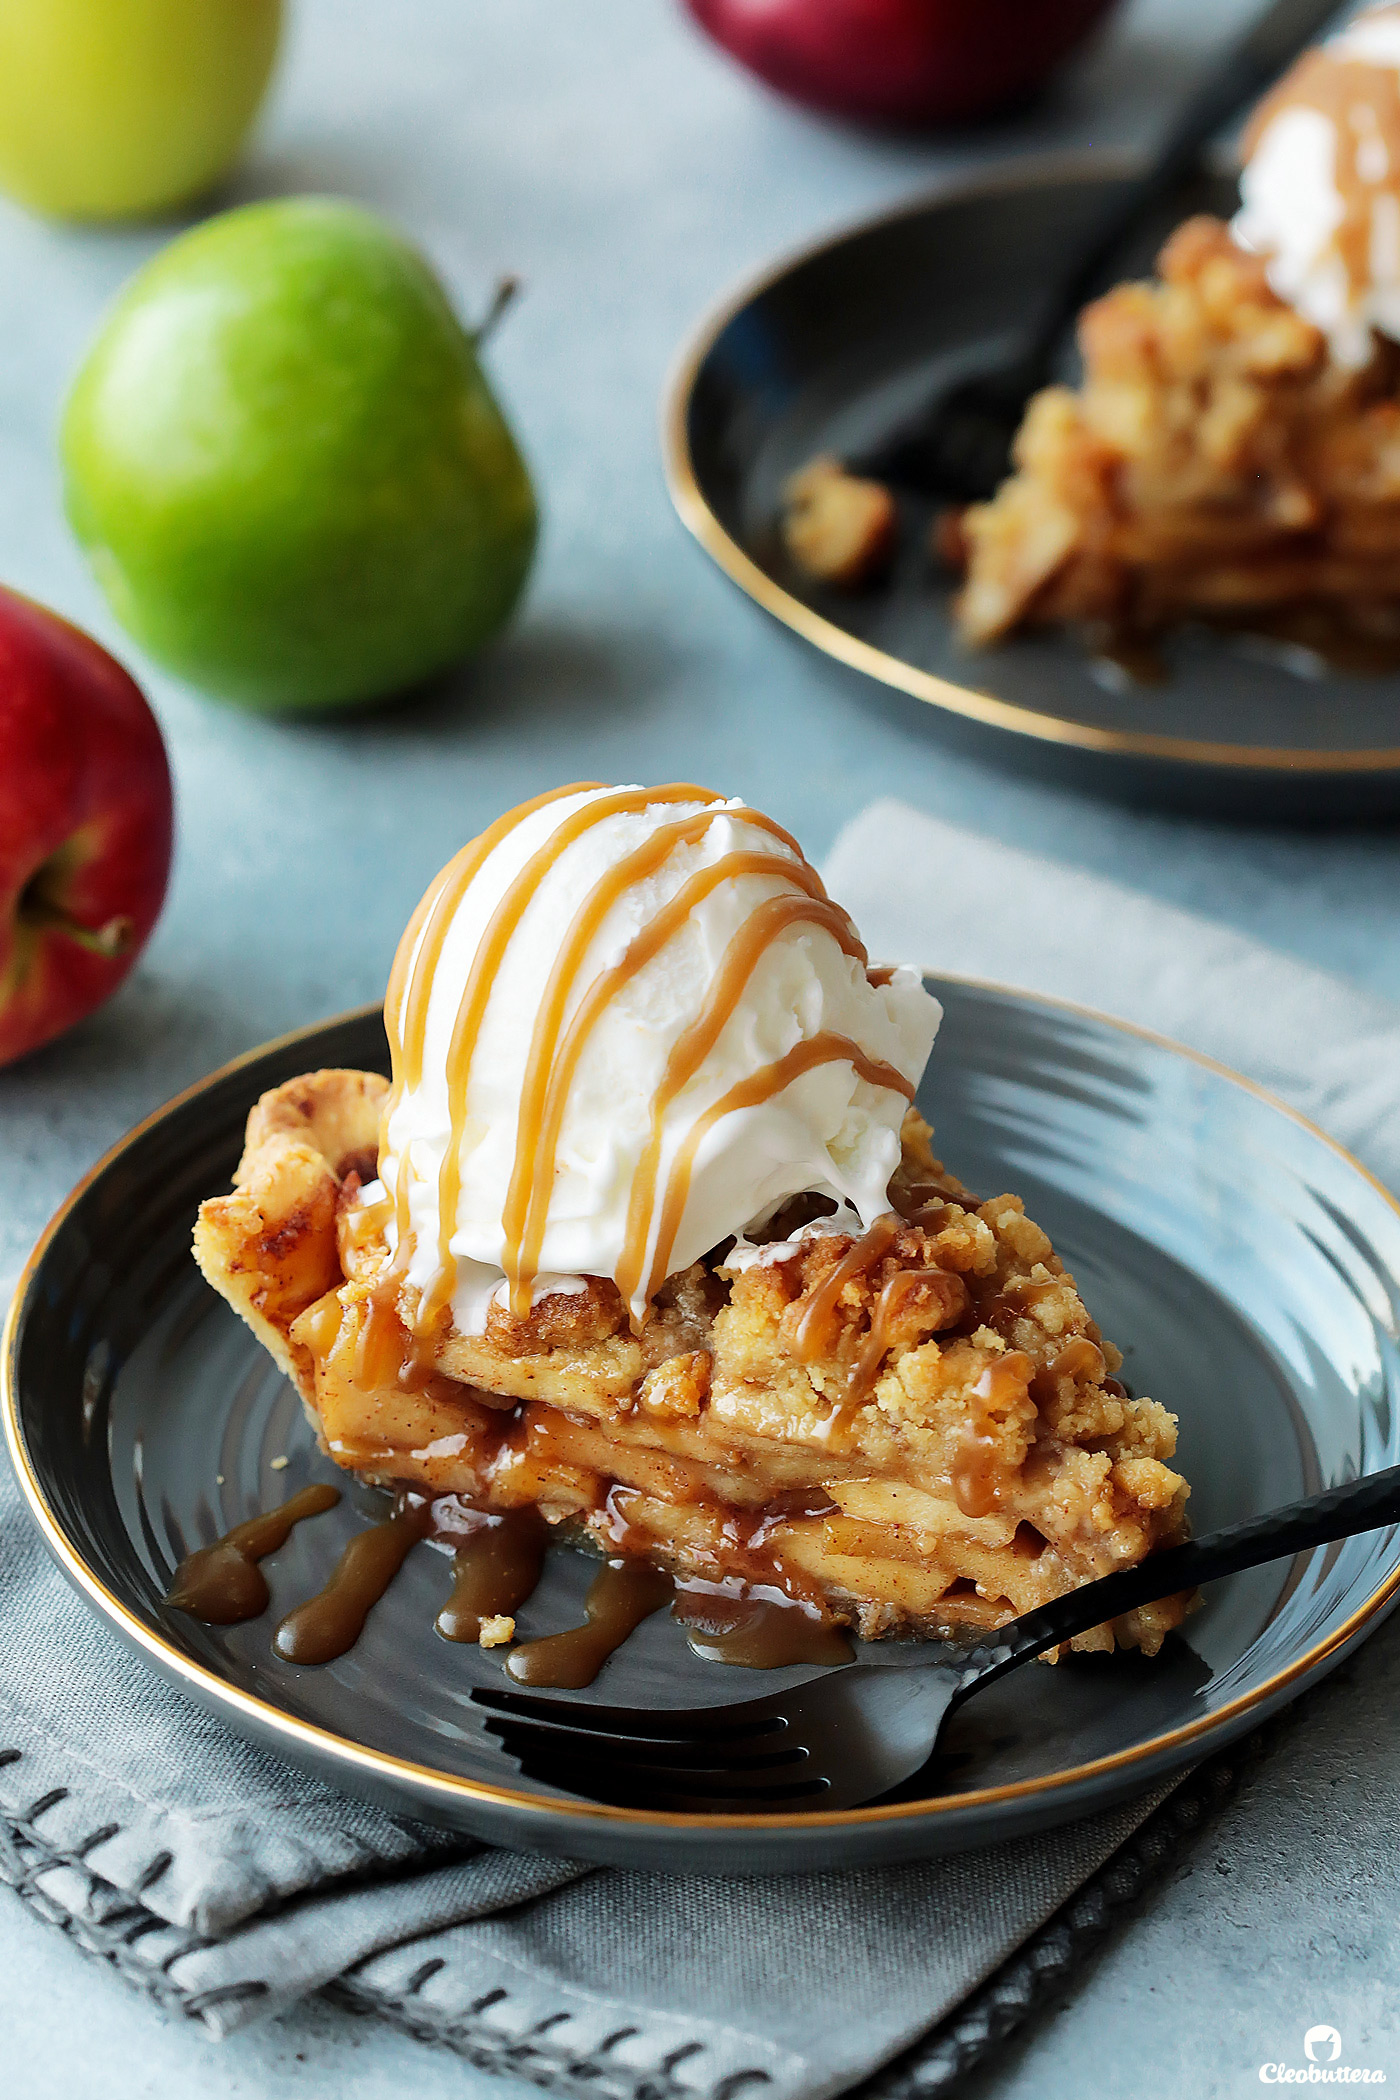
Now that it’s done…forget about waiting several hours for the juices to set, because there’s nothing more delicious than a piping hot apple pie topped with a scoop of ice cream.
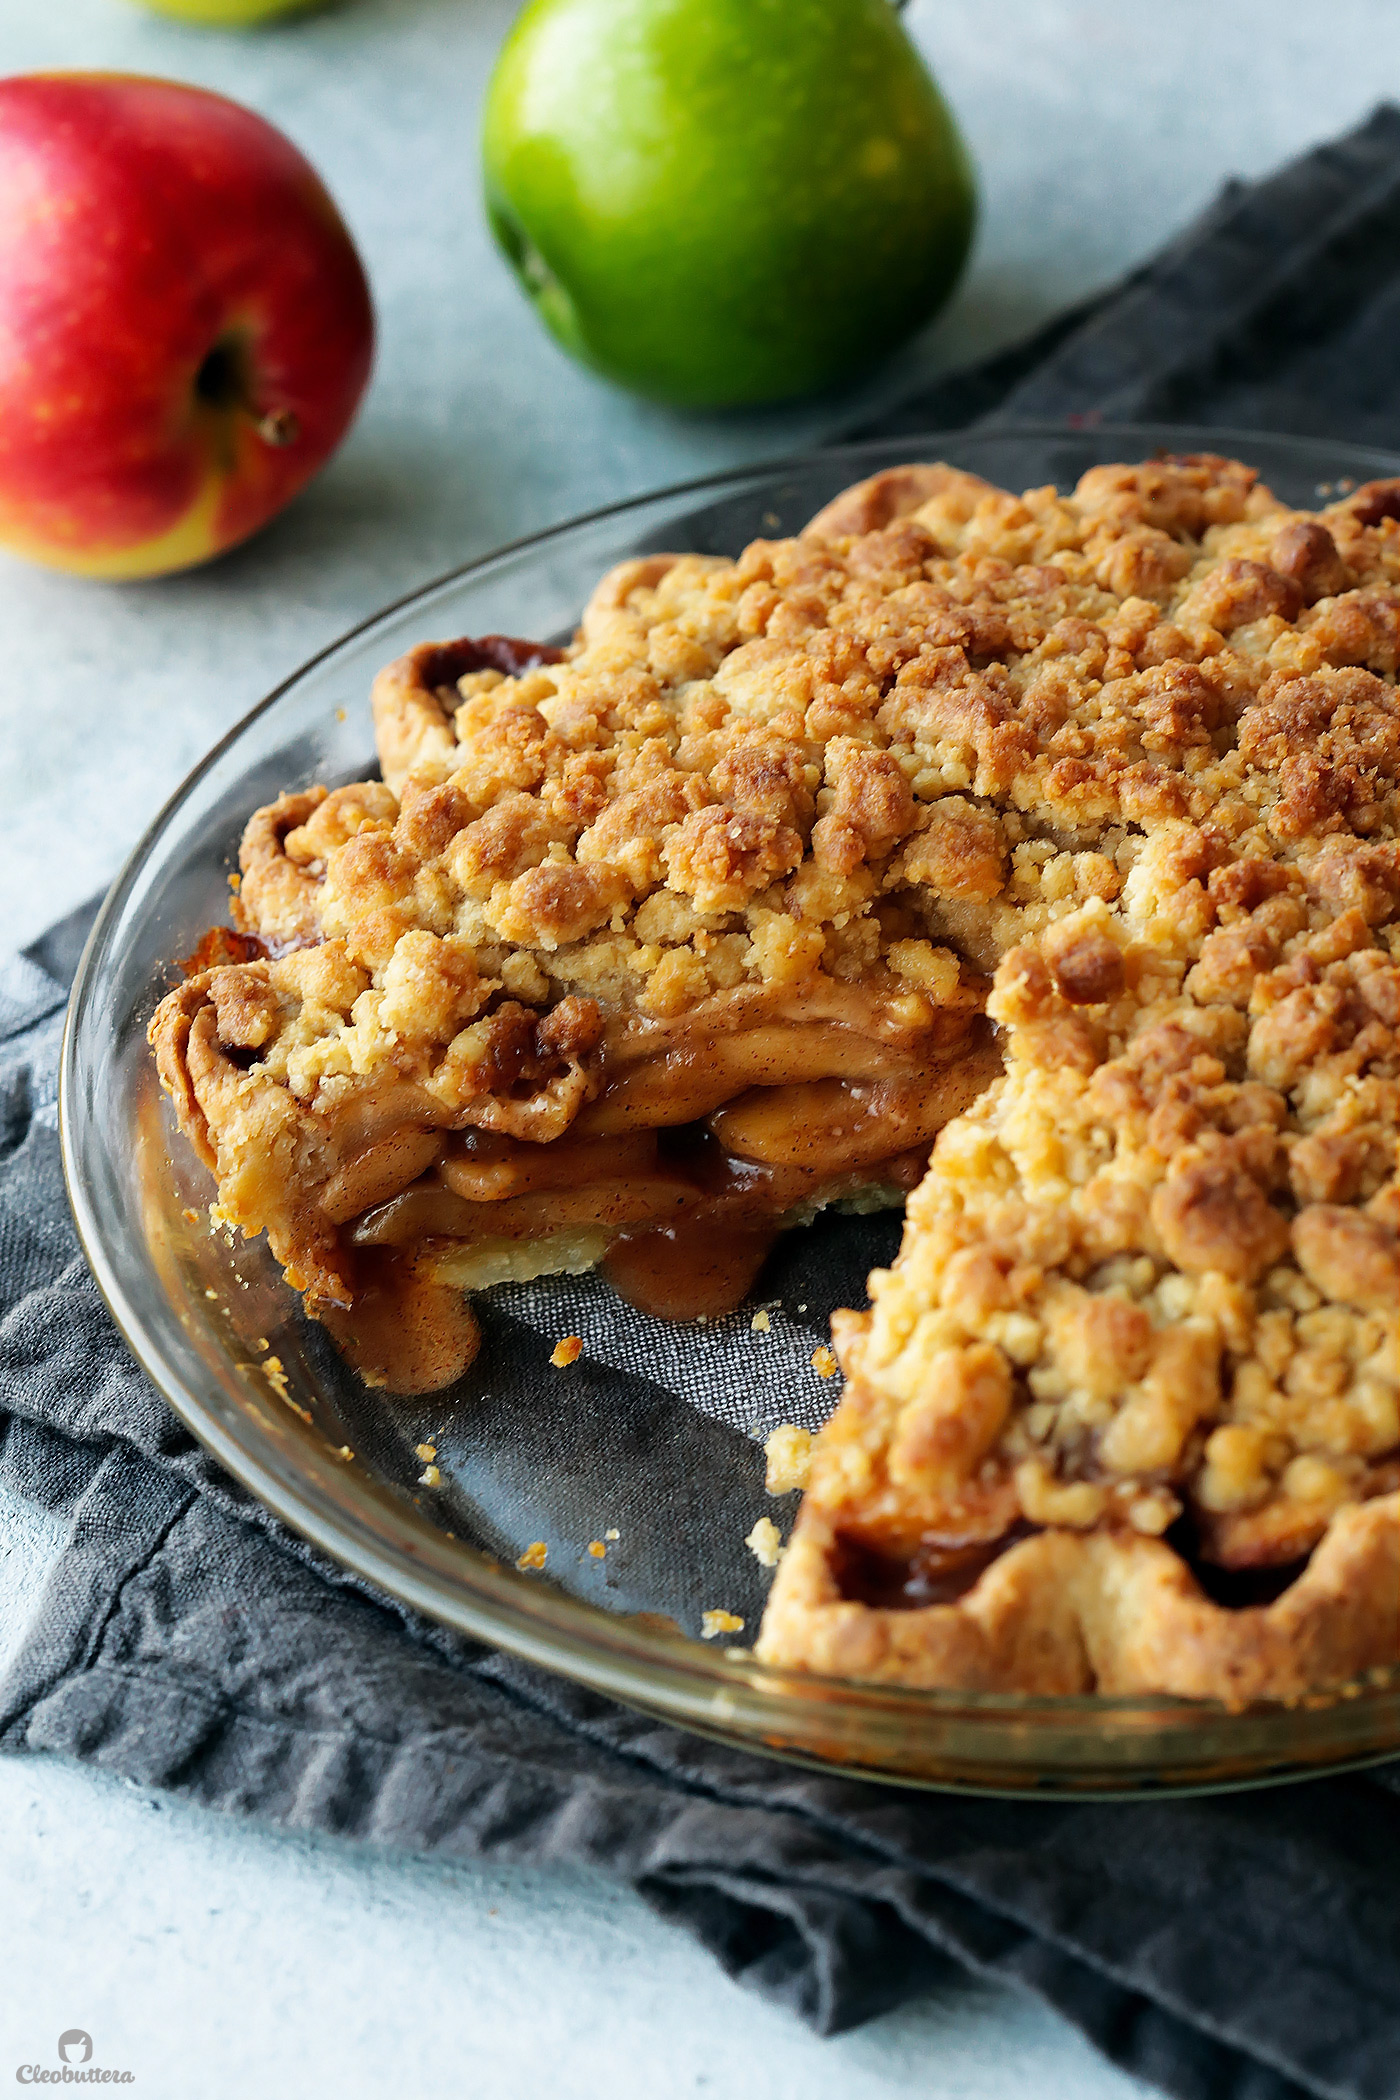
And if you’re wondering about that bottom crust that we worked so hard to achieve…
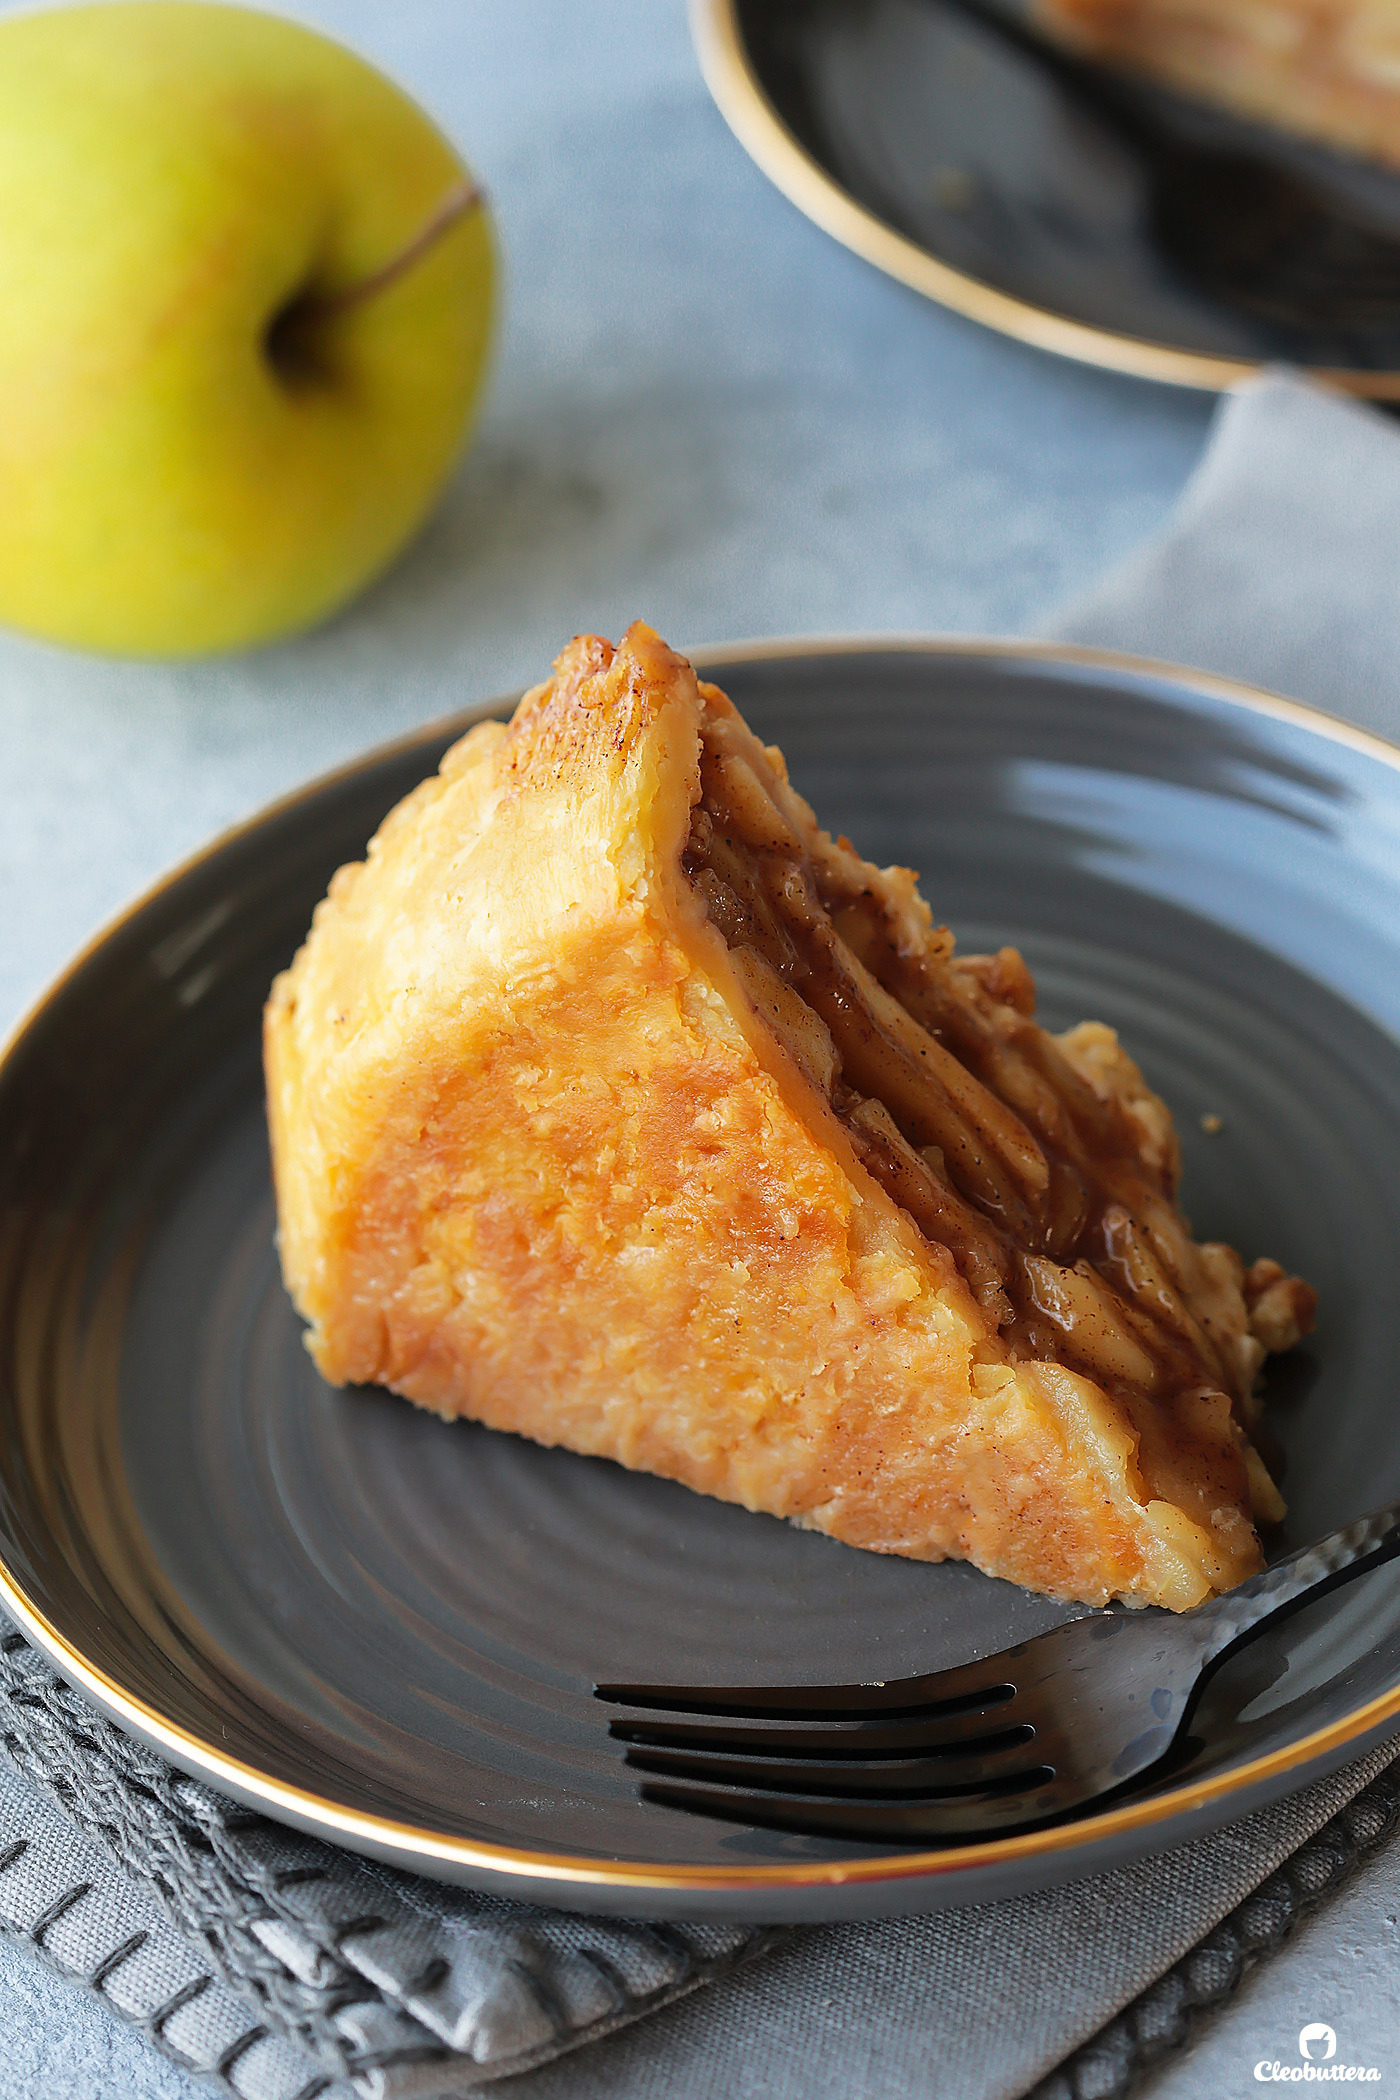
Well there you go!
Crisp and flaky on the bottom, crunchy and crumbly on top, spiced and saucy in the middle…now that’s apple pie success! Finally.
Apple Crumb Pie Tips:
- Make it in advance. Every component of this pie can be prepared ahead of time! So all you have to do on the day of, is put everything together and bake. Pie crust dough, can be refrigerated for up to 2 days or frozen for up to 1 month. Apple filling and crumb topping can be made a day in advance.
- Know your apples. You can choose your favorite variety of apples as long as its a kind that keeps its shape while cooking (suggested varieties in the notes section of the recipe). Just keep in mind that the kind of apple(s) you choose, will determine the amount of sugar you’ll need to add.
- Taste the filling. Because natural sugar levels in apples vary greatly depending on variety and season, it’s important to adjust the sugar amount according to taste. Start with the least amount of brown sugar; if the filling is bland, add up to 2 more tablespoons sugar. A sweeter apple like Golden delicious will require less sugar, while a tart kind like Granny smith will need more. Similarly, adjust the salt in the end, according to taste to balance out the sweetness. If you like other spices like cloves, ginger and all spice, feel free to add them in the end to taste. Lemon juice or zest are also welcomed additions. It’s YOUR pie, make it your way.
Apple Crumb Pie

Super flaky crust, warmly spiced, saucy apple filling, crunchy crumb topping…this is apple pie perfection right here! A few tricks ensures a crisp, well-browned bottom crust that is never, ever dense or soggy.
Ingredients
For the crust:
For the Apple Filling:
- 1.2 kg whole, unpeeled baking apples; 920g after peeling & coring, about 6 to 7 apples* (see note below)
- 7 tablespoons unsweetened apple juice or cider
- 3 tablespoons water
- 2 1/4 teaspoons cornstarch (cornflour)
- 3 1/2 tablespoons (50g) unsalted butter
- 4 to 6 tablespoons packed soft brown sugar, preferably dark* (see note below)
- 1 1/2 teaspoons ground cinnamon (may be reduced to 1 tsp for a less spiced filling)
- 1/4 teaspoon freshly ground nutmeg (optional, but recommended)
- 1/4 teaspoon fine salt (reduce to 1/8 tsp if using tart apples)
- 1/2 teaspoon vanilla extract or 1 teaspoon if using imitation vanilla flavoring (optional, but recommended)
For the Crumb Topping:
- 1 cup plus 3 tablespoons (142g) all purpose flour, preferably weighed*
- 1/2 cup (100g) packed light brown sugar
- 6 tablespoons (85g) unsalted butter, melted
- 1/2 teaspoon salt
Instructions
To make the crust:
- Start by preparing the single-crust dough of The Flakiest All-Butter Pie Crust as per recipe in the link up until step 6. Wrap dough tightly in plastic wrap and refrigerate for at least 2 hours. See note below, for make ahead tip!
- While the dough is chilling, prepare the apple filling.
To make the apple filling:
- Peel apples, core and slice into 1/4-inch thick slices. In a small bowl or measuring cup with a spout, whisk together apple juice (or cider), water and cornstarch; set aside.
- In a large pan, melt butter over medium-high heat. Add apples and cook, stirring occasionally, until beginning to soften, become slightly pliable and release their juices, about 5 minutes. Stir in 4 tablespoons (50g) of brown sugar, cinnamon and nutmeg and cook until fragrant, about 30 seconds.
- Whisk the cornstarch mixture to re-incorporate then pour over the apples and cook, stirring frequently, until sauce bubbles and thickens, 1 to 2 minutes. At this point, be sure that the apples have reached the doneness of your liking, because they won't cook any further, even after baking in the oven.
- Taste the apple mixture, add an extra tablespoon or two of brown sugar, if needed. Adjust salt to taste. Remove from heat, then stir in the vanilla. Transfer to a baking dish and let cool completely to room temperature, about 30 minutes. (See note below for make ahead tip!) Meanwhile, prepare the crumb topping.
To make the crumb topping:
- In a medium bowl, stir all ingredients until no dry spots remain and mixture forms clumps. Refrigerate until ready to use.
To assemble the pie:
- Please refer to The Flakiest All-Butter Pie Crust recipe post for a step-by-step picture tutorial for the following instructions.
- On a well floured counter, use a rolling pin to roll the dough into a 12-inch circle. To transfer it to the pie dish, roll the dough loosely around the rolling pin and unroll it onto a 9-inch pie dish, leaving at least 1-inch overhang around the edges. Ease dough into the dish by gently lifting edge of the dough with your hand while pressing into plate bottom with your other hand.
- If needed, trim overhang to ½ inch beyond lip of the dish. Tuck overhang under itself; folded edge should be flush with edge of plate. Use your fingers to crimp dough edges around the dish. Refrigerate dough‑lined plate until firm, at least 30 minutes.
- Adjust oven rack to middle position and heat oven to 180C/ 350F.
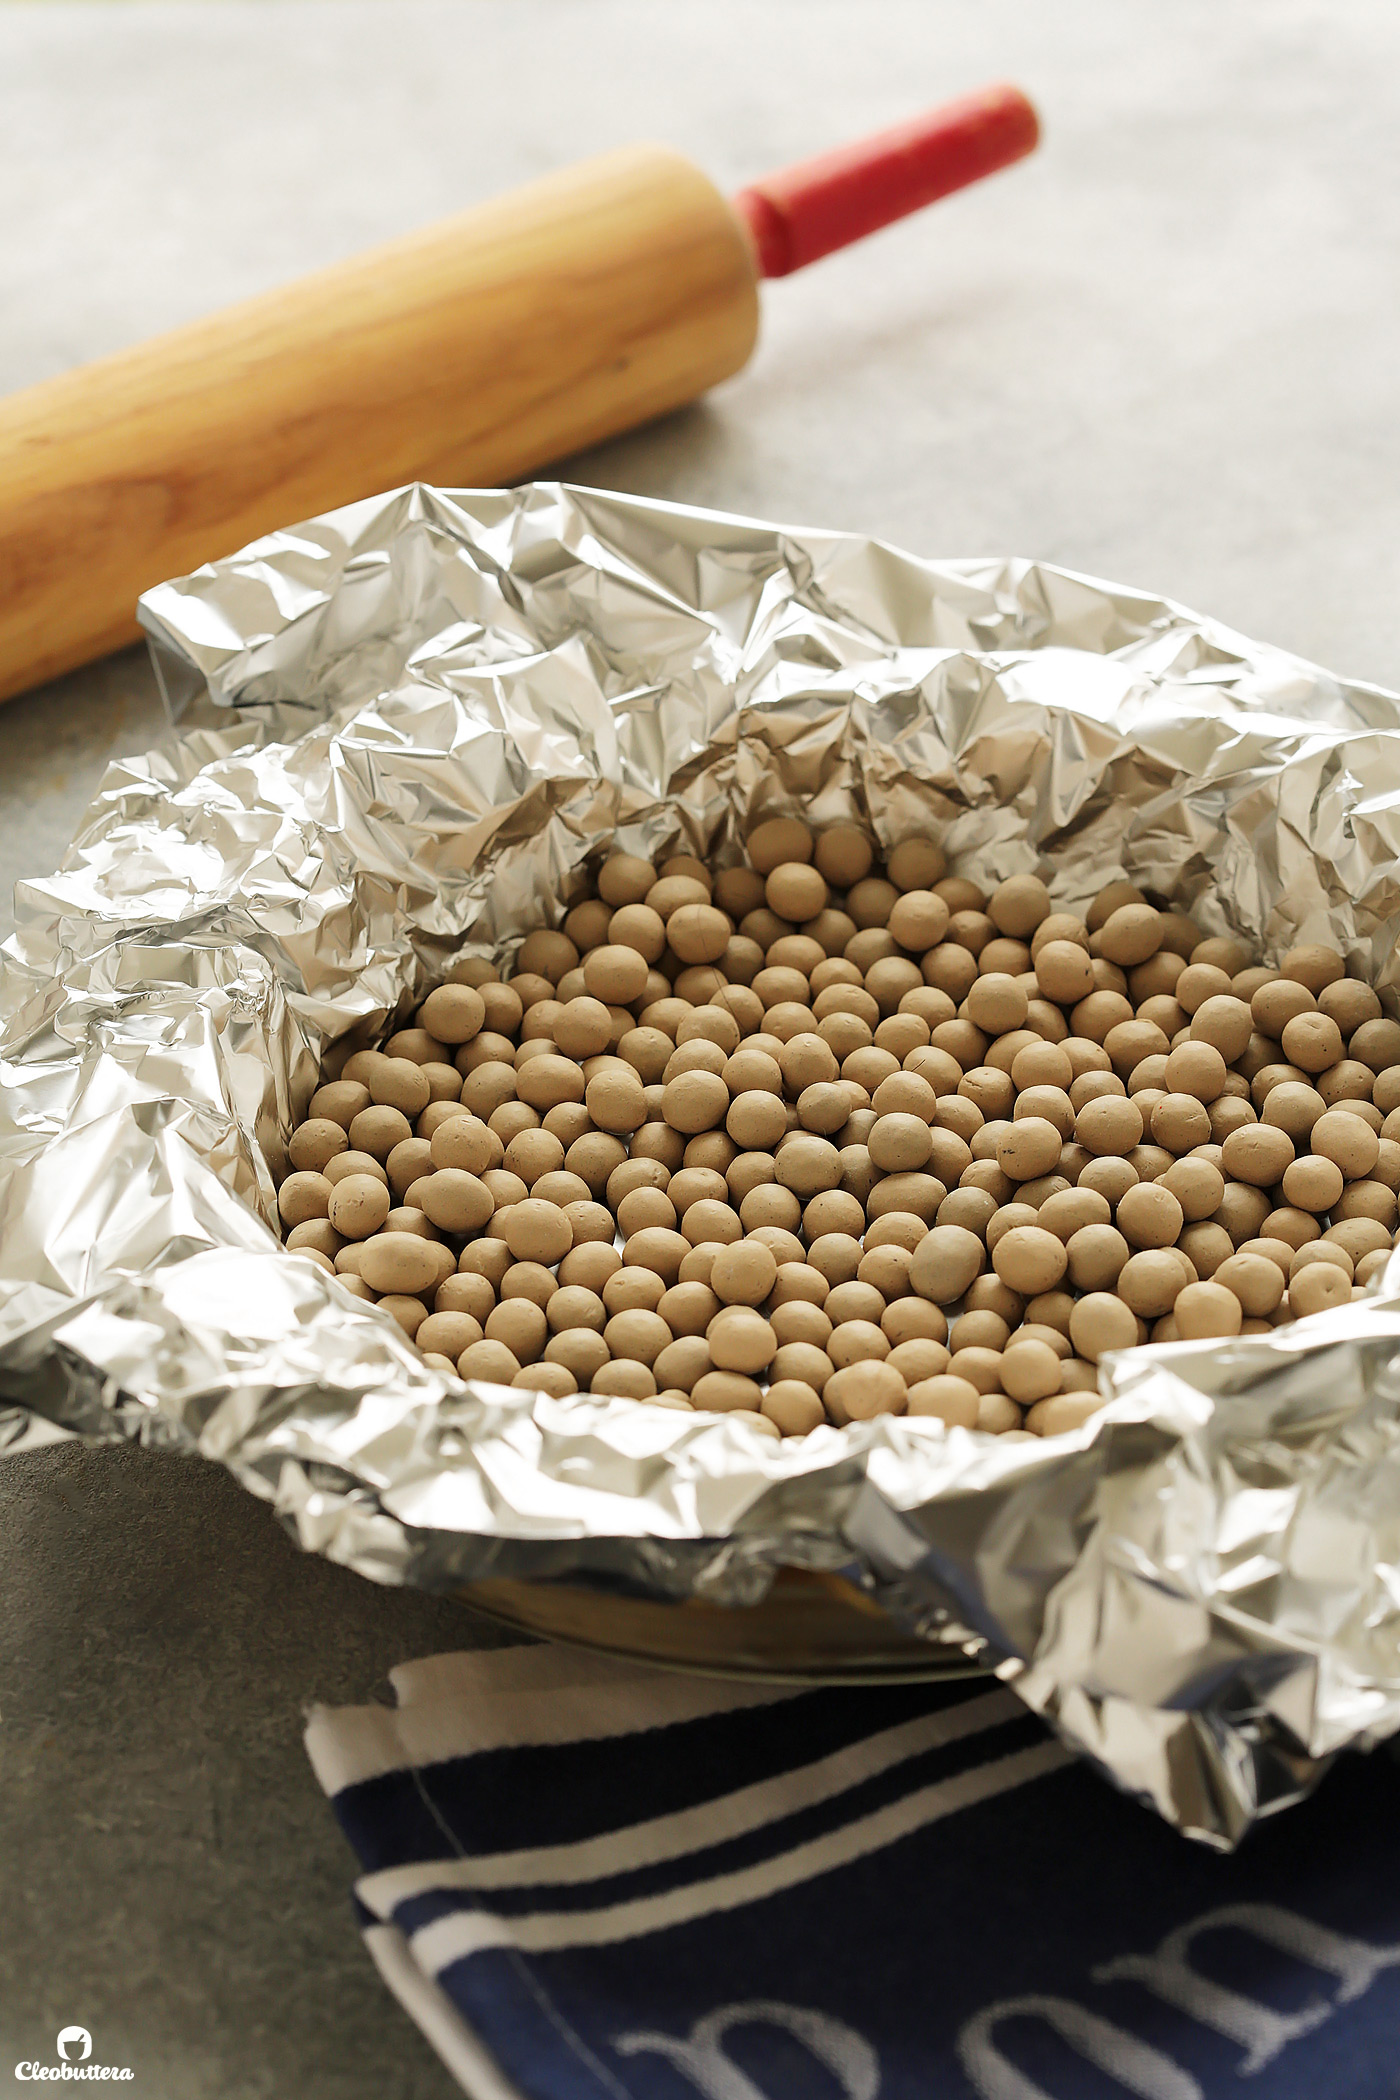
- Line chilled pie shell with aluminum foil, covering edges to prevent burning, and fill with pie weights or beans/rice/sugar.
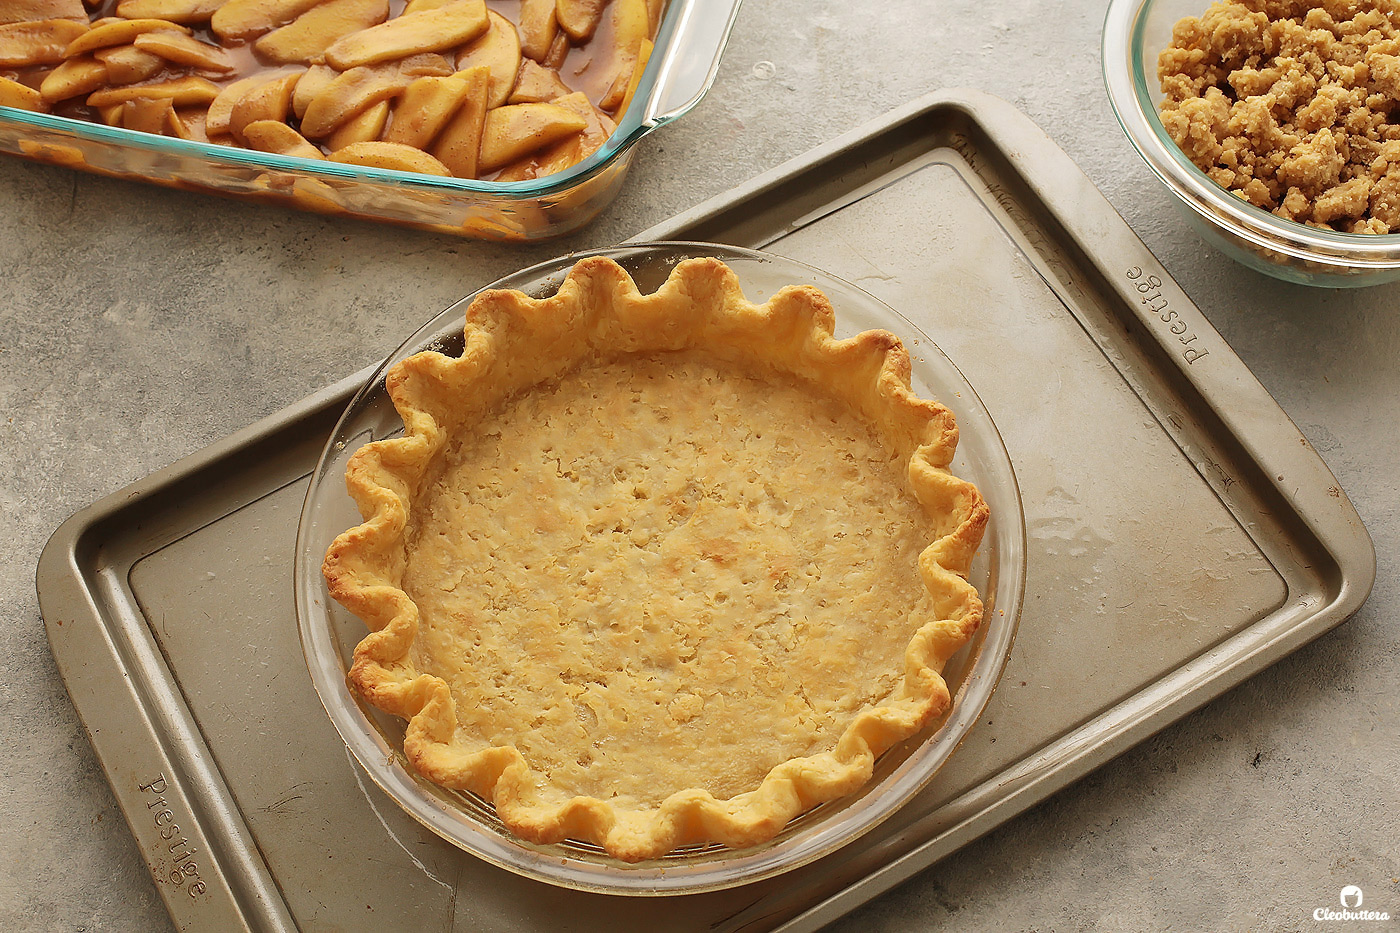
- Bake until edges are set and just beginning to turn golden, but the center will remain pale, 15 to 20 minutes. Remove foil and weights, rotate plate, and continue to bake again for 10 to 15 minutes longer until the crust is lightly golden brown in color; just a couple shades shy of being fully baked.. If crust begins to puff, pierce gently with the tip of a paring knife.
- Transfer the room temperature apple filling to the hot crust into an even layer, pouring any remaining liquid from the baking dish into the pie.
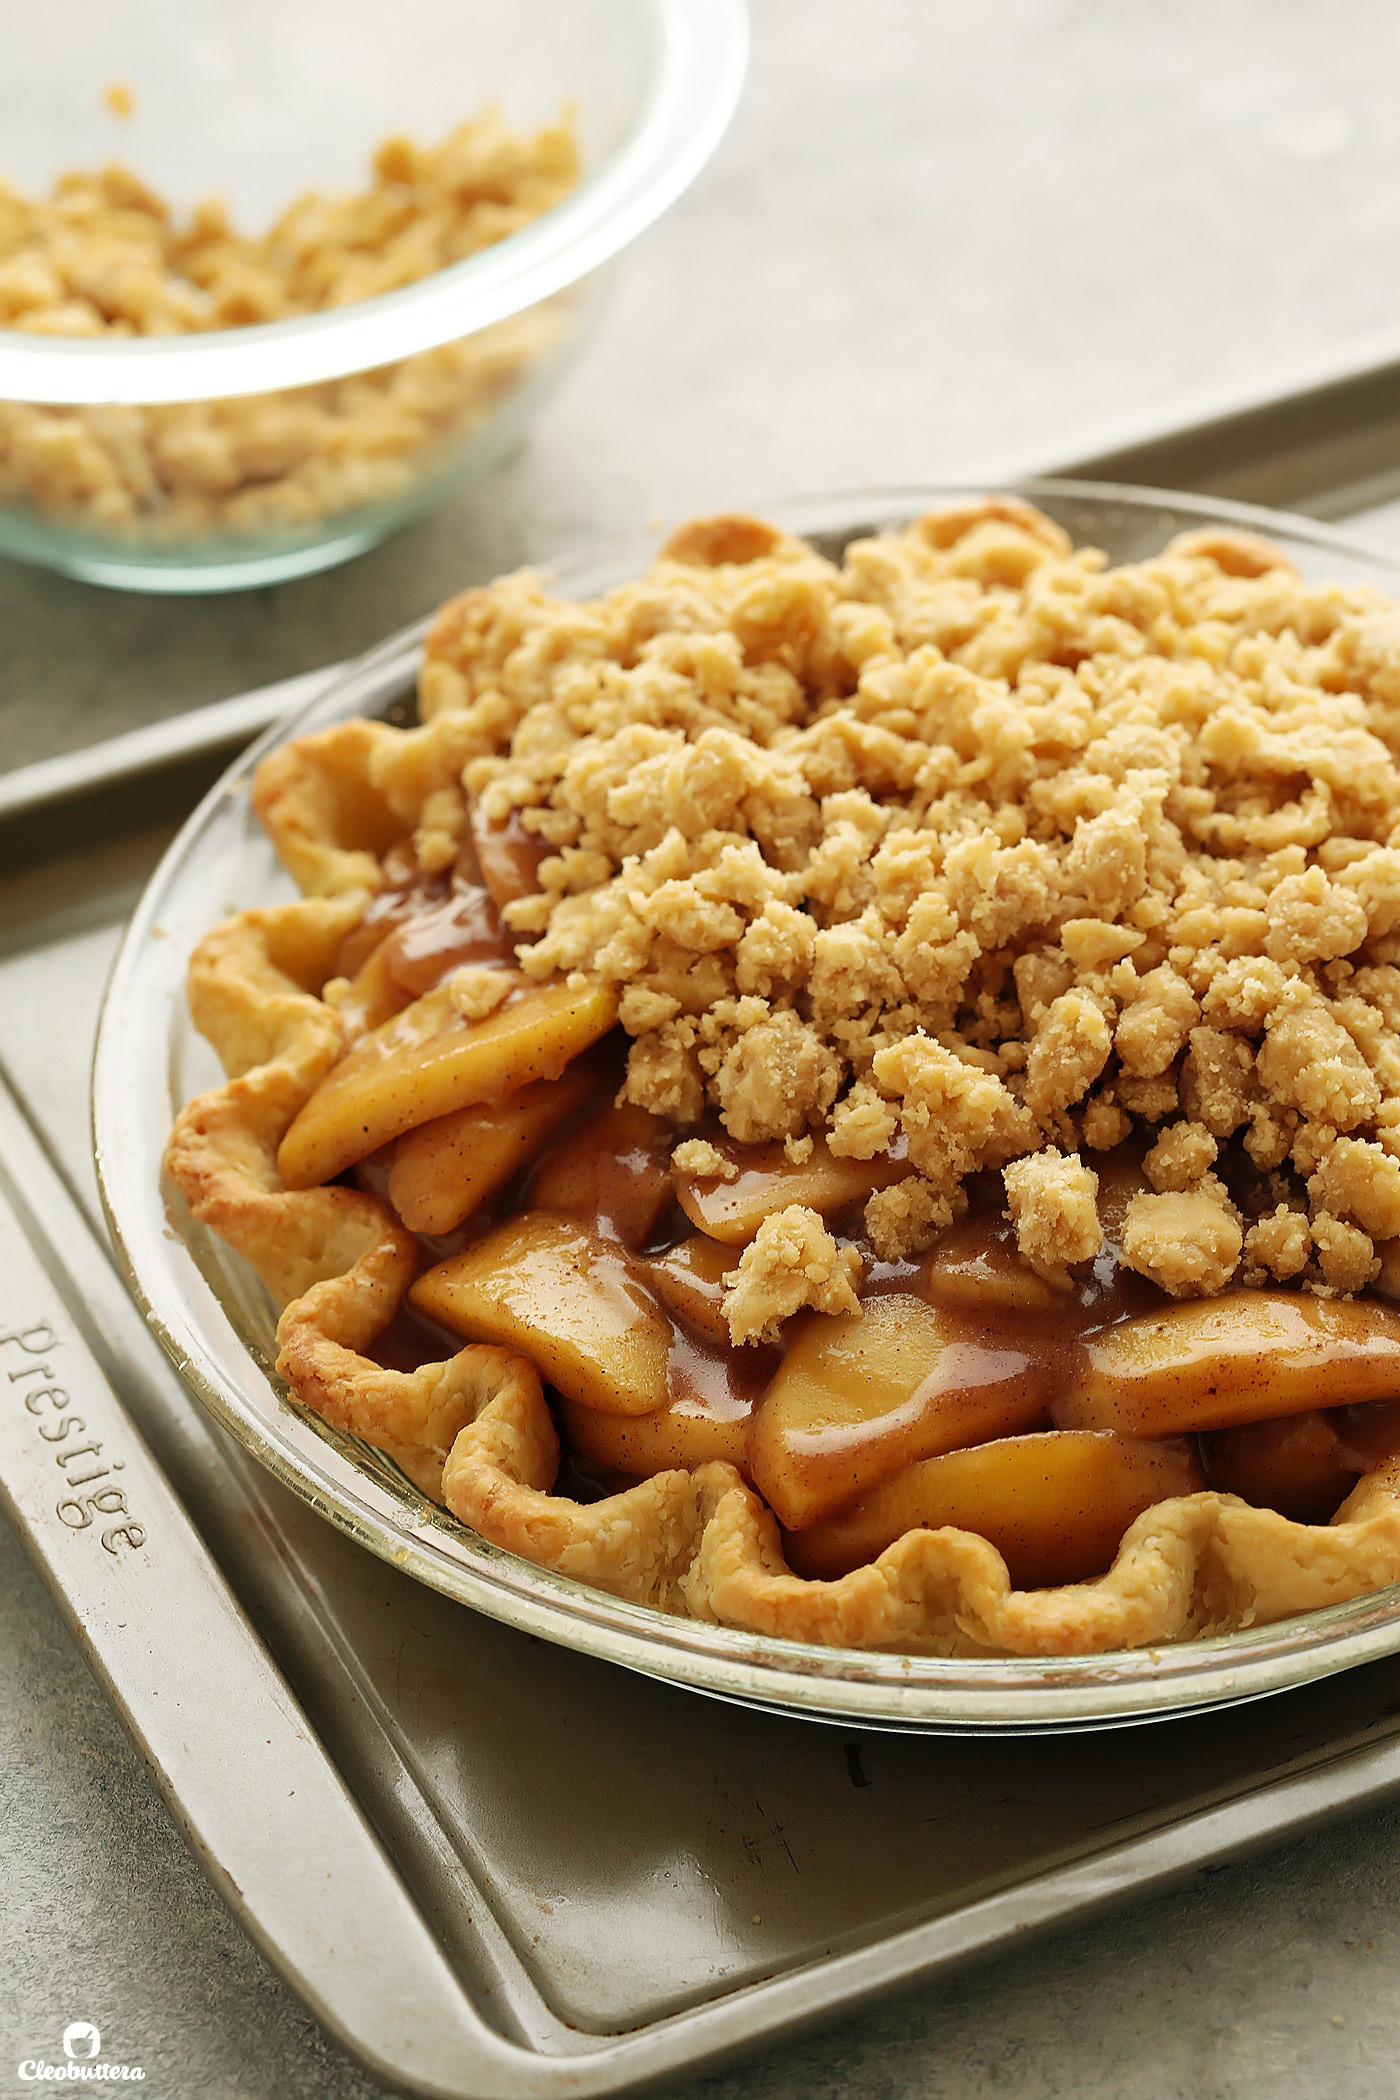
- Break topping (it will harden in the fridge) into pea-size crumbs and distribute evenly over apple mixture. Pat topping lightly to adhere.
- Set pie over a foil or parchment paper lined, rimmed baking sheet (to catch any drips) and transfer to the oven. Bake for 30 to 40 minutes until the topping is golden brown in color and the apple filling is bubbling.
- Allow to cool from 10 to 15 minutes, then serve with vanilla ice cream, if desired.
Recipe Notes
- The best "baking apples" are those that keep their shape and don't cook down to mush. Granny Smith (green), Golden Delicious (yellow), Jonagold, Braeburn and Fuji apples are all great choices. I love using a greenish yellow variety (see photo in post) that is unlabeled here in Egypt. It has a great balance of sweet and tart flavors, that tastes like a cross between Granny Smith and Golden Delicious. You can choose your favorite variety or a mix of 2 kinds; a combination of sweet and tart apples tastes best here. Just note that the kind of apple(s) you choose, will determine the amount of sugar you'll need to add.
- Because natural sugar levels in apples vary greatly depending on variety and season, it's important to adjust the sugar amount according to taste. Start with only 4 tablespoons (50g) of brown sugar; if the filling is bland, add up to 2 more tablespoons sugar; I use 5 tablespoons (63g). A sweeter apple like Golden delicious will require less sugar, while a tart kind like Granny smith will need more. Similarly, adjust the salt in the end, according to taste to balance out the sweetness; I use 1/4 teaspoon.
- Weighing ingredients, especially flour, is ideal in baking due to its consistency. If you don't have a kitchen scale to weigh the flour, use the Spoon & Sweep method: Use a spoon to lightly fill measuring cup with flour until required amount is obtained, then sweep access with the back of a knife.
- Make ahead tips! Pie crust dough, wrapped tightly in plastic wrap can be refrigerated for up to 2 days or frozen for up to 1 month. If frozen, let dough thaw completely on counter before rolling. Apple filling and crumb topping can be made up to 24 hours in advance. Refrigerate covered until needed. Bring apple filling to room temperature before using.
Pie crust recipe adapted from The Flakiest All-Butter Pie Crust, which is adapted from Cook's Illustrated.
Measurements Note: All recipes of this site have been developed using weight measurements. Although US volume measurements have been included for your convenience, it is highly encouraged that you weigh your ingredients using a kitchen scale to get the best possible results. Due to the sensitive nature of baking, kitchen scales are proven to yield more accurate and consistent results than measuring cups. Enjoy!
Powered by ![]()
This post may contain affiliate links.
All images and content are owned by Cleobuttera® and are copyright protected. Please do not use my images without prior permission. If you would like to republish a recipe, please rewrite it in your own words and link back to the recipe page on my site. Original recipes and creations of this site are intended for personal and home use. Commercial replication or media consumption are only allowed with a written consent and agreement with Cleobuttera owners. Otherwise it is considered a violation of intellectual property. Thank you for respecting and appreciating the amount of time and effort that goes into creating free, unique recipes that make people happy.


My mouth is salavating, I hope I can hold of till Thanksgiving. This to me is apple pie. Can’t wait to make it.
Thanks Ann Marie! I can’t wait for you to try it. I hope you love it as much as we do! Happy Thanksgiving in advance 🙂
I made this apple pie and I drizzled Carmel syrup on top of apples before adding crumb topping and man o man this this was the best pie of any kind I have have ever tasted. Thank you for sharing such goodness.
its on my weekend baking list, i will tag you when u make it
Wooohooooo! Can’t wait to hear what you think of it!
I made it for my bookclub on Friday night! First, the crust is AMAZING! My best, flakiest crust EVER, and I have been making pie crusts for about 38 years. I’ve tried half shortening, lard, vodka, everything. Even my picky sister said it was my best!
The apple pie was delicious! I stuck to the recipe as closely as possible, except used all dark brown sugar because I didn’t have light brown. I don’t usually make apple, or even order it because… well ho hum… apples, when there is pecan pie to make, and chocolate desserts to order. And all the peeling! But, this was wonderful. I used 3 kinds of apples – Granny Smith, Haralson, and Honey Crisp. After all, this is apple country. Next time I will add more spices for even more flavor. My only difficulty was that the crumb topping didn’t brown like yours did. I kept it in the oven at least 15 minutes longer than the time said. It is a convection oven – but I haven’t checked the temp in awhile. I will say I had cooled the apples in my three season porch room – which is pretty much the temp of the outdoors here in Minnesota – so it was probably 45-50 F. I am guessing that made it take much longer to heat up. I might try a blast under the broiler if I have the same trouble next time. It was still delicious!
Thank you for the lovely recipe and blog! I was in Egypt (and climbed Mt. Sinai) twice — many years ago. I love Egypt. And oooh, the spices you have at your fingertips there!
Oh wow Elaine! I’m in love with your very thorough and wonderful feedback! Coming from an experienced pie maker like yourself, that means EVERYTHING! I’m also so glad you agree about that pie crust…flakiest ever right? Thank you so much for taking the time to let me know how it went and how much you enjoyed it. Comments like yours is what makes my day.
It’s so amazing to hear that you’ve been to Egypt and enjoyed your adventure here. I wish that someday, I find it in me to climb Mt. Sinai too 🙂
Or if you ever come to Minnesota, let me know! No real mountains to speak of, but beautiful lakes and lots of amazing bakeries!
Sounds & looks yummy! Could this be made without the pie crust like an apple crumble? So just the apple filling with crumb topping on top?
Sure that would work! But an even better fit, is the filling from this Apple Pandowdy. It’s a lot saucier!
I just tried it – apple pandowdy filling topped with crumb topping in your pie recipe. Wooooooooooow!!!!!!
Wooooohoooooo! Love hearing that it turned out so well! I must make it myself soon.
I was searching the internet high and low for the perfect apple crumble but couldn’t seem to find one! so I thought to myself maybe c.eobuttera has one!!! so I typed in the website and low and behold the first thing I see is an apple crumble recipe!
But I do have a question! what do you think if i added salted caramel? would it be to much! I’m thinking what if I ruin it??
Hahahaaaa now that’s what I call foodie telepathy 🙂
I wouldn’t recommend adding salted caramel inside the filling as it might become a little too sweet. I’d suggest serving salted caramel sauce on the side instead.
That is exactly what I did ! and it turned out AMAZING!!!!!!!!!!!! I made your flakiest crust and it was the flakiest best crust in the universe!! thank you!
Hey Tasbih!!
What brand of apple juice do you use? I feel like all the local brands taste super sweet!
Hi Salma! I use Juhayna Pure apple juice. It’s just a small amount & the brown sugar is not that much, so the sweetness is balanced out in the end.
I made the crust for the pumpkin pie I baked for Thanksgiving. It was awesome, so I am emboldened to try the apple pie for a visitor on Monday. This looks perfect. I have had the same experience with soggy crust, crunchy apples and more so I am anxious to see how much I love this one.
I’m so excited for you Sheila! I can’t wait to hear what you think of it. I hope you love it just as much as you loved the pumpkin pie.
Two words THE BEST, really the crust is super delicious, I changed apples for pears and it turned out amazing! Even though I totally miss the step three for assemblig the pie and the crust shrank, but that was not a big deal once I tasted it! It was so delicious, that I almost ate it all, I really didn’t want to share a single piece!
First, please allow me to apologize for my embarrassingly late reply. I had technical issues with the comments section for the past couple of weeks that disabled me from replying, nor receiving new comments. So relieved it’s fixed now, along with a new look for the blog!
I’m also thrilled to hear that you loved this pie! I absolutely LOVE the idea of using pears instead of apples for a change. I must try that myself. Thank you for taking the time to share your feedback!
Hey this pie looks incredible and I’m planning on trying it out tomorrow! I was wondering if I could just cover with a lattice design pie crust on top instead of the crumb topping. Would I then need to parbake the crust?
Hi Nouran! No need to parbake the crust, but you might need to increase the baking time to about 1 hour. If the lattice is browning too quickly, just loosely tent it with foil to avoid over-browning.
Attachment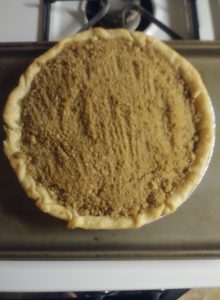
Perfect with a pinch of cinnamon in the crumb mix! So easy,and so tasty thanks for sharing,and can’t wait to check more of your recipes out
This looks so delicious Mike! AMAZING! I’m so happy to hear that you enjoyed it. Thanks for your wonderful feedback and for sharing your photo ?
hello dear,
can i make this into a real apple pie with raw crust from top and bottom with your same filling and crust recipe??
Hi Rana! Absolutely! You’ll just need to double the pie crust recipe and there won’t be a need to par-bake the bottom like you won’t here. Just place the apple filling over the raw pie dough, top with the other half of pie dough, crimp, chill until rock solid then bake. Enjoy!
Can I substitute apricots for apples? And if so, do I need to change the spices?
Hi Jay! I’ve never actually baked with apricots before, so I really can’t know for sure how it will turn out or what spices will work with it. So sorry about that. If you do experiment with it, please let us know how it turns out. Best of luck!
I made this recipe yesterday for a family gathering, it was PERFECT the whole pie was gone in no time, the crust is super flaky and buttery, the filling is divine perfect sauce consistency, perfect cinnamon flavor, i loved how you insisted on tasting the filling to know my sugar preference every bite of it was just like heaven.
The only thing i changed is i added some real apple juice reduction as we dont use preserved juice.
Thank you so much!!!
That’s so wonderful to hear Rana! I’m so happy it was such a hit! Thank you so much for coming back to update us with your amazing feedback. So glad you enjoyed so much.
Would I be able to make this filling with a pie crust on the bottom and the top? Would I simply not prebake the crusts? Or would that not work?
Hi Shelby! Sure…you can most certainly make a double crusted pie using this recipe. You’ll just need to double the pie crust recipe and there won’t be a need to par-bake the bottom like you would here. Just place the apple filling over the raw pie dough, top with the other half of pie dough, crimp, chill until rock solid then bake. Enjoy!
Of course now I find it ??♀️
It was not showing up at first. Anyway, it turned out amazing! Thank you!
Happy to hear that Shelby!
I cannot find my original comment to respond to… I was the person who asked about double the pie crust recipe and making this pie, but with a pie crust on top.
Just wanted to say I made it, and it turned out great! Love the flavor of the filling, and love the control over how done the apples are.
This pie was devoured in minutes lol. Thanks for sharing!
Attachment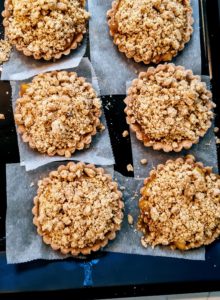
Just wanted to say how amazing this recipe is! I tried it out today, but with individual pies and it went down really well??.. now officially my dad’s favourite pudding (some accolade, let me assure you)!
Many thanks!
Used the recipe for the apples and the crumbs, but not the dough. We decided to make mini pies in cupcake tins! We precooked the apples as instructed, but used raw, premade dough from the store. We lined the cupcake tins with circles of raw dough, filled them will cooked apple filling, and topped it with crumbs. Cooked it for about 20 minutes at 350° and they were amazing! Great recipe ?
Mini apple crumb pies sound incredibly cute! I’m so glad you liked this recipe and that the shortcut worked just as well. Thanks for you wonderful feedback ?
Thanks for sharing this post with all of us. A best ever apple crumb pie recipe i have ever tried. Also here i have a special apple pie recipe. Check out the recipe here: https://www.recipespack.com/mini-apple-pies-sprinkle-bakes/
I’m really happy you enjoyed it Bhavesh! I love Sprinkle Bakes’ recipes and I’m sure this one be no different. Thanks to you for sharing too ?
I can’t even begin to express how delicious this pie is!!
I was skeptical of all the blending in the pie dough method, but really curious/eager to try it out. I usually grate all my cold butter into the flour, work it in a tiny bit and then add a couple TBS of ice water. I found this past method somewhat unreliable in making a tender crust every time and I had issues with my butter leaking out while baking. I was so pleasantly surprised by Tasbih’s method – it turned out super crumbly, tender, flaky, flavourful, but also held together well.
The apple filling was perfectly saucy, sweet and spiced – I used Mac apples and added the full 6 TBS of brown sugar.
The crumble topping was a nice contrast to the bottom crust and apple filling. It soaked up some the apple juices and got a bit crunchy on top.
This recipe is definitely moving into the #1 spot for best apple pie I’ve ever made and I’ve tried probably close to a dozen different recipes (Sally’s baking addiction, Martha Stewart, bon appetit, chef John, etc…)
Thanks for sharing this lovely recipe ??
This pie is perfect. I followed the recipe carefully – I love how accurate it is. Thank you, Tasbih!
Hello Tasbih,
Thank you for this great recipe, It is THE BEST APPLE PIE I’ve ever had!
And the crust OMG it’s to die for, I have been on the look for an Apple pie recipe for a long time and I though why not check clebuttera? Thank god I did! I went and bought everything and baked it today and I honestly can’t stay away from the fridge ?
The only change I did was adding crushed pecans to the crumble and it turned out perfect!
Thank you again for your great recipes and looking forward to your new ones.
Your post helped me a lot. Thanks!!!