Best Ever Pastry Shop-Style Basbousa
The search for the perfect, aunthenic Egyptian-style basbousa stops here! This one is super soft, dense, never ever cake-y, and melt-in-the-mouth delicious. Easily rivals the pastry shop’s. Plus…recipe video included!
People of the World…Ladies and Gentlemen…Boys and Girls…
Please make way, give a big round of applause, scream your loudest cheer and show some love as you welcome the one…the only…The Greatest Basbousa in all the land!
It’s here! It’s here! The much anticipated, the highly requested, the most sought after recipe of the year!
A perfected classic worthy of a grand entrance and a bragging title.
This is IT people! The only basbousa recipe you’ll ever need. One I can wholeheartedly claim to be the BEST recipe on the internet (of its category).
How do I know?
Weeeeell…I kind of tried them ALL!
I’ve spent a good part of the last 3 years testing over 40 recipes (I stopped counting after 40), searching high and low for a homemade basbousa recipe that measures up to the ones we get from the “good” pastry shops here in Egypt, if not better.
To say it was the most frustrating recipe I’ve ever encountered, would be an understatement. Those who have tried making this type of pastry shop-style basbousa, would understand. Failure after failure after inedible failure. And its not because its difficult to make. Oh no! Basbousa’s difficulty level can be compared to making muffins, but it all boils down to the ratio of ingredients and mixing method. If you don’t have the right ones…you don’t have a good basbousa.
Before I vent over my basbousa journey and give you all the tips and tricks on how to make a basbousa that will make your jaw drop…let me back up a little to explain what basbousa is.
So what is Basbousa?
Basbousa which literally translates ‘just a kiss’ (aaaaawwwww), is basically a syrupy semolina “cake,” with a prominent buttery flavor, a signature pleasantly sandy texture, made super moist with a generous shower of sugar syrup. It originated in Egypt, but is also popular throughout the Middle East and the Mediterranean under different names and variations like: Nammoura, Harissa and Revani to name a few. So while they share the similarity of being a semolina based treat soaked in syrup, they tend to vary in flavor, texture and integrity from one country to the other. They’re more like cousins than they are twins. Some recipes call for eggs, others add yogurt. Some add coconut, while others depend on citrus, spice or floral waters for flavor. Some go bold with butter or oil, while others are strictly in the ghee camp. Some are all about the cake-y fluffiness, while others are dense and fudgy.
All great in their own right, but today, we are focusing on the Egyptian kind. The one I grew up with and has a worldwide reputation that precedes its delicousness! The one that signifies all that is sweet in life to the extent that there are popular Egyptian songs just about it. The one that has visitors to Egypt hooked on for life. When our friends from Canada visited us in Egypt last Spring, they fell in love with basbousa so much, that they had to take back a couple of kilos worth of it back home #truestory.
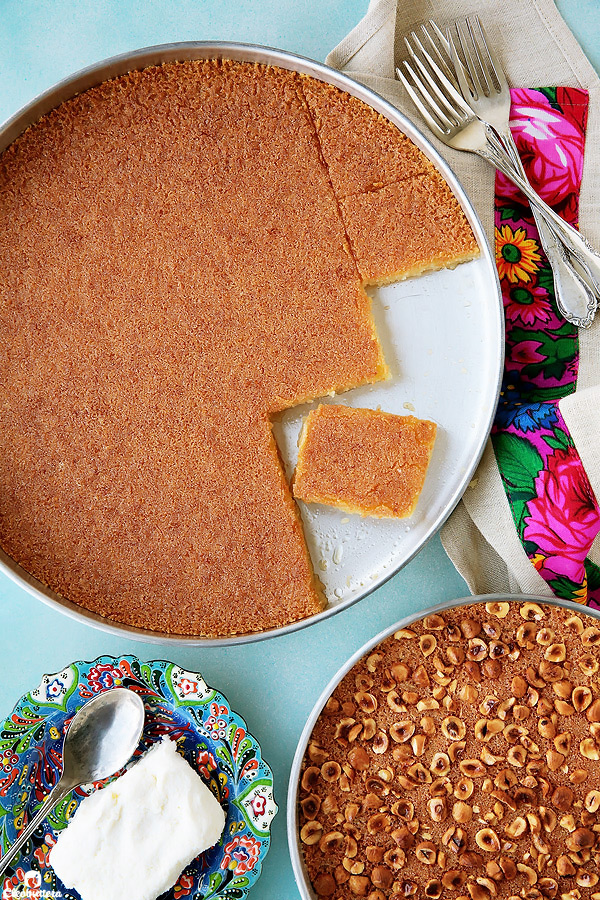
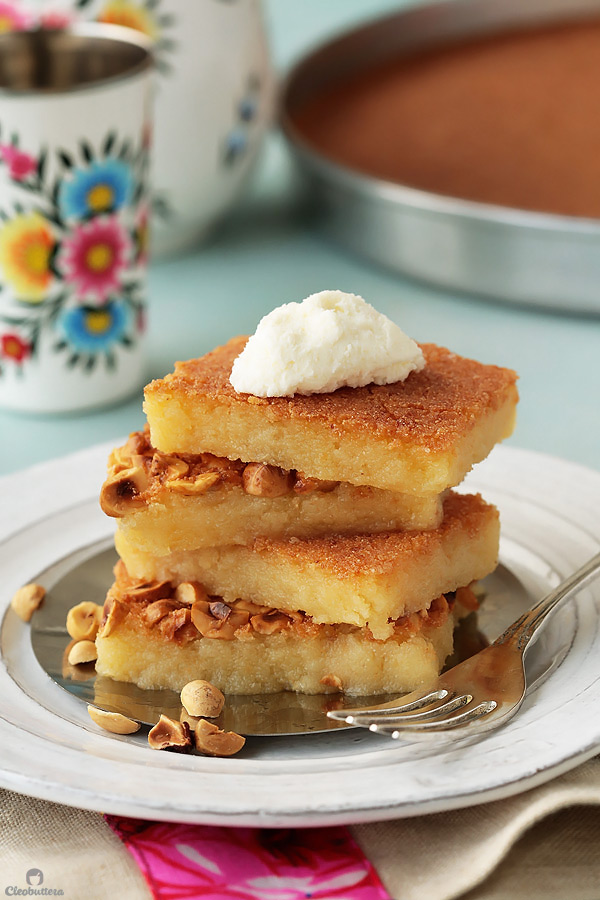
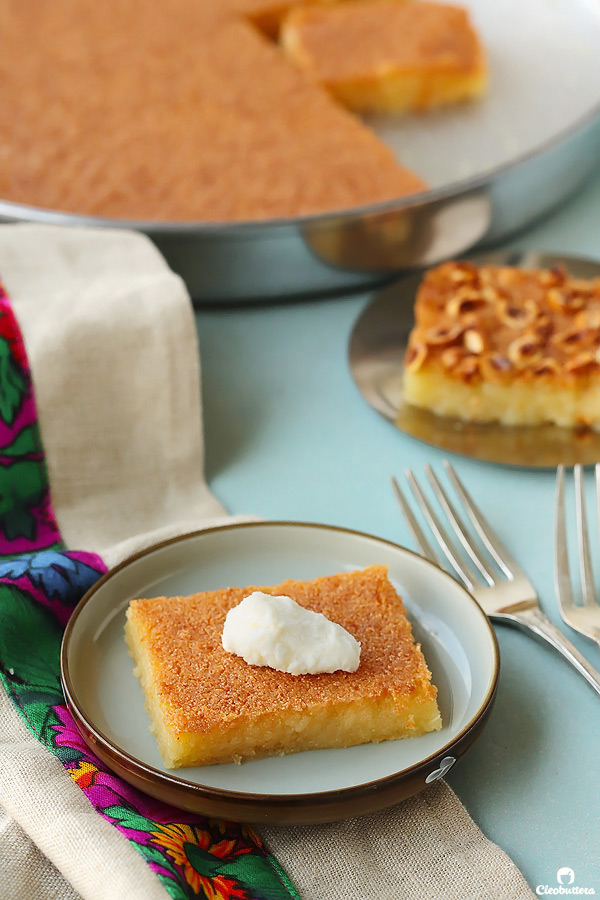
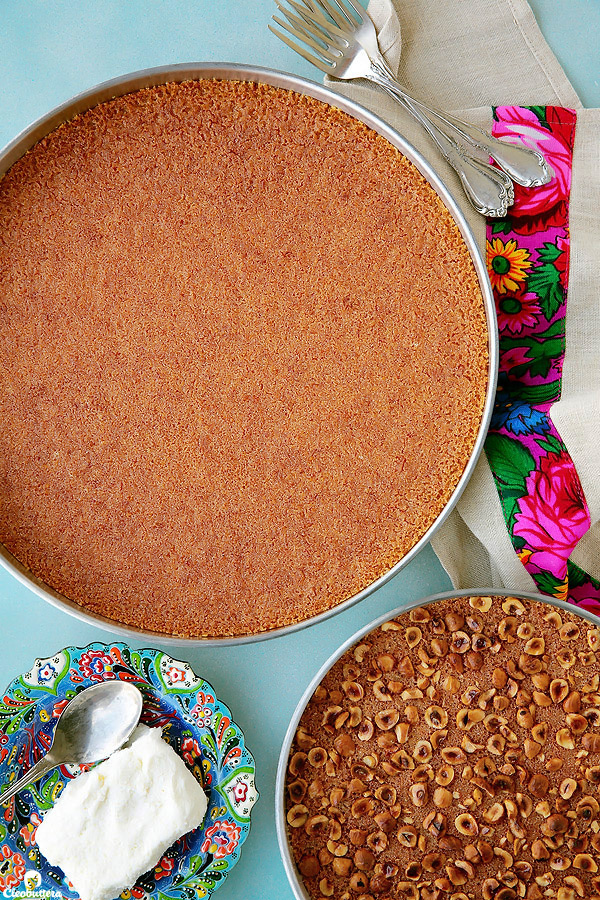
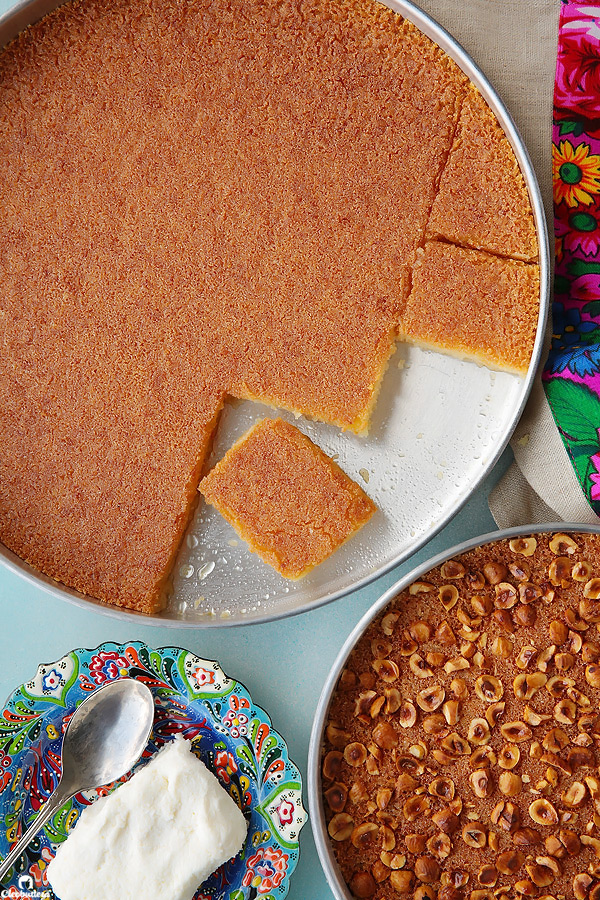
Its sometimes covered in nuts, and a dollop of eshta (country-style clotted cream) is always welcomed.
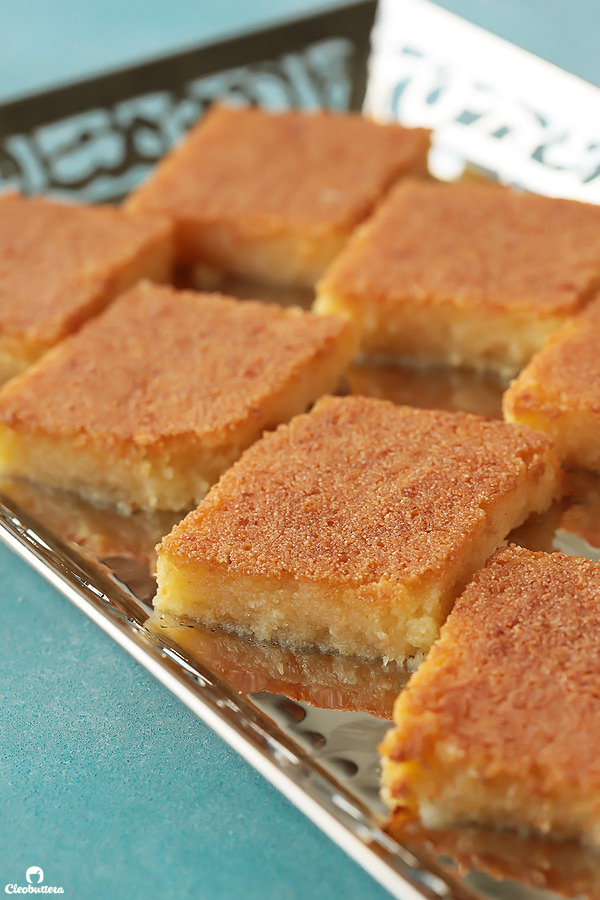
The perfect Egyptian pastry shop-style basbousa is characterized by a soft, dense, never ever cake-y, melt-in-the-mouth texture, with a thin, ever-so-slighlty crunchy surface. And that is exactly what I was after. Is that too much to ask? Apparently YES.
Homemade-style basbousa on the other hand, is also very delicious, but the texture is very different from the ones made at pastry shops. It’s fluffier and cakier, due to the use of baking powder and yogurt. It’s more like if a basbousa and a cake had a baby. Good? Absolutely. What I had in mind? Far from it. It has its time and place and one day I’d would love to tackle it, but today…is all about the pastry shop-style that seems to be driving home bakers crazy.
I watched dozens of YouTube tutorials, read pages of cookbooks, scoured online sources, called up pastry chefs, all claiming their basbousa recipe to be the answer. Giving them the benefit of the doubt, I tried them all, plus more that I had personally developed, only to be doomed with disappointment. I had pans after pans of rock hard “basbousa,” if we could even call it that, fluffy wannabes, cake-y imposters, cloying sweet confections, cracked tops, and most of all, seized up basbousa-ish that refuses to soak in the syrup. Grrrrrrrrrrrrrrrrrr!
I was this close to throw in the towel on it, announce defeat and give in to supporting my local pastry shop. Until an angel in the form of a chef came to the rescue.
Apparently Egyptian Chef Hagar Elhakeem has been following my blog for quite some time and baking from it; huge honor I must say. One day, through Instagram, she sent me photos of the recipes she’s been making from the blog, along with a very kind message of appreciation. She then so kindly offered that if I ever needed help with a recipe, she’d be more than happy to assist. Thinking I had nothing to lose, I jumped to the chance to ask if she happened to have a great pastry shop-style basbousa recipe up her sleeves. And she said: “yes; its very close!” Clearly that wasn’t the first ‘yes’ I’ve heard, but her confidence and the way she described the texture, renewed my faith in basbousa.
So? I tried it and it turned out exactly like she’d described, “very close.” It was definitely the BEST basbousa recipe I’ve tried at this point. The sweetness and flavor was on point, but I felt there was room for improvement in the texture department. I wanted it softer, denser, fudgier and fall off the fork tender. And I cannot be more excited to say that after a few tweaks, I DID IT! But without Chef Hagar’s base recipe, I would’ve been still searching, so I can’t thank her enough for that.
So without further ado, please meet the fruit of my labor, the reason I grew a gray hair in my 30s, my love and pride: Le Pastry Shop-Style Egyptian Basbousa.
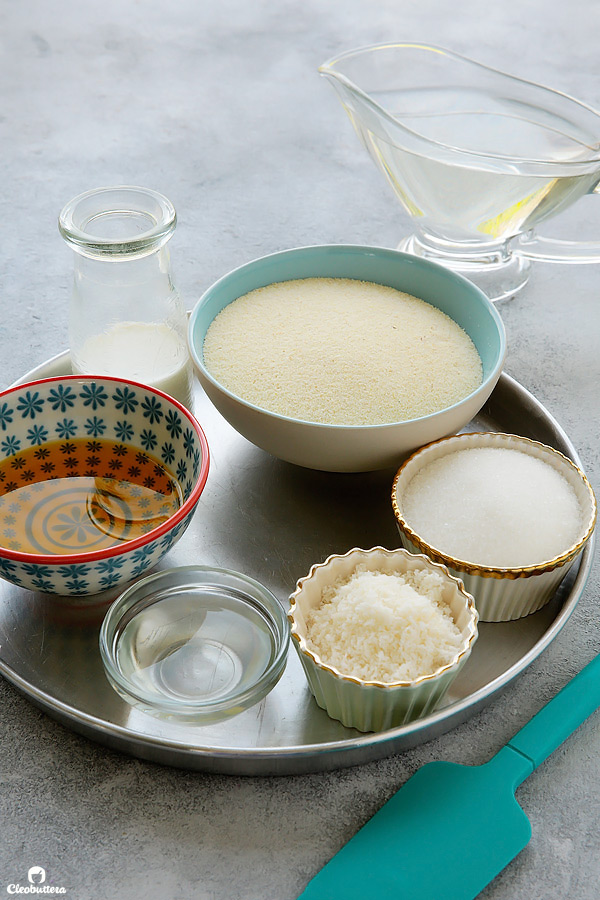
Okay…first things first. Ingredients:
- Semolina (aka Semeed in Arabic): Is the heart and soul of basbousa. It’s what gives it structure and that signature sandy texture. It’s a type of flour made from durum wheat and is commonly used for making pasta. It is extremely high in gluten, which explains why a lot of basbousas can comes out tough, and brick-like. With the right treatment, gluten development can be kept to a minimum, yielding super soft results. For this recipe, you’ll want to stick with medium grind semolina. Avoid fine semolina as is makes for a cakier basbousa and coarse makes it, well, too coarse.
- Ghee: It is the fat of choice here and the main essence of an authentic Egyptian basbousa. Since basbousa doesn’t have a lot going on in terms of flavor, the taste of ghee really comes through. So your basbousa will taste as good as your ghee is, so choose the brand you love the most. Butter CANNOT be substituted here; I tested it out and the texture and flavor was completely off. If you must, you could use clarified butter only. Here’s a tutorial on how to clarify butter.
- Unsweetened Shredded Coconut (aka desiccated coconut): I know that pastry shop basbousas don’t taste like coconut, but trust me on this…most basbousas you’ve been eating contain coconut, you just don’t know it. The coconut amount here is very little, so the taste is very subtle, and if you didn’t know it was there, you wouldn’t be able to detect it. It adds a flavor dimension, that wouldn’t be present without it; that special somethin’ somethin’ you can’t put your finger on. My son hates coconut, but he goes nuts for this basbousa. If you’re absolutely against it, you could reduce the amount by up to half. While I wouldn’t recommend omitting it, the basbousa will work without it.
- Milk: Yes pastry shops make it with milk, not yogurt like so many recipes do. Some even make it with water to cut on costs. I tried water, and works really well too, but it lets the ghee flavor shines even more. So if this is something you like…go ahead and use water.
- Sugar: Obviously.
- Heavy Sugar Syrup: Two kinds of syrup go into making this basbousa. Heavy syrup goes into the batter before it bakes, and the light one is used for soaking the baked basbousa. By heavy sugar syrup, I mean the kind we use over kunafa, balah el sham, and Qatayef. It has a 2 to 1 ratio of sugar to water and the consistency of corn syrup. It is the secret weapon here; what gives the basbousa that soft, fudgy, melt-in-the-mouth texture. I always have my Big Batch Sugar Syrup on hand, so I just use some of that, instead of making 2 different types of syrups every time I make a basbousa. It’s also worth noting, that I tried subbing in light corn syrup and it worked really well. So there’s a quicker option!
- Light Soaking Syrup: This one is used to soak the baked basbousa with. It’s what gives the basbousa its syrupy texture and softens it. This kind of syrup is much thinner than the former sugar syrup. It has a higher ratio of water to sugar, so it also way less sweeter. You’ll find that most basbousa recipes, will have you pour boiling hot syrup over the hot basbousa, but here we’re breaking the rules. Hot syrup causes the basbousa to seize and turn rock hard, so make sure its cooled down to room temperature.
Phew that was long!
Now that we’ve got the list of ingredients out of the way…the process is actually a breeze to come together. See for yourself!
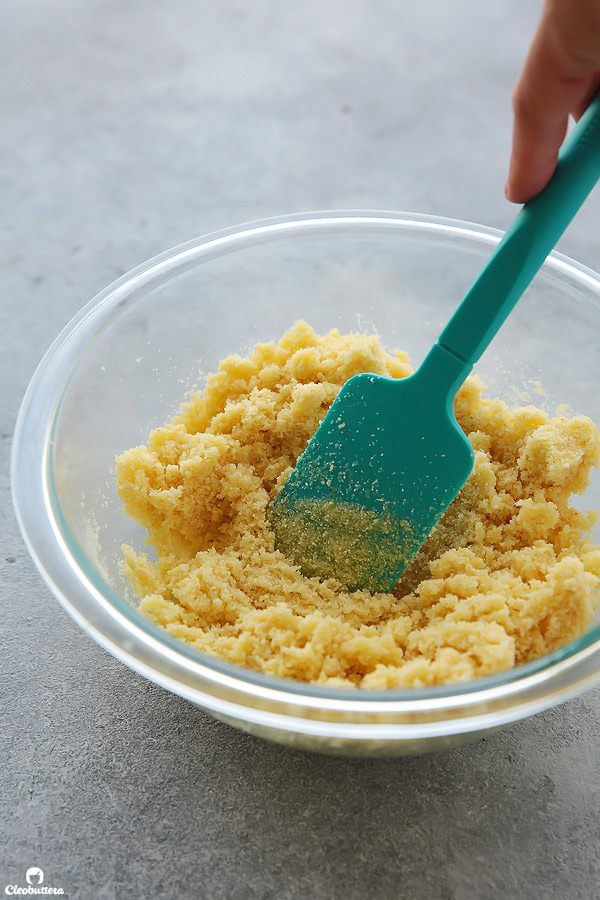
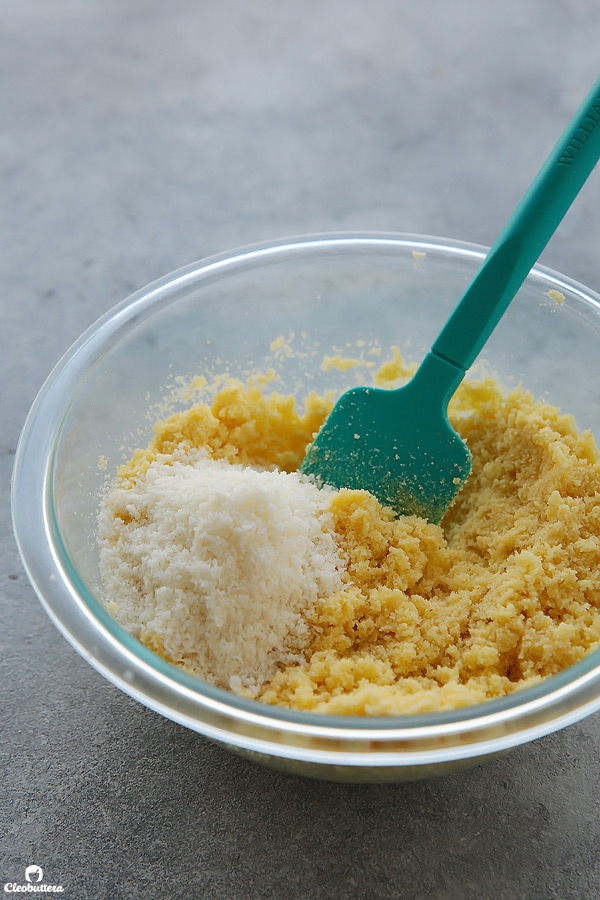
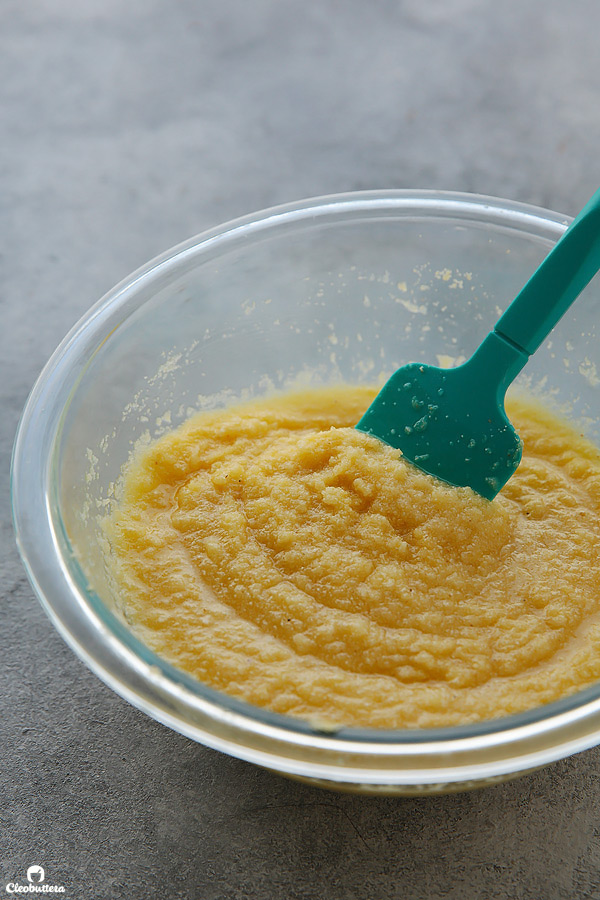
Remember when I mentioned how semolina is super high in gluten. Now, this is how we shield it from developing. You need to well coat every grain of semolina with melted ghee to waterproof it, so when it hits the liquid ingredients, it doesn’t develop as much gluten. This is traditionally done by hand; a process called ‘bas’ which is not surprisingly the first 3 letters of bas-bousa. I’m a spatula girl and I find it does the job really well, but you do you.
In goes the coconut; that optional (but not really) ingredient. Before I add it in, I like to shred it even finer in the food processor, so I don’t get obvious long strands in the final product. After that, you’ll want to leave the mixture to hang out together until you prepare the liquid ingredients.
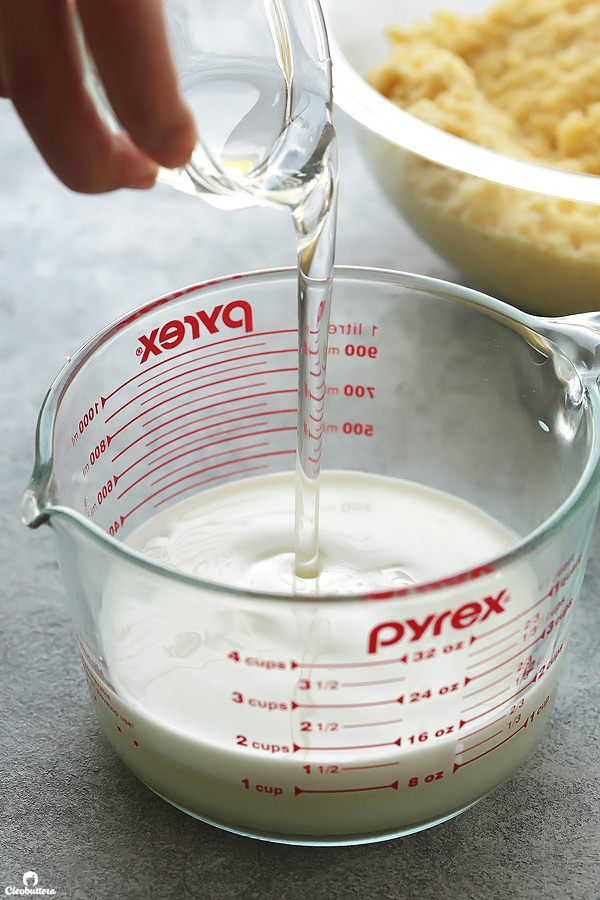
In a measuring cup, the milk, sugar and heavy sugar syrup go in together, then microwaved until very warm.
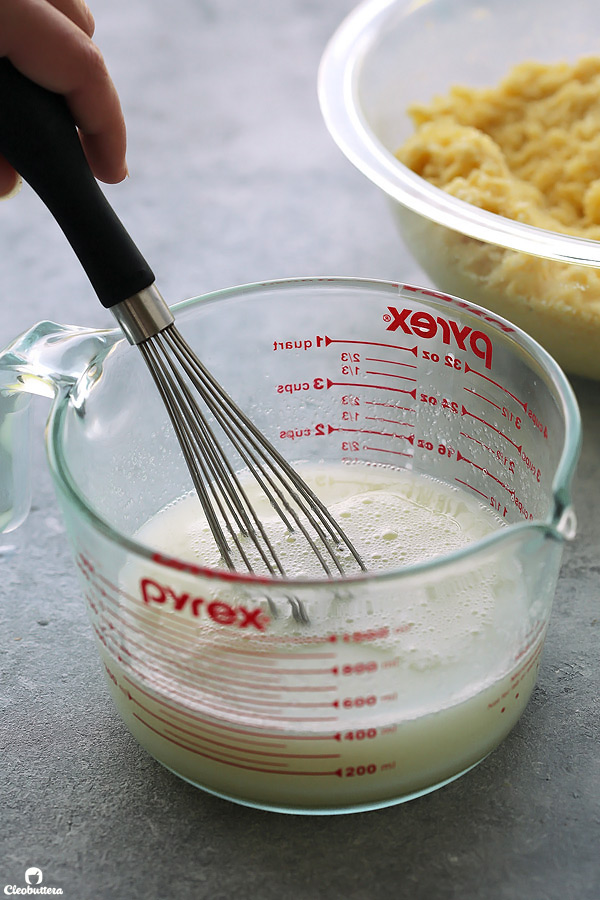
Then whisked together until all the sugar granules dissolve completely.
Liquid goes into the dry…
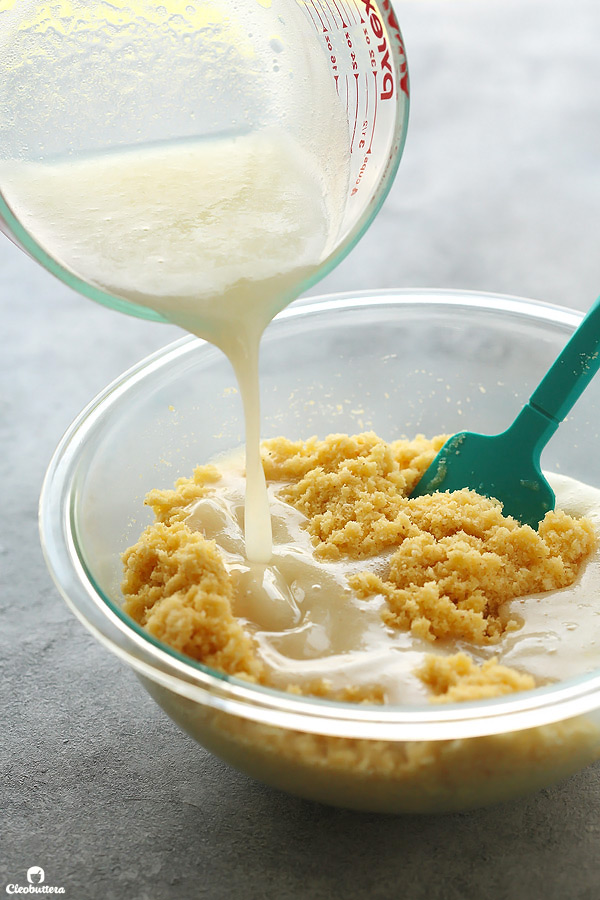
Then folded in ever so gently. Don’t forget we’re dealing with a gluten monster here that were trying to tame. So the less you handle the batter, the better. Overmixing increases gluten development, so you just want to mix until no pockets of dry ingredients remain.
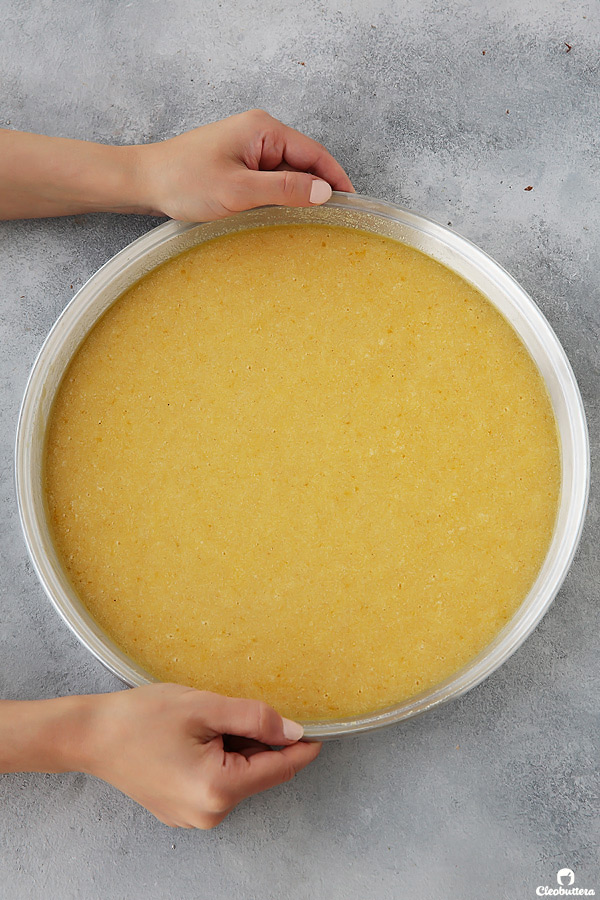
Now pour the batter into a baking pan that’s been greased with ghee…don’t listen to anyone who tells you to grease the pan with tahini. Lies, lies, lies! I actually tested it out in what was probably my 51st trail and it made the basbousa taste like tahini. So unless you want a tahini flavored basbousa, go with ghee. Tap the pan over the counter several times to smooth. Then refrigerate until the batter is no longer jiggly; that should take about 15-20 minutes. This resting step allows the liquids to hydrate and expand the semolina grains, which makes for a finer texture.
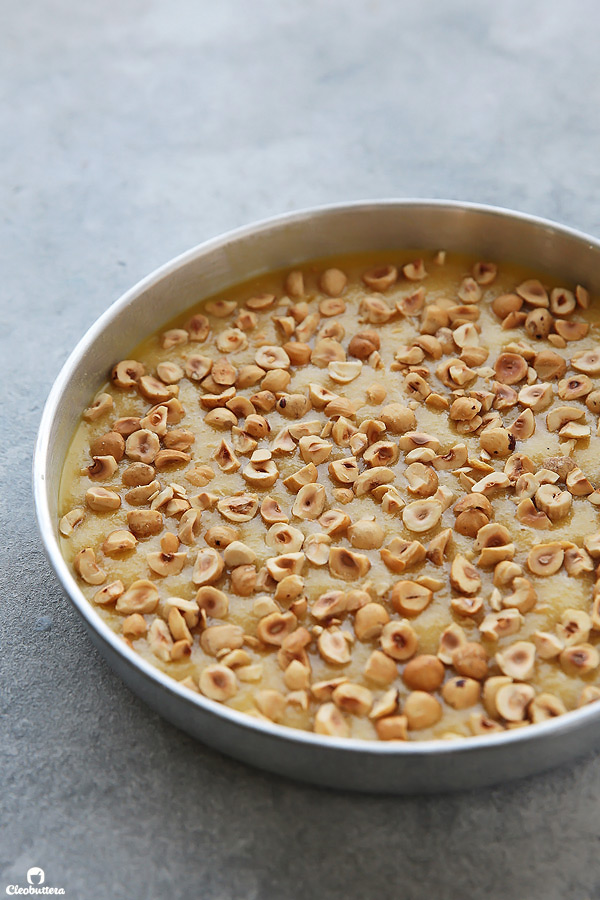
If you love nuts; go nuts! Hazelnut is probably the most common nut topping. For some people, a basbousa doesn’t count if it’s not covered in nuts…I’m not one of those people. Refrigerate that as well then bake!
When it comes out of the oven, it will look like a dry land in the peak of drought. So immediately quench its thirst with the cooled light soaking syrup.
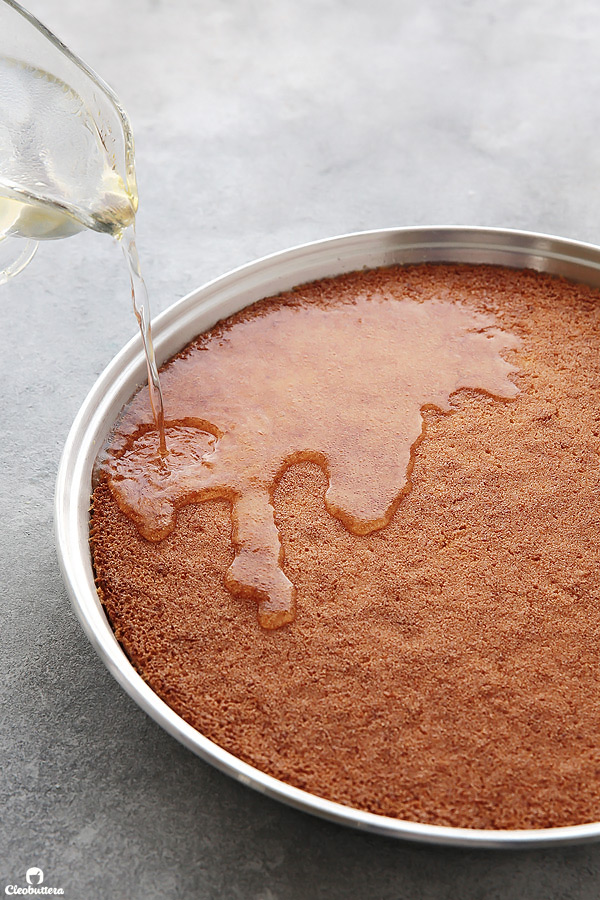
And forget about it for at least 30 minute to cool down a bit and give the semolina grains some time to drink up all the syrup and puff up and become nice and soft.

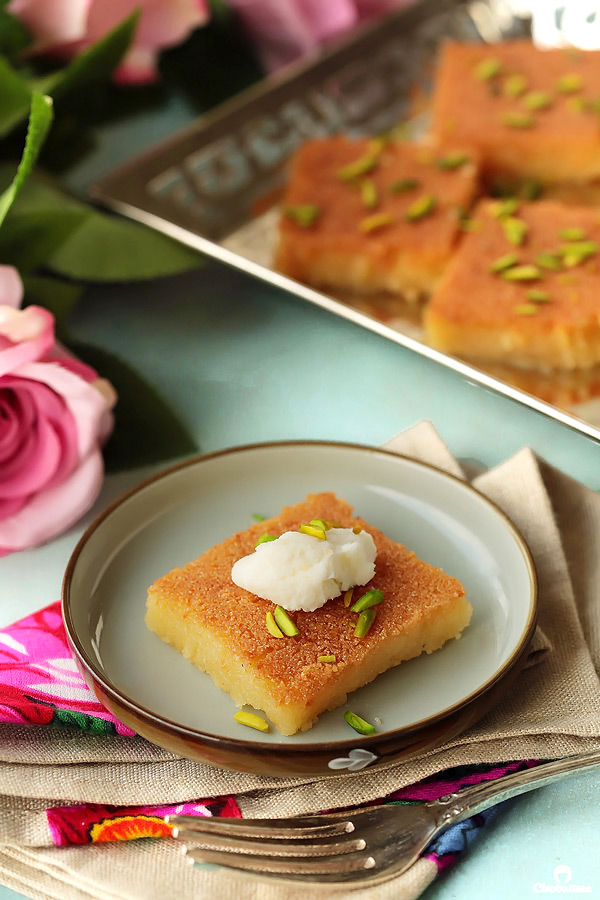
Then prepare to be amazed by how the knife glides into it like butter. I love it while still slightly warm…with a dollop of eshta on top. YUM!
People will have a hard time believing that this basbousa came out of your oven and not from the store. So be prepared to defend yourself.
As a self-proclaimed basbousolgist, I urge you to give this one a try and I guarantee that you’ll making it over and over again. Yes…I’m that confident in the beauty of this recipe.
But may I ask you a favor? Would you please, pretty please weigh your ingredients using a scale. It’s for your own good. I’m only looking after your #BasbousaGoals
And if you’d like to get a more up close and personal view of exactly how I make it, please check my tutorial labeled ‘Basbousa’ on my Instagram highlights.
Enjoy 🙂
Best Ever Pastry Shop-Style Basbousa
The search for the perfect, aunthenic Egyptian-style basbousa stops here! This one is super soft, dense, never ever cake-y, and melt-in-the-mouth delicious. Easily rivals the pastry shop's. For the best possible ingredients, be sure to weigh your ingredients using a kitchen scale.
Ingredients
For the Light Soaking Syrup:
- 250g (1 1/4 cup) granulated sugar
- 350g (1 1/2 cup) water
- Small squeeze of lemon juice
For the Basbousa Base:
- 500g (3 cups) medium grind white semolina (semeed NOT basbousa mix)*
- 150g (2/3 cup plus 1 tablespoon) ghee, melted
- 50g (1/3 cup packed) unsweetened shredded coconut (aka desiccated coconut), (optional but highly recommended; could be reduced)
- 150g (2/3 cup) whole milk
- 100g (1/3 cup) heavy sugar syrup (recipe below; may be substituted with Big Batch Sugar Syrup
- 250g (1 1/4 cup) granulated sugar
- 2 tablespoons ghee, for brushing over the basbousa (optional)
- 150g raw nuts, like hazelnuts or almonds, blanched and coarsely chopped (optional)
- Fresh eshta (country clotted cream), for serving, optional
For the Heavy Sugar Syrup: (enough to make the 100g syrup called for in the batter; but still weigh before adding)
- 70g (1/3 cup) granulated sugar
- 40g (2 tablespoons plus 2 teaspoons) water
- A drop of lemon juice
Instructions
To make the Light Soaking Syrup:
- Start by making the syrup as it needs to cool down to room temperature before using. In a medium saucepan, combine together the sugar, water and squeeze of lemon juice.
- Set the saucepan over medium-high heat. Gently stir the mixture, as it heats, being careful not to get any sugar granules up the sides of the pan. Continue stirring until the sugar has completely dissolved. Bring mixture to a full boil, then remove immediately from heat. Set syrup aside to cool completely before using.
To make the Basbousa Base:
- Adjust oven rack to middle position and preheat oven to 210C/ 410F. Grease a 34cm (13 inch) round pan with ghee; set aside.
- In a medium bowl, combine together the semolina and melted ghee, stirring really well with a rubber spatula, to coat the semolina grains with the ghee. It is very important to make sure that every grain is well coated, as this step reduces gluten formation which can result in a tough basbousa.
- If desired, process the coconut in a food processor or spice grinder until very fine. Stir into the semolina/ghee mixture until well combined.
- In a 4-cup microwave-safe measuring cup (or small bowl), combine together the milk, heavy sugar syrup (recipe below), and sugar. Heat in the microwave until very warm; about 1 1/2 minutes. Whisk the mixture really well until the sugar is fully dissolved. To make sure if the sugar has dissolved, dip your finger in the mixture, rub between your fingers, and if you can't feel any grit, then its good to go.
- Pour the warm milk mixture over the semolina mixture, and using a rubber spatula, fold gently just until no dry pockets of semolina remain. Do not over mix, or the basbousa can turn tough.
- Pour the batter into the prepared pan. Tap the pan over the counter several times to smooth out.
- Transfer the pan to the refrigerator for 15 to 20 minutes to rest (but no longer than 1 hour), until the batter has thickened up and is no longer a loose fluid. If you shake the pan, it shouldn't jiggle. Sprinkle the nuts, if using, over the surface of the batter, pressing it in to adhere.
- Bake for 22 to 27 minutes or until the basbousa's surface is deep golden brown in color.
- As soon as the basbousa comes out of the oven, quickly pour the cooled Light Sugar Syrup all over the basbousa. The syrup should soak in, in a matter of a few minutes. Once soaked in, brush the surface of the basbousa with 2 tablespoons of ghee, if desired.
- Allow to cool in the pan for at least 30 minutes, before cutting into squares and serving. Use a flexible lifter to get the sguares out of the pan. Serve warm or at room temperature with fresh eshta, if desired. Store in an airtight container for up to 1 week at room temperature. Individual servings may be rewarmed for a few seconds in the microwave.
To make the Heavy Sugar Syrup:
- In an extra small saucepan, combine together the sugar, water and drop of lemon juice. Set over high heat. Try to avoid stirring it as it heats to prevent crystallization from happening. Once it comes to a boil, reduce heat to low and allow to simmer for 5 minutes or until the syrup thickens and reduces down to 100g (1/3 cup).
Recipe Notes
- Please note that this recipe was developed using metric weight measurements. For your convenience, I've converted them into cups, but due to the temperamental nature of this recipe, it is highly recommended to use a scale to measure your ingredients, even liquids, to achieve the best possible results. Results of using cups, cannot be guaranteed.
- My preferred brand of semolina for making this recipe is Sonbolat Elforat, but I've also used Five Stars with great results. Whatever brand you're using, just make sure that its medium grain; NOT labeled fine or coarse. Also be sure not to confuse semolina (or semeed) with basbousa mixes. Basbousa mix has semolina as one of the ingredients, but they also contain sugar, baking powder, etc and so they will not work in this recipe.
- Recommended semolina brands by readers: Sainbury's in the UK, Cedar #2 in Canada, Sooji Wheatlets in the US and coarse semolina in Australia.
- My favorite brand of ghee is Best Sherraton.
- Butter cannot be substituted for ghee in this recipe, as it badly affect the texture. However, if you must, you could use clarified butter only. To clarify butter, melt 200g butter slowly over medium low heat until the milk solids have separated from the butterfat. and collected on the bottom of the saucepan. Remove the pan from heat, let the butter settle for 10 minutes, then carefully skim the foam from the surface with a spoon. Slowly pour the clear butterfat into a bowl, leaving all the milk solids behind in the saucepan. You should end up with about 150g clarified butter.
- The coconut taste is very subtle here, and if you didn't know it was there, you wouldn't taste it. It adds a flavor dimension, that wouldn't be present without it. You could reduce the amount up to 30g, if you prefer. While I wouldn't recommend omitting it, the basbousa will work without it.
- If you wish to make 1/2 the recipe, bake in a 24cm (9 1/2 inch) pan. Baking time remains the same.
Recipe adapted with changes in mixing method from Chef Hagar Elhakeem
Measurements Note: All recipes of this site have been developed using weight measurements. Although US volume measurements have been included for your convenience, it is highly encouraged that you weigh your ingredients using a kitchen scale to get the best possible results. Due to the sensitive nature of baking, kitchen scales are proven to yield more accurate and consistent results than measuring cups. Enjoy!
Powered by ![]()
This post may contain affiliate links.
All images and content are owned by Cleobuttera® and are copyright protected. Please do not use my images without prior permission. If you would like to republish a recipe, please rewrite it in your own words and link back to the recipe page on my site. Original recipes and creations of this site are intended for personal and home use. Commercial replication or media consumption are only allowed with a written consent and agreement with Cleobuttera owners. Otherwise it is considered a violation of intellectual property. Thank you for respecting and appreciating the amount of time and effort that goes into creating free, unique recipes that make people happy.