Nutella Dream Cake {1st blog anniversary and a video!}
Hands down the ULTIMATE Nutella Cake! With more than 3 1/2 cups of Nutella between the frosting, sauce-y filling and crunchy bottom, this impossibly moist layer cake is a Nutella lover’s dream come true! {PLUS: A VIDEO of the process!}
Cleobuttera is officially a toddler!!!!
Today my baby blog is turning ONE! Wooot wooot!!
And you bet we’re celebrating with Nutella. Its just the right thing to do. And a VIDEO too!
You see, just like today, with cold feet, I launched the blog with these Molten Nutella Pops, unveiling an unexpected shower of love, support and cheer. As cheesy as this may sound, but thankfully, I was welcomed to the blogging world with open arms. It was beautiful. And scary. But mostly beautiful. And for that, I will forever be grateful to YOU and Nutella. But YOU more…much much more.
I often refer to these Molten Nutella Pops as my lucky charm, because they mark the start of a new chapter in my life.
A chapter full of new experiences, wonderful people, exciting milestones, sleepless nights, rewarding moments, mind shattering burnout, happy readers and drama….Ooooooh the drama.
I jumped into the blogosphere with an immense passion for baking and a hope to find the right means to pour it in. Since opening a bakery or taking special orders was out of the picture due to personal and lifestyle reservations, I was willing to give this blogging thing a try. I mean how else will I ever know. I had nothing to lose.
I did my homework, slipped on my nerdy pants and studied food blogging like it was my business. I read every article remotely related to the topic, I took an introduction to photography crash course, I bought this book, and this one too, I enrolled at this gem, poured my heart’s savings over a fancy camera, picked out a clever name for the blog and got the website designed by these good people.
I knew exactly what I was doing, but truth is I had absolutely NO idea what I was doing.
When I first hit publish on my first blog post, my heart sank a little. And I’m just saying “little” to sugarcoat it. It was more like a roller coaster of emotions. Between “Oh no! What have I just done?!” and “Cool! I’m finally doing something with what I love.” It was a struggle between the huge responsibility I just cast on myself, not feeling at ease with being LIVE under the public eye and wanting to go ahead and try this out.
I was scared of criticism, negative feedback, work overload and unable to keep up with other life’s priorities and weight gain. And I was right! All of these things happened. But you know what?! I’m happy they did (except for the weight gain ?), because they built some muscle to my previously easily-bendable personality. You know what they say…what doesn’t kill you, makes you stronger.
When I decided to blog, I knew I was going to be doing my own photography, photo editing, writing and managing social media. But I was confident that it would be mostly playing in the kitchen with sugar and spice and everything nice.
Ha! LOL! Heheheeeeeeee ?
I had noooooooooooo idea. Because reading about something and imagining it is one thing, and actually doing it is a whole other thing. Photography, food styling and photo editing are now taking over my life because they’re my daily struggle. I can’t even begin to tell you how many times I had to reshoot a photoshoot just because the pictures sucked. Not to mention, the many great recipes that never made it to the blog, because I wasn’t satisfied with the pictures. It literally takes me a full day to write a post, which I’m fully to blame for, because I just lack the capability of keeping it short and to the point. Managing social media, comments and emails are a lot more than what one person can handle. Gosh! I miss the kitchen!
As exhausting as blogging may be, a simple comment from a reader saying “I tried this recipe and everyone loved it!” just makes it ALL worth it in the end. And then all of a sudden it just feels right. Blogging feels right. Blogging suits me. This is exactly what I needed in my life.
I talk food and you talk food back to me. I share with you pictures of my food and you send me pictures of yours. I play mad scientist in the kitchen and you’re willing to hear all about it. I supply you with recipes and you make me happy with your feedback. I interact with people from all around the world, which is surreal by itself. Dude I’ve made good friends with people who don’t speak a word of English or Arabic, but google translate made it happen! I’ve developed some of the best friendships and virtually met some of the awesomest people on the planet. I’ve made a beautiful circle of blogging friends who just get me; I absolutely LOVE them and appreciate their appreciation. Blogging has showed me how nice people can be and how the world still has good in it.
Now tell me that wasn’t worth it!
In my short year of blogging, I can honestly say that it’s been one of the most rewarding experiences of my life and that alone is worthy of celebration.
With Nutella!
But this year, it’s more than just a pop. It’s grand, it’s over the top and it’s DREAMY.
It is the Nutella-iest Nutella cake you will ever taste.
This cake has been my speciality for several years and I found no better occasion to share the secret with you than today. You’ve been the best readers and supporters anyone could ever ask for and for that, I’m giving you CAKE!
And not just any cake…THE BEST NUTELLA CAKE IN ALL THE LAND! As agreed on by public consensus.
It is THE birthday cake in my family. No one is ever interested in anything else.
You have no idea how many times I’ve been asked to bring this cake to gatherings and dinner parties. And now you can too. And you’re gonna be popular for it. I guarantee it.
Now let’s dissect this monster of a Nutella.
First of…this cake is not shy of Nutella. Its has more than 2 pounds of Nutella in it and I’m not going to apologize for it. It’s without a doubt a special occasion cake, so we’re gonna make every bite count.
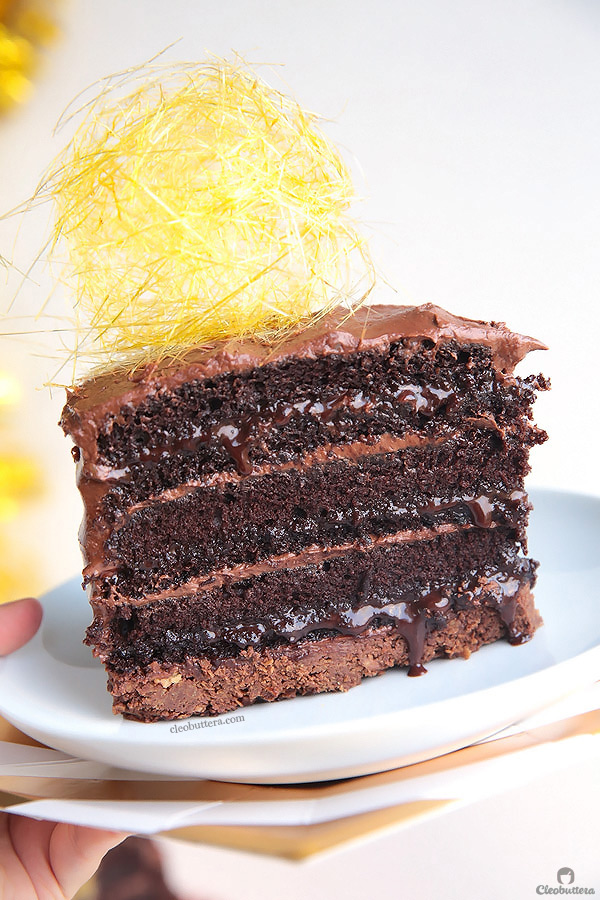
It starts with a crunchy bottom made from feuilletine, melted chocolate and Nutella. Feuilletine is tiny crispy flakes of impossibly thin toasted crepe bits, that look like corn flakes but taste nothing like it; more like wafers. When combined with the Nutella and chocolate, it produces the most delicious crunchy layer that is reminiscent of Ferrero Rocher. I have to admit that it could be hard to find, and so you could substitute crispy rice cereal for a similar effect or omit this layer altogether if you’re not interested in the texture. In the recipe below, I’ll give you more details about it.
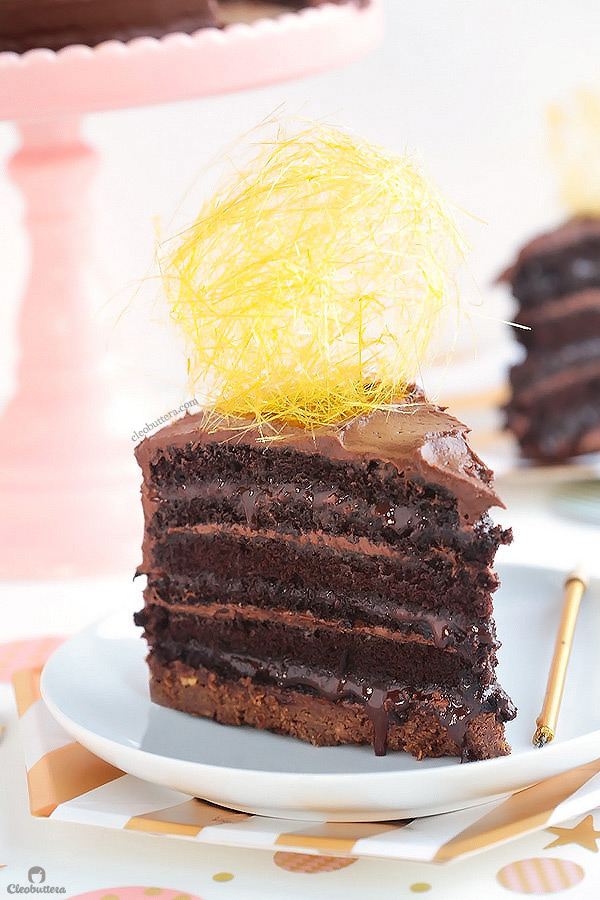
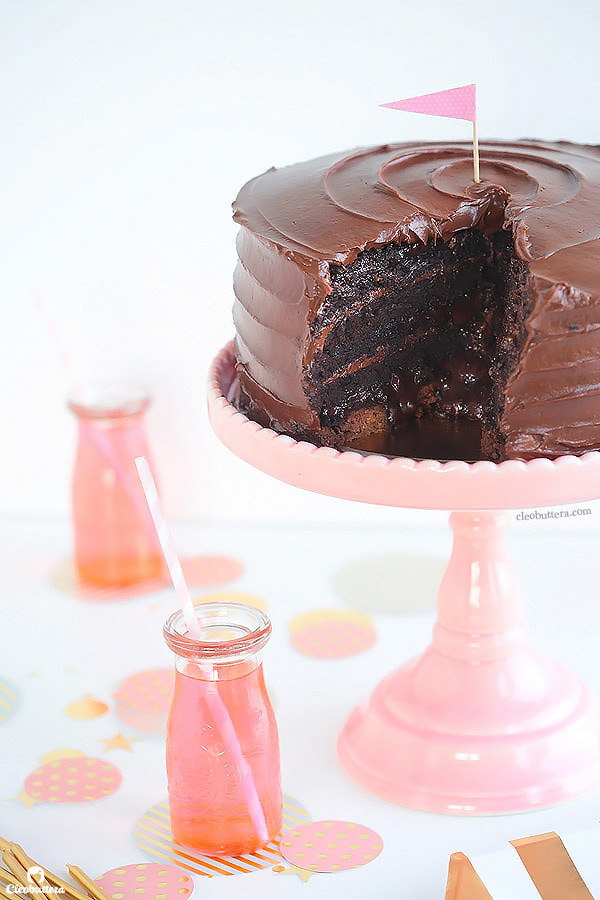
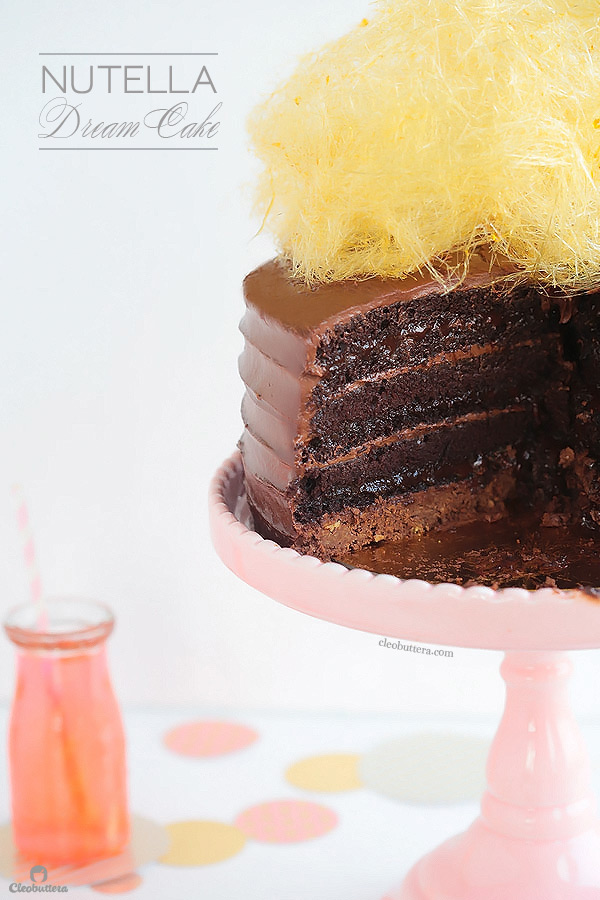
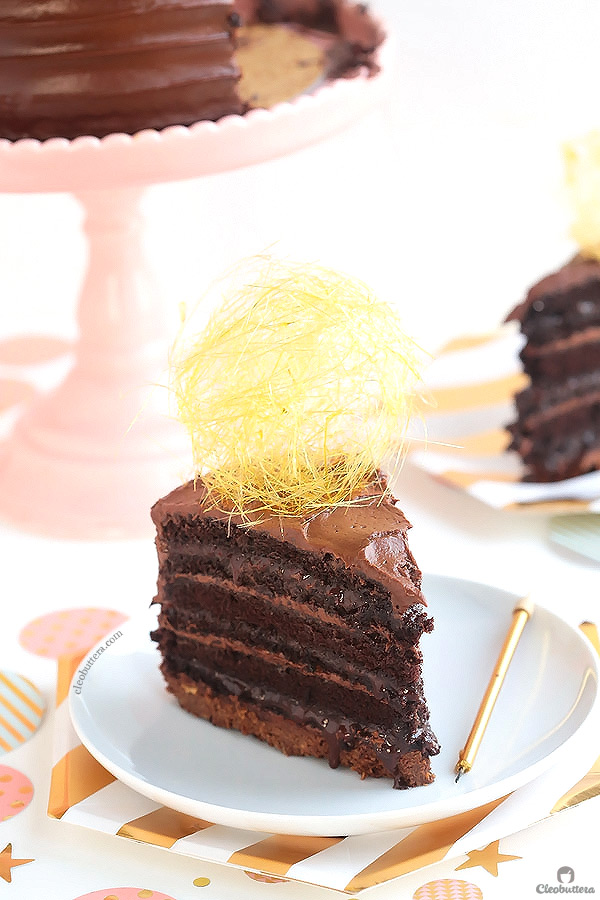
After the crunchy bottom, comes alternating layers of cake-y goodness, Nutella-y ooziness and chocolate-y creaminess. Now this is a sight that could make any Nutella lover weak in the knees.
The cake is made up of 3 layers of ultra moist chocolate cake. The chocolate cake starts with…wait for it…a CAKE MIX ?
Now before you start judging me…hear me out first. I’m not a cake mix snob but I always prefer from scratch with a few exceptions and this ones happens to be one of them. While I do have a couple of great from scratch chocolate cake recipes up my sleeves, from some reason they just happened to mask the Nutella flavor. Now note that I’ve been making this cake for years and have been tweaking it overtime, so I’ve experimented with every possible recipe. When made from scratch, my tasters would remark that it is an amazing “chocolate” cake but they don’t notice the Nutella. WHAAAAAT?!!! Something about using a cake mix instead here that makes the Nutella take center stage and shine. Also the scratch cakes would absorb the Nutella sauce, so when you cut into it, you don’t get that irresistible oozing look. And that’s nonsense!
Moreover, the cake mix is vastly improved upon with other all-natural ingredients, so it tastes a lot better and more homemade than if we were to make it as per the box’s instructions. No one was ever able to suspect that Ms. Betty Crocker had her touches in this cake; so no one needs to know but you. We add flour, sugar, cocoa powder, vanilla and sour cream, so it’s like you’re only using the cake mix as a base for making a whole other cake.
The cake layers then get sliced in half horizontally, giving you 6 thinner layers. Each two layers sandwich a luscious Nutella sauce made from pure Nutella that gets thinned out with a little milk. Not only does that add another dimension of Nutella flavor but it acts as a moist maker and an ooze creator:)
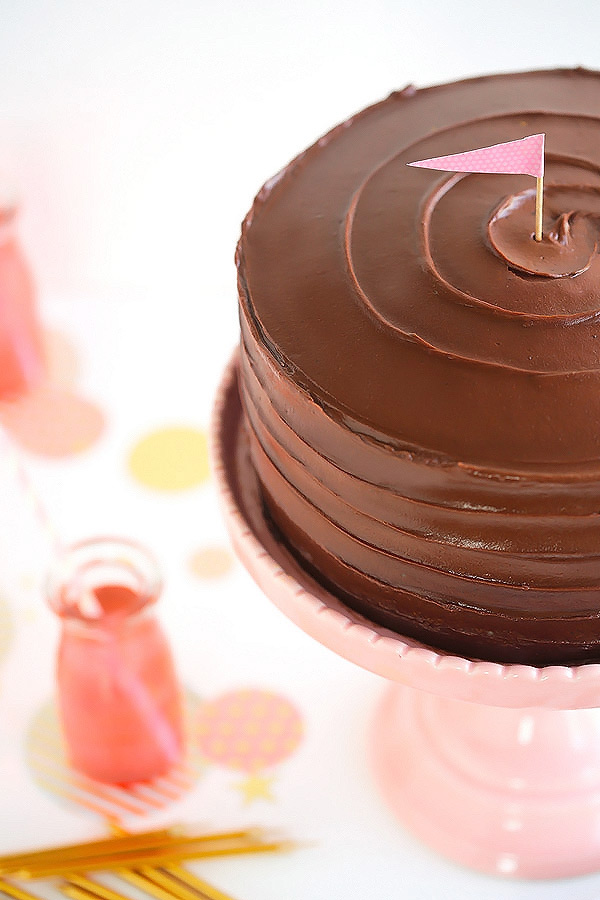
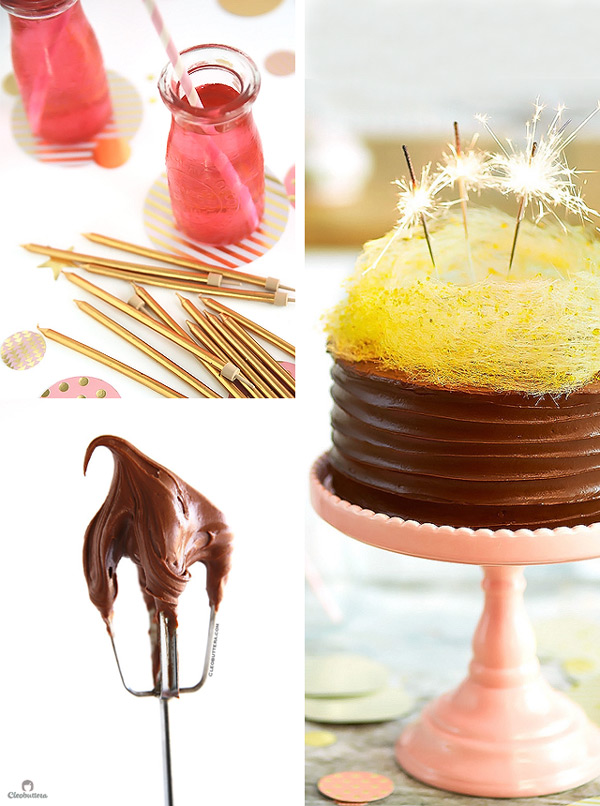
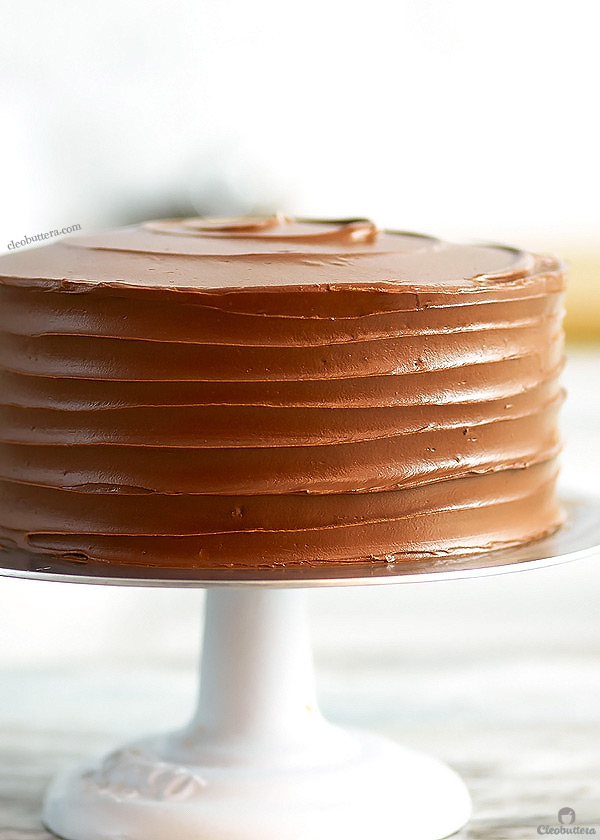
The sandwiched layers then get filled and frosted with the creamiest and dreamiest of all Nutella frostings! I used it over these cupcakes and would use it as a face mask if I could. There’s a ton of Nutella it in and ZERO powdered sugar. So it’s chocolatey and Nutella-y without being too sweet. It’s my favorite chocolate frosting in the world!
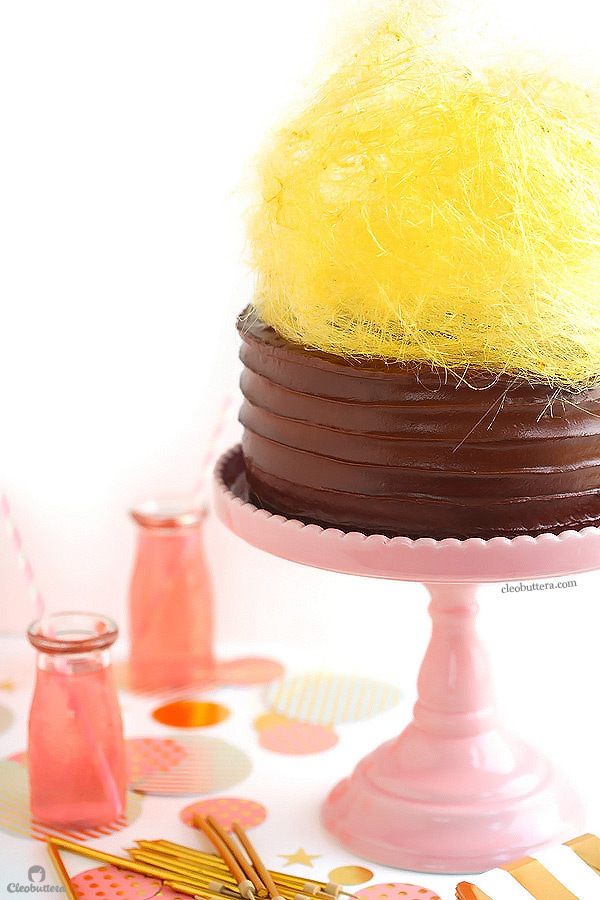
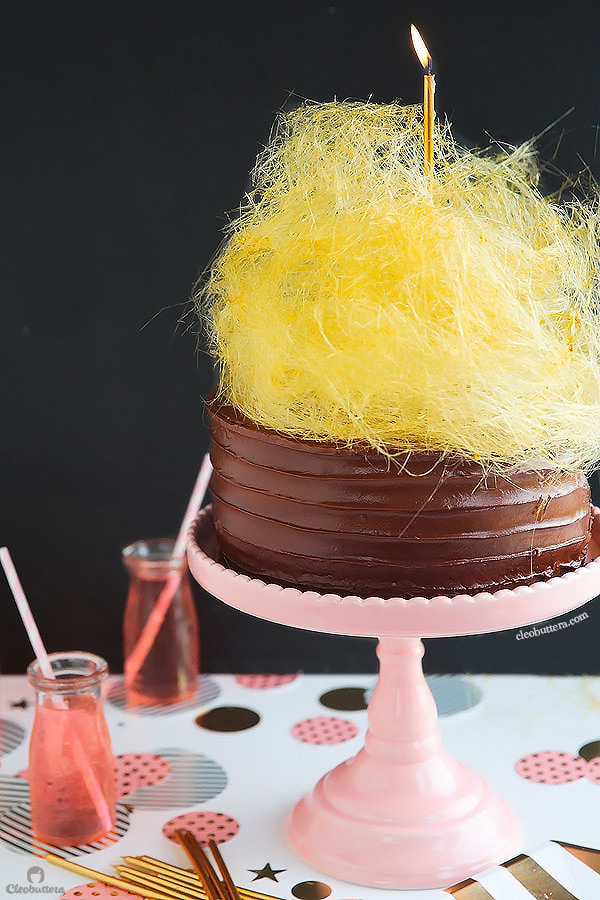
Then just for fun and because it’s a special occasion I added a huge halo of spun sugar on top. It looks a bit like cotton candy (or a blonde afro) but the texture is crunchy and the taste is caramel-y. It’s kind of addictive, but you most certainly could omit it; I was just playing around. I’m kind of bummed though, at how it turned out in the pictures; spun sugar is a lot beautiful in real life and manage to strike an immediate wow factor.
You could shape the strands as big or as small as you like and it adds just the right touch of elegance. Or not! Because with a cake this heavenly, no adornments are necessary. All you need is your mouth and good appetite.
Now because its my blogiversary, and because this is a cake not to be taken lightly, I wanted to make this post extra special. So instead of my usual process photos, I skipped them for something ever better. I made you a proper VIDEO! Non of these 15 second iPhone videos I’ve been sharing on my Instagram, but an HD quality video shot with a professional camera, by professional people, in a professional kitchen studio.
I was lucky enough to have the opportunity to collaborate with the talented team of Flavor Republic to bring you a special video for a very special cake. Not only are they amazing at what they do, but they were patient enough to put up with my pickiness and obsessiveness with a big smile on their face. Their welcoming studio and friendly team made standing up in front of the camera a breeze (and I’m camera shy!). I came to them as a stranger and left as friend with a heart full of so much love and appreciation (and a bunch of phone numbers). It was a wonderful experience and I would do it again in a heartbeat. Make sure you follow them on Instagram if you love stunning food photos and videos.
Now a BIG, FAT chocolate covered, caramel dipped thank you to my dear readers, bloggy buddies, family and friends for a wonderful year. Your continues support is what got me through the hardships that comes with the job. Your feedback, encouragement and interaction is just the fuel I need to keep going. Thank you for sticking by and baking along. I hope to continue to meet your expectations and bring forth more deliciousness you could trust.
*Stay tuned because in the next post, I will show the world pictures of all the wonderful stuff you’ve been making from the blog and sending to me! If you’ve made a recipe from the blog, took a photo of it and would like to be included in this coming post, that would be my utmost pleasure! Either email it to me or send it through a direct message on Instagram, but if your account is public, you could simply hashtag it cleobuttera. Facebook messenger works too! Whatever suits you 🙂
But for now, enjoy the video! And make the cake.
With love,
Tasbih ?
Nutella Dream Cake
Please note that I developed this recipe using a kitchen scale then remeasured everything into cups and spoons for your convenience. Due to the scale's accurate precision, I highly recommend using one, if available, for the most perfect results. The whole cake could be prepared a day in advance, stored in the refrigerator overnight under a cake dome. Bring to room temperature before serving; this could take up to 5 hours.
Ingredients
For the Nutella Crunch layer: (optional but recommended)
- 1/2 cup (3 1/2oz/ 100g) semisweet chocolate chips (or finely chopped chocolate)
- 1 tablespoon (1/2 oz/ 14g) butter
- 1/2 cup plus 1 tablespoon (5 7/8 oz/ 167g) Nutella
- 2 1/2 cups (7 5/8oz/ 217g) Feuilletine (may be substituted with crispy rice cereal) *see note
For the cake:
- 1 (15.25oz/ 432g) box chocolate cake mix (Devil's Food, Chocolate Fudge or Dark Chocolate)
- 1 cup (4.4oz/ 125g) all-purpose flour
- 1 cup (7oz/ 199g) granulated sugar
- 1/4 cup plus 2 tablespoons (32g) unsweetened cocoa powder
- 3/4 teaspoon salt
- 3 large eggs
- 1 1/2 teaspoons vanilla extract
- 1/2 cup vegetable or neutral tasting oil
- 1 1/3 cups water
- 1 cup (8oz/ 227g) sour cream
For the Very Nutella Frosting (makes about 3 1/2 cups):
- 1 cup (8oz/ 227g) unsalted butter, softened to room temperature
- 1/2 cup (4oz/ 113g) cream cheese (or 8 Kiri squares), softened but slightly cool
- 1 1/2 cups (1 lb/ 454g) Nutella
- 1/2 cup plus 1 tablespoon (4oz/ 113.4g) semisweet chocolate chips
- 1/2 cup plus 1 tablespoon (4 oz/ 113.4g) milk chocolate chips
For the Nutella Sauce Filling:
- 1 1/3 cups plus 1 tablespoon (15oz/ 425g) Nutella
- 1/4 cup plus 3 tablespoons whole milk
For the Spun Sugar garnish: (optional)
- 1 cup (7oz/ 199g) granulated sugar
- 2 tablespoons light corn syrup
- 2 tablespoons water
Instructions
To make the Nutella Crunch Layer: (could be prepared several days in advance)
- Line an 8 or 9-inch cake pan with a parchment paper round then spray with a non-stick cooking spray; set aside. (Make sure that you use the same size pan as you plan to use for the cake layers).
- In a large bowl, combine together the chocolate chips and butter and melt over a double boiler or in the microwave, stirring every 20 seconds.
- Stir in the Nutella until well combined. Add in the Feuilletine and gently stir into the Nutella mixture to coat.
- Transfer the feuilletine mixture to the prepared pan, then using the bottom of a cup, smooth it out and press it down to an even layer. Cover with plastic wrap then chill in the freezer until set and forms a firm layer; at least 30 minutes and up to several days. Keep in the freezer until ready to use.
For the cake:
- Adjust oven rack to middle position and preheat oven to 350F/180F.
- Line three 8 or 9 inch cake pans (all the same size) with parchment paper rounds then spray with non-stick cooking spray. Optionally, wrap the sides of the pans with soaked cake strips like these, which help achieve a level cake that has no dome. Don't worry if you don't have it.
- In a large bowl, whisk together the cake mix, flour, sugar, cocoa powder and salt until well combined.
- Add in the eggs, vanilla, oil, water and sour cream. Using a large whisk or electric mixter, beat on low speed until all ingredients are combined. Scrape down the bowl to make sure that all ingredients are well incorporated, then beat for 1 minute longer.
- Divide the batter equally between the 3 cake pans then bake for 20 to 25 minutes, or until a toothpick inserted in the center of the cake comes out clean or with a few moist crumbs attached.
- Allow the cakes to cool in the pans for 15 to 20 minutes in the pan, then invert on to a plate, peel off parchment paper then reinvent on to a wire rack to cool completely before filling and frosting.
- While the cakes are cooling, make the frosting and sauce.
To make the Very Nutella Frosting:
- Over a double boiler or in a medium microwavable bowl, place both types of chocolate chips and melt in the microwave, stopping every 20 second to stir the chocolate. Heat and stir until almost completely melted. The warmth of the melted chocolate will melt whatever bits of chocolate left. Set aside to cool slightly.
- In the bowl of a stand mixer fitted with a paddle attachment (or a large bowl and an electric mixer), Beat the butter until smooth and creamy. Add in the cream cheese and beat until smooth and well combined; about 1 minute.
- Add in the Nutella and mix until completely incorporated. Scrape down the bowl.
- Add in the melted chocolate and mix until everything is well combined, scraping the bowl as need. Cover with plastic wrap and keep in a cool place until ready to use.
To make the Nutella Sauce Filling:
- Combine the Nutella and milk in a medium bowl, whisk well until completely smooth.
- Cover and set aside in a cool place until ready to use.
To assemble the cake:
- Take the Nutella crunch layer out of the freezer, invert over your hand, then using the other hand, peel off the parchment paper. Reinvent onto a cake board.
- Frost the crunch layer with a thin layer of the Very Nutella Frosting, about 1/3 cup. Set aside.
- Using a long serrated knife, carefully slice each cake layer horizontally to make 2 thin layers. You should have a total of 6 thin layers.
- The cake slices are very fragile, so use a cake board, cake lifter or the removable bottom of a tart pan to move the layers around and stack them. Place the bottom half of one of the sliced cake layers on top of the crunch layer. Top with about 1/2 cup of the Nutella sauce. Use a spatula to spread it all over, avoiding the far ends. Top with the second half of the sliced cake layer. Frost with a generous layer of the Very Nutella Frosting; about 2/3 of a cup.
- Top with the bottom half of another one of the sliced cake layers. Repeat the process by spreading about 1/2 cup of the Nutella sauce over it, then placing the top half of the sliced cake layer. Frost with a generous layer of the Very Nutella Frosting; about 2/3 of a cup.
- You should now have 2 thin layers left. Use the bottom half of last of the sliced cake layers to top the frosting. Spread with the remaining Nutella sauce. End with the final layer of thin cake.
- If the cake feels slippery and unstable, insert a bamboo skewer in the center of the cake, all the way to the bottom; that will help hold everything together. Now crumb coat the cake by frosting the sides and top of the cake with a thin layer of the remaining frosting. Don't worry if you get crumbs over the frosting, we'll cover them up layer. Place the cake in the freezer until the frosting has firmed up.
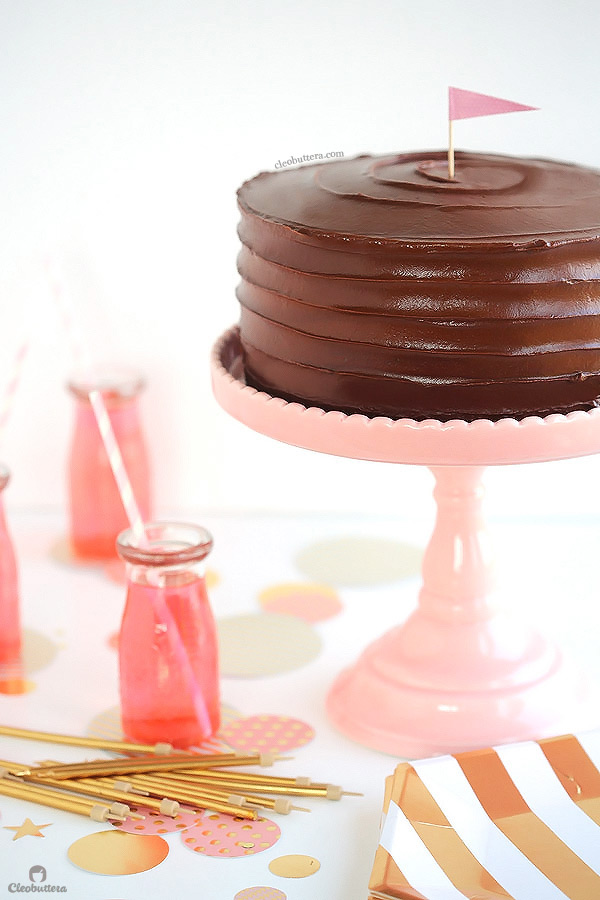
- Take the cake out of the freezer, then frost with all the remaining frosting, covering up all the first crumby layer of frosting. Make swirls, swoops or leave it smooth. Top it with anything your heart desires like sprinkles, flags, candles or spun sugar (recipe below).
- Serve right away or refrigerate overnight covered under a cake dome. Bring to room temperature before serving.
To make the spun sugar:
- Secure a long-handeled wooden spoon under a heavy cutting board on the edge of a counter, with the handle facing out and extending over the edge. Place newspapar on the floor, directly under the cutting board. Alternatively, place a large bowl over a newspaper covered counter. Grease the edges of the bowl with oil.
- Bring the sugar, corn syrup, and the water to a boil in a heavy, light-colored saucepan over medium-high heat, stirring until the sugar has dissolved. Stop stirring. Cover the saucepan with its lid for about 2 minutes. This will create condensation that will wash down any sugar crystals that may have formed on the sides.
- Uncover and continue cooking the mixture until it turns deep amber in color. Remove from heat and allow to cool slightly until thickened; about 5 minutes.
- Dip the tines of a fork (or of an old whisk that had it ends cut off) into the caramel. Holding the fork above the spoon handle, swing the caramel back and forth like a pendulum in long arcs, allowing strands to fall in threads over the handles.
- Gently gather the strands into a a halo-like ball, shaping it with the palms of your hands. Top immediately over the cake right before serving. Avoid making on humid days. If not using immediately, place in an airtight container and place in the freezer for up to 3 weeks.
Recipe Notes
- This recipe will make an extra tall 8-inch cake or a 9-inch cake of medium length. The taller one has more of a wow factor, while the shorter one is more practical and the serving sizes are more reasonable. In the pictures, I used 9-inch cake pan. Your call though 🙂
- Feuilletine is tiny crispy flakes of impossibly thin toasted crepe bits. They look like corn flakes but taste nothing like it; more like wafers. When combined with the Nutella and chocolate, it produces the most delicious crunchy layer that is reminiscent of Ferrero Rocher. Admittedly, it is a hard to find ingredient but one that is worth seeking out in specialty baking stores or amazon.com or you could make it from scratch. To make from scratch, I followed this recipe but used 100 grams of each ingredient instead of 35 grams and the results were even better than the store-bought kind, but definitely quite a process. Here in Egypt, I was able to buy a kilo bag of Valrhona brand from a bakery supplier. If you're interested let me know and I'll pass on their contacts. In a pinch, you could substitute rice crispy cereal. The texture is different though and it will get stale quicker but it is every bit as delicious. With that said, please keep in mind that this whole crunchy layer is optional; the cake is still fabulous with it but it adds a pleasant crunch that the cake won't suffer without.
- If you don't have 4 round cake pans of the same size, no worries, I don't too; I just have two! Just make the crunch layer a day in advance, then on the second day, unmold it onto a regular plate and leave in the freezer until needed. To make the cake layers, divide the cake batter equally into 3 bowls of the same size. Pour the content of 1 bowl into 1 pan and the content of another bowl into the second pan. Put the 2 pans in the oven, then cover the 3rd bowl (with the cake batter) with plastic wrap and set aside until the others bake. Allow the cakes to cool slightly, invert onto a wire rack, wash one of the pans, prepare it then pour the contents of the 3rd bowl into. Bake!
Chocolate cake base recipe adapted from Sprinkle Bakes.
Spun sugar recipe adapted from Martha Stewart's Cupcakes.
Nutella crunch layer recipe given to me by a pastry chef.
*Frosting and sauce recipe are a Cleobuttera original.
Measurements Note: All recipes of this site have been developed using weight measurements. Although US volume measurements have been included for your convenience, it is highly encouraged that you weigh your ingredients using a kitchen scale to get the best possible results. Due to the sensitive nature of baking, kitchen scales are proven to yield more accurate and consistent results than measuring cups. Enjoy!
This post may contain affiliate links.
All images and content are owned by Cleobuttera® and are copyright protected. Please do not use my images without prior permission. If you would like to republish a recipe, please rewrite it in your own words and link back to the recipe page on my site. Original recipes and creations of this site are intended for personal and home use. Commercial replication or media consumption are only allowed with a written consent and agreement with Cleobuttera owners. Otherwise it is considered a violation of intellectual property. Thank you for respecting and appreciating the amount of time and effort that goes into creating free, unique recipes that make people happy.
