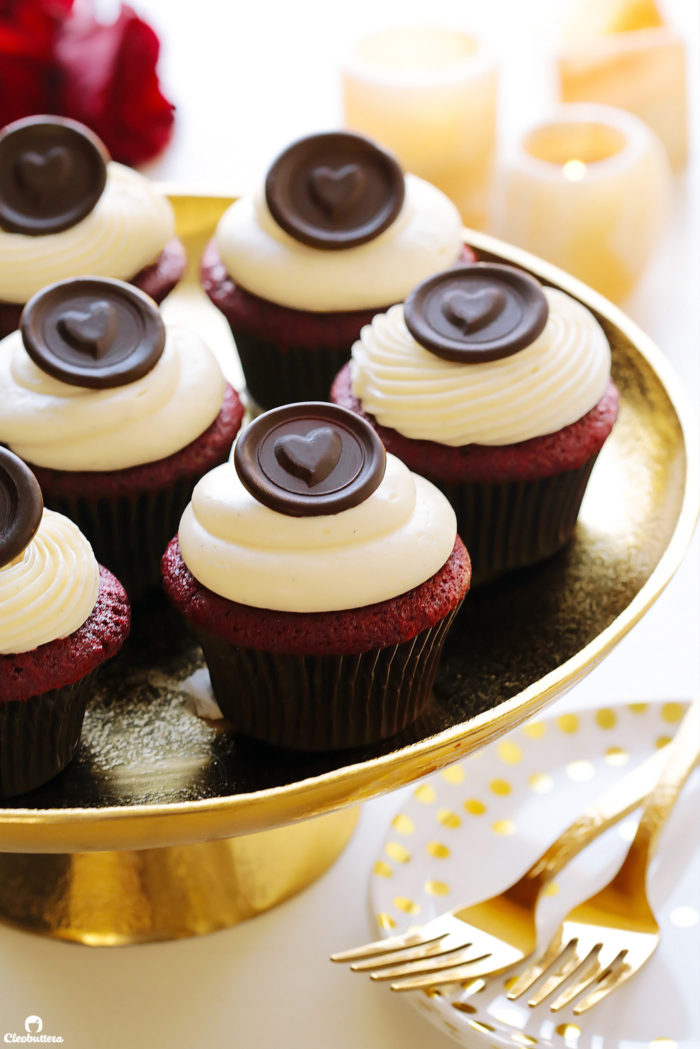
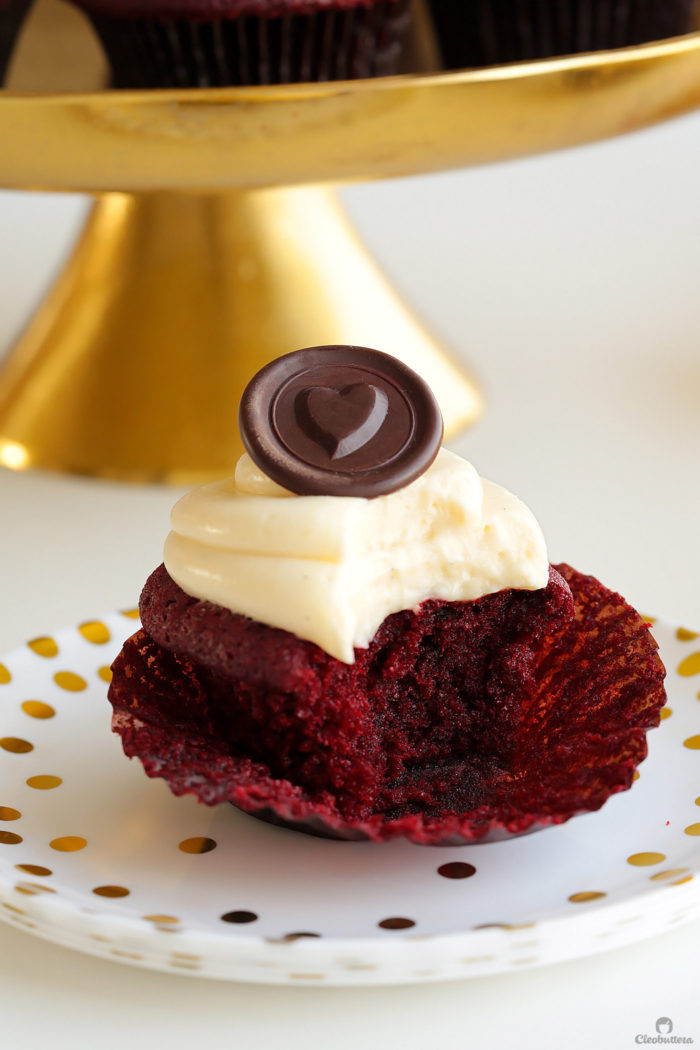
A Great Red Velvet Cupcake…Finally!
This red velvet cupcake recipe took years to perfect & the result is everything you can hope for! Soft and tender with a velvety texture, and super flavorful with tangy notes and sweet vanilla that’s been kissed with cocoa. A cloud of not too-sweet, whipped cream cheese frosting takes it over the top. It’s a winner!
Four years.
Over 25 different recipes.
More than 50 trials.
At least 18oz (512g) of red food coloring.
Around 400 cupcake liners.
Two forever red-stained t-shirts, a few extra centimeters around the waist and a semi-fried brain, is what it took to come up with a red velvet cupcake recipe GREAT enough to share.

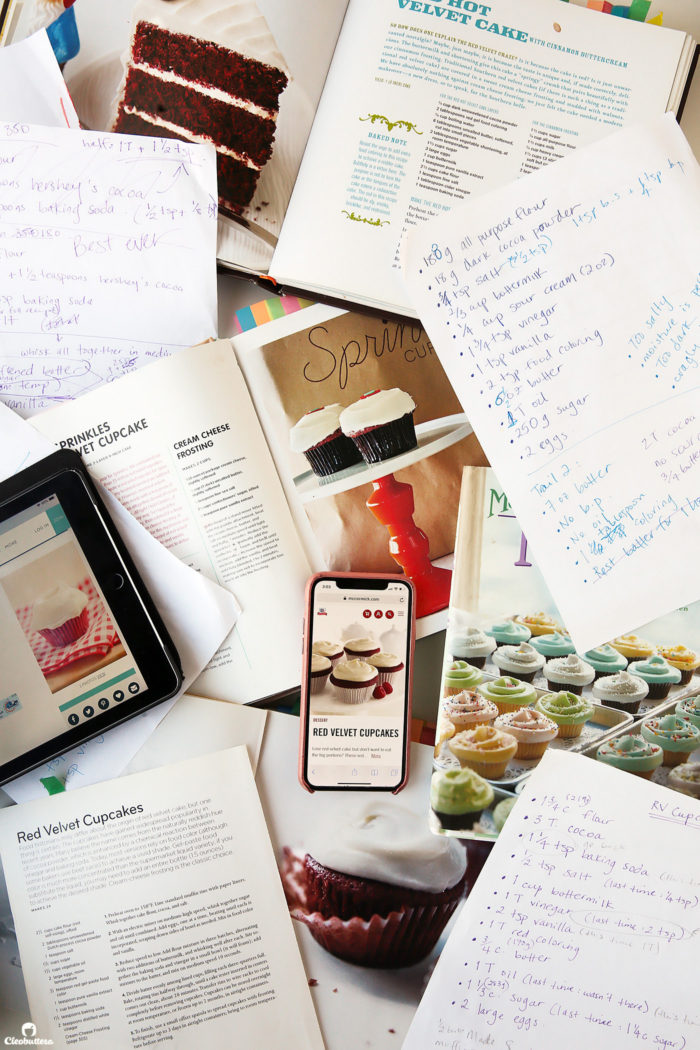
Every year for the past 4 years, around Valentine’s Day, I strap on my apron, bust out my mixer, lay down the cookbooks, print out recipes and take a ton of notes, with one mission in mind: Finding the “best” red velvet cupcake/cake to ever exist. ‘Tis the season of red velvet after all, and even with the high demand for a recipe, I knew I couldn’t just give you an okay one.
So I’d keep testing until the 14th of Feb rolls by, then take the righteous decision to stop…move on, and revisit it the next year. And so the wait kept getting longer.
The perfect red velvet cupcake didn’t just land in my hands as easy as I thought it would. I tested, retested, tweaked, and eaten more red velvets than is humanely possible. From famous bakeries’ “secret” recipes, to the most popular and highest rated ones by celebrity chefs, bloggers and renowned websites. If it’s out there, then I’ve most likely tried it.
Some were pretty good, I must say. But between the good, bad, and ugly, most red velvets I’ve tried, had left me unimpressed and questioning the hype.
With issues ranging from dry texture to greasy crumbs, lacking flavor or tasting like…play-doh? I’ve came to the harsh realization that they’re mostly just a vehicle for cream cheese frosting than anything else. So if someone doesn’t like cream cheese frosting, chances are there’s nothing this cake can do for them. Which is a disappointment since its such a pretty cake.
But I was convinced that there had to be more beyond that enchanting shade of lipstick red that people seem to gush over.
I mean…tangy buttermilk vanilla cake with a light kiss of cocoa and a velvety texture sounds pretty amazing, and if made correctly… dang delicious!
Like the one at Sprinkles! Have you had it before? If you know, you know.
Their red velvet is unparalleled and its not hard to see why it’s their bestseller. The fact that it has actual flavor and not just sweet nothingness hiding behind a gorgeous color and a cap of frosting, restores my faith in red velvet cake. It is the only red velvet cupcake/cake I’ve came to love, and I’ve had so many from all over.
So with the reaffirmed conviction that red velvet can actually be tasty…I placed Sprinkles Red Velvet as a benchmark and went to work.
I even bought The Sprinkles Baking Book as soon as it was released just for the famed recipe, but was pretty bummed that it baked up no where near as good as the bakery’s. It was drier and not quite the right flavor (reviewers would agree), but somewhat close, and a good starting point prone to tweaking.
I tinkered so much with the original recipe, that I ended up almost changing it into a completely new one that I feel pretty confident to say…is pretty darn incredible and the best I have come across. It’s not a Sprinkles’ clone, but one that can go head to head with it.
It is thee Red Velvet Cupcake recipe you’ll want up your sleeve and one that is sure to wow even the non-fans!
These red velvet cupcakes are…
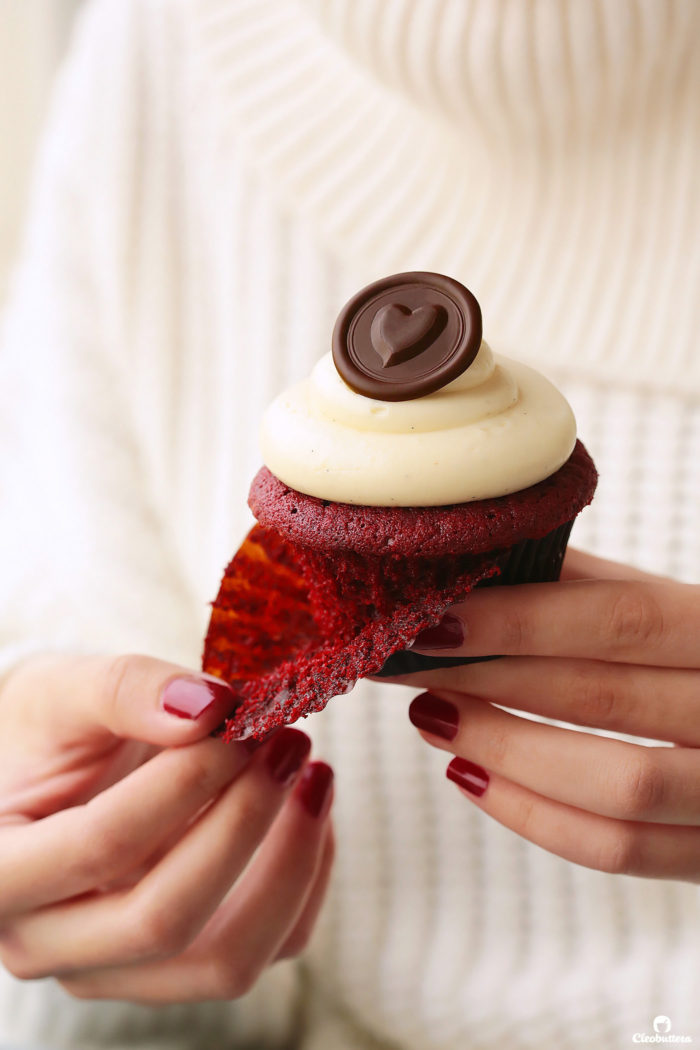
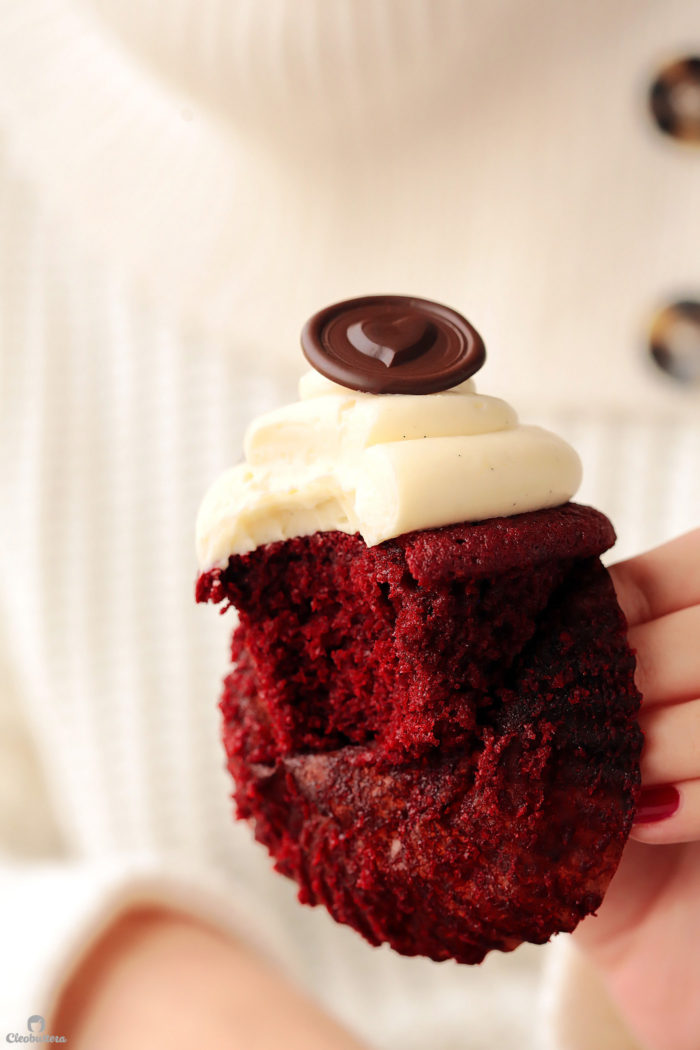
- Melt-in-the-mouth soft, with a tender, velvety crumb.
- Insanely mmmmmoist (sorry if you hate this word, but there’s no better way to describe it).
- Impossibly buttery.
- Super flavorful with noticeable tangy notes, a lovely light chocolate complexity and a sweet vanilla taste.
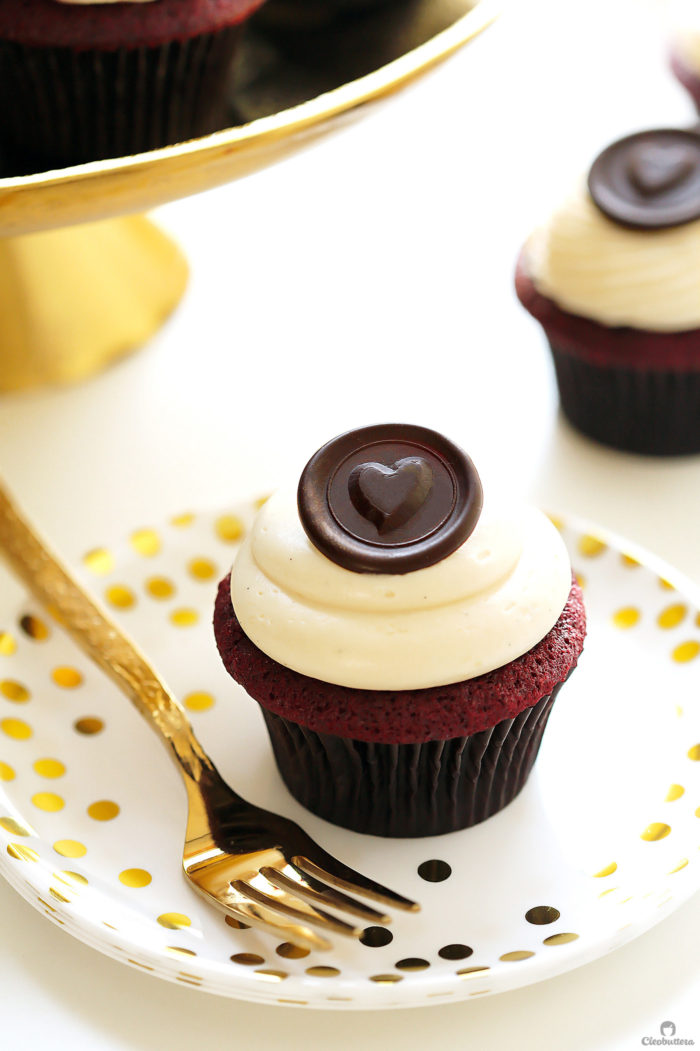
- Crowned with a cloud-like, whipped vanilla cream cheese frosting, that is not overly sweet.
I’m typically more of a cake than frosting person, and I’m not necessarily a cream cheese frosting fan, but oh my goodness, this frosting is in a league of it’s own. I could not have enough of it. It is undoubtfully the best cream cheese frosting I’ve ever had and I think you’ll agree.
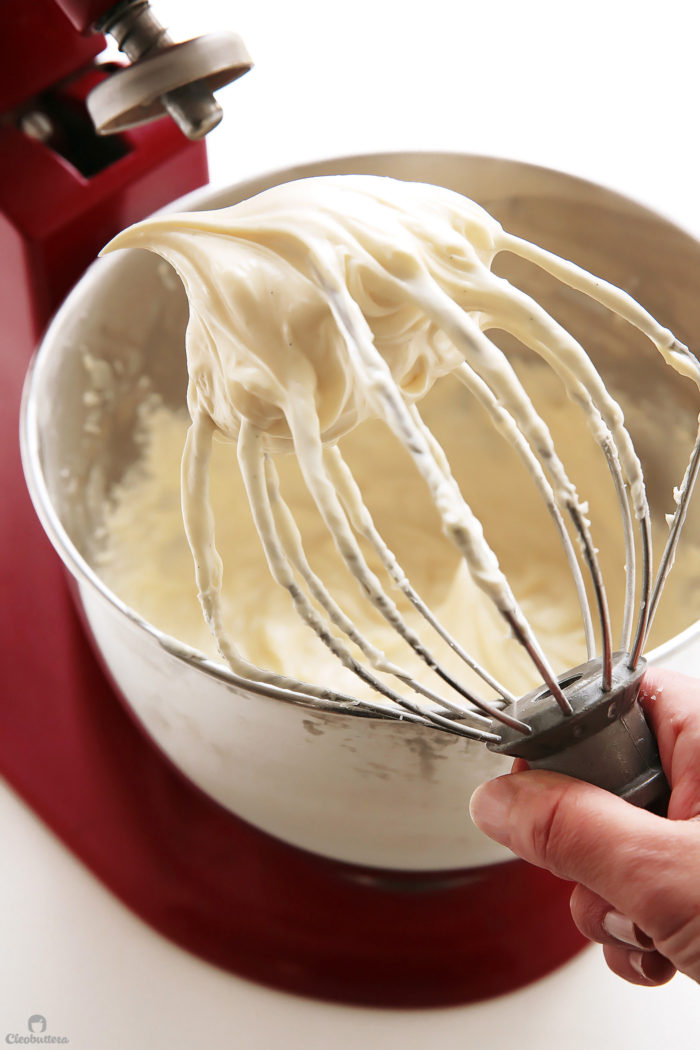
Whipping the heck out of it, makes it so airy and fluffy; it’s almost like a richer version of whipped cream. Unlike most recipes out there, it’s juuuust sweet enough, by keeping the sugar amount at bay.
A special mixing technique that I’ll explain later, keeps it nice and stable, which makes it perfect for piping and garnishing with your favorite topper.
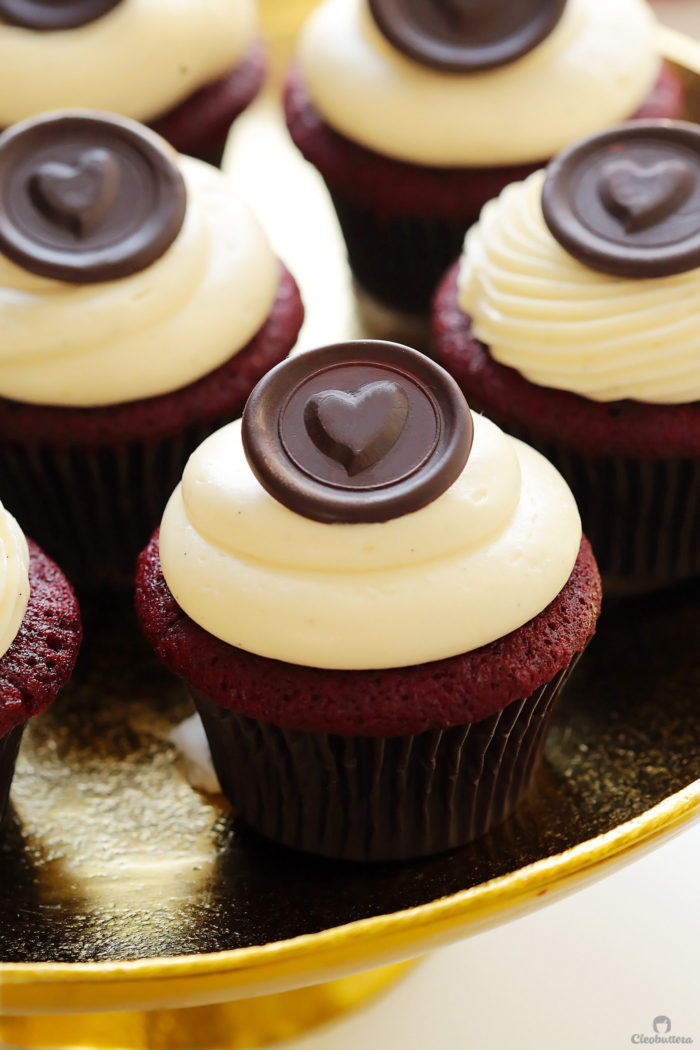
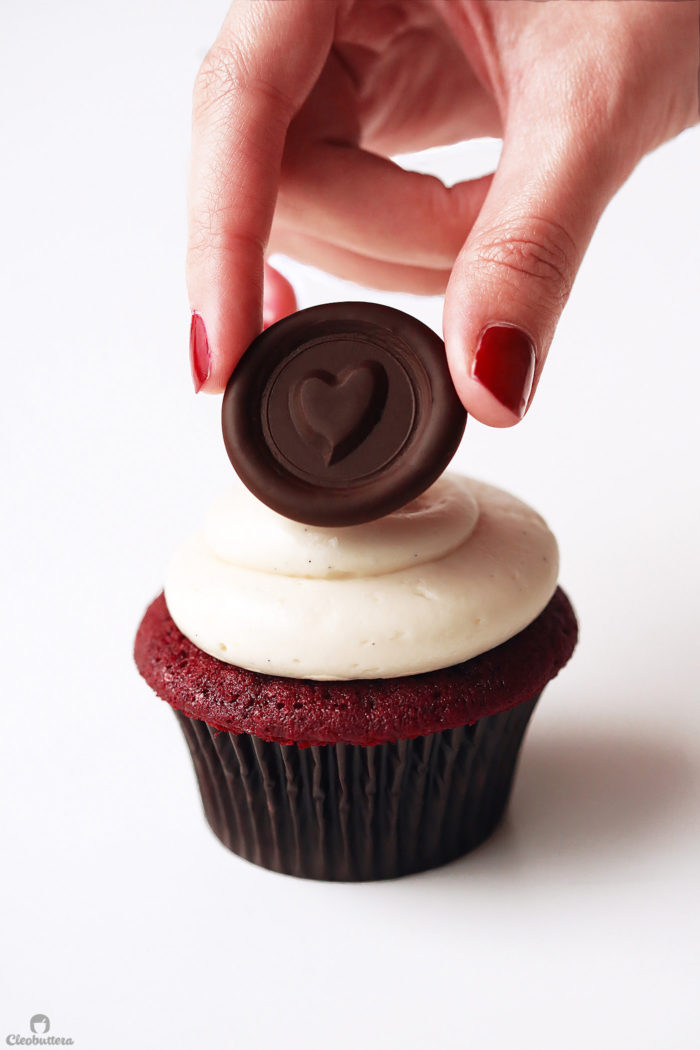
Speaking of toppers, the moment I remembered these gorgeous chocolate wax seals over at Sprinkle Bakes, I couldn’t resist but ditch the red fondant hearts I had originally planned for, for heart stamped seals. They were somewhat tedious to make and require a special stamp, but they were definitely worth it in the end.
I’ll go into detail on how to make them further in the post, but for now…let’s discuss the cake portion of the recipe.
What makes these red velvet cupcakes so good?
- A generous amount of butter. The ratio of butter to dry ingredients is out of wack here! This is no diet food. It not only keeps the cupcakes so soft and moist, but it adds a rich buttery flavor that oil-based recipes lack. There’s no doubt that oil makes cakes so moist, but its flavor falls flat. It works wonderfully for heavily flavored cakes such as carrot and chocolate, but with delicately flavored cakes like vanilla and red velvet, you need the help of butter for superior taste and dimension.
- A couple tablespoons of oil. Now that we have the butter for flavor, a smidge of oil does wonders in keeping the cupcakes moist for longer. While using all butter in this recipe made it taste amazing, it caused the crumb to dry out quicker. Swapping only 2 tablespoons of the butter with oil, really helped keep the texture moist without compromising the taste.
- More cocoa powder than the usual. Upping the cocoa amount than most recipes, adds just enough depth to the flavor for you to know its there, without overpowering the tanginess and vanilla notes. Any less and the flavor falls short, any more and it starts tasting like a chocolate cake in disguise.
- Buttermilk. A key ingredient for traditional red velvet cake and this recipe is no different. It adds that signature tanginess that red velvet is known for and its acidity tenderizes the crumb and reacts with the baking soda to make it rise. I played around with using a combination of sour cream and buttermilk, but the additional fat in sour cream, caused the cupcakes to sink in the center.
- Vinegar. Again another acidic ingredient that heightens that tangy flavor. You won’t taste it in the final cake…promise.
- Bake at 170C/338F. Through trial and error, I found that low and slow bakes the cupcakes more gently, keeping the crumb softer than when baked at the more typical 180C/350F.
How to make great red velvet cupcakes?
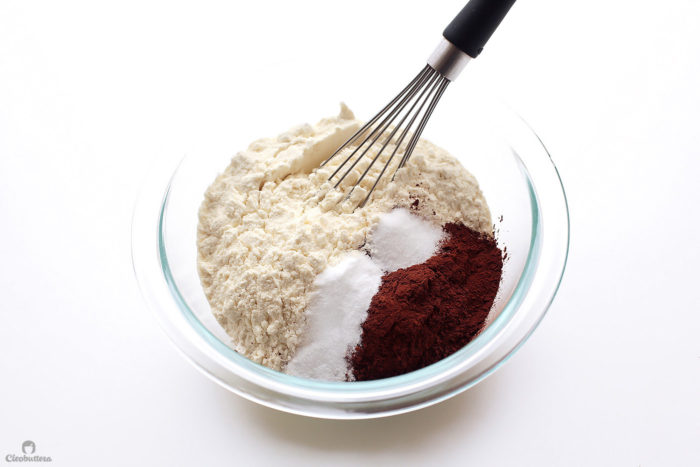
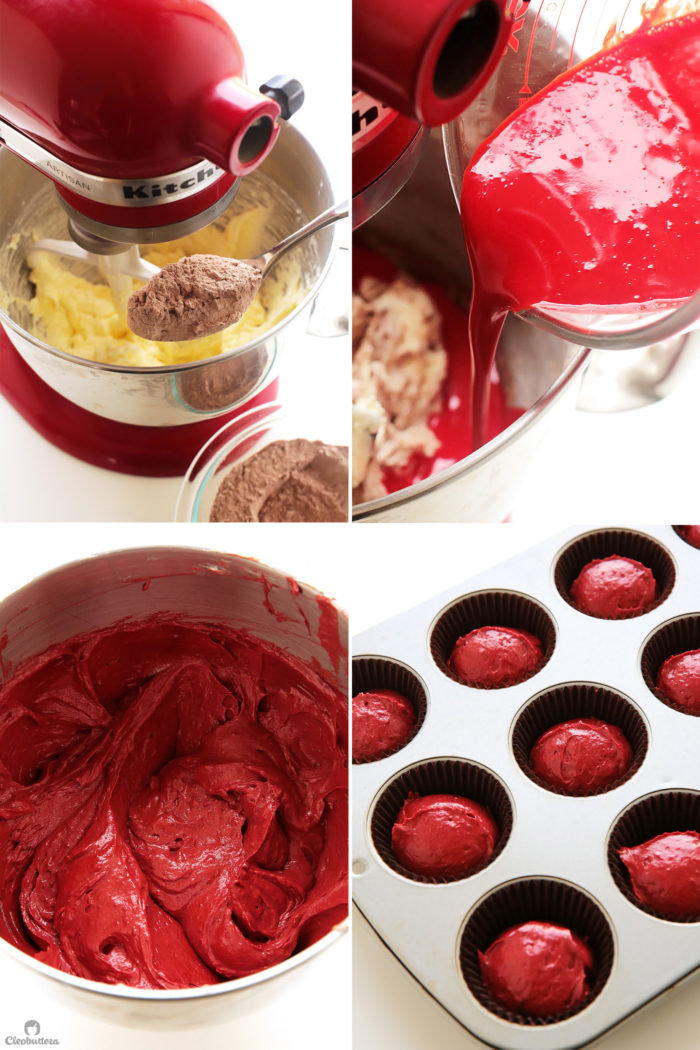
Begin by whisking together the dry ingredients to combine: all purpose flour, unsweetened cocoa powder, baking soda and salt. Make sure to sift the cocoa powder beforehand if its lumpy, or you’ll end up with undissolved cocoa pockets in the baked cupcakes. Alternatively, you can just sift everything together instead of whisking them.
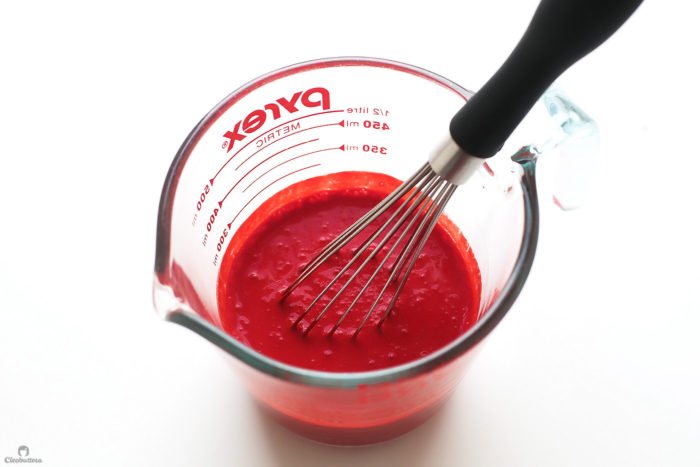
Moving on to the wet ingredients…just whisk together the buttermilk, vinegar, vanilla and red food coloring. Try to get past its shockingly red color and set that aside.
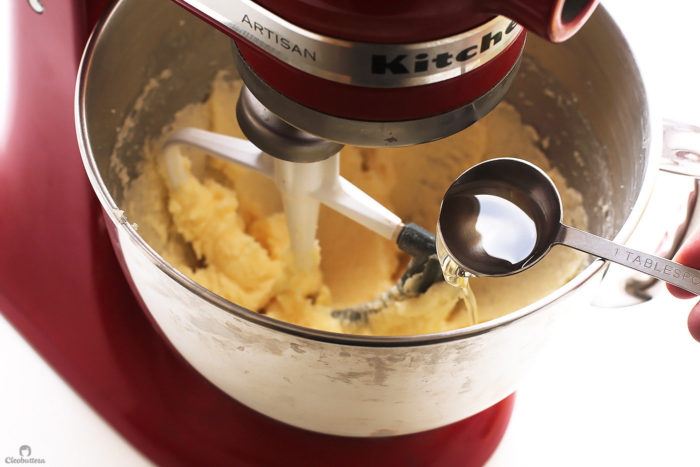
You’ll then beat together the butter and sugar, and while the mixer is still running, slowly drizzle in that oil. Then beat the heck out of them until they’re super light and fluffy and almost white in color. It’s that step that aerates the batter, and makes the cupcakes so airy and fluffy, so make sure you don’t skimp on it.
Then add the eggs, one at a time, mixing well between each addiction.

Now change into something you don’t care about, because things are about to get messy!
Start by adding 1/3 of the flour mixture, followed by 1/2 of the scary red buttermilk mixture (mwahahahahaaaaah!), then another 1/3 of the flour mixture, the remaining buttermilk and ending with the flour mixture. At that point, it’s important not to overmix the batter. So mix juuuuuust until smooth and well combined.
Scoop into your cupcake liners. And I know you’ll hate me for this, but the batter makes an annoying amount of 16.
How to make the Whipped Cream Cheese Frosting?
While the cupcakes are baking, make that impossibly good Whipped Cream Cheese Frosting!
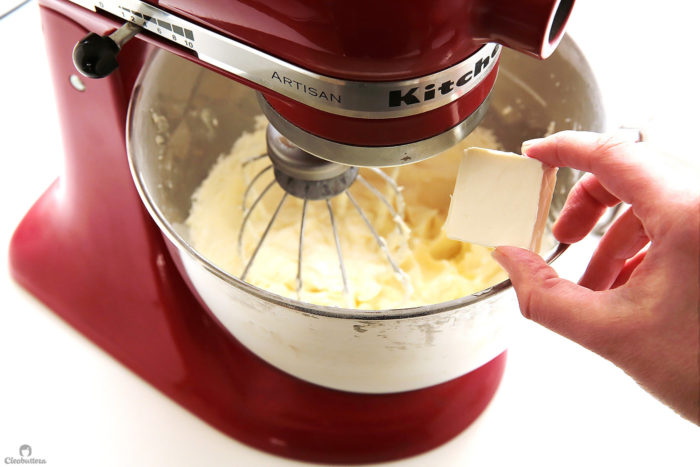
The trick to keeping the frosting so stable and pipeable without adding a ton of powdered sugar, is using COLD cream cheese instead of room temperature. I swear by it…It’s magic!
We also mix things in a different order than the usual. So we first whip the butter and powdered sugar together until its as fluffy as possible, then we add in pieces of cold cream cheese, one piece at a time. It’s important to make sure that each piece gets incorporated before adding the next, so the frosting doesn’t ends up with clumps.
Now if you’d like the top your cupcakes with those elegant chocolate “wax” seals like I did, well you first need to know that they require some patience and a little digging around for metal wax seal stamps. I had my eyes set on this stamp, but since it was going to arrive later than I needed it, I decided to do a little DIYing and sort of make my own.
I picked my design and took it to a metal worker in the hustle of old Cairo, where he custom-made it for me! The quality was less than I had hoped for and the appearance was utterly un-photogenic, but it did the trick.
How to make Chocolate “Wax” Seal Toppers?
Before you begin to make them, I encourage you to check Sprinkle Bakes video for better visualization. But here’s how it’s done.
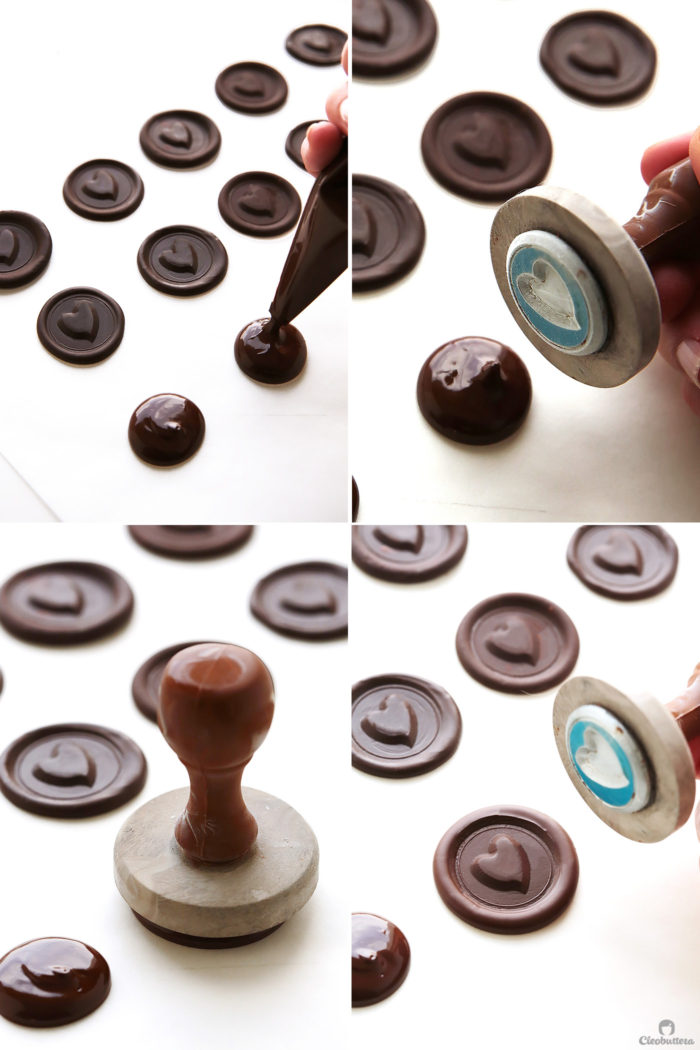
Basically you just pipe tempered, melted chocolate mounds unto a piece of parchment paper. The melted chocolate CANNOT be too warm or it will stick to the stamp. Similarly, the stamp needs to be ice cold. To thoroughly chill it, you can place it into a cup full of ice or over an ice pack. Just be sure to wipe the stamp off of any water droplets that may have formed.
Then you just press the stamp over the chocolate, let it stand for 10 seconds or until the sides of the chocolate look set. At that point, gently lift off the stamp and place the stamped chocolate in the fridge to fully set through. And viola!
A gorgeous topper worthy of a stunner cupcake!
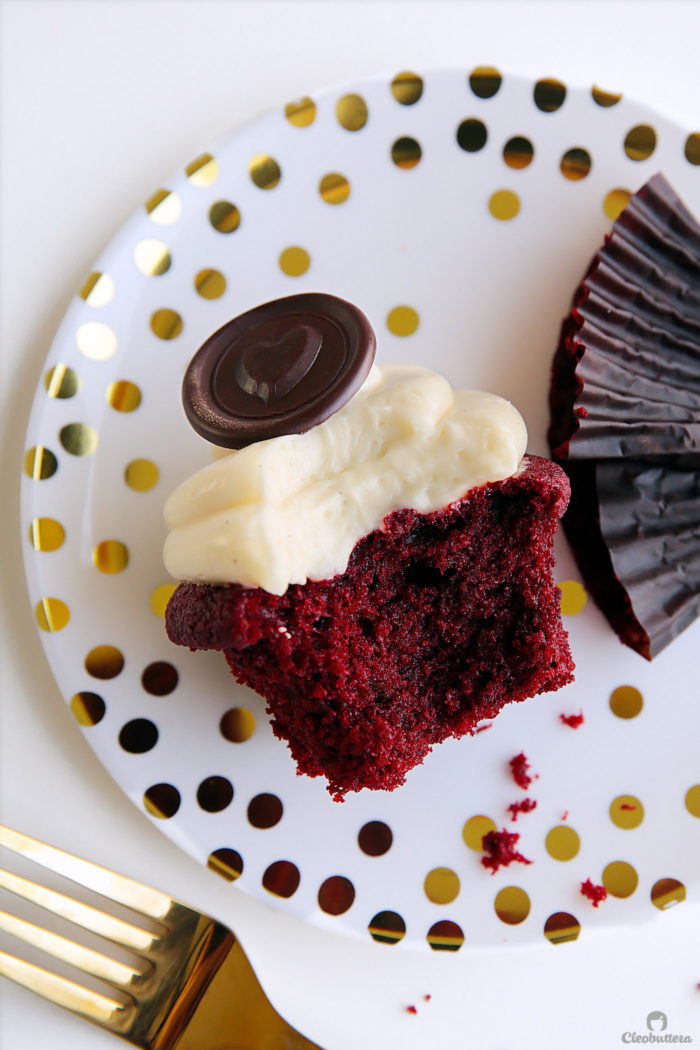
Light, fluffy, moist, flavorful and so much more than just a dazzling color.
So glad this Valentine’s Day didn’t slip without a red velvet cupcake to present you.
Now that I’ve done all the testing, it’s your turn to make it! But before I go…here are some tips and tricks to help you get it as perfect as can be.
Tips for success:
- Weigh your ingredients. I know I sound like a broken record with this one, but it really makes a huge difference. Mis-measuring ingredients is the biggest culprit of baking. Unlike cooking, an extra bit of this or little less of that, will affect the outcome. Baking really is a science. For the best possible results, I cannot recommend busting out the kitchen scale more. If you don’t have a scale, please don’t shy away from this recipe; it will still turn out great if you’re careful to measure the flour, especially, correctly. Lightly spoon the flour into your measuring cup, then sweep off excess using the back of a knife.
- Use room temperature ingredients. It’s important to bring all your refrigerated ingredients to room temperature before using. That way they mix together more evenly without causing the batter to split or curdle, and produce a uniform texture.
- Whip it good. Don’t skimp on creaming the butter, oil and sugar together. It should transform from a dense yellow mixture, to a fluffy, almost white one. This step incorporates air into the batter, which make the cupcakes have that fluffy, open crumb you see here.
- Don’t overmix. Once you start adding the flour mixture, be careful not to overbeat the batter. Just mix until everything is combined and the batter is smooth after the last addition. Overbeating can cause the cupcakes to bake up tough and sometimes even sink in the middle
- Don’t open the oven door till the end. Due to large amount of fat and liquid in this recipe, it has a very delicate nature and can collapse if you open the oven before its done. Try to resist opening the oven door, until you can no longer see any shiny batter over the surface of the cupcake.
- Do not overbake. No matter how much butter you add in the batter, overbaking a cupcake will cause it to dry out. Mine are done after 20 minutes, but each oven is different. So as soon as the cupcake has no wet batter on the surface, springs back when lightly touched and a toothpick inserted in the center comes out with a few moist crumbs attached, then its done!
- Cool before frosting. Be sure that the cupcakes have cooled completely before piping on the frosting. The heat from the cupcakes will cause the frosting to melt if you add it before they cool.
FAQs:
What’s the best way to store these?
I think the texture of these cupcakes are best on the same day they’re baked, while they’re nice and fresh. If you’d like to make them in advance, the cake portion of the cupcake (without the frosting) will keep well in an airtight container at room temperature for about 3 days. The frosted cupcakes can stay at cool room temperature for up to 24 hours. To avoid the cream cheese from spoiling, if storing longer than that, it is recommended to freeze the cupcakes (in an airtight container) as opposed to refrigerating them. The fridge will keep the frosting safe to eat, but unlike the freezer, it tends to dry out the crumb of butter cakes. It’s no biggie if you decide to refrigerate the cupcakes, but just expect a slightly less moist product. Bring back to room temperature before serving.
What can I substitute buttermilk with?
I absolutely love the flavor that “real” buttermilk imparts, and believe it makes the cupcakes stand out more. However, in a pinch you can substitute it with the milk and vinegar/lemon juice combo. Just add 2 teaspoons of vinegar or lemon juice in a measuring cup and pour enough whole milk over it to reach the 3/4 cup mark. Whisk together and let the mixture stand for a few minutes until it thickens up. You’ll still need to add the other 2 teaspoons vinegar called for in the recipe.
Can I leave out the red food coloring?
Yes! You won’t get that iconic color that red velvet is known for, but it will taste exactly the same. You may also want to consider beet powder for a natural alternative.
Can I make this recipe into a layer cake?
I got so consumed into testing it out in cupcake form, that I never get around trying it as a cake. It will most probably work just fine, but since I haven’t tried it myself I can’t vouch for its success. Will update the post with a definitive answer, as soon as I get a chance to test it out in cake form.
A Great Red Velvet Cupcake...Finally!

This red velvet cupcake recipe took years to perfect & the result is everything you can hope for! Soft and tender with a velvety texture, and super flavorful with tangy notes and sweet vanilla that's been kissed with cocoa. A cloud of not too-sweet, whipped cream cheese frosting takes it over the top. It's a winner!
Ingredients
For the Cupcakes:
- 1 1/2 cups (180g) all purpose flour
- 2 1/2 tablespoons (15g) unsweetened cocoa powder (sift if lumpy)*
- 1 teaspoon baking soda
- 1/2 teaspoon salt
- 3/4 cup (187g) well shaken buttermilk, at room temperature*
- 2 teaspoons white vinegar
- 1 teaspoon pure vanilla extract (or 2 teaspoons if using imitation vanilla flavoring)
- 2 teaspoons red gel food coloring (or 1 1/2 tablespoons liquid red food coloring)*
- 3/4 cup (170g/ 6oz) unsalted butter, softened to room temperature
- 2 tablespoons (23g) neutral-tasting oil (such as vegetable, sunflower, or corn oil)
- 1 cup plus 3 tablespoons (238g) granulated sugar
- 2 large eggs, at room temperature
For the Whipped Cream Cheese Frosting:
- 1 cup (227g/ 8oz) unsalted butter, softened to room temperature
- 3 cups (340g) powdered sugar, sift if lumpy
- 1/8 teaspoon salt
- 12 ounces (340g) cream cheese, cold straight from the fridge (cut into 1-inch pieces)*
- 1/2 teaspoon pure vanilla extract (or 1 teaspoon vanilla bean paste or imitation vanilla flavoring)
- 2 tablespoons (28g) sour cream, optional*
For the Chocolate "wax" Seal Toppers: (optional)
- 50g (1 3/4oz) semisweet or dark chocolate
- Cup filled with ice or ice pack
- Metal wax seal stamps*
Instructions
To make the cupcakes:
- Adjust oven rack to middle position and preheat the oven to 170C/338F. Line two 12-cup cupcake pans with 16 paper liners.
- In a medium bowl, whisk together the flour, cocoa powder, baking soda and salt to combine. Set aside.
- In a small bowl or a large liquid measuring cup, whisk together the buttermilk, vinegar, vanilla and food coloring. Set aside.
- In the bowl of a stand mixer fitted with the paddle attachment (or in a large mixing bowl and an electric hand mixer), beat the butter on medium speed until creamy, about 1 minute. With the mixer running, gradually add in the sugar, then slowly drizzle the oil. Raise the speed to medium-high and continue beating together, scraping down the bowl as necessary, until lightened up in both color and texture; 4 to 5 minutes. The color should turn very pale (almost white) and texture should look soft and fluffy.
- Add the eggs, one at a time, beating well after each addition.
- Scrape down the bowl and beater with a spatula, then resume mixing on lowest speed. Add in one-third of the flour mixture and beat until just incorporated. Pour in half of the buttermilk mixture and beat lightly until combined. Repeat with half of the remaining flour mixture, remaining buttermilk mixture, and ending with the remaining flour mixture, scraping down the bowl as necessary. Mix until just combined and a smooth batter forms, being careful not overmix.
- With a rubber spatula, give the batter one good, final stir to make sure that everything is well incorporated. Use an ice cream scoop to divide the batter evenly among the 16 cupcake liners, filling them up 3/4 of the way.
- Bake until the cupcake's center springs back when lightly touched and a toothpick inserted in the center comes out clean or with a few moist crumbs attached, about 20 minutes. Resist the urge to open the oven's door while the surface is still looking wet, or the cupcakes might risk sinking in the middle.
- Let cool in the pan for about 5 minutes then transfer to a wire rack to cool completely before frosting. While the cupcakes bake, make the Whipped Cream Cheese Frosting.
To make the frosting:
- In the bowl of a stand mixer fitted with the whisk attachment (or in a large bowl and an electric handheld mixer), beat the butter until lightened up and creamy; 2 to 3 minutes.
- With the mixer running on low speed, gradually add in the confectioners sugar, followed by the salt. Raise the speed to medium-high and whip until lightened in both color and texture; about 5 minutes.
- With the mixer still on medium-high speed, add one piece of cream cheese at a time, one after the other, mixing well after each addition so there are no lumps. Continue whipping until light and fluffy, and air pockets have formed.
- Beat in the vanilla and sour cream (if using) just until incorporated.
To assemble the cupcakes:
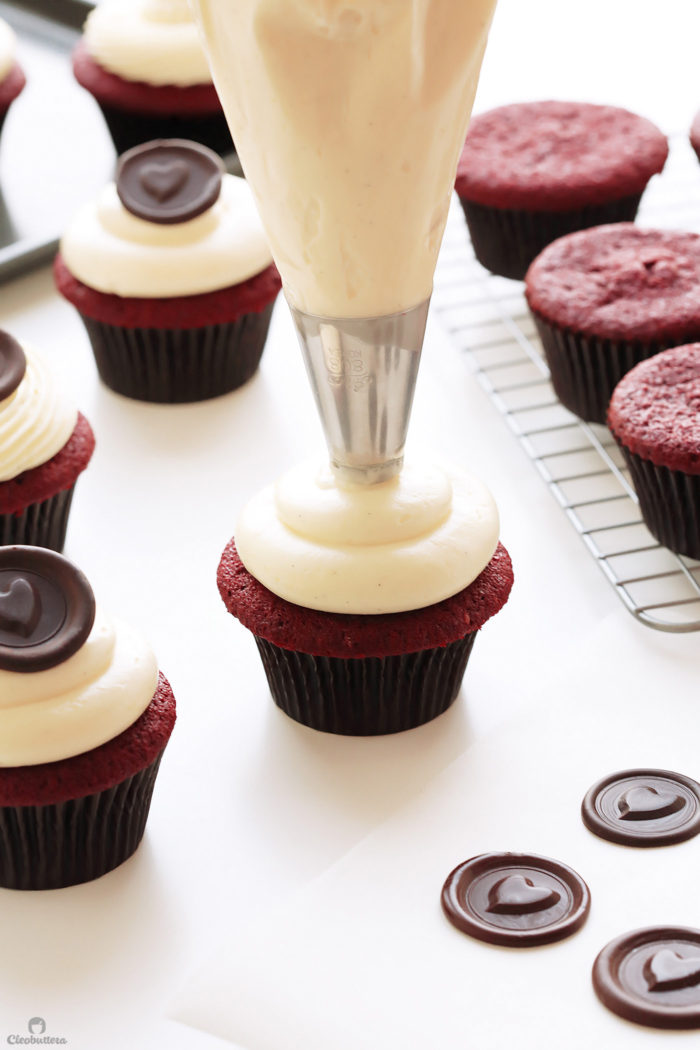
- Fill a piping bag fitted with your favorite piping tip (I used Ateco 808 and Ateco 867) with the Whipped Cream Cheese Frosting. To frost, start piping in the center, going around once, then ending with a swift pull.
- Top with the chocolate seal stamps (if using), red fondant hearts or sprinkles, if desired. The frosted cupcakes will keep well at room temperature in an airtight container for 24 hours. Please refer to the FAQs for longer storage.
To make the chocolate seal toppers: (if using)
- Place the metal wax seal stamp in the cup filled with crushed ice or over an ice pack to thoroughly chill the bottoms. If you don’t ice your seals, the chocolate will stick to the wax seal.
- Grate 12g of the chocolate and set aside. In a small, microwave-safe bowl, microwave the remaining 38g os chocolate in 15 second intervals, stopping and stirring in between until mostly melted. Continue to stir the chocolate until it has completely melted and very smooth. Stir in reserved grated chocolate until fully melted. (This process of melting 3/4 the amount of chocolate first and then adding in the remaining grated 1/4, is a quick way to temper the chocolate, which will allow the toppers to set firmly without melting to the touch; so don't skip it).
- Let the chocolate stand 3-5 minutes or until it's barely warm to the touch. It's important that the chocolate is not too warm when you make an impression with the stamp, or it will stick to the stamp.
- Pour the melted chocolate into a piping or zipper lock bag with the end snipped off. Squeeze 3/4-inch round drops of the chocolate onto a parchment lined baking sheet. Make a row of 3 to 4 chocolate drops.
- Remove the stamp from the ice and quickly wipe it off of any water droplets with a towel. Place the chilled stamp onto a chocolate round, press down gently, then let stand for 10 seconds or until the chocolate looks set around the edges. Gently lift the stamp and you should now have a chocolate seal. Place back the metal wax stamp into the ice to rechill and repeat with remaining melted chocolate. Refrigerate finished chocolate seals until firm.
- Peel firmed seals from the parchment paper and place over the cupcakes.
Recipe Notes
- For best flavor, use a high quality, dark, natural unsweetened cocoa powder. While light colored cocoa powder such as Hershey's, still works just fine, I've found that darker types yield a richer taste in this recipe. I prefer the brand Hintz, which is readily available where I live in Egypt, but use whatever high quality, dark cocoa available to you. Dutch-processed cocoa powder is not recommended here, as it affects the rise of the cupcakes.
- Buttermilk, also known as 'laban rayeb' in Egypt, adds a wonderful tangy flavor, tenderizes the crumb and activates the baking soda, which makes the cupcakes rise. While its best to stick to real buttermilk here, it can be substituted with a combination of whole milk and vinegar or lemon juice, if you must. Add 2 teaspoons of vinegar or lemon juice in a measuring cup and pour enough whole milk over it to reach the 3/4 cup mark. Whisk together and let the mixture stand for a few minutes until it thickens up. You’ll still need to add the other 2 teaspoons vinegar called for in the recipe.
- The amount of red food coloring may vary depending on the type and brand used as well as the shade of red preferred. For that deep burgundy red you see here, I use 2 teaspoons of either Americolor Super Red or Chefmaster Christmas Red gel food coloring. If using a liquid food coloring such as McCormick, you'll need to increase the amount to around 1 1/2 tablespoons, since it's less concentrated than gel. If you favor a natural alternative, beet powder may be substituted. I'm unsure of the amount though, as I've never tried it myself. You may also omit the food coloring completely if you prefer; you won't get that iconic red color, but it will taste exactly the same.
- For the cream cheese, I use Kiri squares which is easily accessible where I live. If using Philadelphia, be sure to use brick-style, not the spreadable type in the tub.
- The sour cream in the frosting adds a tangier taste and creamier texture. Since the amount is only 2 tablespoons, you don't have to get out of your way to buy a new tub just for it. It's amazing with it, but you can easily skip if you don't have it on hand and still get great results.
- The heart wax seal stamp I used here was custom-made by a metal worker in Old Cairo. Although it did the trick, I wasn't in love with the quality and for that reason, I'd suggest ordering one off of Amazon or Etsy. Alternatively, fondant heart cut outs or sprinkles would look really cute on top of these cupcakes.
Cupcake recipe is a Cleobuttera original loosely inspired by The Sprinkles Baking Book.
Frosting recipe is a Cleobuttera original.
Chocolate "wax" seals adapted from Sprinkle Bakes.
Measurements Note: All recipes of this site have been developed using weight measurements. Although US volume measurements have been included for your convenience, it is highly encouraged that you weigh your ingredients using a kitchen scale to get the best possible results. Due to the sensitive nature of baking, kitchen scales are proven to yield more accurate and consistent results than measuring cups. Enjoy!
Powered by ![]()
This post may contain affiliate links.
All images and content are owned by Cleobuttera® and are copyright protected. Please do not use my images without prior permission. If you would like to republish a recipe, please rewrite it in your own words and link back to the recipe page on my site. Original recipes and creations of this site are intended for personal and home use. Commercial replication or media consumption are only allowed with a written consent and agreement with Cleobuttera owners. Otherwise it is considered a violation of intellectual property. Thank you for respecting and appreciating the amount of time and effort that goes into creating free, unique recipes that make people happy.


Looks so divine. Coincidentally, I’ve been looking for a flop proof red velvet recipe from last week and this recipe came out at the perfect time. Definitely going to try it, InshaAllah! Jazakallah khair for your lovely blog and sharing your awesome recipes!
So happy this recipe came just in time! Thank you so much Jameelah for your kind words and prayers. I hope you love these cupcakes as much we do.
Hello. You are amazing in a way that you tried and tested everything first and then most of all so generous to share.
My question is can i make it as a cake , if so will there be a difference in temperature and time? Thank in advance for your reply.
Thank you so much Grace for your sweet words; it’s really my pleasure to be doing this.
Due to being so consumed with testing this recipe in cupcake form, I have not tried it as a cake yet. Although I can’t be 100% sure of the results without trying it myself first, I’m pretty confident that it should work just fine as a cake. The temperature should remain the same, but of course the baking time will be longer depending on the size of pan you’re using. If you do give a try, would love to know how it turns out. Best of luck and enjoy!
Hello dear did it work as a cake? And did you doubled it ?
Hi, i wanted to make cake layers with this recipe, if so, how many minutes should i bake it and what temperature should be maintained?
Hi Nafla! As mentioned in the FAQs section of the post, I have not had a chance to try this recipe in cake form yet. Although I can’t be 100% sure of the results without trying it myself first, I’m pretty confident that it should work just fine as a cake. The temperature should remain the same, but of course the baking time will be longer depending on the size of pan you’re using. If you do give a try, would love to know how it turns out. Best of luck and enjoy!
The frosting.. If u use a star tip, will it retain the shape? Is it stiff like the other buttercream? I want to pipe rosettes on cupcake,. So was checking.
From the round pipe u used, looks like its very soft.
Hi Shabna! Absolutely! This frosting is very stable and keeps its shape very well. I wouldn’t describe it as “stiff” because it doesn’t have a ton of powdered sugar to make it crust, so while its creamy in texture, it’s perfectly pipe-able and will retain detailed designs. If you look closer in the pictures, you’ll notice that I’ve frosted some of the cupcakes with a very intricate star-shaped tip aka french tip. Please refer to the 1st and 4th photo of the post to see how they look ?
What can we use to substitute the white vinegar?
Apple cider vinegar will do the trick ?
Ma sha Allah. I love your amazing and unique recipes that never fail me out. Can I double the recipe pls?
Thank you so much Khairy…that’s always great to hear! Sure! This recipe doubles really well; I did it before for my son’s birthday without any issues. Enjoy ?
Is the granulated sugar in cupcake receipe,normal everyday sugar
Hi Sandra! Yes granulated sugar, is the normal everyday sugar. Also known as castor sugar in other countries.
Hi Tasbih, this is such a great recipe! I’ve tried it both as a cupcake and a cake (using three 6 inch pans) and it came out beautiful both times. Well done!
YAY! Love hearing that it worked so well for you ?
Hello dear did you double the recipe? And how much time did it take? Thank u so much
I have been looking for the perfect red velvet cake for a few days now. Some had too much chocolate, some not enough. Your recipe was just perfect. This was the 4th red velvet I have tried and I won’t be looking for another.
I’m so glad this recipe hit the spot for you Carolyn! Thank you so much for such wonderful feedback.
Hello! I just made the red velvet cupcakes and OMG they are Amazing! Thank you for poating the recipe and all the tips!
I LOVE the texture and how tender they are. I would like to to make a chocolate cupcakes and vanilla cupcakes from this recipe. What alterations do you suggest to do this?
Thank you
Hi May! So happy you love it so much! For chocolate cupcakes, I’d recommend using one of these amazing chocolate cupcake recipes (this or this), instead of tinkering with this one, as it one will require further testing and work to get it to stand up to additional cocoa powder.
For vanilla cupcakes, you can substitute the cocoa powder for additional flour (by weight), omit the food coloring, increase the vanilla and leave everything else the same.
Best of luck!
Hi Tasbih. I’m a big fan of yours. I tried a red velvet recipe from another website and, I didn’t like it very much. The frosting was weird and the cake was so normal, like what is the difference between it and a normal cake; only the red colour. I was so disappointed but I wanted to try it again. I tried yours and honestly, it’s perfect. My family loved it sooo much. So thanks a lot!!!!! This is the recipe I’m using from now on.
I have a question though. How long can the frosting last in the fridge, because I have some frosting left that I could use later?
I’m beyond excited that you loved this one Rawan! Thank you so much for your wonderful feedback!
Cream cheese frosting usually lasts around 3 days in the fridge but can keep for about a month in the freezer.
I can’t emphasize on how delicious this creation is! I tried it first with couple of alternatives in the ingredients and it sank in the oven. Did it on the next day again, but following all instructions as it is and it turned out to be perfect. Cream cheese!!! Ouffff couldn’t imagine a better taste or texture. Things i changed in the second try: 1) using a better quality baking soda 2) replaced margarine with lurpak 3) made sure that all ingredients were room temperature
I’m so happy to hear that you nailed it the second time around Sally! It’s amazing how big of an impact little ingredients make in a recipe. Thank you so much for sharing your experience with us. Highly appreciated.
Perfect red velvet cupcake recipe! I made this many times since I found this recipe. Enjoyed a lot by my children and co workers! I’m gonna try making layer cake tonight!
Wooohooooo! Love hearing that Juju! Please let us know how the cake layers turn out…I have yet to try it in cake form ?
Hello Tasbih! This cupcake recipe is perfect – the taste, texture, density (light with some body)…delicious. An absolute winner and will be my go-to cupcake recipe. As I am restricting calories (you’ve got to pick your battles!) I accompanied it with a marscapone frosting. I am sure your frosting recipe is delicious!
Recipe: 1 container (8oz) Marscapone Cheese; 1/4 Cup of Powdered Sugar; 2 Teaspoons Vanilla Extract; 1 Cup of Whipping Cream. Whisk together the first 3 ingredients just until blended. Using an electric beater on medium speed, whip the cream until stiff peaks form. Gently fold into the marscapone mixture. [Credit to southern living.com (check out their coconut cake recipe – I’ve tried it – delish)]
I have been looking at recipes for a Persian Love Cake and my head is spinning…there are recipes which have semolina/cream of wheat, they range in the number of eggs, the amount of cardamon, some use ground almonds, others use almond flour…Do you have a recipe for such a cake, which for me renders up tales of Arabian Nights? if not, would you be inclined to explore such a recipe so that we can embark upon an adventure of flavours of the Middle East, such as rose water, cardamon, saffron, almonds and pistachios?
Absolutely love your blog and your passion for baking the perfect delectables.
It’s so wonderful to hear that you loved these cupcakes so much Fareeaa! Mascarpone frosting sounds divine; thanks for sharing the recipe.
I’m just as confused as you are about Persian Love Cake lol! I had this phase of obsession too and the different variations got my eyes boggling. It’s definitely something that I’m planning to delve deep into because the idea sounds incredible. I’ve never actually tasted it before as it’s not well-known in Egypt, but I can already imagine how amazing it is. When I do land on a winner, I’ll surely share. Thanks so much for your suggestion ?
Hi Tasbih,
I have noticed that there is a slight difference in the frosting recipe for this red velvet cake to the carrot cake. I was wondering if you reckon that this frosting is the new and improved cream cheese frosting. Or do you think that the slight difference works for the different cake due to their taste and texture? Hope you could clarify.
Btw, I have tried a few of your recipes and they are all excellent recipes. I am now about to try your carrot cake recipe. Thus, my query about the cream cheese frosting.
Thank you for your effort and for sharing your recipes!
Hi Zan! I’m so happy to hear that you’re enjoying the recipes you’ve been trying! I hope you love the carrot cake just as much; it’s one of the most popular recipes of the blog.
You’re right about the different variations of cream cheese frosting working differently for each cake. I found that due to the red velvet’s delicate flavor, a less cheese-y frosting worked best as to not overpower its taste. Because the carrot cake is heavily spiced and has a bold flavor, a cheese-ier frosting contrasted it beautifully without overwhelming it. You can use either frostings for the carrot cake, but for red velvet, I recommend sticking to this one. Enjoy ?
Hello Tasbih, thanks for taking time to research and post this recipe, I tried it today and it didn’t turn out perfect. The batter overflowed in the oven although i measured all the ingredients with a scale and butter ,eggs and buttermilk were room temperature. The taste is amazing but they are sooo soft that I couldn’t remove them from the pan without them breaking. What could i have done wrong?
I have exactly the same experience! My cupcake wet overflowing and sank in the middle. The taste is amazing, however they are so soft that they will fall from their lining when turning upside down!
I thought maybe I mixed it too long or maybe I used too much oil? I did measure everything though..
HI Nashwa! Apologies for my embarrassingly late reply, as I was having such health issues the time you wrote this comment. I’m happy you liked the flavor of these cupcakes, and I’m sorry to hear that you’re having issues with sinking. Sinking could be due to either over-mixing the batter, underbaking, a discrepancy in measuring or too much moisture for the kind of flour you’re using. Since you’re already measuring precisely and using room temp ingredients, then it could be other factors. As soon as the flour is added, mix until just combined. Make sure to bake until the tops of the cupcakes spring back to the touch and a toothpick inserted in the center comes out clean. If you’re already doing all this…then maybe the type of flour you’re using doesn’t have the same protein level as the one I’m using and is therefore not strong enough to support all the liquid. In that case, I’s suggest omitting the oil. This should do the trick. Hope that helps!
Hi, thank you for the receipe…I have one question – did you need to fill the cupcake pan – hall full or 3/4th full?
It’s my pleasure Greta! I fill about 3/4 up the way. Just as long you as you get 16 cupcakes out of the batter, then they should be the perfect size. Enjoy ?
Lots of great pointers. Thank you! I have yet to try the chocolate topper and frosting, but the red velvet cupcakes was a success. Moist, fluffy, flavorful.
I love hearing that you liked the cupcake part so much. Thank you for your wonderful feedback!
Jazāk Allāhu Khayran dear sister for replying and sharing this recipe- its brilliant!!! I enjoyed baking it and alhumdullilah we all enjoyed it at Iftar ??
So happy you enjoyed them Alayna ?
Can you use cake flour instead of all prupose flour? If so is there a difference in how much flour to use?
Hi B. Apologies for my embarrassingly late reply, as I was having such health issues the time you wrote this comment. You can use cake flour here if you prefer; just use the same amount in weight as all purpose.
can this be made using a bundt cake if I doubled the recipe???
Hi John! I honestly haven’t tried this recipe in any other form than cupcakes, so I can’t tell with certainty if a bundt would work successfully. The are some readers, however, who have reported back that they made it as a layer cake with great results.
Hi! As mentioned above, I made the cupcakes but unfortunately they didn’t turn out too well. I think I filled the cupcake pans too much. Even though it was filled for 3/4, my cupcakes were overflowing and unfortunately sank in the middle. With the amount of batter I was able to make 20 cupcakes that were all too full. The taste was amazing though (at least got that one right), however they are so soft that they fell from their lining when turning upside down!
I wondered where I went wrong? Maybe I mixed it too long or maybe I used too much oil (as they were super moist!) ? I did measure everything though..what are your thoughts?
HI Laurien! Apologies for my embarrassingly late reply, as I was having such health issues the time you wrote this comment. I’m happy you liked the flavor of these cupcakes, and I’m sorry to hear that you’re having issues with sinking. As you mentioned, sinking could be due to either over-mixing the batter, underbaking, a discrepancy in measuring or too much moisture for the kind of flour you’re using. So first, be sure that you’re measuring precisely. Precision is everything in baking, and the best way to ensure that is to use a kitchen scale. Also make sure that your liquid ingredients (eggs, buttermilk, etc) are at room temperature. As soon as the flour is added, mix until just combined. Make sure to bake until the tops of the cupcakes spring back to the touch and a toothpick inserted in the center comes out clean. If you’re already doing all this…then maybe the type of flour you’re using doesn’t have the same protein level as the one I’m using and is therefore not strong enough to support all the liquid. In that case, I’s suggest omitting the oil. This should do the trick. Hope that helps!
I had high hopes because the batter was so fluffy and delicious but these didn’t turn out very well. They spread too much and sank in the middle. They were way too soft and crumbly as well.
HI Jen! I’m sorry to hear that you’re having issues with sinking. Sinking could be due to either over-mixing the batter, underbaking, a discrepancy in measuring or too much moisture for the kind of flour you’re using. So first, be sure that you’re measuring precisely. Precision is everything in baking, and the best way to ensure that is to use a kitchen scale. Also make sure that your liquid ingredients (eggs, buttermilk, etc) are at room temperature. As soon as the flour is added, mix until just combined. Make sure to bake until the tops of the cupcakes spring back to the touch and a toothpick inserted in the center comes out clean. If you’re already doing all this…then maybe the type of flour you’re using doesn’t have the same protein level as the one I’m using and is therefore not strong enough to support all the liquid. In that case, I’s suggest omitting the oil. This should do the trick. Hope that helps!
I searched the internet for hours and then I came across this promising recipe. It did not disappoint! I actually make a cake instead of cupcakes and the layers came out brilliant! I doubled the recipe and got 4 nine inch round cakes. I baked them at the recommended temperature for about 18-20 min. Thank you for putting in the work and sharing this recipe so we didn’t have to! You’re the best!!
I’m so happy you found your way to my blog. Welcome! What an amazing feedback Lauran! I still haven’t tried the recipe in cake form, but I’ve been wanting for so long. Thanks to your tips and positive experience, I’m now even more excited to try it soon.
Hi! I really want to try this recipe will vanilla bean paste… which one do you use?
Hi Linda! The one I use is just labeled ‘Natural Madagascar Vanilla Bean Paste.’
Best red velvet cupcakes ever, amazing flavor!!! Thank you so much for sharing this with the world!
I did have a little issue and wanted to ask you for help, it might have happened to you at some point. I live in France, so I made my own buttermilk… but I did read your recipe notes and am wondering if ‘laban rayeb’ is the same as the fermented milk I can find in french supermarkets? Do you have any idea? Other than the buttermilk, I did everything exactly as in the recipe and I ended up with 20 overflown cupcakes… They grew sooo much that there wasn’t much cupcake left inside the liners… but they were really really tasty though!!
And thank thank you for the cream cheese note also… no bricks of Philadelphia here either and I never thought of using Kiri!! Frosting came out perfect!
Hi Monica! I’m so happy you loved the flavor such much. I did get several comments experiencing overflown cupcakes too, while others having no issues at all. I’m so confused to why this is happening to some people and not to others. I honestly don’t think it has to do with the DIY buttermilk. Could be the type of baking soda? This is baffling me. I’m honestly unsure if fermented milk is the same thing as buttermilk/rayeb. So sorry about that.
Hi I would love to try this recipe, but since I am a vegetarian, can u suggest what can I substitute the eggs with?
I’m so sorry Rashimi, but I’m not familiar with egg substitutes in baking. Sorry about that.
OMG these were amazing and definitely a keeper! Was a hit with the whole family and my work colleagues! Will be making over and over and over again. Thank you, thank you, thank you
YAY! Absolutely LOVE hearing that. Thank you for your wonderful feedback Kristina!
was wondering if chocolate chips would taste good or ruin the batter? i love me some chocolate chips in there!!
Hi Jessica! Chocolate chips would taste amazing here. However, my only concern is that because the batter is fairly thin, it might cause them to sink to the bottom. Maybe mini chocolate chips would work better here as they’re not as heavy.
I’ve tried this recipe twice and the flavor and texture and moisture is PERFECT! However, on the first try… (using slightly taller liners than standard) – 16 cupcakes were overfilled, and spilled and sunk in the middle. Second try, I spread it out into more cupcakes, and they were still flat/slightly sunken, and they shrunk. Any idea what I’m doing wrong? They are soooo good, and yours look perfect, I really want to make the recipe work!
I did chocolate with this recipe by just adding more cocoa and reducing the flour by the same amount… and they were perfect! But I have no idea why.
I’m really happy to hear that you like this recipe Amber. Sinking could be due to either over mixing the batter, underbaking, a discrepancy in measuring or too much moisture for the kind of flour you’re using. So first, be sure that you’re measuring precisely. Precision is everything in baking, and the best way to ensure that is to use a kitchen scale. Also make sure that your liquid ingredients (eggs, buttermilk, etc) are at room temperature. As soon as the flour is added, mix until just combined. Make sure to bake until the tops of the cupcakes spring back to the touch and a toothpick inserted in the center comes out clean. If you’re already doing all this…then maybe the type of flour you’re using doesn’t have the same protein level as the one I’m using and is therefore not strong enough to support all the liquid. In that case, I’s suggest omitting the oil. Hope that helps!
I made these for my co-workers for Valentine’s Day and they were a hit. Sooo delicious. Thanks for guinea pigging a ton of red velvet recipes to find the perfect one!
Hahahaaa! It was my pleasure? So happy to hear that they were so well received.
Hi, Tasbih! Thanks a bunch for the recipe.
I made this into layer cake last night and i yielded two layers of 8inch (20cm) round cake.
I baked with the same temperature (170°C) for approx 25mins. It came out beautifully!
What an amazing feedback Ciara! I still haven’t tried the recipe in cake form, but I’ve been wanting for so long. Thanks to your tips and positive experience, I’m now even more excited to try it soon.
I loved these cupcakes. The only thing i.changed was to use cake flour instead of a.p. flour. I yielded 20 cupcakes. Don’t know how that happened but I’m not complaining. They were great. I sure will make these again.
I’m sure that cake flour made them even more softer…yum! SO happy you loved the results.
First let me start by saying thank you for your countless hours of truly making the BEST Red Velvet Cupcake. I am not sure how I found your website but am so grateful I did. I made the recipe as listed including adding sour cream to the frosting. My husband stated it was the best cupcake he ever had. I have made a few other recipes and he has never said this high compliment except for this recipe. I made them for my sisters 40th bday as a surprise. This will be my only go to recipe.
Oh WOW! What an incredible feedback?! I’m beyond happy to know that this recipe did not disappoint and was so well received. Happy 40th to your sister!
Hi is the final product moist, soft, gooey/sticky (center)?
Thanks
Hi Katrina! The cupcakes are very soft and tender, but they shouldn’t feel wet or gooey or sticky. The centers are fluffy and airy.
Hi can you confirm there is NO baking powder in this recipe?
Hi Lauren! Yep…baking soda is the only leavening agent in this recipe. No baking powder required.
Hi,
I really want to make this recipe today as it looks absolutely divine! Unfortunately where I live there is no brick cream cheese, only the one in the tub. Does this affect my frosting – would i need to make any changes to get it stable and not all gloopy?
Hi Fozia! The thing with tub cream cheese is that it contains a high water content that makes it spreadable. For this reason, it makes for a frosting with a softer consistency that doesn’t hold it’s shape well. You can still use it, but expect a softer frosting.
Hi. They were very good!! I live in Seattle and so I’m assuming it’s ok to bake these at 350°F? Most cupcakes are baked at this temp. I did try at the lower temperature you suggested and then I had to add more time because they weren’t done. Please let me know. OH, and the frosting was amazing!
I’m so happy to hear that you enjoyed these Laura! I personally had a better rise using the lower temperature, but since every oven is different, you can surely adjust the temperature to what works the best for you. It seems that higher temperature of 350F might just work better for you. Enjoy ?
So excited to hop on this recipe! After looking long and hard for a good red velvet recipe, this one seemed by far the greatest, with the greatest reviews. I looked at three different markets, and all were sold out of buttermilk:( All I was able to get was powdered buttermilk. I was wondering if you think using that mix with water would hurt the cupcakes?
Hi Sophia! I’m really sorry for seeing your comment so late. You can surely use powdered buttermilk as long as you stay within the same amount of liquid called for it the recipe.
Thanks for such a great recipe. If possible can you please let me know the brand of the following ingredients you use
1. Flour
2.buttermilk
3.unsalted butter
All the ingredients are at room temp?
I would appreciate your reply.
Thanks
Hi Kulfah! I live in Egypt so here are the brands I use:
Flour: Al Doha
Buttermilk: Juhayna
Butter: Lurpak
Yes all refrigerated items need to be at room temp.
These were PERFECT! The cream cheese frosting is so good! I had never seen adding sour cream but it really makes it pop! My hunt for a great red velvet is over! Thanks!
Wooooohooooo! That’s music to my ears. So happy you loved it so much ?
I tried your recipe yesterday and cupcake top was very flat. I prefer my cupcake with the dome. Did I do something wrong? I filled the cupcake liner 3/4 full.
Hi Ann. You didn’t do anything wrong; they do come out with flat tops. If you l’d like them more domed, you can omit the oil, but note that the cupcakes will lose some of their moistness. Not dry but not as melt in your mouth moist. Still delicious though.
Salam can i use self raising flour for this recipe. Thank you xXx
Salam Alayna! No dear, it’s better to stick with plain flour as self raising has baking powder in it, and this recipe works better with baking soda as the leavener.
Jazāk Allāhu Khayran dear sister for replying and sharing this brilliant recipe. I really enjoyed baking it and alhumdullilah we all enjoyed eating it at Iftar ??
Amazing! I’m really happy you enjoyed it so much ?
Hello Tasbih,
This was an amazing recipe, perfectly moist light and crumbly! I tried multiple recipes before yours that were all subpar. Can you please post a recipe for vanilla cupcakes, I only trust your recommendations now haha, thank you for this delicious recipe!
Thank you so much Amina for your trust! I’m really happy you loved this recipe. Vanilla cupcake is a work in progress ?
Hello! How to make half of this recipe? Is it just divide all the ingredients into two? Thank you.
Hi Apple! Yes…just divide everything by two. Enjoy ?
Hi, did you ever end up trying this as a layer cake?
Hi Lauren! Not yet unfortunately, but I’ve had a lot of feedback from people who did and have reported back great results. You can read some of their feedback in the comments ?
These were PERFECT! I made them for my mother in law’s birthday and everyone loved them. The frosting was especially amazing. The only issue I had was because they were so moist and tender, I had to be really careful getting them out of the pan to cool. This will definitely be my go-to red velvet!
Really happy that these cupcakes made your MIL’s birthday a little extra sweet ? So glad you enjoyed this recipe!
Omg these are amazing! Sooo fluffy and moist. Im not a very good Baker but the Instructions were soo easy to follow. I skimped on the coloring and doesnt look like the picture and I was a bit sloppy on spooning them in but the taste is amazing. I cant wait to make these again. ( just to perfect the look lol, I mean I wont eat them all 🙂
I did add the sour cream to the frosting as I love the tanginess to cut out the sweetness, highly recommended.
Love hearing that you loved them so much Kim! Thank you for your wonderful feedback ?
Hi! I was wondering if you can incorporate chocolate chips into the recipe, and how can you do so for best results?
Hi Arina! Chocolate chips would taste delicious here. I’d recommend using mini chocolate chips though as they’re lighter in weight, so they have a lesser probability of sinking to the bottom. I feel like regular-sized ones might sink as the cupcakes are so light and fluffy. You can just fold them in the end like I do for these chocolate chip muffins. Enjoy ?
Wow! Bakery quality Red Velvet Cake from Home! The cupcakes were soft, airy and delicious! I agree with the recommendation to weigh the ingredients, otherwise it could throw off the proportions of the ingredients. The next time I make them I will dispense the batter into 18 cupcake liners rather than 16 since I had some spillage over the liners and that portion was overcooked and I had to remove it from rest of the cupcake. The frosting was out of this world!! This recipe is the best tasting red velvet cupcakes and cream cheese frosting! Thank you for sharing this amazing recipe!
That’s music to my ears Joann! So happy you loved this recipe so much. Thank you for your wonderful feedback ?
Do you have any recommendations on making this recipe keto compliant and to convert the all purpose flour to a keto approved flour? Would you substitute almond flour for the all purpose flour? I believe almond flour has more moisture than all purpose flour so how would that factor into the recipe? A cup of all purpose flour weighs 120 g while a cup of almond flour weighs 96 grams. For the sugar I would swap it out with swerve. Any recommendations or things to consider in making the keto substiutions. Thank you
It’s so hard to tell without experimenting with it first Joann. Almond flour is also very high in fat, so you’ll probably need to significantly decrease the butter to make up for the added fat. If you do play around with it, please let us know how it turns out.
Thank you so much for this recipe. I received a request for red velvet cupcakes for a graduation. I found this recipe, followed it to the letter and the grad & family LOVED them! The cream cheese frosting? Amazing! I would never think using cold cream cheese would work after years of using only room temp. Do you think I could add cocoa powder or dark chocolate ganache to the frosting to make it chocolate cream cheese frosting?
SO happy you loved how the cupcakes turned out Jacquelyn! You can definitely add cocoa powder to the frosting…it would make a delicious chocolate cream cheese frosting ? You might need to increase the powdered sugar through, since cocoa powder tends to add some bitterness that needs to be balanced out.
I ended up adding cooled chocolate ganache to the cream cheese frosting – delicious!
Hi! What can I substitute the white vinegar with and how to make a buttermilk?
Hi Yaya! Vinegar is imperative to the success of this recipe. You can use an kind of distilled vinegar you have like apple cider vinegar.
To make buttermilk substitute, yust add 2 teaspoons of vinegar or lemon juice in a measuring cup and pour enough whole milk over it to reach the 3/4 cup mark. Whisk together and let the mixture stand for a few minutes until it thickens up. You’ll still need to add the other 2 teaspoons vinegar called for in the recipe.
This is THE BEST red velvet I have ever had. It’s absolutely perfect along with the cream cheese icing which isn’t too sweet! I have even used this recipe for vanilla cupcakes and a layered vanilla cupcake with amazing results all around. It is now my go to recipe and will soon be trying out chocolate cupcakes with it as well. Thank you Tasbih for being so kind enough to share such a gem of a recipe with us!
I’m really glad you loved it so much Rumbi! Thank you for your wonderful feedback ?
*Sorry I meant layered vanilla cake
Not into baking or even eating cakes but tasted these at a friends’ house and just had to recreate. They really are delicious- perfect texture and taste. Followed the recipe to the letter and still having some sinkage.
Would using a fan oven affect the temperature at all? I baked for 20 mins at 170’c. Should I reduce the temperature or bake for longer, or both?
Thank you so much and hope you are in good health! ??
Hi Tasbih,
Thank you for the recipe! I made it for the first time (followed the recipe to a T) and my family and friends loved it. Most of them didn’t have feedback, but the ones who had feedback said that the cake is a little dry.
I can’t set my oven at 338° so I put it on 340° and baked it for 18 minutes instead of 20. I inserted a toothpick and it came out clean.
What do you think I should do? Should I cut the flour or should I cut the baking time?
Thanks in advance for your help!
Hi,
I followed exact measurements but my cupcakes had a bitter aftertaste. Any idea why that happened?
Thanks you!
Hi! I’m about to use Dutch-processed cocoa powder, would it affect the cupcakes?
Hi Angel! I have not tried it so I’m not 100% sure, but I don’t think it should be a problem. It will however yield darker colored cupcakes, that might not allow the redness to come through as bright. If you have natural cocoa powder, I’d recommend using it instead for a milder cocoa flavor and a brighter red color. But if dutched is all you have on hand, then you can go ahead and use it, but you might want to decrease the amount of oil by 1 tablespoon, as dutched is higher in fat. Best of luck and enjoy ?
Hi Ms.Tasbih,
I hope this message finds you well. I’d like to thank you for sharing this amazing recipe in here.
I’m so happy I came across your website and decided to give it a try. First time wasn’t so good but I saw its potential (the texture on the cupcake top was MMmmm!) Next day, I tried again (without reading all your tips) and BOOM! Satisfyingly good. But my third time was perfection. I read thoroughly and followed strictly all your guidance along the way. BIG THANK YOU, Ms.Tasbih! May God bless you and your family! 🙂
Wow these were PERFECT! Light and fluffy, but moist! I was worried that with the amount of butter they would be too dense, but nope. Also, mine did seem to be sinking in the middle at first, but they rose evenly by the end of the baking time.
Thank you for this recipe! Was initially worried because of the amount of liquid making the batter runny but it turned out so moist and yummy, even when placed in the fridge overnight! Frosting was perfect and not too sweet. My family isn’t too fond of frosting so I did a basic rosette pipe I used 250g cream cheese for the frosting (with the rest of the ingredients scaled down) and ended up with extra – would use 180g of cream cheese instead.
Attachment
Hi Tasbih! I love reading your blogs and after seeing this a few months ago I immediately followed you on IG. Anyway, I tried making this and it’s my second time making it using your recipe. I’m wondering what went wrong. My batter is watery. I followed all the measurements and even used a kitchen scale.
Asalamalaikum Tasbih
Hope you’re doing well
I have made the recipe in cake form and it was just as delicious.
You deserve all the praise for your innumerable testings for this recipe and finally making it a go-to perfection!
Kudos to you and your dedication.
Much love ❤️
So I baked these cupcakes and while they taste SO delicious, I also ran into the problem of the cupcakes just being too soft and just collapsing into itself when I went to remove them from the pan, like it had no structure. I was so sad. So with the remaining batter I had left I added some flour, baked for 22 minutes, and let them cool completely in the cupcake pan and that helped with the structure, but taste-wise weren’t AS great. I made sure to weigh my ingredients and everything was at room temperature so I’m not sure what went wrong. The first batch were kind of underdone even though my toothpick came out clean. I might give these a go again and maybe add more flour to the whole batter, because the taste was UP THERE! Even my husband complimented them and he’s not much of a cake guy.
these were so good!!! it’s such an easy recipe to follow and it’s as foolproof as it can get. thank you so much for sharing it with us. i frosted my cupcakes with white chocolate ganache and they were heavenly!!!
These tastes delicious but unfortunately after trying this recipe twice in one day!(so sad) my cupcakes still sunk…. Both times I weighed everything exactly and used room temperature ingredients.. Fit them into 18 instead of 16 since I did not want to fill the liners all the way to the top. Even with 18, my cupcake overflowed then sunk! So then I was like okay I did something wrong.. Second time I made sure not to overmix the batter. Unfortunately, they still sank 🙁 im so sad.
Just my two cents… If you live at a higher elevation, you might try reducing the leavening agents a bit. I live at 4500′ and I reduce leavings by about 1/3. Also, if you don’t have one, get an oven thermometer. Your oven could not be calibrated correctly.
Red Velvet Cupcakes are my absolute favourite. I had never dared attempt to make them out of fear that I might ruin the red velvet taste for myself. Lucky for my I bumped into your recipe the first time I ever thought of making them, and I don’t have to look elsewhere. Thanks for making this one so easy.
I have a question though, is there an eggless version of this? I want to bake this for a friend but unfortunately she is allergic to eggs 🙁
I tried this cupcake buy using your recipe literally and it become awesome cupcake.
I want to make this recipe, but how in the world do I get my oven to 338 degrees?
I have been looking for and trying numerous red velvet cupcake recipes that have not wowed me. The cupcakes were not as moist as I wanted. I just tried your recipe and am very impressed! I could tell they would come out different just by the process and the way the batter looked and smelled. I followed the recipe to the T and did end up with 20 cupcakes. Maybe others had the same issue and filled only 16 liners hence the overflowing issue. For oiliness, putting a teaspoon or so of uncooked rice under the cupcake liner helps to absorb the oil and keep the cupcakes from peeling off the liner. I will definitely be using this red velvet recipe from now on!
I made these for my partners birthday and they were amazing!
I tried out a cake with the above recipe. The cake was very soft and tasty. Thank you.
These didn’t work for me 🙁 I weighed everything, but they just didn’t cook through. I cooked for over double the time and they’re still kinda pudding-like in the middle. They all flopped in the middle, the saddest looking batch of cakes I’ve made 🙁
I really like this amazing red valvet cupcake recipe. I found this recipe really easy to make and very delicious in tatse. Even i have special red valvet cupcakes recipe. Check out the recipe here: https://www.recipespack.com/red-velvet-cupcakes-with-cream-cheese-frosting-recipe/
These cupcakes are amazing!! I didn’t have buttermilk so made my own according to your instructions (it only thickened a little but I guess that was enough). And I had more than 16 cupcakes, 21 I think (I went by the 3/4 full instruction rather than strictly sticking to 16 cupcakes). They were absolutely perfect – smooth, soft, velvety, moist. And the frosting was heavenly. Felt like the cupcakes were bought at some boutique bakery.
Thank you Tasbih for your hard work on this recipe!
Hey dear, Thanks a lot for sharing such a kind of delicious Red Velvet Cake with Cream Recipe. Finding a perfect recipe is not an easy task at all. Really, you are helping the food lover providing them with all types of amazing recipes in your blog. I love your writing style and presentation. I am also a food lover. I like to explore new foods and recipes. That is why I know the different test of foods and recipes for different occasion and personality. In that case, I am also trying to help the food lovers providing them with the best foods and recipes ideas for their beloved person to serve them in different occasion, event, and party programme. So, I run a blog to pursue my passion. Please, You are requested to visit my recipe blog and let me know how it looks like and also please do not forget to leave your valuable feedback in the comment section. Keep up the best work. All the best. Thanks again.
Hello Cleo,
First thank you for posting this recipe. I bake this recipe today and it was easy to follow and by far the best Red Velvet recipe. My son was very happy with the cupcakes for his birthday. The taste of the cupcake is the true taste of red chocolate goodness. The cupcakes were moist and the frosting was divine, fluffy and light.
Guys, Thanks For sharing this Great Recipe. My Family Loved it. I am definitely sharing this recipe and this website with my friend. Hope they also love it. Thank you again for sharing such a great recipe.
Attachment
Made this recipe for the first time yesterday, and opted for a layered cake. I used the
Easy Layers 5-Piece Layer Cake Pan Set from Wilton and baked for around 18 minutes at 325F (these layers are really small). It was simply divine!
Quick tip, it helps to refrigerate the layers before stacking all 5, I almost had a collapse happen but all was well. Not the greatest at decorating, but here’s a photo!
For the icing, used 1 1/3 recipe total, and opted for vanilla bean paste. It turned out great!
Thank you for this awesome recipe, it is certainly one for the books.
Hello! Thank you for sharing this recipe! I am wondering if you have had a chance to try it as a layer cake and if you have any advice for cook time with various pans? I am going to use this recipe to make a layer cake shaped like a fire truck for my son’s birthday, and am working on the shape with a collection of pyrex, metal, and silicone pans. So any advice would be very helpful! Thanks.
Thank you so much for the wonderful post.
I have made those cupcakes 2 day’s ago they where super good glad I find your post.