How to Make Chocolate Cloud Italian Meringue Buttercream
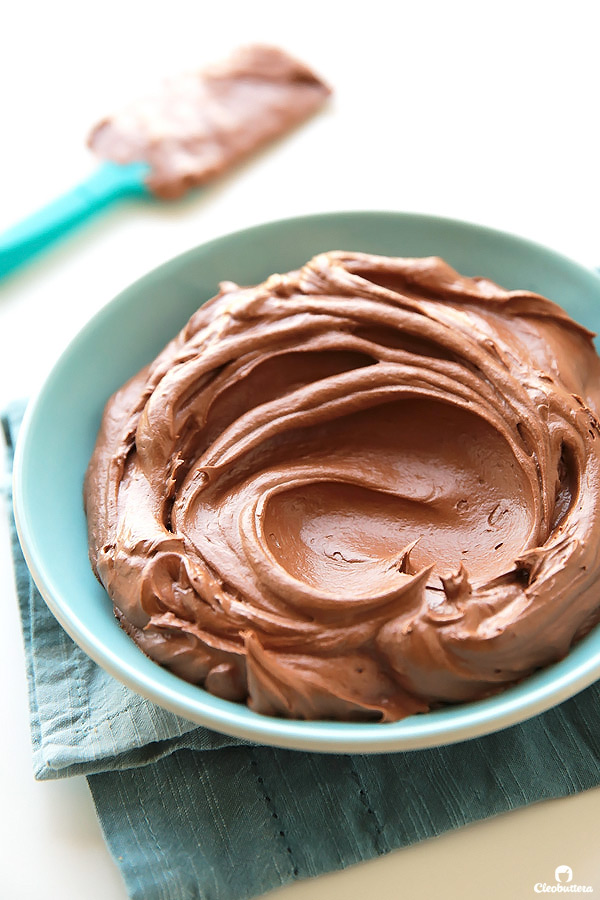
Step-by-step tutorial on how to make fluffy, mousse-like, light-as-air Chocolate Italian Meringue Buttercream, that feels like biting into a chocolate cloud.
Almost one year ago, on a trip to San Francisco, I had one of the best chocolate experiences of my life.
It was in the form of the unforgettable Chocolate Velvet Cupcake from Kara’s Cupcakes, a San Francisco Bay Area premier artisan bakery. As an annoyingly picky dessert enthusiast, I’m normally not one to be impressed by bakery cupcakes, until this one came along. It blew my mind!
And it looked something like this…
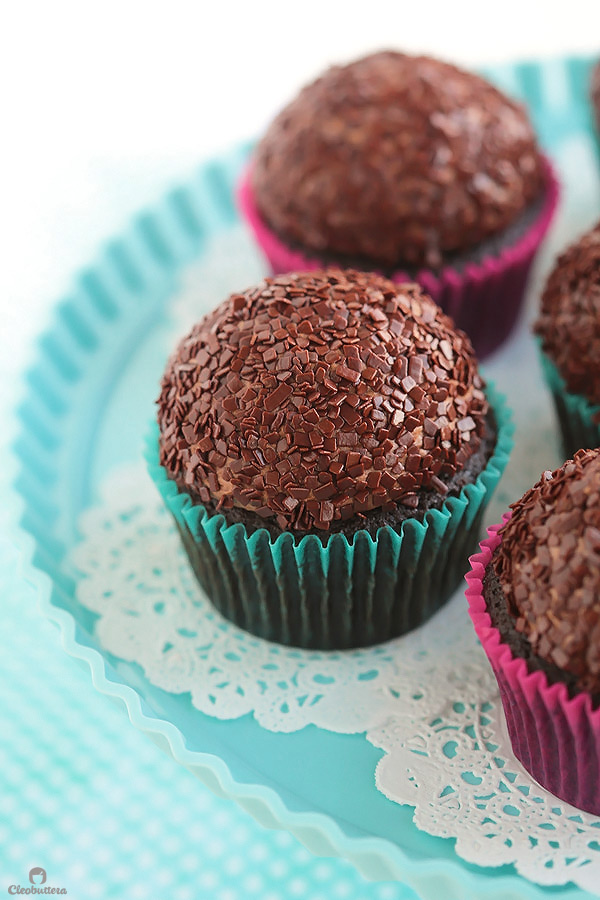
Whereas most bakery chocolate cupcakes can be generally dry, heavy and cloyingly sweet (with a few exceptions of course), Kara’s Chocolate Velvet Cupcake is on the other end of the spectrum. Moist, light-as-air, chocolatey without being an overkill and perfectly sweet. In fact, I remember it being too light, that I went back and bought several more. One on these fluffy little nuggets was not enough for this chocolate lover! Plus, calories don’t count on vacations amirite? The whole experience was like biting into a chocolate cloud.
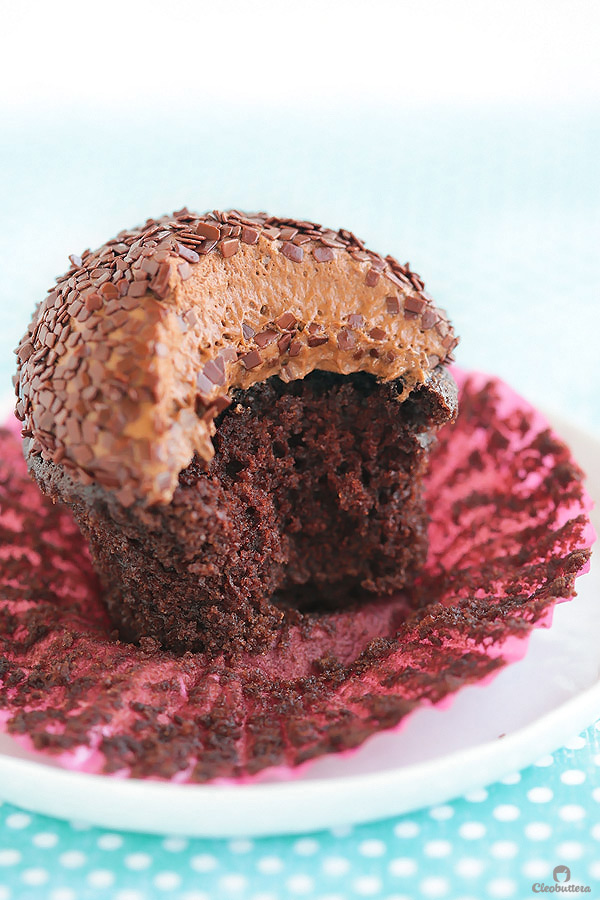
The cupcake itself is super moist and fluffy with a deep chocolate flavor, but its the frosting that intrigued me the most. I’ve never tasted anything like it before. As I sat down on the bench right in front of the bakery, I dissected it like the food nerd that I am, trying to make sense of the deliciousness in my hand. In terms of appearance, it looked whipped with lots of air pockets and had the color of rich milk chocolate. The texture was UN.REAL. Airy and fluffy like chocolate mousse, soft and creamy beyond belief, light and ethereal and not gritty to the slightest. Though the pale brown color may not indicate this, but the frosting packs an intense chocolate flavor, that is just sweet enough and chocolatey without being overpowering.
What was it? I was itching to know!
Whipped ganache? Naaaah! It’s lighter than that.
Some kind of meringue buttercream? Naaaaaah! It’s less buttery and less rich than that. Possibly though?
One way to know…Google!
My web spying efforts brought me to this:
Kara’s Cupcakes website describes their Chocolate Velvet Cupcake as “chocolate cupcake with a velvety bittersweet chocolate buttercream.” So hint number one: Bittersweet Chocolate! No wonder why the chocolate flavor is SO intense.
Then in this YouTube video, Kara Haspel Lind, owner and executive pastry chef of the famed bakery, describes it as “delicious, moist chocolate cake made with Scharffen Berger cocoa powder, and then on top of it you get an Italian Meringue Buttercream, rolled in French Chocolate Callebaut Sprinkles” She said it! She said it! She gave away the secret! It’s Italian Meringue Buttercream! Although it didn’t feel like it. I mean I’ve had desserts made chocolate Italian Meringue buttercream before, but this was so much better. Lighter, yet more chocolatey.
Proud of my discovery, I snapped a couple of photos of Kara’s epic cupcake, posted it on Instagram and pledged to come up with a homemade version. So there we are…one year later and after more trials than I could count, I think I nailed it. I will not claim this to be a Kara’s copycat recipe nor a clone but an inspiration, because let’s be real, I only had it once it my life and now its half the globe away from me to be able to compare them side be side. One thing for sure though, is that its every bit as delicious as I remember the original to be and will conjure up the same feelings of chocolate bliss!
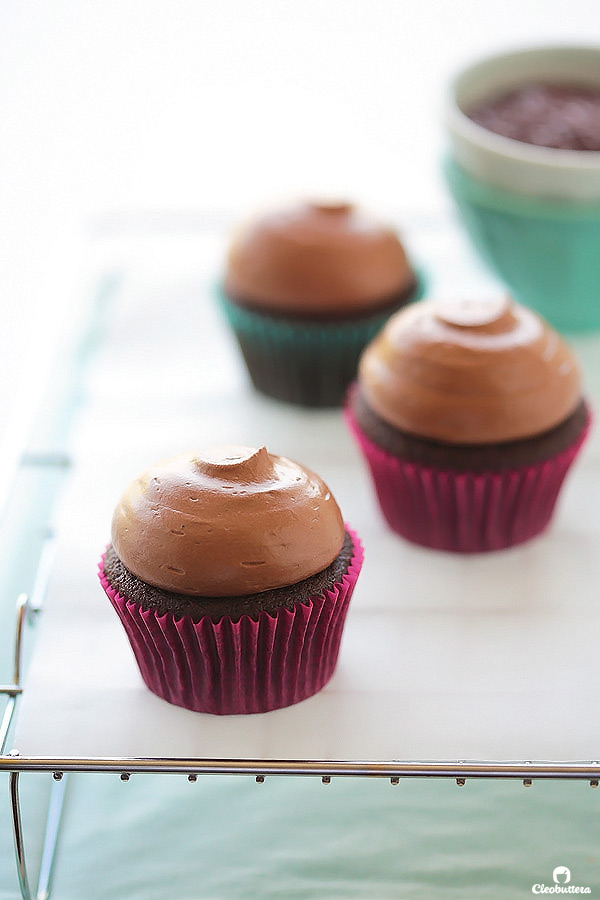
The cupcake portion is moist, light, fluffy and chocolatey, and the buttercream is like a big fluff of chocolate cloud.
This post is dedicated to the buttercream portion of the cupcake. Because unlike your typical American frosting where you throw everything in the mixer with your eyes half shut, this type of buttercream is a little more involved and so it requires some extra visuals.
Don’t fret though! Making Italian Meringue Buttercream does not require any super powers. All you really need is some alertness, FAITH, a candy/food thermometer (sorry but it’s kinda important here) and a sprinkle of pixie dust✨ Totally made that last one up, but why not?

Let’s talk ingredients. You’re gonna need sugar (some in a saucepan and a little reserved on the side), water, egg whites, butter, vanilla and chocolate. Not pictured: A pinch of salt ?
Now SUPER IMPORTANT! The egg whites MUST be at room temperature. Just place your whole eggs in a bowl of warm water for a few minutes before separating them. That shall do the trick.
Also SUPER DUPER IMPORTANT! The butter MUST be soft but still slightly cool. You don’t want it to be too soft to the extent of being melty; waxy consistency is perfect. Cool room temperature is the right word here.
You might come notice that the amount of butter I’m using here is half as much as most recipes for meringue buttercreams. That’s intentional. I often find this type of buttercream tasting way too rich and buttery that even a butter lover like myself can’t handle. They tend to taste like a slightly sweetened stick of butter! Me can’t do! And also Kara’s did not taste that buttery, so I’m assuming theirs is shy of the butter too. Not sure though! Kara please correct if I’m wrong and just handle your secret recipe will ya? While testing different amounts of butter, I also noticed that the full amount of butter muted the chocolate. So I cut down the amount to just enough to make the buttercream come together.

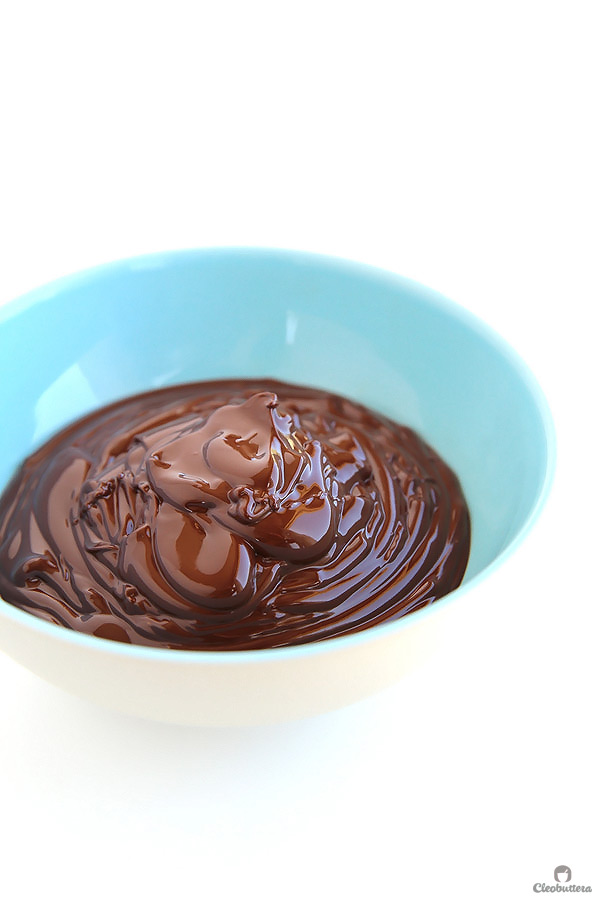
Let’s talk chocolate! Use the good stuff. Remember when I mentioned that Kara’s make their buttercream using bittersweet chocolate? Yup! Do that too! Bittersweet chocolate is high in cocoa solids; about 60% to 70%, so a little goes a long way. That means that you won’t need that much to produce a chocolatey frosting. While semisweet chocolate around 52% cocoa can be substituted, the frosting will have a slightly less chocolatey punch to it. When I tested out semisweet chocolate, I found that I had to increase that amount to get the same chocolate flavor as the bittersweet. While it tasted incredible, I found that the frosting firmed up more than I wanted to as it sat and has a less cloud-like texture.
IMPORTANT! (ALSO SUPER DUPER): Make sure that after you melt the chocolate, to allow it to cool until its no longer warm to the touch but is still fluid before adding it to the buttercream. If there are any solid chocolate pieces, you’ll end up with tiny chocolate shards throughout your frosting. Likewise, make sure that its not warm, or it will melt the frosting.
Phew…If you’ve made it this far without closing the website tab or falling asleep, here’s a virtual high-five✋? Thanks for sticking by and hang in there, we’re almost done. Actually we’re just beginning the buttercream but we’re almost done with the post.
So let’s do this!
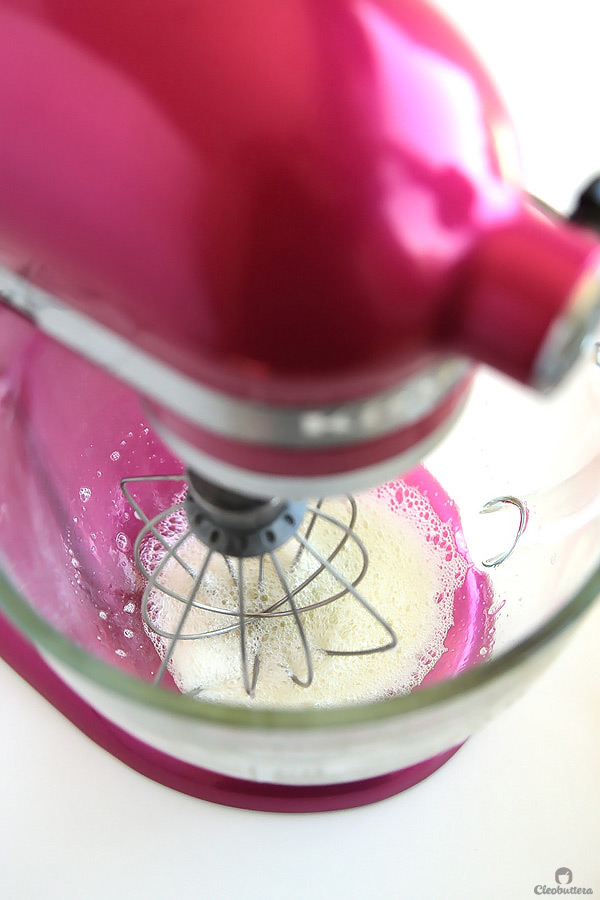
So first, you want to wipe the bowl and whisk attachment of your mixer with a paper towel dampened with a little lemon juice or vinegar to eliminate any traces of grease. Then pour in the egg whites along with a pinch of salt and forget about them for a second. Also take 2 tablespoons of the sugar and put them in a tiny bowl and keep near the mixer; we’re gonna need them later alligator.
Now in a small saucepan, combine the remaining sugar with the water and set over high heat. Do not stir, do not collect 20, do not pass Go. Cover the saucepan with its lid and allow the mixture to come to a boil, swirling the saucepan a few times to combine. (Covering the saucepan will cause condensation that will help wash away any sugar crystals that may have stuck to the sides).

Once the sugar mixture has reached a boil, remove the lid and attach or hold a candy/food thermometer to the side of the saucepan.
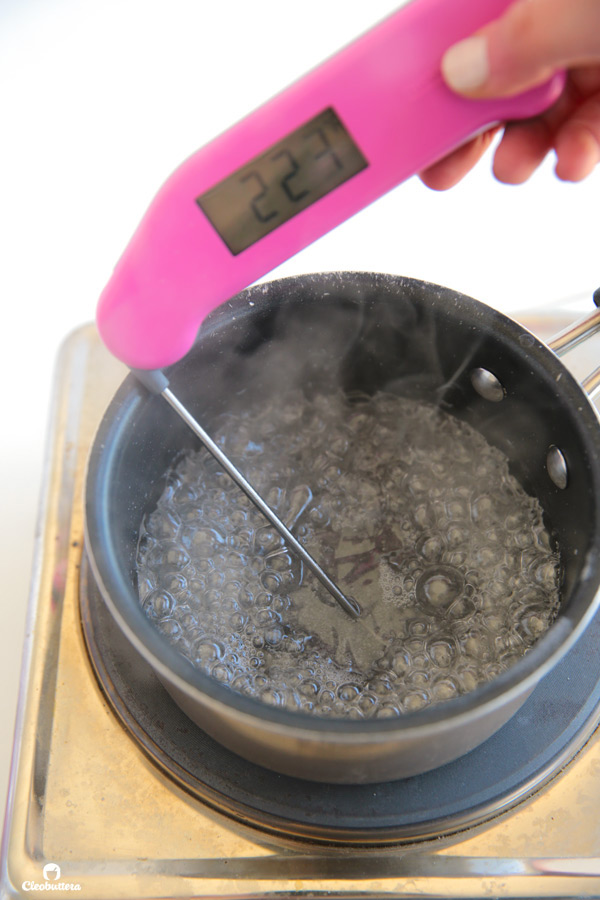
Cook until the sugar mixture reaches 230F/110C.

Once the syrup reaches about 230F/ 110C, immediately begin to whip the eggs whites on high speed until foamy, then gradually add in the reserved 2 tablespoons of sugar.
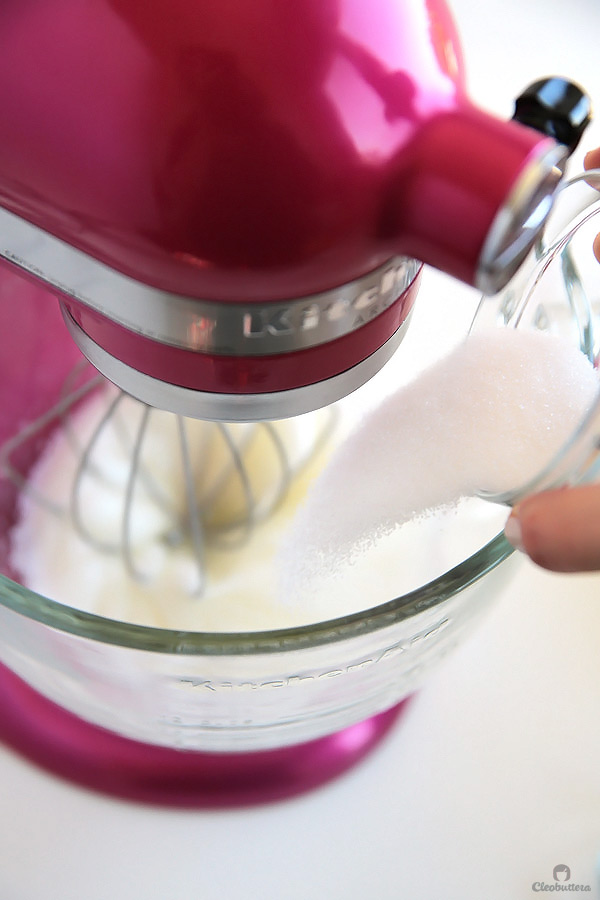
Continue to whip until stiff, but not dry peaks form, about 30 more seconds.
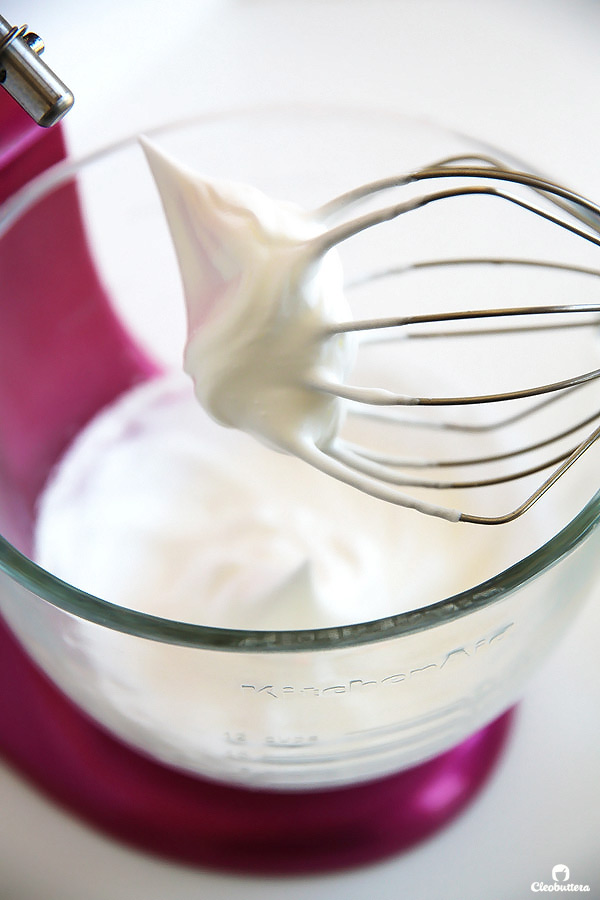
Meanwhile, continue to cook the syrup until it reaches between 240F/ 115C and 245F/118C. Typically (and ideally), the syrup will reach this temperature by the time the whites are whipped.

Once the syrup reaches between 240F/ 115C and 245F/118C, remove it from heat immediately and with the mixer still running on high speed, pour the hot syrup into the egg whites in a thin, steady stream. Try to avoid getting the syrup on the sides of the bowl.
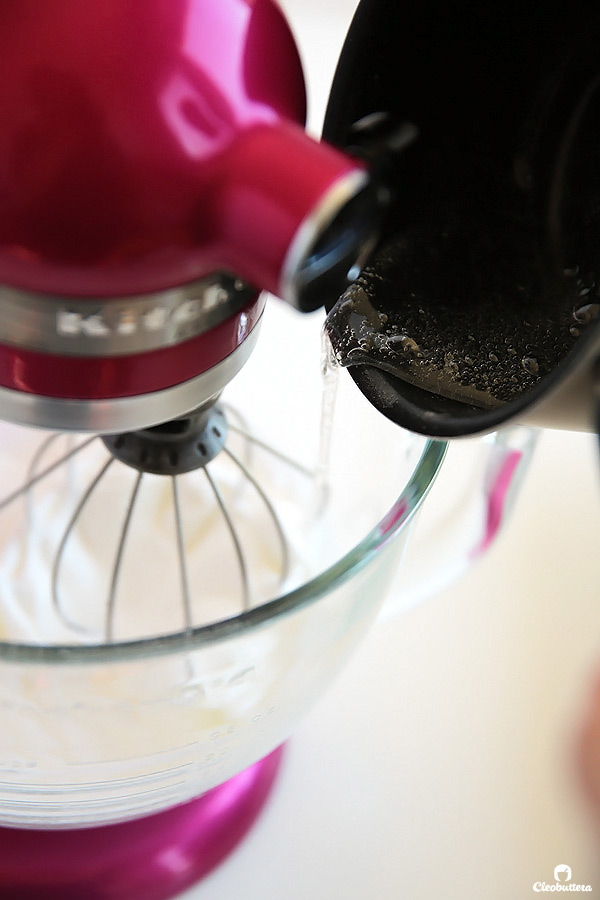
Beat until the bottom of the bowl has cooled to room temperature.
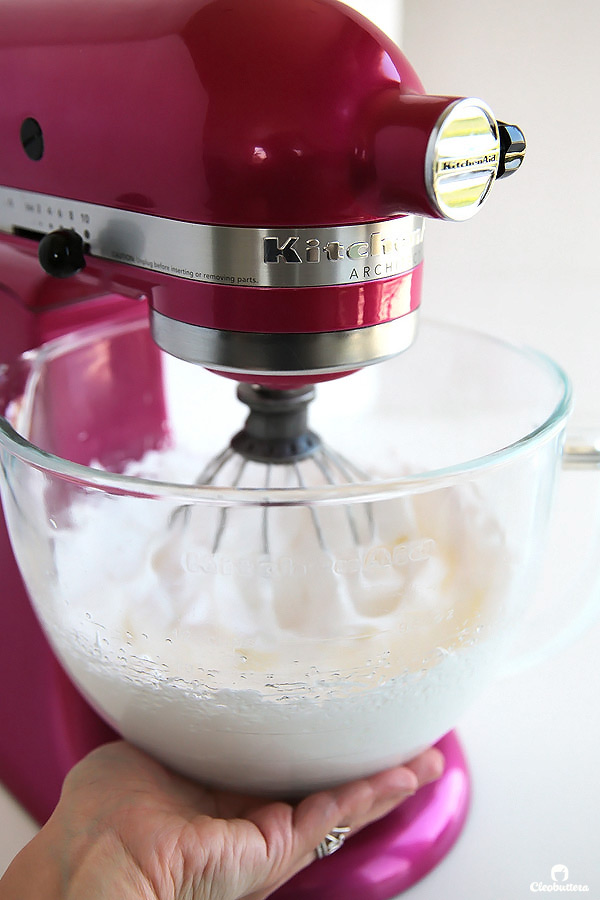
The egg white mixture will triple in volume, turn super white and glossy and holds stiff peaks. This is now basically marshmallow fluff or meringue frosting. It’s SO good and you could stop there and slather it over Tres Leches Cake and call it a day, but you’re here for the chocolate cloud aren’t you?
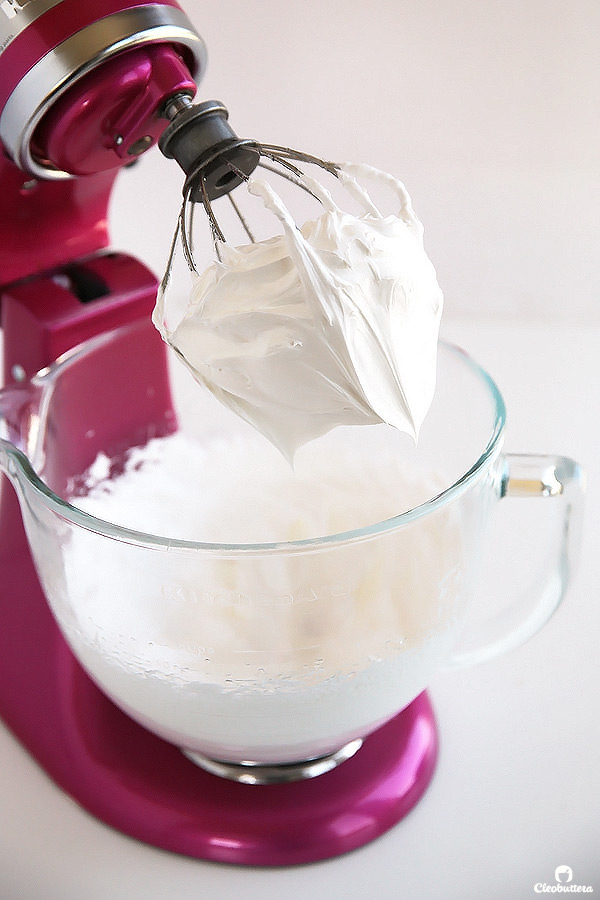
It is very important to make sure that the meringue is at room temperature and not warm one bit at this point. Then with the mixer running on high speed, add the butter one piece at a time. Remember, the butter should be slightly cool and not too soft.
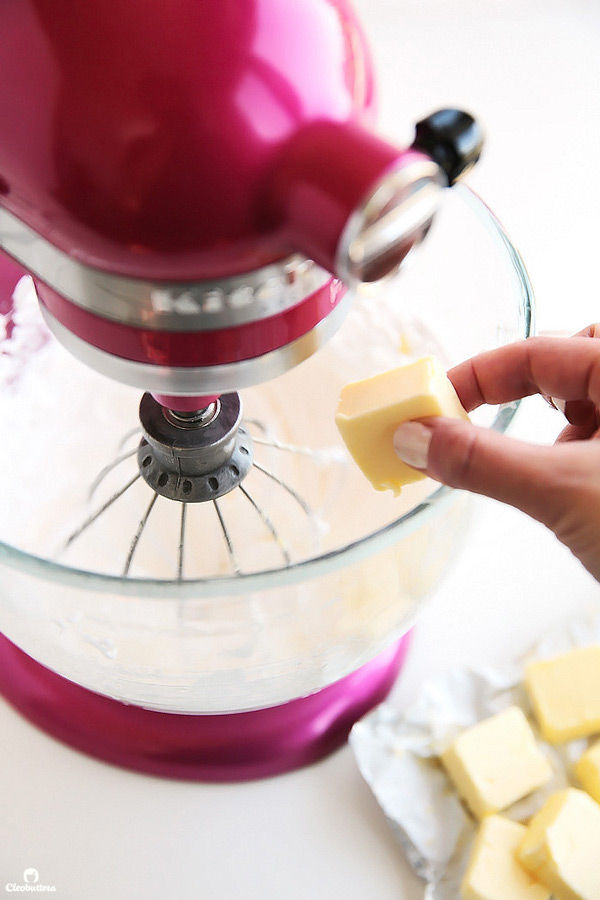
Whip well between each butter addition.
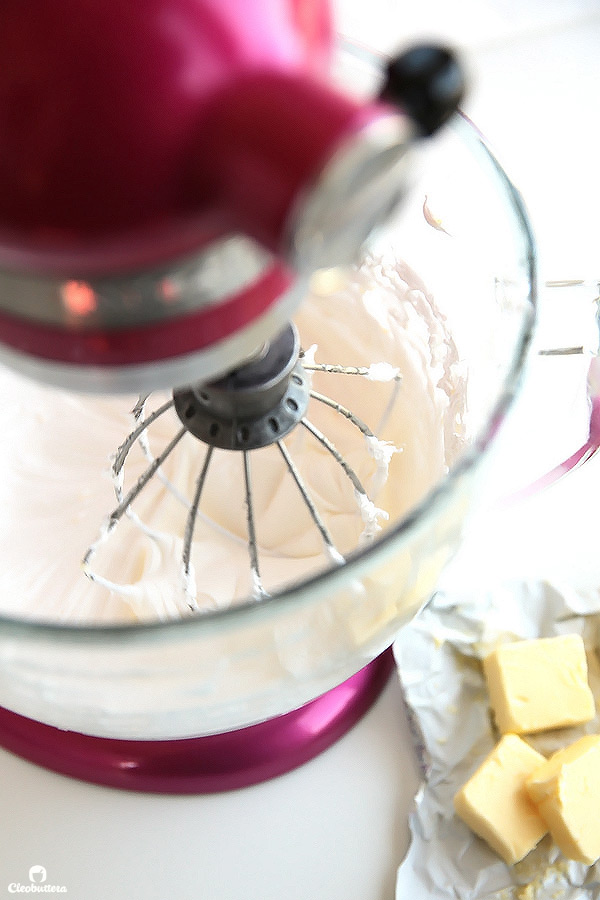
And VOILA! A beautiful, smooth buttercream is now ready to be used. Just kidding?
The buttercream will look like a total flop. It will deflate, curdle and lot like a depressing soupy mess. You might shed a tear and throw a little curse, probably at me. Worry not my friend! This is where FAITH comes to play. Just keep whipping! It will come together in no time I promise. Or maybe up to 5 minutes or so.
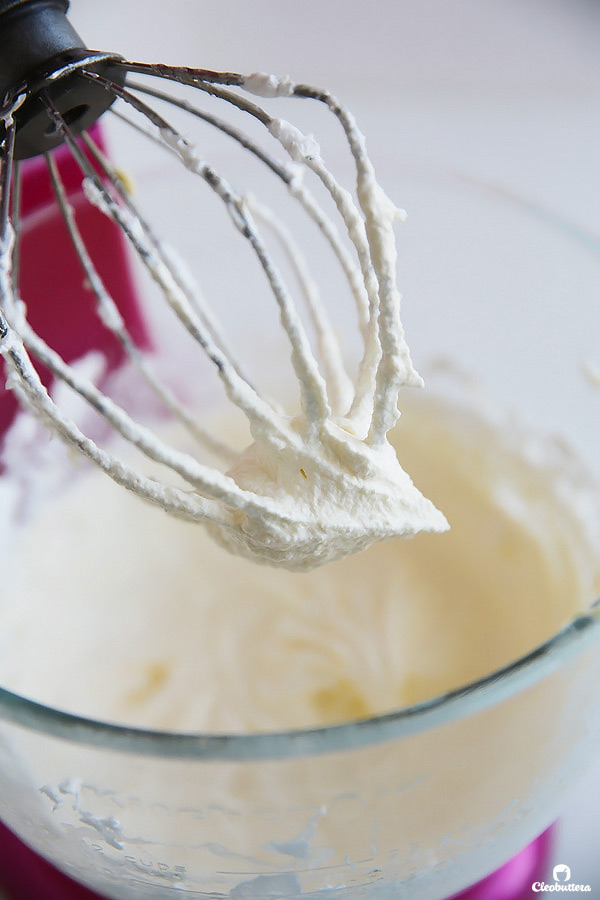
See…getting there.
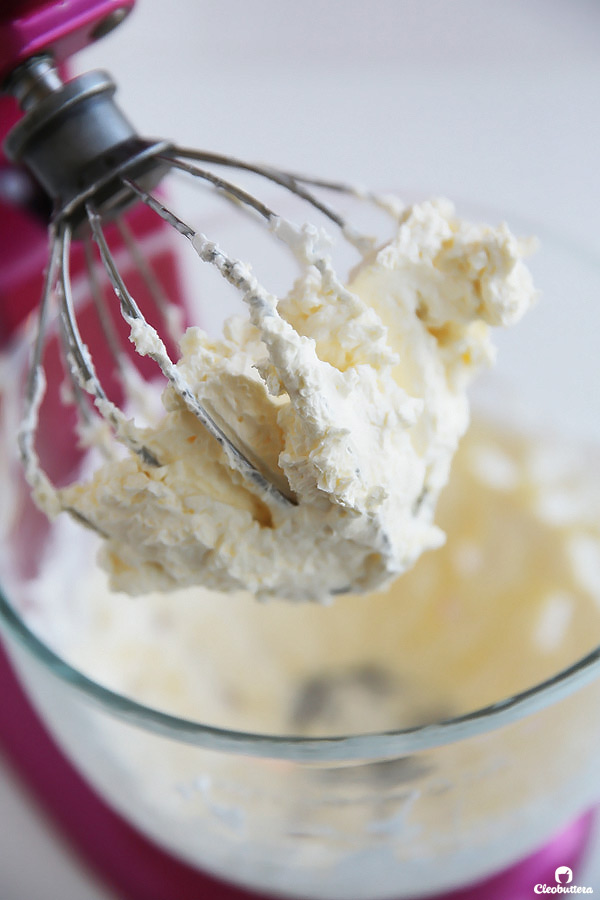
And there we are! The buttercream is now thick and fluffy.
If that doesn’t happen, then chances are that either the meringue was warm or the butter was too soft when you added it. It’s not the end of the world! Just place the bowl in the refrigerator for about 10 minutes (do not get it too cold), then rewhip.

Add in the vanilla and continue whipping for another 3 minutes.
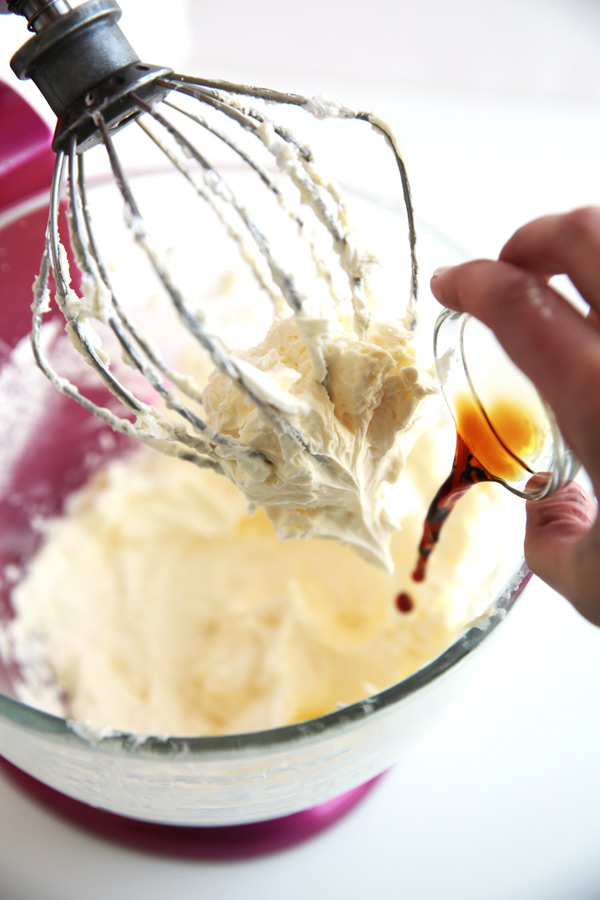
Congratulations! Now you have a fluffy Vanilla Italian meringue buttercream. You could use that as is, if you like, although I’d add a vanilla bean in there if we’re going all vanilla. But for now, let’s turn it into a chocolate buttercream cloud.
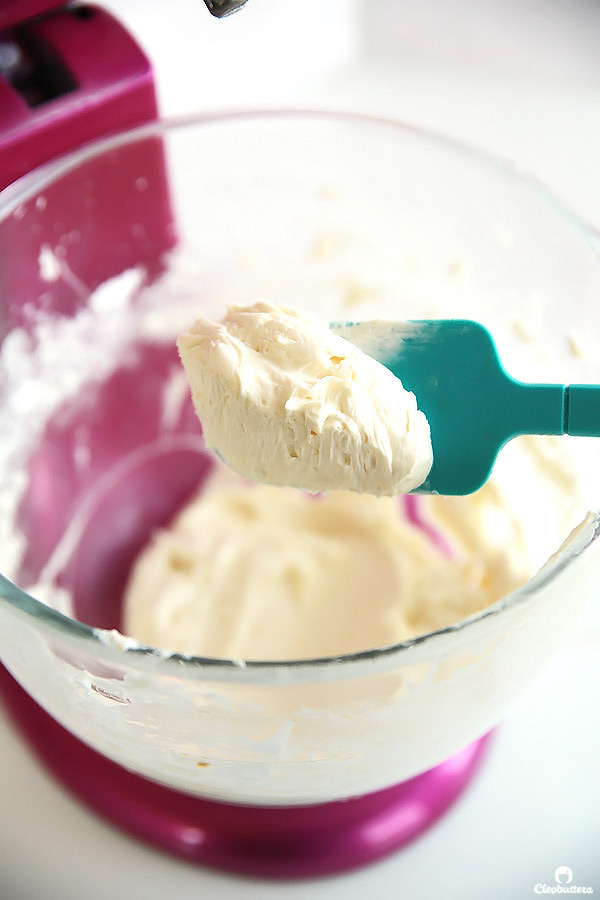
Finally, you’re gonna add in your melted and cooled chocolate, then give it few folds with your rubber spatula.
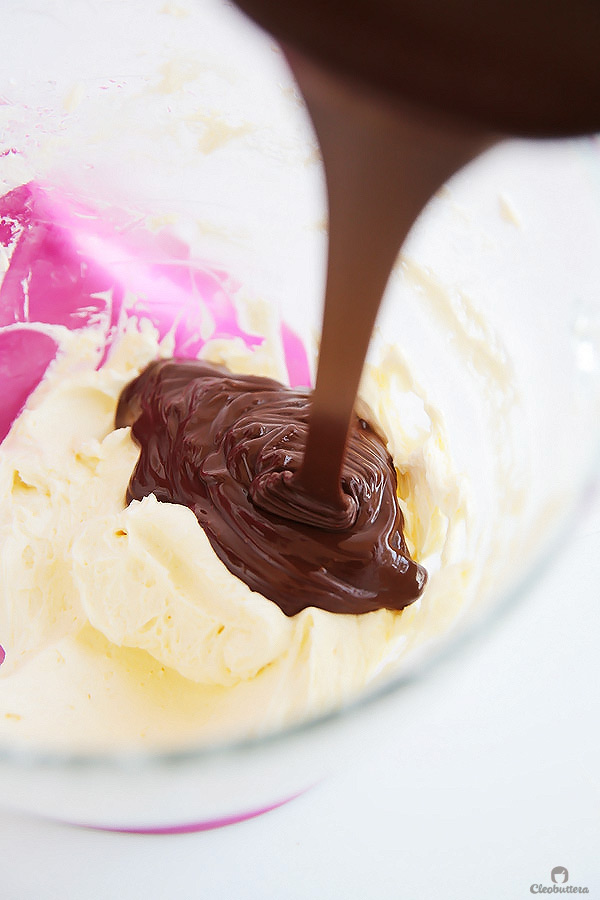
Continue to whip it some more until smooth and uniform in color.
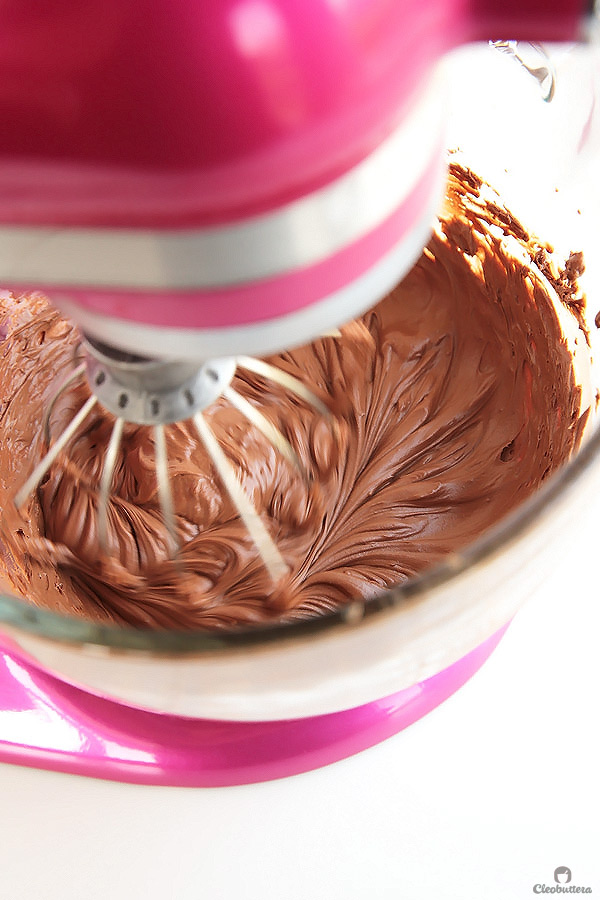
Mmmmmmmm…heaven I tell ya!
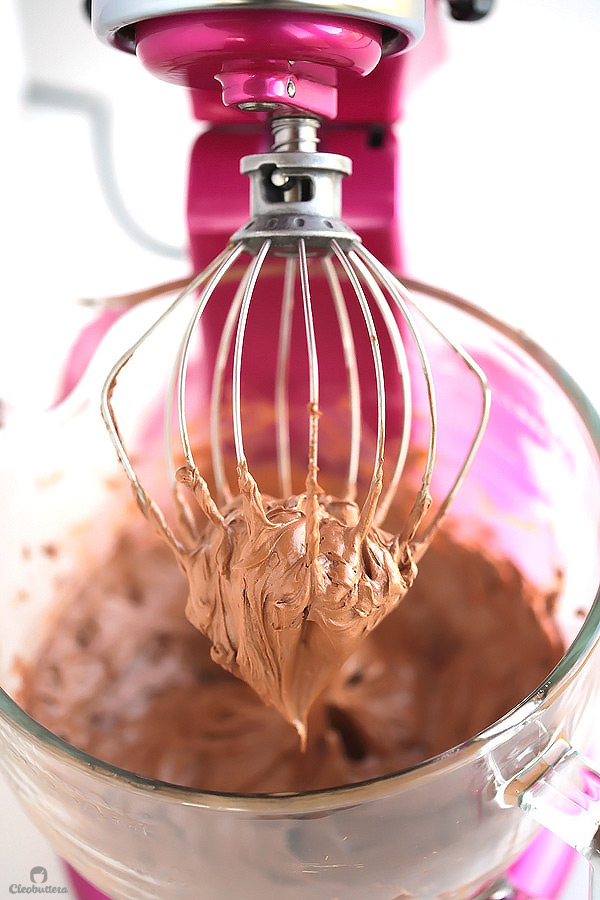
Creamy, whipped, billowy heaven.
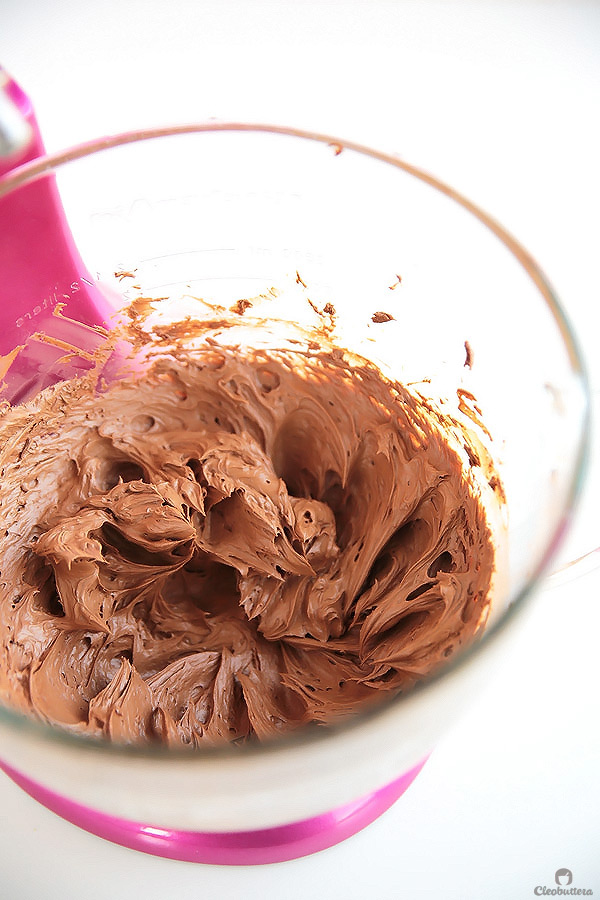
Let’s take a moment to appreciate all the air pockets whipped into the buttercream. That’s fluffiness baby!
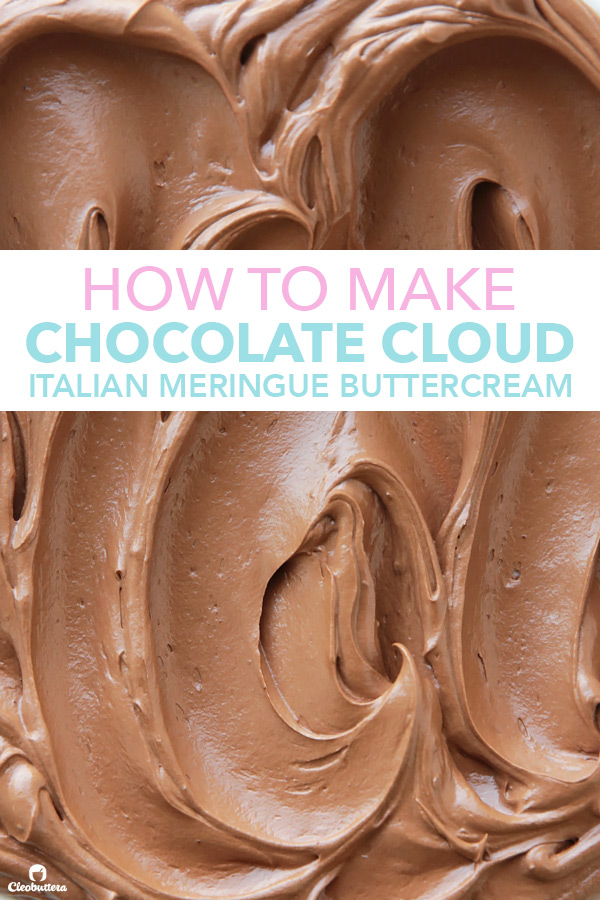
It’s creamy, soft yet stable enough to be piped, and tastes like a cross between chocolate mousse, whipped ganache and a less sweet American frosting without the sugar grit. The best of all worlds really.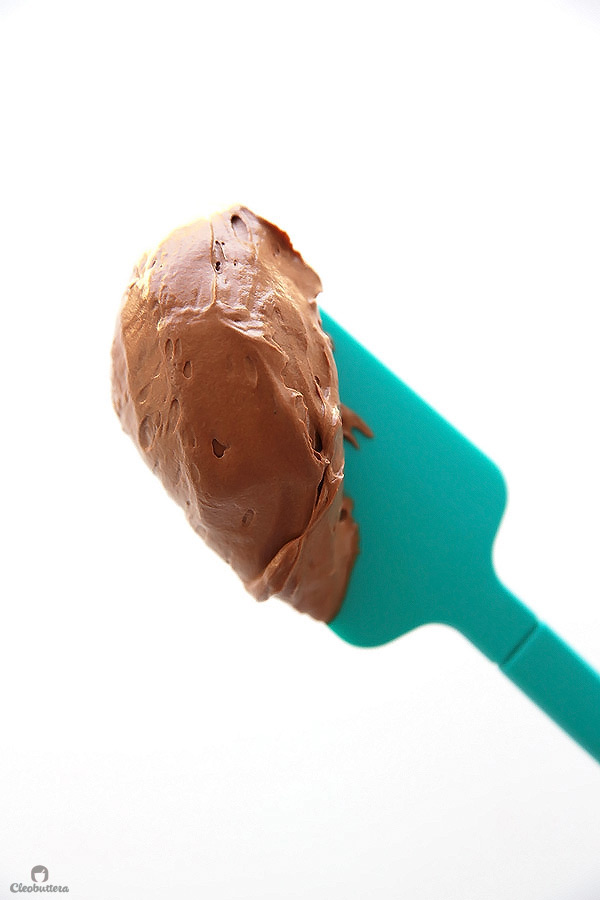
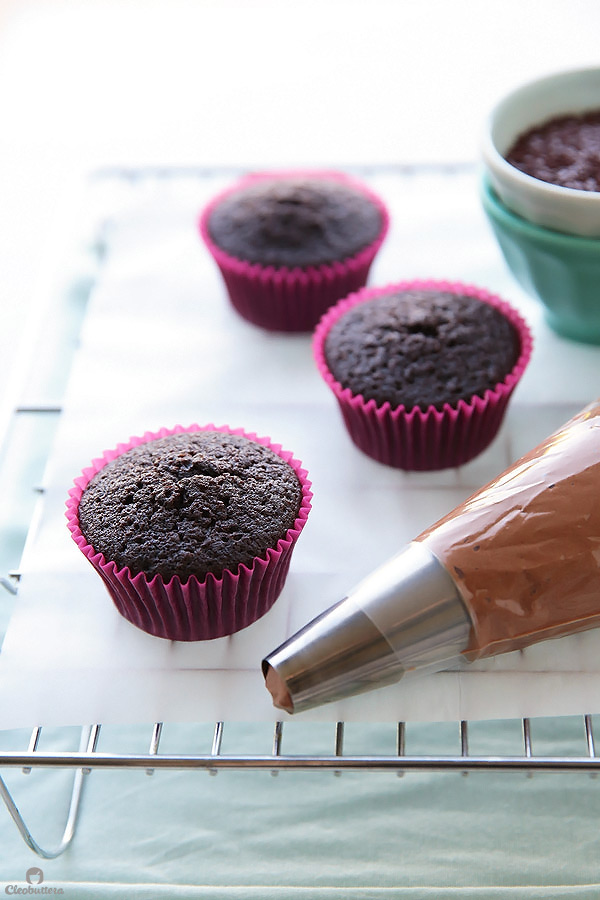
And now…I can finally say that you’re ready to frost.
Here’s a quick video of exactly how I pipe the buttercream on my Instagram!
Be sure to check the cupcake part recipe by clicking here. Trust me, you don’t want to miss this one.
How to Make Chocolate Cloud Italian Meringue Buttercream

Fluffy, mousse-like, light-as-air Chocolate Italian Meringue Buttercream, that feels like biting into a chocolate cloud. The perfect crown to these Chocolate Cloud Cupcakes.
Ingredients
- 4oz/ 114g good quality dark chocolate (preferably 60% to 70% cocoa), chopped or callets/discs (*see note)
- 1/2 cup (3 1/2oz/ 100g) granulated sugar, divided
- 1/4 cup (59ml) water
- 2 large (1/4 cup/ 60g) egg whites, at room temperature
- pinch of salt
- 1/2 cup (4oz/ 114g) butter (cut into tablespoon pieces), at cool room temperature (not too soft)
- 1 teaspoon vanilla extract
Instructions
- Place the chocolate in a medium, microwave-safe bowl. Heat the chocolate in the microwave, stirring with a silicone spatula every 15 seconds, until almost completely melted. Remove the chocolate from the microwave and continue stirring until fully melted. Allow it to cool until it is no longer warm to the touch but is still fluid. Meanwhile, make the buttercream base.
- Wipe the bowl and whisk attachment of an electric mixer with a paper towel dampened with a little lemon juice or vinegar to eliminate any traces of grease. Put the egg whites and a pinch of salt in the bowl, then set aside. Place 2 tablespoons of the sugar in a tiny bowl and keep near the bowl of egg whites.
- Place the remaining sugar and water in a small saucepan and set over high heat. Do not stir. Cover the saucepan with its lid and allow to come to a boil, swirling the saucepan a few times to combine. (Covering the saucepan will cause condensation that will help wash away any sugar crystals that may have stuck to the sides). Once the sugar mixture has reached a boil, remove the lid and attach or hold a candy/food thermometer to the side of the saucepan and cook until the sugar mixture reaches 230F/110C.
- Once the syrup reaches about 230F/ 110C, immediately begin to whip the eggs whites on high speed until foamy. Gradually add in the reserved 2 tablespoons of sugar, and continue to whip until stiff, but not dry peaks form, about 30 more seconds.
- Meanwhile, continue to cook the syrup until it reaches between 240F/ 115C and 245F/118C. Typically (and ideally), the syrup will reach this temperature by the time the whites are whipped.
- Once the syrup reaches between 240F/ 115C and 245F/118C, remove it from heat immediately and with the mixer still running on high speed, pour the hot syrup into the egg whites in a thin, steady stream. Try to avoid getting the syrup on the sides of the bowl.
- Beat until the egg white mixture triples in volume, turns super white and glossy, hold stiff peaks and the bottom of the bowl has cooled. This is now basically marshmallow fluff or meringue frosting. It is very important to make sure that the meringue is at room temperature and not warm one bit at this point.
- With the mixer running on high speed, add the butter one piece at a time. The buttercream will now deflate, curdle and lot like a disastrous soupy mess. Don't worry; its supposed to happen. Just keep the faith and continue whipping until the buttercream comes together and is thick and fluffy. It may take up to 5 minutes to reach this point. If that doesn't happen, then chances are that either the meringue was warm or the butter was too soft. It's not the end of the world! Just place the bowl in the refrigerator for about 10 minutes (do not get too cold), then rewhip. Add in the vanilla and continue whipping for another 3 minutes. Congratulations! Now you have vanilla Italian meringue buttercream. Now let's turn it into a chocolate buttercream cloud.
- Make sure that the melted, cooled chocolate is completely fluid without any solid pieces or you'll end up with chocolate pieces throughout your frosting. Likewise, make sure that its not warm, or it will melt the frosting. Pour the melted chocolate over the buttercream and fold it in with a rubber spatula. Return the bowl to the mixer and beat until smooth and uniform in color; 1 to 2 minutes. Woohoooooo! Your chocolate cloud buttercream is now ready to use!
- The buttercream will keep covered at room temperature for 1 day, refrigerated in an airtight container for up to 1 week, or in the freezer for up to 3 months. Bring the buttercream to room temperature before using. Rewhip to restore the spreadable consistency, but, to avoid curdling, not until the buttercream has reached room temperature.
- Use as desired or frost on top of these Chocolate Cloud Cupcakes.
Recipe Notes
- Bittersweet chocolate around 60% to 70% cocoa is preferable for this recipe. Due to its high percentage of cocoa solids, a little goes a long way, so it will produce a frosting with a more intense chocolate flavor. Semisweet chocolate around 52% cocoa may be substituted, but the frosting will be slightly less chocolatey. If using semisweet chocolate, you may want to consider increasing the chocolate to 6oz/ 170g to achieve a stronger chocolate flavor, but note that frosting will firm up slightly as it sits and will be less cloud-like; delicious nonetheless.
Measurements Note: All recipes of this site have been developed using weight measurements. Although US volume measurements have been included for your convenience, it is highly encouraged that you weigh your ingredients using a kitchen scale to get the best possible results. Due to the sensitive nature of baking, kitchen scales are proven to yield more accurate and consistent results than measuring cups. Enjoy!
This post may contain affiliate links.
All images and content are owned by Cleobuttera® and are copyright protected. Please do not use my images without prior permission. If you would like to republish a recipe, please rewrite it in your own words and link back to the recipe page on my site. Original recipes and creations of this site are intended for personal and home use. Commercial replication or media consumption are only allowed with a written consent and agreement with Cleobuttera owners. Otherwise it is considered a violation of intellectual property. Thank you for respecting and appreciating the amount of time and effort that goes into creating free, unique recipes that make people happy.