The Perfect Caramel Cake (with sea salt and optional salted caramel popcorn)
This Southern-style caramel cake is simply dreamy. The best yellow cake you’ve ever had, filled and covered with the creamiest, not-too-sweet caramel icing, sprinkled with sea salt and topped with optional salted caramel popcorn for a surprise crunch!
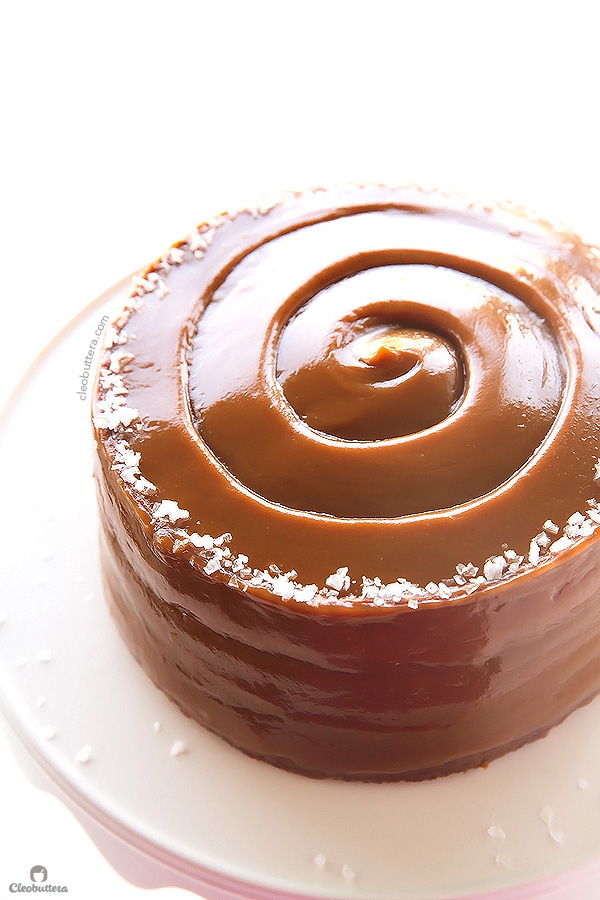
*Please note that some of the cake images of this post look very different from one another. This is because I baked and photographed the cake 3 different times on 3 different occasions. All are made from the same exact recipe, but just different presentations. The first time, I topped the cake with caramel popcorn (refer to 2nd image), but then I felt bad that the glistening surface of the cake was hidden, wasn’t very satisfied with the cake sides and I also wanted to show you the option of omitting the caramel popcorn if you prefer, so its more like a classic caramel cake. The second time around (image below) I played around with making a swirl and doing a better job covering the sides. While very pretty, I must confess that it was very challenging and frustrating. This is because its really hard to try and manipulate caramel that wants to set and it also risks separating (I don’t recommend going through the same ordeal). For that reason, I made another photoshoot with caramel that has been simply poured on and have not been played around with (refer to 3rd and 4th image), which in my opinion is the way to go. So there you have it…3 looks; the choice is yours:)
Remember a bajillion days ago when I posted my last recipe, the No-Bake Salted Caramel Popcorn?
Yeah? Well this cake post was supposed to be the sequel. And the “smart” plan was to post it a few days after it, because they revolve around the same idea and that should’ve made a ton of sense!
But as you can see, I’m an “awesome” planner 🙁
I baked the cake (3 times!!!), shot the photos (3 times!!!), and took all the material with me to my summer vacation destination, thinking I’m super organized, with a strong determination that I will edit them and finish off the post for you shortly.
Pffff…who am I kidding? Work on vacation? Yeah right!
Then came back-to-school week (oh how do I love theeee) which got me quite occupied…in the best of ways, I must admit.
But! I had the best of intentions, so I know you’ll find it in your heart to forgive me for keeping this dreamy cake from you for that long.
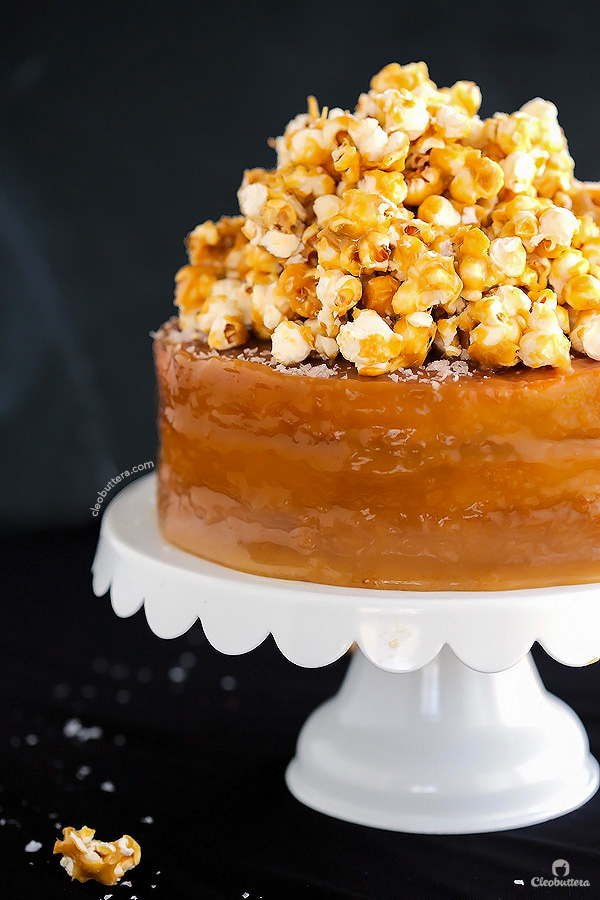
See that ol’ salted caramel popcorn from the last post piled on top? Makes sense now? Can you see where I was going?
Thank you!
Ladies and gentlemen, we have a SEQUEL!
Seriously guys, this caramel cake is a triumph!
Do you know how long I’ve been searching for the perfect Southern-style caramel cake? I lost track, but its A LOT!
But this one has finally put an end to my search. No more caramel cake recipe testing for me because this one is PER-FECT!
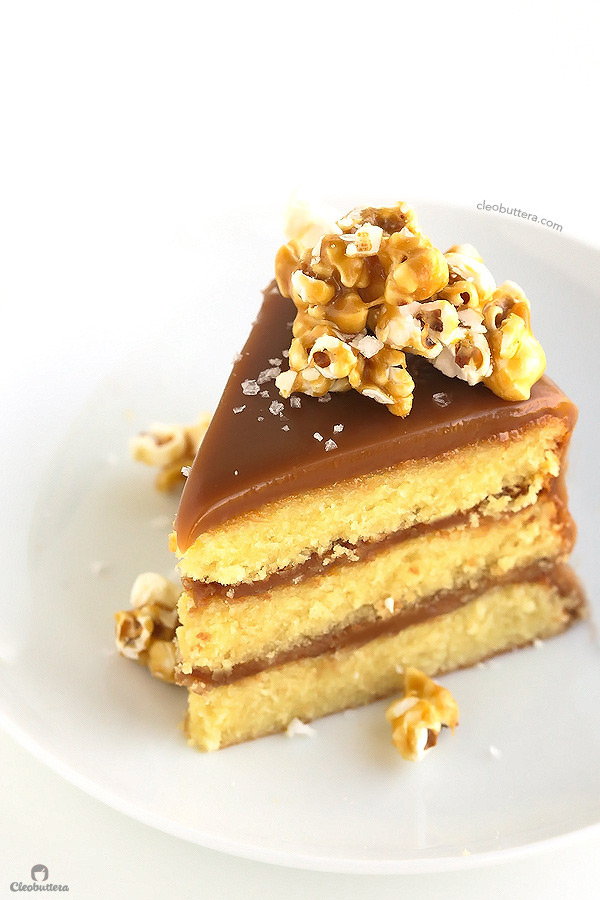
Three perfectly moist and tender yellow cake layers filled and covered with a not-too-sweet caramel glaze, that it soft enough to the bite, yet sturdy enough not to roll off the cake. A little sprinkling of sea salt, tickles the mouth, while a topping of salted caramel popcorn adds a pleasant textural contrast. I’m in love.
The perfect caramel cake has to start with perfect yellow cake layers, which is not easy to come by.
The yellow cake layers used here are melt in your mouth mmmmmmmmmoist,super tender with a very fine crumb. To the naked eye, it might appear dense, but once it touches the tongue, it’s OMG so FLUFFY! It’s THE BEST yellow cake I’ve ever made or had and I’ve made A LOT! You name the recipe…I guarantee you I’ve tried it.
I was kinda on this foodie mission to find the best yellow cake recipe, so I was crazy with experimentation. For years! Until I met this one on Mel’s blog. She developed it after having test it over 16 times so we could enjoy the fruit of her labor.
Mel…if you’re by any chance reading this…BIG high-five and thank you! Really really.
To get the ins and outs of this yellow cake, I urge to hop to her blog, to read all about the details. Very interesting.
Now you can’t have a perfect caramel cake without a perfect caramel icing. Right?
It must taste unmistakingly of caramel…obviously, but as importantly it must not be not be as liquid as a caramel sauce. The icing should be able to fill the cake layers without causing them to slide around and should adhere to the outside of cake as soon as it sets. The glaze should also be soft enough to bite, kinda like chocolate ganache, without sticking to the teeth.
A lot of the recipes that I’ve tried either call for adding a ton of powdered sugar to a caramel or toffee sauce to thicken it up. That actually mutes the caramel flavor and just makes your teeth want to fall off. I might have a sweet tooth but I’m not a fan of overly sweet frostings by any means.
Other recipes that are authentic to the Southern version caramel glaze are perfectly sweet, but require 1 1/2 to 2 hours of cooking over the stovetop with occasional stirring. Yes! You heard that correctly…1 1/2 to 2 hours!!!! I must admit that in the past, I was desperate enough for a good caramel icing that I just had to try it. To be completely honest, it did not work out at all for me. It could be that I’m not skilled enough, but I’m not planning to dedicate another 2 hours of my life to trying to get it right any time soon.
And why would I, when this version takes only 15 minutes MAX on the stove and tastes heavenly?
Creamy, thick, shiny, soft and perfectly sweet.
I’ve adapted it from Lottie + Doof’s blog only cooking it slightly longer to get it to a thicker consistency.
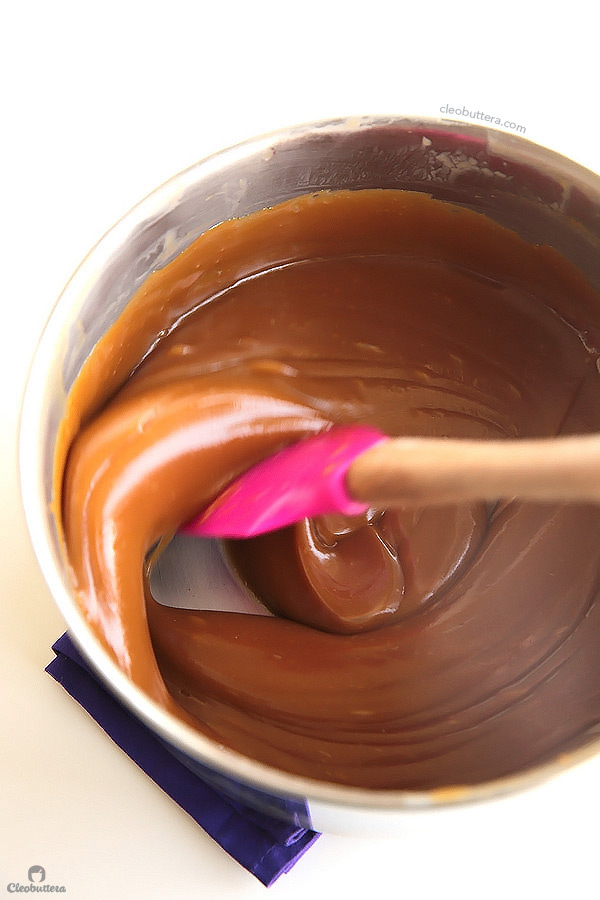
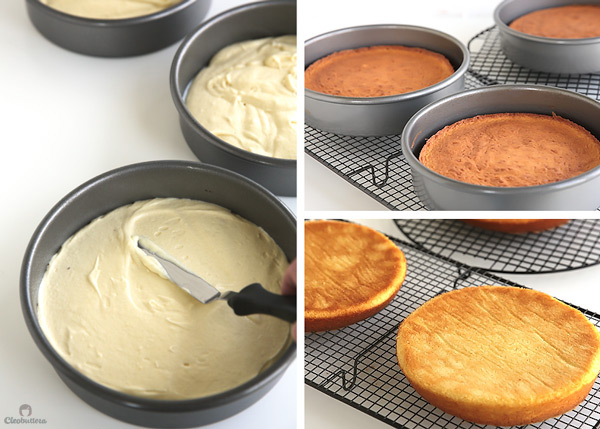
To make the caramel cake, you’ll begin by whipping up the Best Yellow Cake recipe, divide it among 3 (8 inch pans) and bake ’em up. You might notice a little shrinkage of the cake sides a few minutes after they come out oven, down worry, they’re still gonna taste and feel amazing. Flip them over a wire rack and allow them cool completely.
While the cake layers are in the last few minutes of cooling, start making the caramel icing.
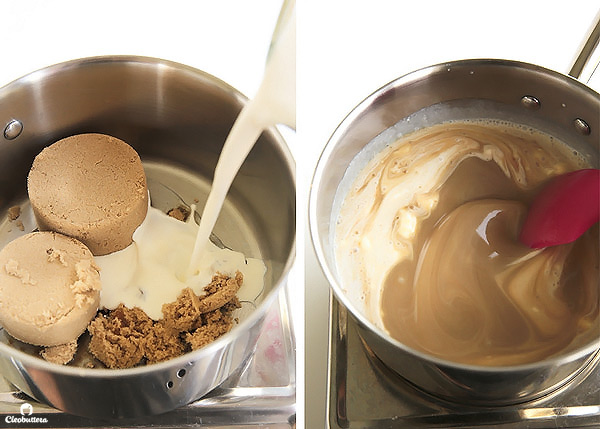
Light brown sugar, corn syrup, salt and heavy cream all go into a LARGE saucepan. Don’t skimp on the size of the saucepan or you might end up with the icing spilling everywhere.
Due to the large ratio of cream to sugar (hence the not too-sweet-icing), the mixture will look like a pale pot of beige soup at first.
Bring it to a boil over medium heat, stirring constantly until the mixture reduces down, thickens, turn into a dark amber caramel color and register from 230F to 234F on a thermometer (aka the soft ball stage). Now a food thermometer will make this icing a no-brainer to make. However, if you don’t have one (seriously consider buying one, if you cook and bake often) but don’t worry, I’ll still show you how to know when you’ve reached the right temperature.

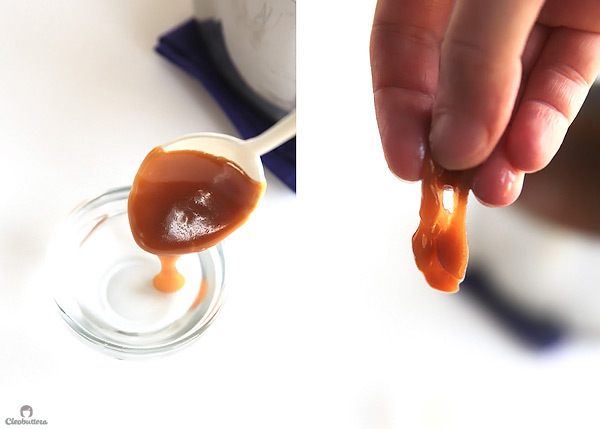
This is for my non-thermometer owning friends: As soon the icing starts showing signs that its ready, drop a teaspoonful of the icing in ice cold water. Allow it to cool for a few seconds, then feel it. The icing should easily form a ball while in the cold water, but flattens once removed. The caramel should be soft but it shouldn’t be fluid; kind of like a slightly molten piece of mozzarella cheese. See how I’m able to hold it, yet it stretches like the cheese on a hot pizza? That’s exactly want you want.
Once it has reached the right temperature, don’t stir it around again.
Let it cool off slightly; only about 5 minutes, give one stir to reincorporate (if necessary), then start pour over the layers. It is important that the icing remains very warm, so its still pourable, but not very hot that it spreads all over and creates a big mess.

Let it drip all over the sides, and my advise to you is to leave it alone and let it flow naturally over the cake. It’s ok if some areas on the sides aren’t covered. Naked side cakes are all the rage right now. Trying to play around with a caramel icing that wants to set will only cause you to lose your sanity.
I almost did.
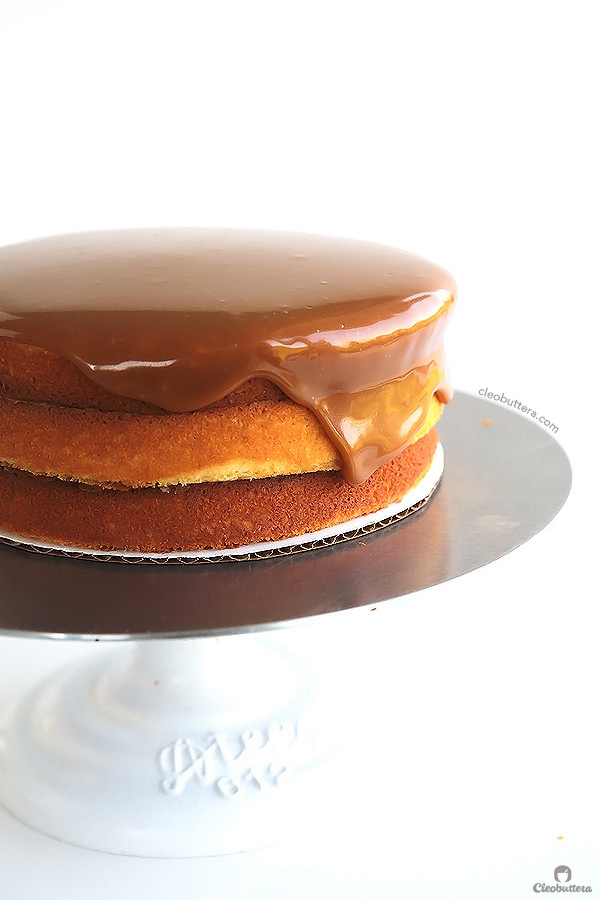
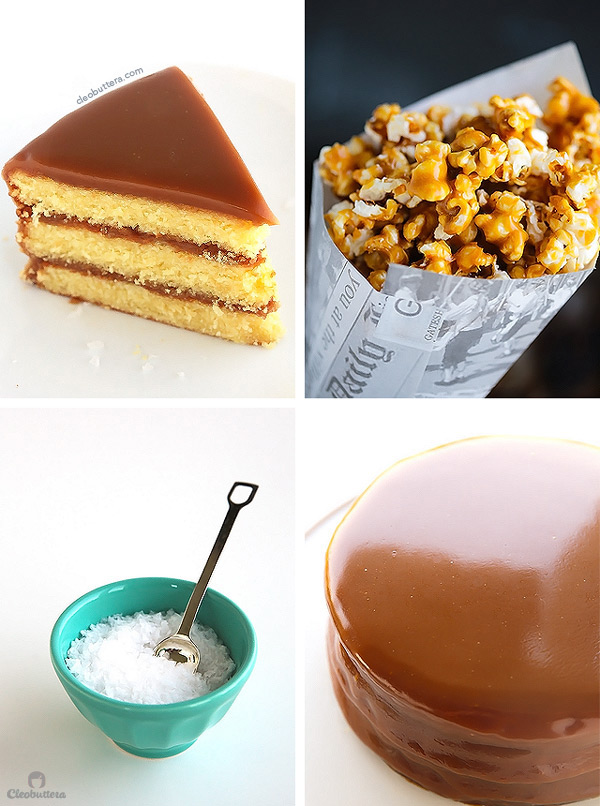
See? Pretty right? The sides are perfectly flawed and the top is like the surface of a piano.
Now who wants to ruin that?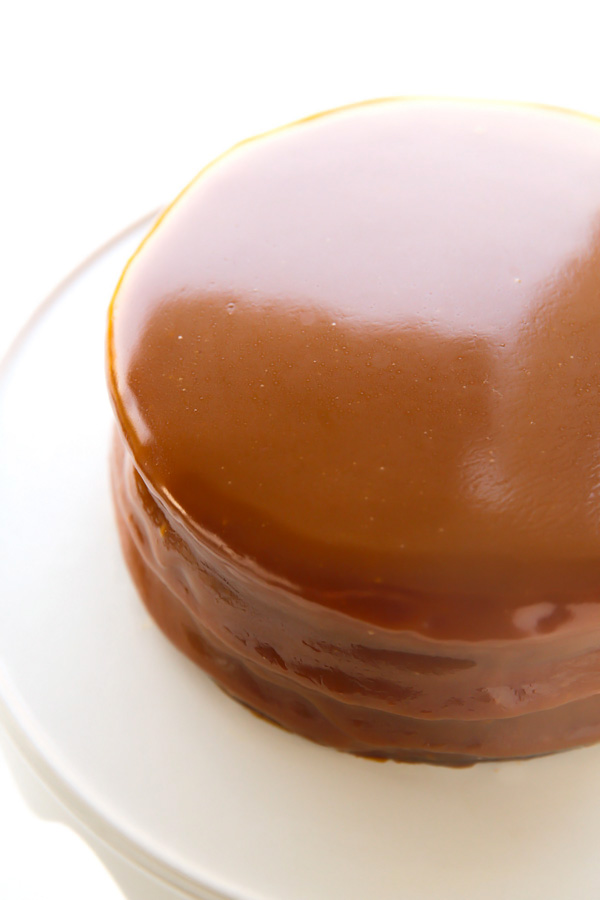
Apparently someone I know that shall remain nameless…
Swirl at your own risk…you’ve been waaaaaarned.

On the other hand, if you take my advice and leave things well alone, you’ll be rewarded with these perfectly clean cuts.
Sea salt or not. Caramel popcorn or not. This cake is downright delicious!
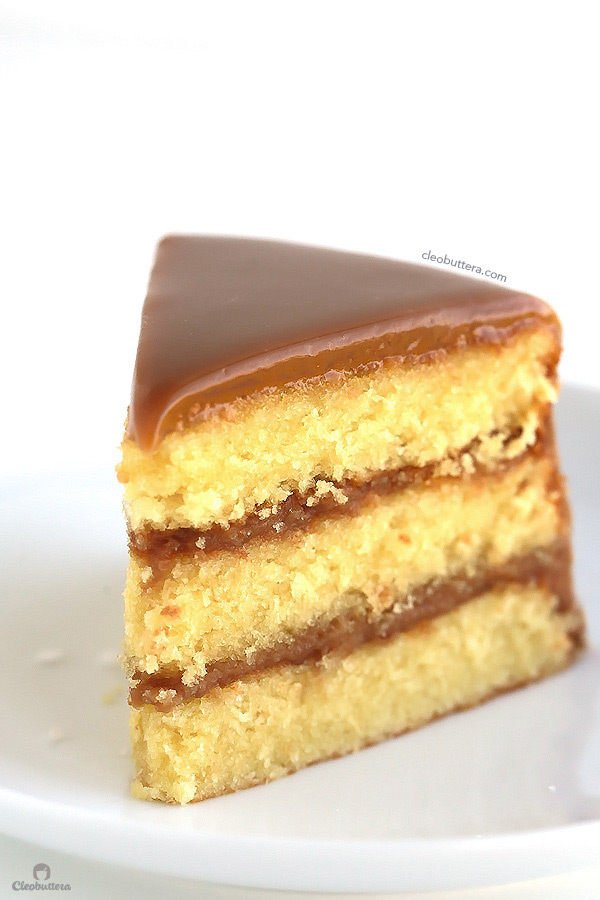
Heheheeee…just wanted to show you this wonky looking slice that spent the night in my sauna-like kitchen. August in Egypt is tough stuff you guys.
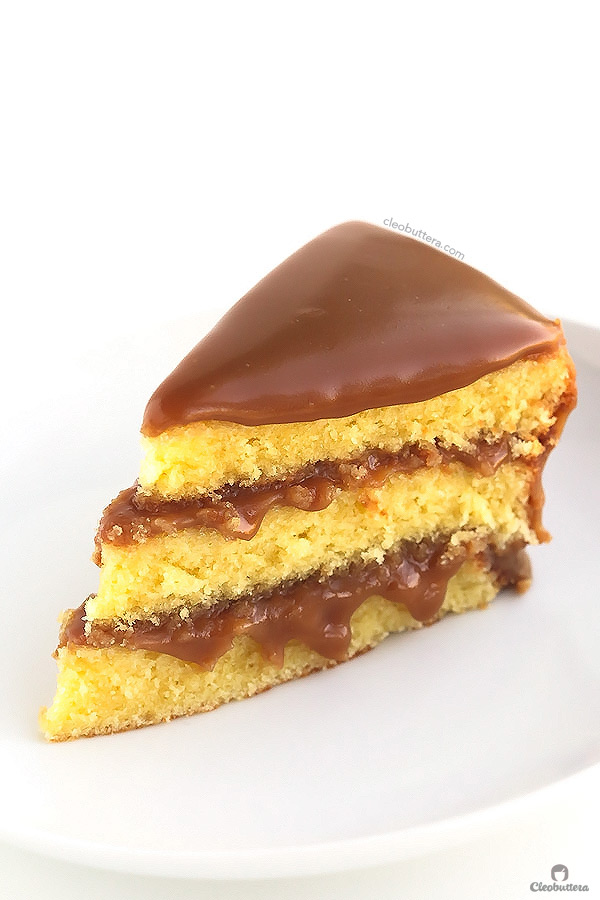
Well at least you now know that this it the worst case scenario.
A yummy looking disaster, if I do say so myself.
The Perfect Caramel Cake (with sea salt and optional salted caramel popcorn)

Using a kitchen scale for the yellow cake recipe is highly recommended, for the most accurate results. Please make sure that you only make the icing after the cakes have been baked and cooled. The icing needs to be very warm when poured on the cake and it doesn't reheat well if made in advance. Please be sure to read the 'NOTES' in the bottom.
Ingredients
For the Best Yellow Cake:
- 2¼ cups cake flour, lightly measured (9 oz, 255 g)* (see note for substitution)
- 1½ teaspoons baking powder
- ¼ teaspoon baking soda*
- ½ teaspoon salt
- ½ cup milk (1% or above),at room temperature
- ½ cup sour cream (light or regular), at room temperature
- 1 cup unsalted butter, (8oz, 250g) softened to room temperature
- 1¾ cups granulated sugar (13 oz, 368 g)
- 1½ tablespoons vanilla
- 3 large eggs, at room temperature
- 2 large egg yolks, at room temperature
For the Caramel Icing:
- 3 cups heavy whipping cream
- 1½ cups packed light brown sugar (10½ oz, 300g)
- 3 tablespoon light corn syrup
- ¼ teaspoon salt
- 2 teaspoons vanilla extract
For Garnish:
- Sea salt flakes or coarse salt (for sprinkling), optional
- Store-bought caramel popcorn or ½ recipe No-Bake Salted Caramel Popcorn, optional
Instructions
To make the yellow cake:
- Adjust the oven rack to middle position and preheat oven to 350F/180C.
- Prepare 3 (8 inch) cake pans by spraying the bottom with non-stick cooking spray, then line with parchment rounds. Spray the parchment and sides of the pans. (Alternatively, you could grease the pans and parchment with butter and dust with flour)
- In a medium bowl, sift together the flour, baking powder, baking soda and salt through a fine-mesh strainer, the whisk together to evenly combine; set aside. (Do not be tempted to skip the sifting step in order to achieve maximum lightness and fluffiness in the final cake).
- In a liquid measuring cup or small bowl, whisk together the sour cream and milk; set aside.
- In the bowl of an electric stand-mixer fitted with a paddle attachment (or using a handheld electric mixer and a large bowl), whip the butter on medium speed until pale in color and fluffy, 1 to 2 minutes).
- Add the granulated sugar and beat until lightened in both texture and color, 4 to 5 minutes.
- Add in the eggs and egg yolks, one at a time, beating well between each addition, scraping down the sides of the bowl as needed.. Add in the vanilla.
- On lowest speed, add in ⅓ of the flour mixture and blend until almost combined. Add in half of the milk/sour cream mixture and mix in until mostly combined. Gently mix in another ⅓ of the flour mixture, followed by the last half of the milk/sour cream mixture; beat until almost combined. End with the final ⅓ of the flour mixture and mix just until combined. (Use a rubber spatula to scrape the sides and bottom of the bowl as needed). Give the batter one good, final stir to make sure that everything is well incorporated.
- Divide the batter evenly among the prepared pans, smoothing the surface out with a spatula.
- Bake for 20 to 25 minutes until lightly golden around the edges, the center springs back to the touch and a toothpick inserted in the center comes out clean or with a few cooked moist crumbs attached. Do NOT over bake so the cake doesn't dry out. Resist the urge to open and close the oven to check on the cake mid baking as this can cause the center of the cake to fall and never recover.
- Let the cakes rest in the pans for about 10 minutes, then invert onto a wire rack, peel off parchment paper, and allow to cool completely before filling and icing.
- When the cakes have almost cooled, start making the caramel icing.
To make the Caramel Icing:
- In a large, heavy-bottomed saucepan, combine together the cream, brown sugar, corn syrup, and salt. (Be sure to use a saucepan a lot bigger than you think you'll need, because the mixture expands dramatically as it boils).
- Place the saucepan over a stovetop adjusted to medium heat. Bring the mixture to a boil, stirring constantly with a heat-proof spatula until the sugar has dissolved and everything is well incorporated. The mixture will look very pale and watery at first, so don't be alarmed.
- If the mixture is not boiling well over medium heat, increase to medium-high. Continue boiling the mixture, stirring constantly until the icing thickens and darkens into a dark amber caramel color, and registers 230 to 234°F (110C to) on a thermometer, about 12 to 14 minutes. This is known as the soft ball stage. Stir in the vanilla, if using. Stop stirring once the caramel has reached the right temperature. The less you handle the icing after its been cooked the better, otherwise it risks getting a greasy film over it.
- If you don't have a food thermometer, keep a cup with ice cold water nearby. As soon the icing starts showing signs that its ready, like looking thick and caramel-colored, drop a teaspoonful of the icing in the cold water. Allow it to cool for a few seconds, then feel it. The icing should easily form a ball while in the cold water, but flattens once removed. The caramel should be soft but it shouldn't be fluid; kind of like a slightly molten piece of mozzarella cheese. If this this is not the case, then let the mixture boil for a few more minutes, then test again.
- Allow the icing to cool slightly, about 5 minutes before using it to fill and glaze the cake. It is important that the icing remains very warm, so its still pourable, but not very hot that it spreads all over and creates a big mess.
To assemble the cake:
- Place one cake layer on the serving platter or cake stand, give the icing one final stir to reincorporate (if needed), then pour about ¾ cup of icing on top of it. You should just pour enough to cover the surface of the cake. Use an offset spatula to help spread the icing to the sides.
- Top with another cake layer and pour on another ¾ cup of icing, spreading it all over the surface.
- End with the last cake layer, then pour the remaining icing over the top of the cake, letting excess icing drip over the sides. My recommendation is to leave the icing to drip and set on it own WITHOUT touching it, leaving part of the sides naked and natural-looking, instead of trying to cover the sides up using a spatula. The surface will still be super smooth. I've found that moving the icing around with a spatula, can cause it to break and separate, creating a greasing film. If you attempt to completely cover the sides and swirl the top, as I've done in some of the pictures, you must be warned that it could be a very frustrating process, because the setting caramel is very hard to control.
- Sprinkle the surface of the cake (or just around the rim) with sea salt flakes. Top with salted caramel popcorn, if you like.
Recipe Notes
- If you don't have cake flour (which I never do), use 210 grams (2 cups) all-purpose flour and 45 grams (1/4 cup) cornstarch (cornflour) instead and sift them together. Then add the other dry ingredients and sift once more.
- According to the creator of the yellow cake recipe, Mel, several of her readers have commented "that while the cake tastes amazing, it is sinking in the middle or is baking flat." While I personally had no sinking problems with the cake, she recommends that if you are worried about sunken layers, increase the baking soda to ½ or ¾ teaspoon. I actually tried that and noticed no difference in the outcome, but its up to you.
- Timing is key for the success of this recipe. Do not be tempted to make the icing in advance because it doesn't reheat well. Start cooking the icing only after the cake layers have been baked and almost cooled completely.
The Best Yellow Cake adapted from Mel's Kitchen Cafe
Caramel Icing mostly adapted from Lottie + Doof
Measurements Note: All recipes of this site have been developed using weight measurements. Although US volume measurements have been included for your convenience, it is highly encouraged that you weigh your ingredients using a kitchen scale to get the best possible results. Due to the sensitive nature of baking, kitchen scales are proven to yield more accurate and consistent results than measuring cups. Enjoy!
This post may contain affiliate links.
All images and content are owned by Cleobuttera® and are copyright protected. Please do not use my images without prior permission. If you would like to republish a recipe, please rewrite it in your own words and link back to the recipe page on my site. Original recipes and creations of this site are intended for personal and home use. Commercial replication or media consumption are only allowed with a written consent and agreement with Cleobuttera owners. Otherwise it is considered a violation of intellectual property. Thank you for respecting and appreciating the amount of time and effort that goes into creating free, unique recipes that make people happy.