Crème Brûlée Mille Crêpe Cake
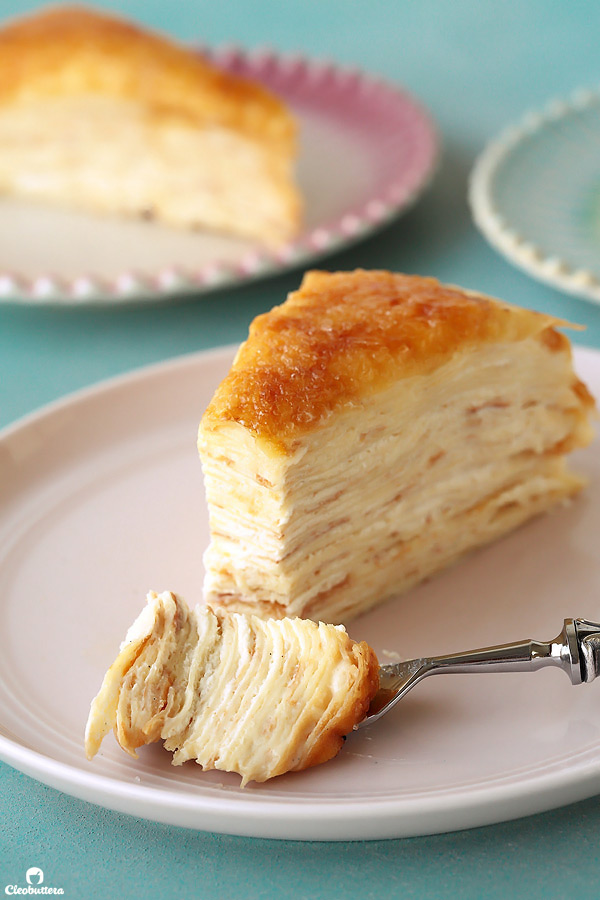
Twenty layers of delicate crêpes, smothered with a cloud-like vanilla bean whipped pastry cream and topped with a thin layer of crunchy, brûléed caramel.
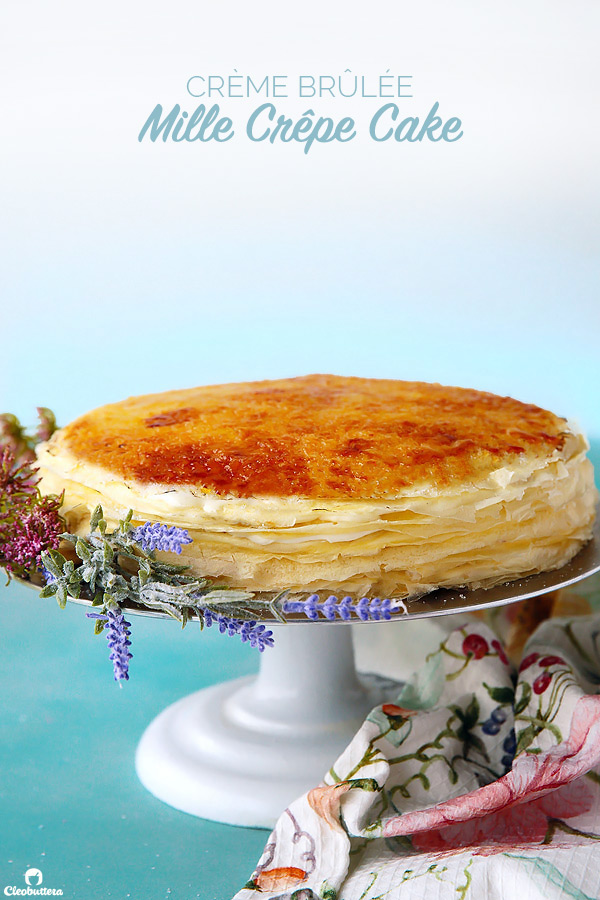
I think we could come to an agreement that a lot of times, food fusions are more about flaunting looks and boasting wow factor than they are about the taste.
I’m all for creativity in the kitchen, and fall for unique concoctions just like every other person. But if the concept compromises flavor, then thankyouverymuch I’d rather stick to the original classic.
Yet, every once in a far while, when a food innovation manages to perfectly conjoin both fusion and taste in foodie matrimony, its like…a literal party in the mouth!
Sushi Burrito, you know I love you, but today let’s take this cake as an example.
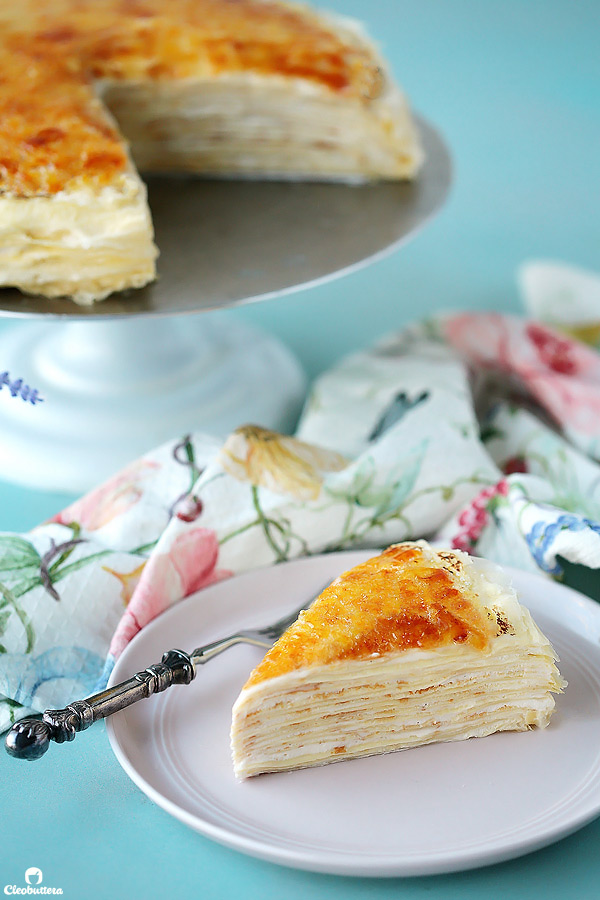
Two French classics merged into one heck of a delicious dessert.
Delicate crêpes and luxurious crème brûlée with its inevitable, shattering layer of caramelized surface, join forces to bring you a cake that literally melts in the mouth. It’s really hard to go wrong with a combo like that. This right here, is the definition of food fusion done right!
I first heard of the famed Mille Crêpe Cake through Martha Stewart when she featured New York City’s Lady M Cake Boutique on her show. Apparently, it’s the bakery’s signature cake, which has gained them worldwide popularity.
So when my husband and I got a chance to go on a trip to New York City almost 5 years ago, getting a taste of the hyped cake immediately jumped to the top of our must-try list.
To say that the experience was unforgettable would be an understatement. It is, to this day, my husband’s favorite dessert in the history of EVER! I personally loved it so much too, but couldn’t give it such a title because let’s be honest, I love too many things to pick a favorite.
* Here’s a photo of the very slice we had at Lady M. Note that we did not stop at this slice ?
What we loved most about the crêpe cake was how light and airy it is without being too sweet. You could easily inhale a couple of slices and it won’t weigh you down. I’m not sure if this is a good or a bad thing, but one thing we knew for certainty, was that replicating a homemade version is a must!
My first couple tries were good, but nothing close to the dreaminess we experienced at NYC. I almost threw the towel over it until I tried Rosanna Pansino’s version. AH.MAZING!
I did make a few minor changes to get it as close as possible to Lady M’s, first of which was brûléeing the top.
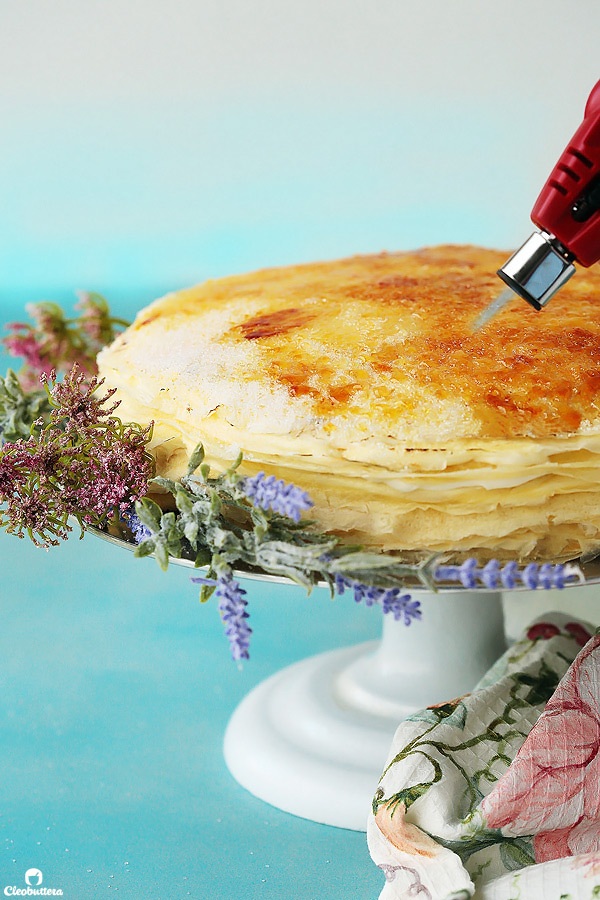
I also increased the filling amount quite a bit, because I found that I tend to run out of it after about the 15th crêpe layer. But then again, I might’ve been using a heavy hand between the layers. That, as well as sneaking spoonfuls in my mouth. It’s so good!
Aside from the fact that Lady M’s looks neater than mine, I’d say that the taste is pretty identical and I couldn’t be more happy with how it turned out. My crêpe cake-obsessed husband gave it his seal of approval and has crowned it his official birthday cake from here thereon.
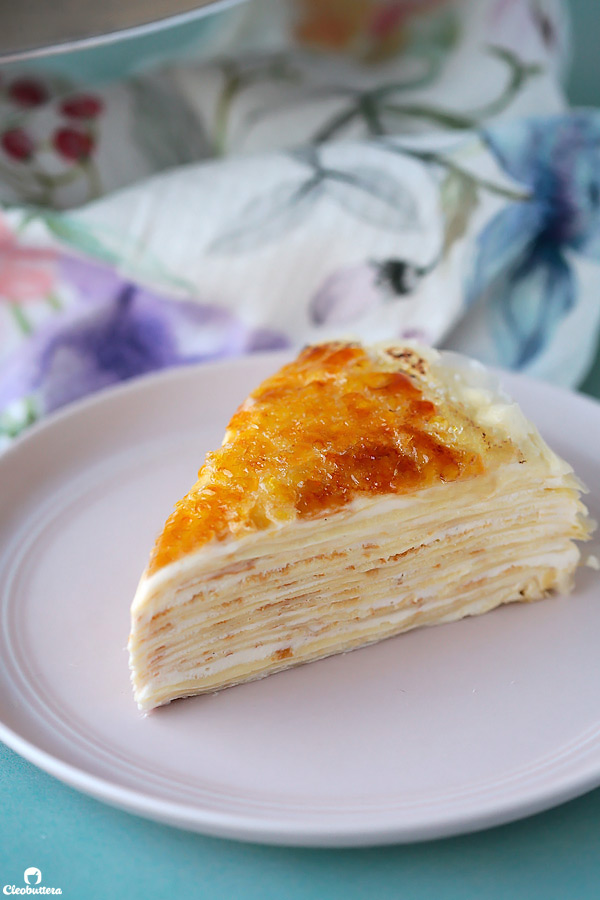
Let’s take a closer look at what makes this cake the taste-bud-pleasing confection that it is.
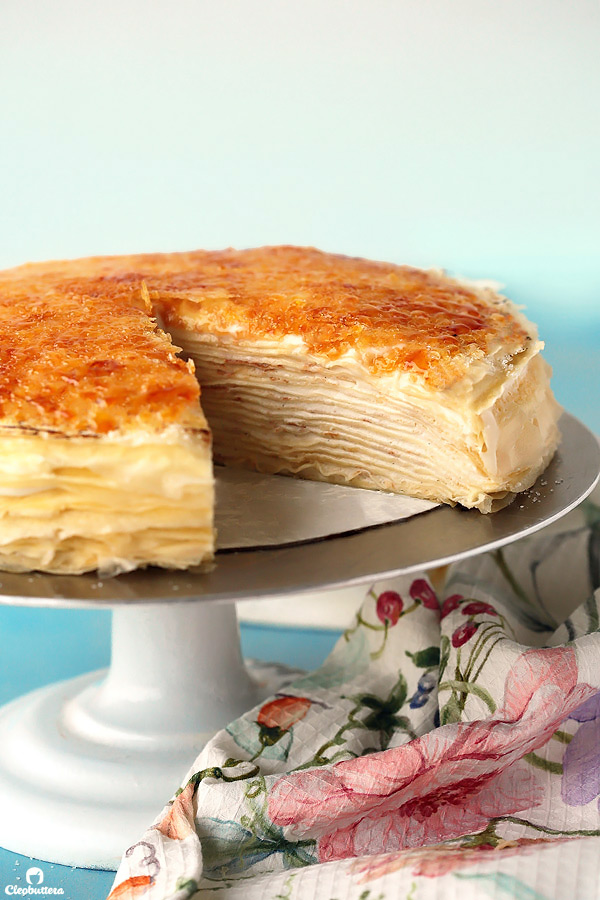
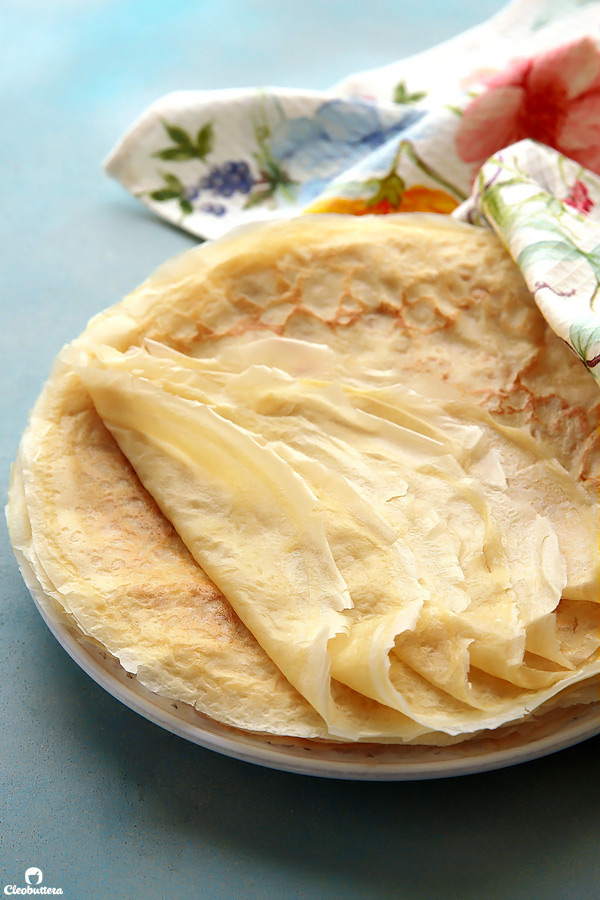
First off, it starts with 20 paper thin layers of super delicate, lace-y crêpes. In my earlier trials, I used batters that produced thicker crêpes which were good on their own, but when piled on top of one another, the textural result of the final cake, ended up just wrong. So very fine layers are essential here to give you that melt-in-the-mouth bite that we’re after.
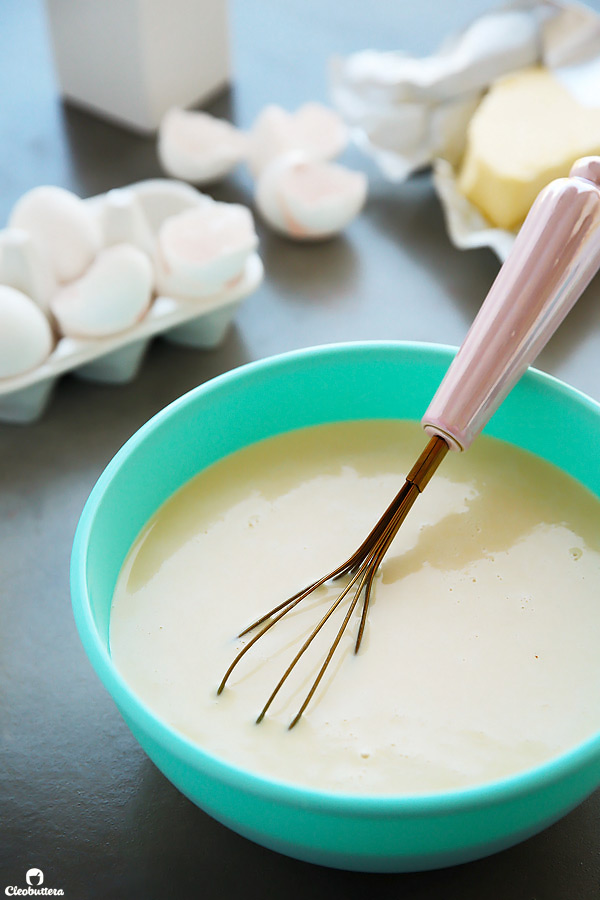
Because the crêpe batter is so thin, it is important to let it rest in the fridge for at least 2 hours or up to overnight before cooking. Why?
During the resting period, the starch molecules in the flour get a chance to absorb the liquid and swell up, making for a more viscous consistency that is easier to work with. It also gives time for air bubbles to escape, which ensures a more even crêpe with little, to no holes.
You know that popular French saying: “The first crêpe is for the dog”? Oh this cannot hold more true for this batter. Except that we have picky cats, not dogs, so in our case, the first crêpe is still for ourselves, but definitely not for the cake. Good thing the batter makes a little over 24 to make for practice crêpes, because you’re gonna need it. The batter is a bit tricky to work with at first, but I promise, you’ll get the hang of it and will become a crêpe pro in no time.
However, it is super duper important that you use a reliable, non-stick pan, otherwise your crêpe will stay there forever.
Holding the pan with one hand and the batter with the other, you’ll want to pour ¼ cup batter into far side of pan and tilt and shake gently until batter evenly covers the bottom of the pan.
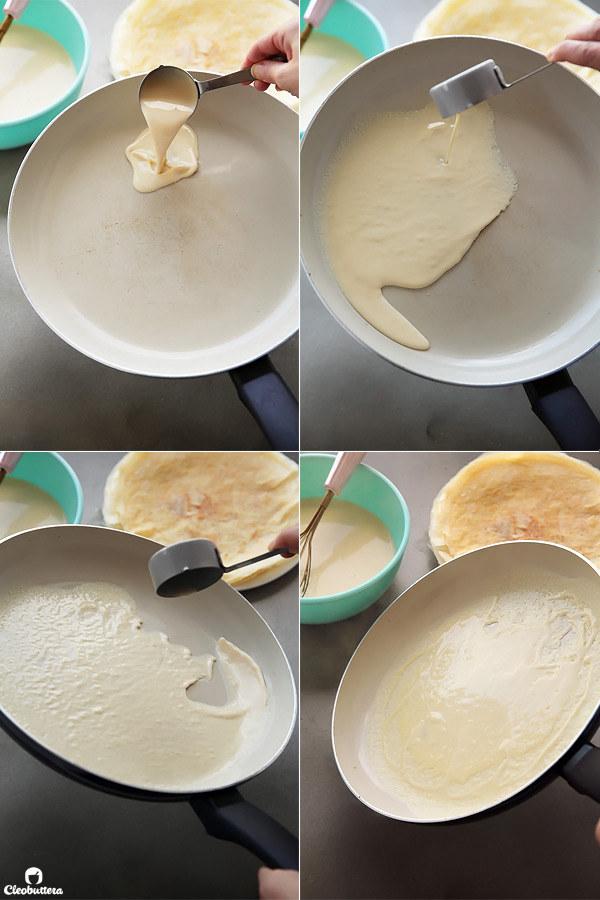
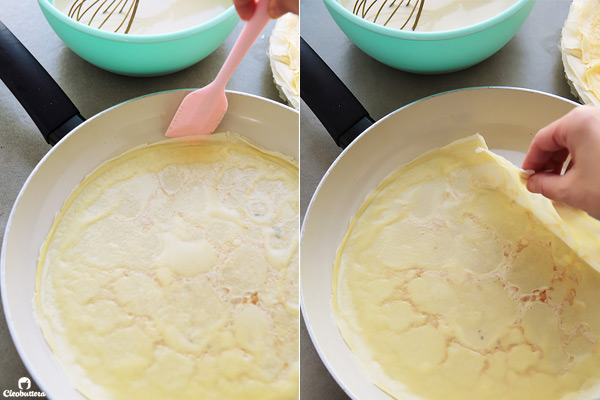
Cook the crêpe until the surface is dry and the crêpe starts to brown at the edges; about 1 minute. Using a rubber spatula, you’ll want to loosen the crêpe from the side of pan.
Then using your fingertips, hold on to one edge of the crêpe and gently flip.
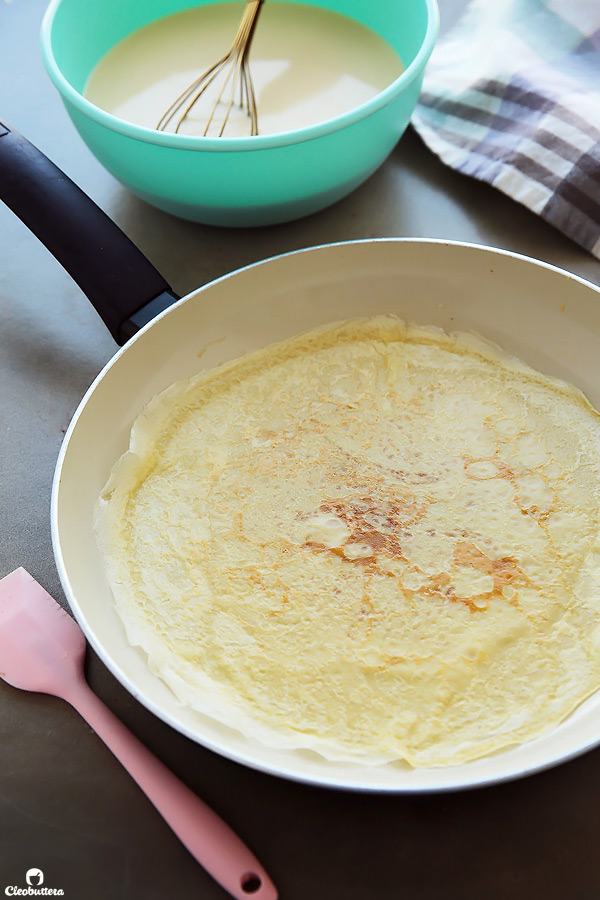
It should be nicely golden in color; you definitely don’t want a pale crepe. Colorless crêpes lack in flavor. Cook the second side until lightly spotted, about 30 seconds.
Each crêpe layer then gets slathered with a thin smear of whipped vanilla bean pastry cream. Straight up, the filling is reminiscent of the rich, custard base of creme brûlée.
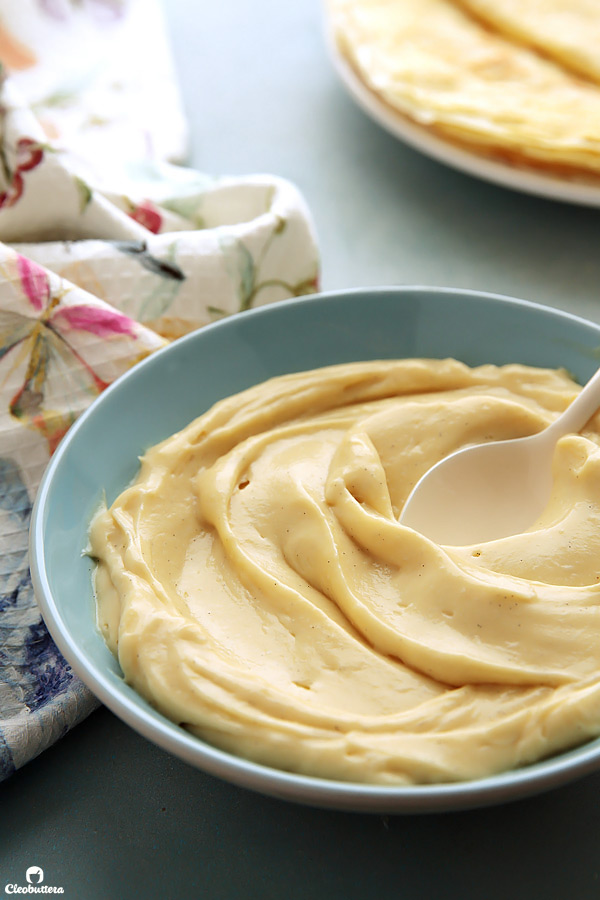
But then we lighten it up into this cloud-like, heavenly thing, by folding whipped cream into it. This type of cream is also known as diplomat cream.
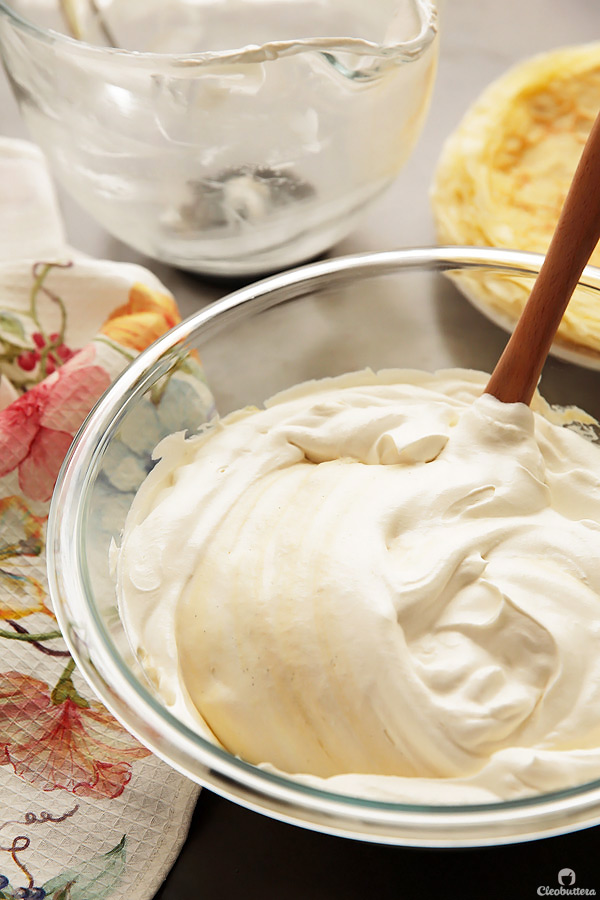
It’s lighter than pastry cream, yet richer than whipped cream. Something wonderful in the middle.
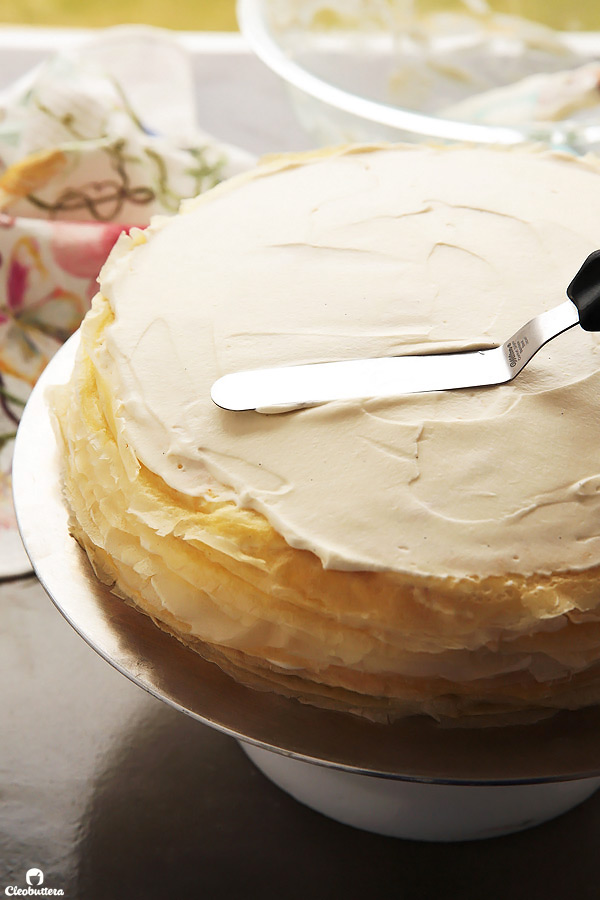
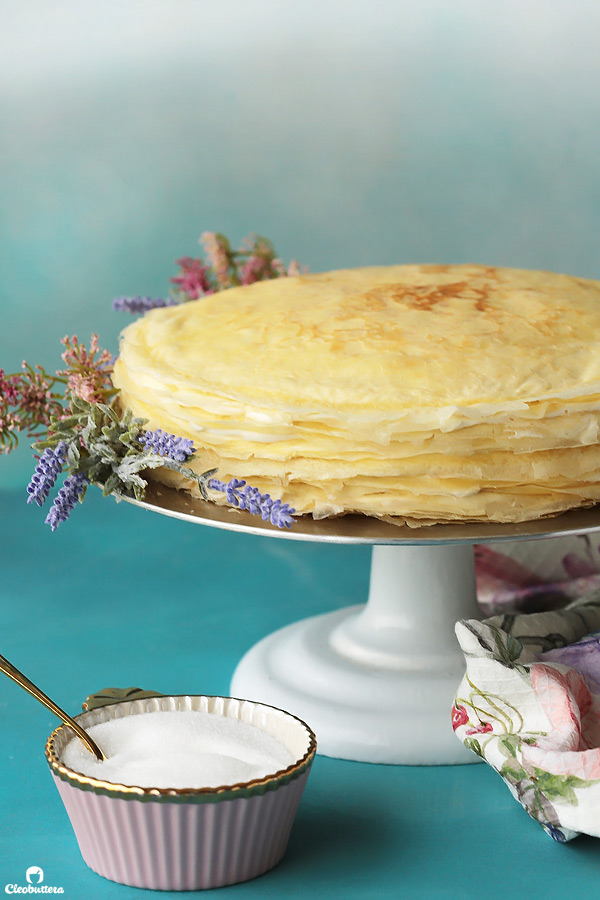
Twenty crêpe layers later and you’ve got a looker. You can most definitely stop right there or top it with a light dusting of powdered sugar and you’ll still get a wowzer.
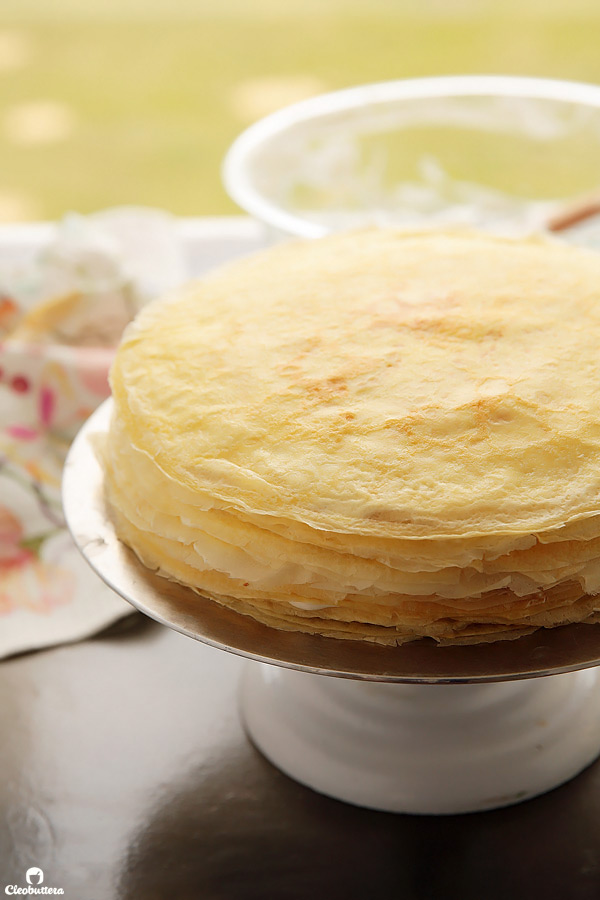
But we’re going for the full creme brûlée effect today. To do that, you’ll simply sprinkle some granulated sugar over the surface and literally set it on fire!
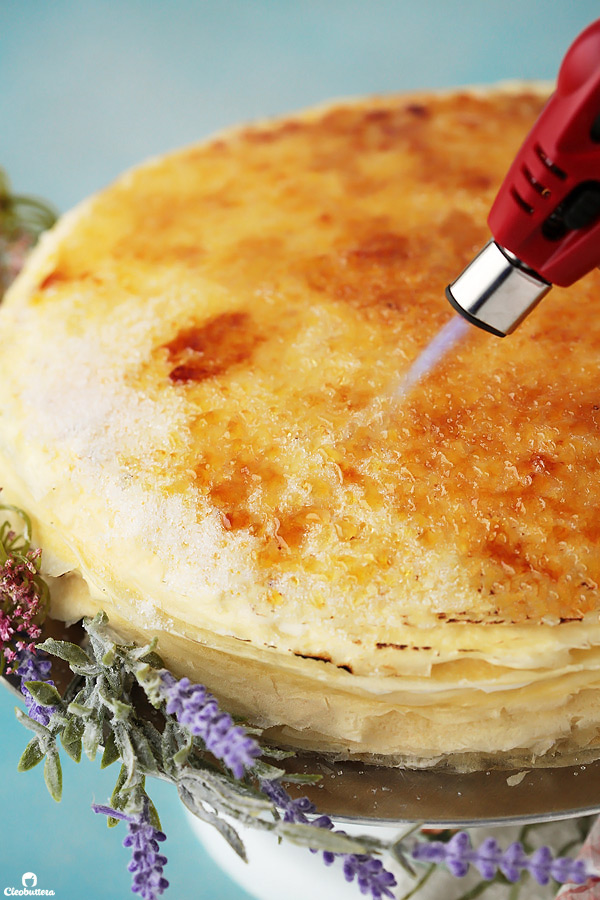
Give the cake a quick chill in the fridge to recover from the torch’s heat, cut into slices and enjoy to the max.
I hope this cake becomes an instant favorite at your house, as much as it is in mine.
Crème Brûlée Mille Crêpe Cake

Twenty layers of delicate crêpes, smothered with a cloud-like vanilla bean whipped pastry cream and topped with a thin layer of crunchy, brûléed caramel.
Ingredients
For the Crepes:
- 1 1/2 cup (6 5/8 ounces/ 188 grams) all purpose flour
- 6 tablespoons (2 5/8 ounces/ 75 grams) sugar
- 1/2 teaspoon salt
- 3 cups whole milk
- 6 tablespoons (3 ounces/ 85 grams) unsalted butter, melted
- 6 large eggs
- 1 1/2 teaspoons vanilla extract
For the Pastry Cream Filling:
- 1 1/2 cups whole milk, divided
- 1 vanilla bean or 1 tablespoon vanilla bean paste or 1 tablespoon vanilla extract
- 4 1/2 tablespoons (2 ounces/ 56 grams) sugar
- 3 tablespoons (7/8 ounce/ 24 grams) cornstarch
- 1/4 teaspoon salt
- 3 egg yolks
- 1 1/2 tablespoons (3/4 ounce/ 21 grams) unsalted butter
For Folding into the Pastry Cream Filling:
- 3 cups heavy whipping cream
- 3 tablespoons (1 1/3 ounce/ 37 grams) granulated sugar
For the Bruleéd Topping:
- 2 to 4 tablespoons (25 to 50 grams) granulated sugar
Instructions
To make the Crepes:
- In a large bowl, whisk together the flour, sugar, and salt.
- In another medium bowl, whisk together the milk, butter, eggs and vanilla until well combined. Pour the milk mixture over the flour mixture and whisk until well incorporated. Use an immersion blender to further mix the ingredients together until very smooth and lump-free. Alternatively, the batter can be mixed in a regular blender.
- Cover with plastic wrap and refrigerate for at least 2 hours and up to 24 hours. Meanwhile, prepare the pastry cream (recipe below).
- Whisk the batter before cooking to reincorporate. Place 1/2 teaspoon oil in a 12-inch nonstick skillet and heat over medium heat until shimmering. Using a paper towel, wipe out skillet, leaving a thin film of oil on the bottom and sides.
- Pour ¼ cup batter into far side of pan and tilt and shake gently until batter evenly covers the bottom of the pan. Cook crêpe until the surface is dry and crêpe starts to brown at edges; about 1 minute. Using a rubber spatula, loosen the crêpe from the side of pan. Using fingertips, hold on to one edge of the crepe and gently flip; it should be nicely golden in color. Cook until second side is lightly spotted, about 30 seconds.
- Transfer crepe to a baking sheet or plate lined with parchment paper. Repeat with the remaining batter and continue to stack the crepes on top of each other. Allow to cool completely before using for the cake.
To make the Pastry Cream:
- In a medium saucepan, pour 1 cup of the milk and the seeds and pod of a scraped vanilla bean or vanilla bean paste. If using vanilla extract, save for later. Heat over medium heat until simmering around the edges.
- While the milk is heating, in a small bowl, whisk together the sugar, cornstarch and salt. Whisk in remaining 1/2 cup milk, followed by the yolks.
- When the milk mixture reaches a simmer, slowly pour the hot milk into the egg yolk mixture while whisking continuously. Return mixture to the saucepan and reheat over medium heat, whisking constantly, until a few bubbles burst on the surface and the mixture is thickened and glossy, about 30 seconds. Remove from heat, and strain the pastry cream through a fine-mesh sieve set over a medium bowl. Add butter and whisk until shiny and smooth. Whisk in the vanilla extract, if using.
- Press plastic wrap directly on the surface to prevent a skin from forming and refrigerate until cold and set; about 1 hour or up to overnight.
- When ready to assemble the cake, in a chilled stand mixer bowl fitted with the whisk attachment (or a bowl and an electric hand mixer), combine the heavy whipping cream and 3 tablespoons sugar, and beat at medium speed until frothy. Increase speed to high and continue to beat until cream holds stiff peaks. Be careful not to over whip.
- Using a rubber spatula, gently fold the whipped cream into the cooled pastry cream, until evenly colored and no white or yellow streaks remain.
To assemble the cake:
- Place one prepared crepe on a large cake platter. Top with a generous dollop of the pastry cream filling; about 1/3 cup. Using a small spatula, spread the filling into a thin layer to completely cover the crepe.
- Top with another layer of crepe and followed by another spreading of filing. Repeat, alternating layers of crepe and filling, until you have reached 20 layers of crepe. Save the nicest looking crepe for the 20th (top) layer.
- Refrigerate the assembled cake for 1 to 2 hours. You could serve the cake as is or with a light sprinkling of powdered sugar. For a bruleéd top, sprinkle the surface of the cake with 2 to 4 tablespoons of granulated sugar and use a kitchen torch to caramelize the top. Refrigerate once again until the bruleéd top is no longer warm. Cut into slices and serve cold or at room temperature. Cake’s texture and flavor is best on the day its made.
Recipe Notes
Recipe adapted with changes from Rosanna Pansino.
Measurements Note: All recipes of this site have been developed using weight measurements. Although US volume measurements have been included for your convenience, it is highly encouraged that you weigh your ingredients using a kitchen scale to get the best possible results. Due to the sensitive nature of baking, kitchen scales are proven to yield more accurate and consistent results than measuring cups. Enjoy!
This post may contain affiliate links.
All images and content are owned by Cleobuttera® and are copyright protected. Please do not use my images without prior permission. If you would like to republish a recipe, please rewrite it in your own words and link back to the recipe page on my site. Original recipes and creations of this site are intended for personal and home use. Commercial replication or media consumption are only allowed with a written consent and agreement with Cleobuttera owners. Otherwise it is considered a violation of intellectual property. Thank you for respecting and appreciating the amount of time and effort that goes into creating free, unique recipes that make people happy.