No-Bake Lotus Biscoff Cheesecake
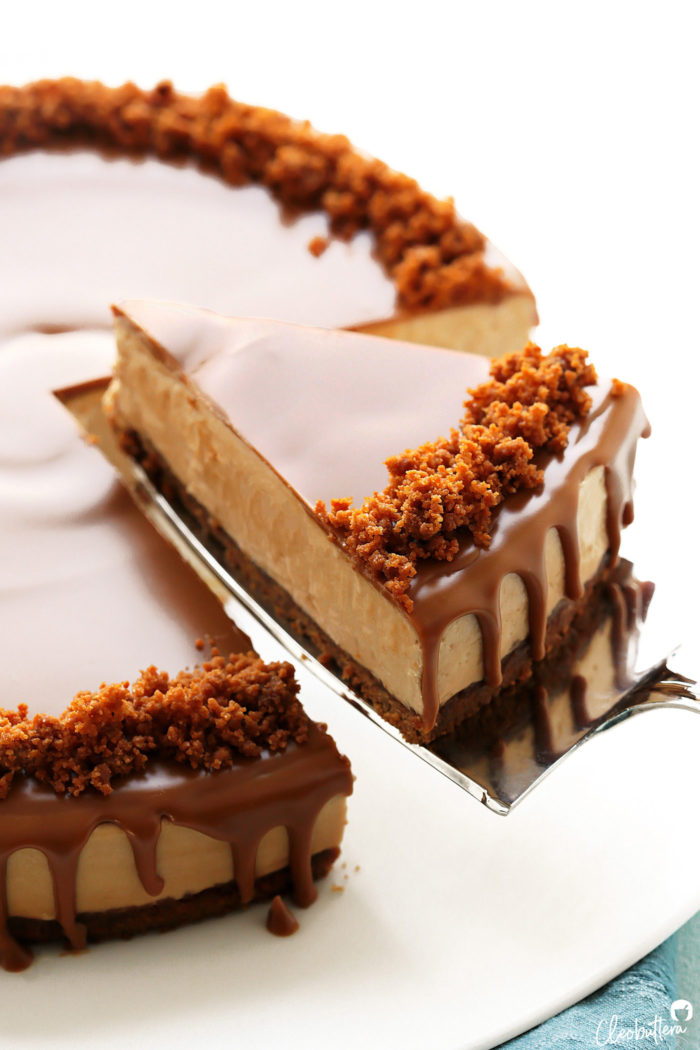
Lotus Biscoff lovers you’re in for a treat! A creamy cheesecake with an airy, mousse-like texture that screams Lotus in every bite! Crushed Lotus biscuits in the crust, creamy Lotus in the filling, melted spread on top and a halo of Lotus crumbs to finish it off. It’s a quadruple Lotus Biscoff delight that’s so easy to make and doesn’t require an oven!
If I get a dollar for every time I’ve been asked to share a Lotus Biscoff cheesecake recipe, I’d be…well…not quite a millionaire, but maybe close to a hundredanaire?
Oh that was a bad idiom! Forget I said that…bad one. Bad idiom. Idiom? Is that even what it’s called?
Anywhooooo…what I was trying to say, is that this right here, is by far one of my most requested recipes. Which is not hard to see why.
While the rest of the world is starting to get over the Lotus craze, here in Egypt, it’s still in hype mode!
Lotus has been enjoying its moment of stardom in the Middle East for the last couple of years, and people can’t seem to get enough of it.
Everything is now Lotus this and Lotus that, and just like Nutella, it is praised for having the capability of turning anything it touches to pure wonderfulness. You can put Lotus on cardboard and people would still eat it.
During a recent trip to Dubai, I was in utter amazement at what restaurants are doing with it. Lotus lattes, Lotus Tres Leches, Lotus Basbousa. If you can think it (or not)…they’ve probably made it. I would not have been surprised if I had seen it coming out of water faucets.
So it comes as no surprise to be getting an influx of requests from my fellow homies for a creamy, dreamy cheesecake that tastes just like the Middle East’s new obsession and the rest of the world’s old flame.
Cue in Lotus Biscoff Cheesecake.
As someone who’s not the biggest fan of cheesecake, I long resisted the urge to give it a go.
Until I actually tasted the one my sister-in-law made and quickly discovered how mistaken I was for waiting so long. It is easily one of the best desserts I’ve ever eaten. EVER!
Coming from someone who feels lukewarm about cheesecake, that means A LOT!
It was creamy, it was crunchy, it was biscoff-y, and most importantly (for me at least), it wasn’t overly cheese-y. My only complaint, is that it was too soupy. The poor “slices” couldn’t get ahold of themselves.
So I couldn’t help but tinker around with different ingredient ratios and mixing methods, to come up with a cheesecake that not only tasted incredible, but sliced beautifully and stood nice and tall and full of pride.
So what exactly is Lotus Biscoff Spread?
In case you’ve been sleeping under a rock, Lotus Biscoff Spread is a legal drug of joy sold in jars.
Lol! Just kidding. Not really. Seriously though, the stuff is addictive, so read with caution.
Lotus Biscoff is an irresistible, sweet European spread made from the famous Lotus Biscoff cookies (aka Speculoos). It has the consistency of peanut butter, but tastes like a cross between graham crackers, digestive biscuits and gingersnaps. Warm with subtle notes of cinnamon, ginger and other spices, and cozy with an iconic caramelized flavor. I mean…what’s not to love?!
And if that makes you drool…wait till you taste this cheesecake! It hits you will blasts of Lotus in every bite!

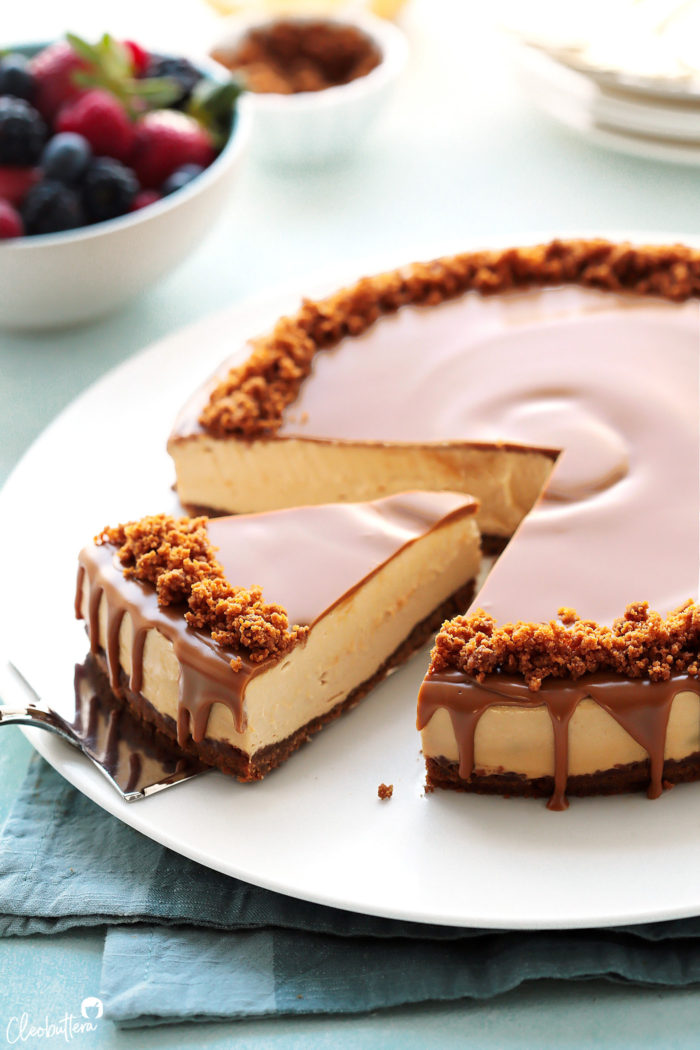
This delicious cheesecake features Lotus is every way, shape and form:
- A crunchy Lotus Biscoff crust in the bottom.
- A Lotus-flavored, creamy and airy cheesecake in the middle.
- A thin layer of melted Lotus spread on top.
- A ring of Lotus crumbs around the rim.
Now if that’s not a Lotus Biscoff explosion, I don’t know what is?!
Oh yeah…these cookies are.
I took the cheesecake to a couple of recent gatherings and needless to say, it stole the show! And this is when I knew it was ready to be blogged about. It was the first thing to disappear off of the dessert table and it was raved about by everyone…including those who don’t like cheesecake!
And I think this is what I love most about it. Its taste and texture has the power to satisfy both cheesecake lovers and repellers alike. Which is weird. But good weird.
What is this cheesecake like then?
- It doesn’t have a strong cream cheese flavor. It does add a nice tang that balances out the sweetness of the Lotus Biscoff, but it’s not overpowering at all. Lotus is the dominant flavor here and its what takes center stage.
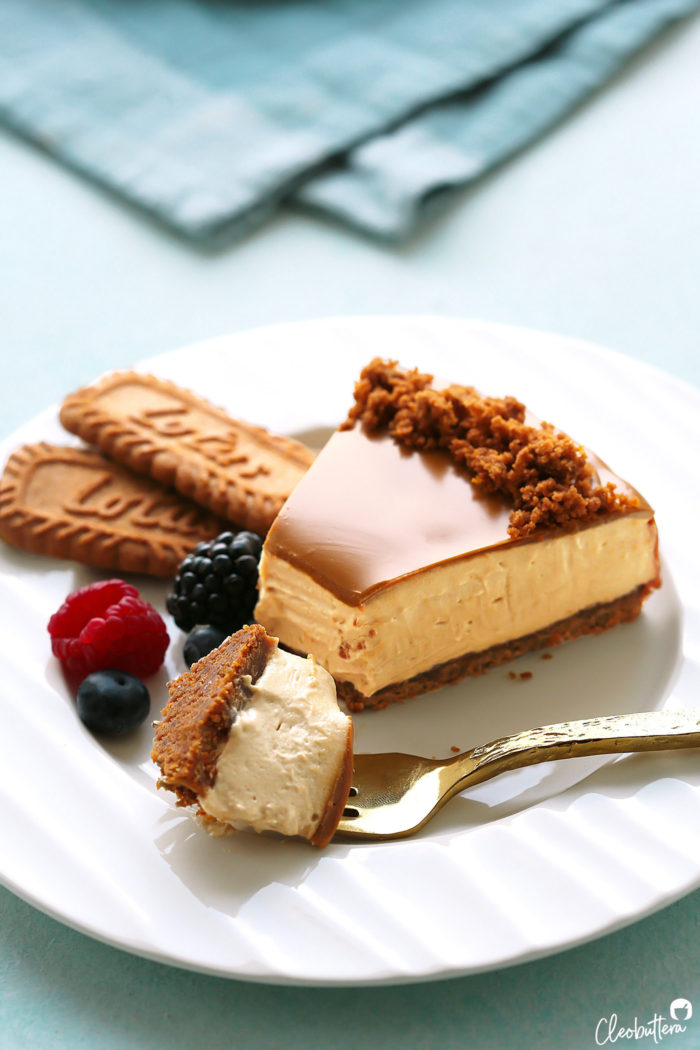
- It has a unique texture that is different from traditional cheesecake. Unlike its dense cousin, this cheesecake has an airy, mousse-like consistency, that is soft, yet stable and feels like a cloud on the tongue. Thanks to some whipped cream folded into the batter, which lightens it up by creating tiny air bubbles in the cake, giving it that ethereal mouthfeel.
If you love Lotus Biscoff (and if you’ve read this far without clicking away, then you most likely do!), then I know you’re gonna love this cheesecake, as much as you’ll love making it.
Why? Because it’s so darn easy! It requires only a handful of ingredients, a few minutes of your time, PLUS (and you’ve probably picked that up from the title) there’s NO baking involved! Well mostly, if we’re being completely honest here. I like to bake the crust, but you don’t have to if you’re feeling lazy.
You’ll just need to plan ahead though, because it does need about 6 hours to set in the fridge. Which actually makes it a great make-ahead dessert!
So let’s make it!
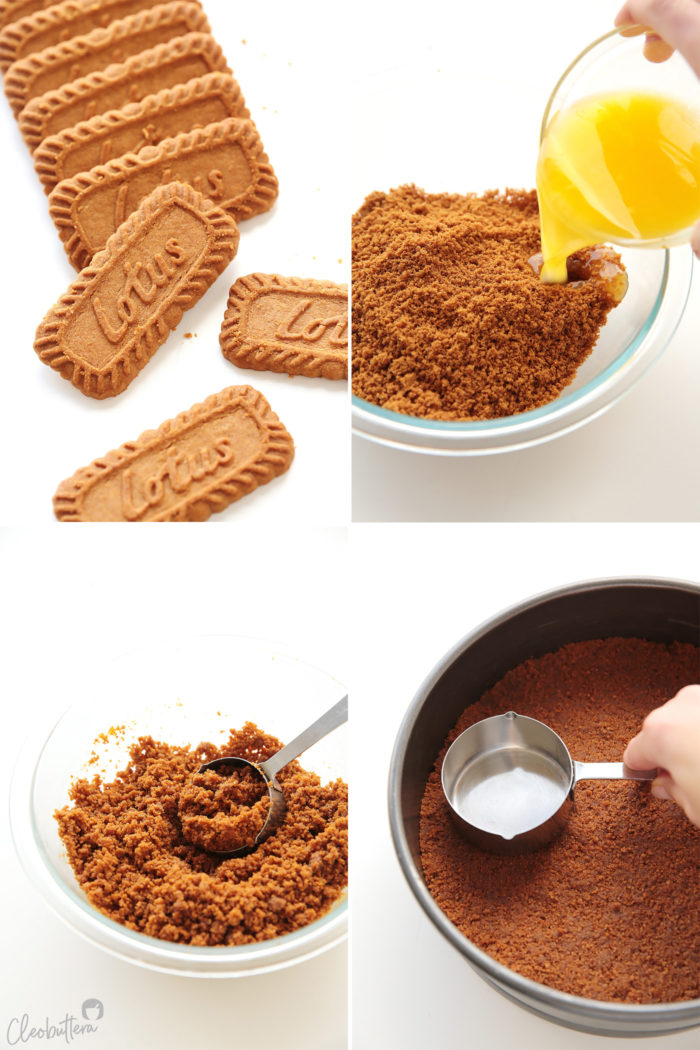
How to make Lotus Biscoff Crust?
- Begin by grinding up a full 250g packet (except 2) of those delectable Lotus cookies into fine crumbs. Off to a great start already!
- Then mix the crumbs up with melted butter.
- Set aside 1/4 cup (50g) of the crumb mixture to garnish the rim with later.
- Pack the rest of the crumb mixture into the bottom of a springform pan. Now, if you want to stay true to the “NO BAKE” nature of the recipe, you can leave it as is and all will be good with the world, but I love to bake it for just about 8 minutes. This helps set the crust better and gives it a more aromatic flavor and crisper texture. Your call! Just be sure to let it cool completely before pouring in the filling.
How to make the cheesecake filling?
- Beat together the cream cheese, Lotus Biscoff spread, powdered sugar and little salt until nice and creamy.
- Then gently fold in some previously whipped cream to lighten it up. Isn’t it funny how something as fatty as whipped cream, actually “lightens” up desserts?
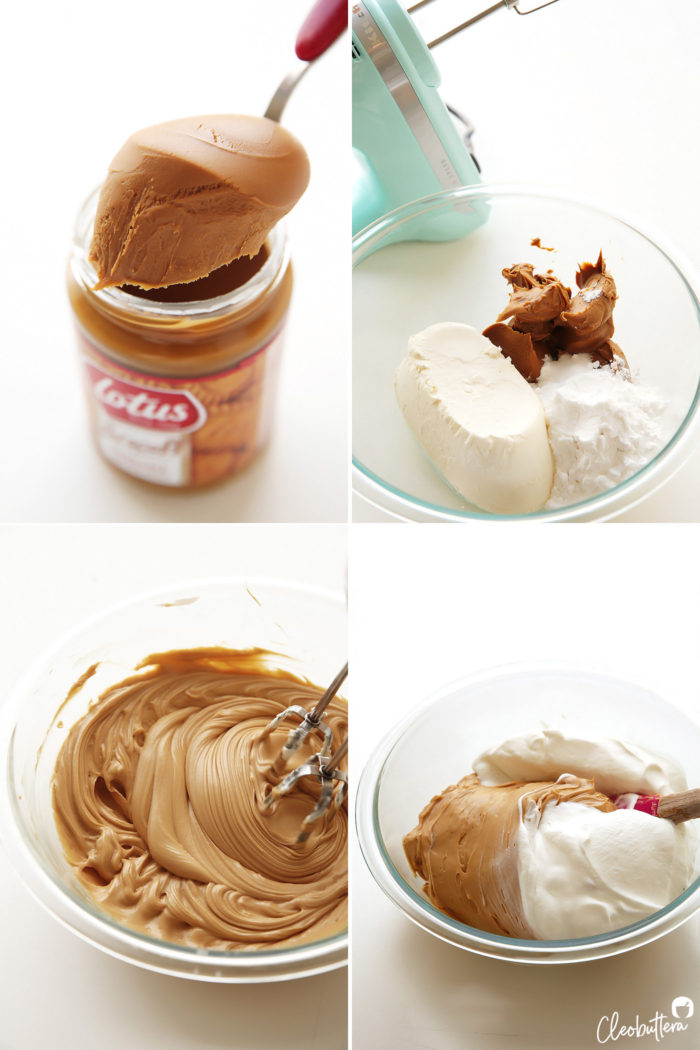
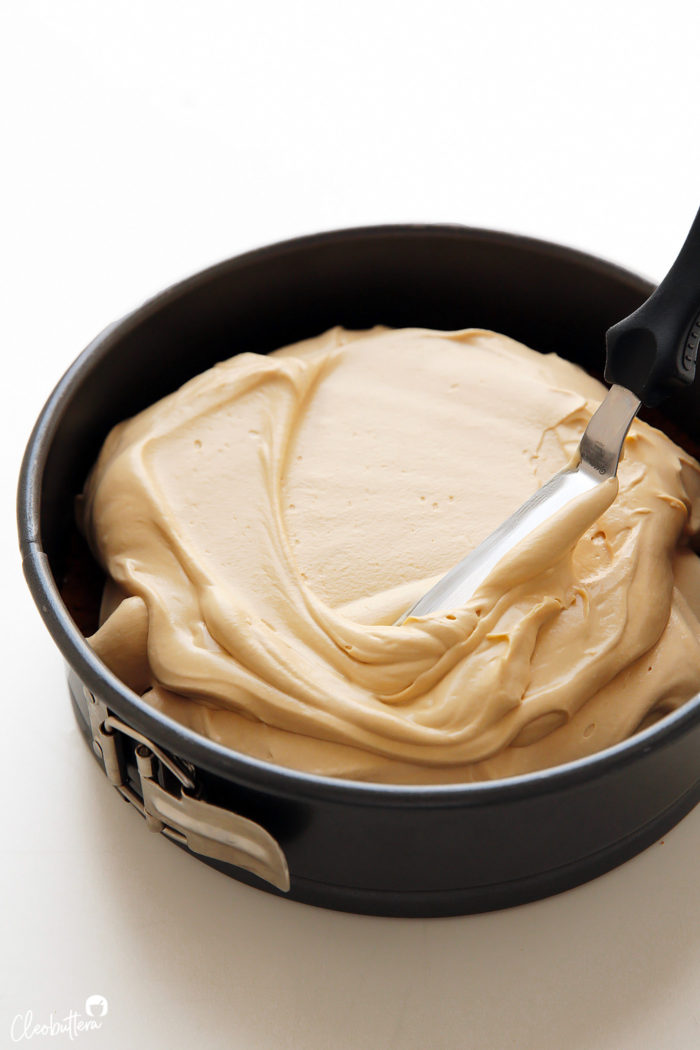
- Plop and spread that yummy cheesecake filling into a smooth layer, trying with all your might, not to ditch the idea of making a cheesecake and eat it all up with a spoon.
- The filling should be thick and spreadable and not soupy at all. At which point, cover that deliciousness, bid it farewell and refrigerate until set; about six-ish hours, even better overnight.
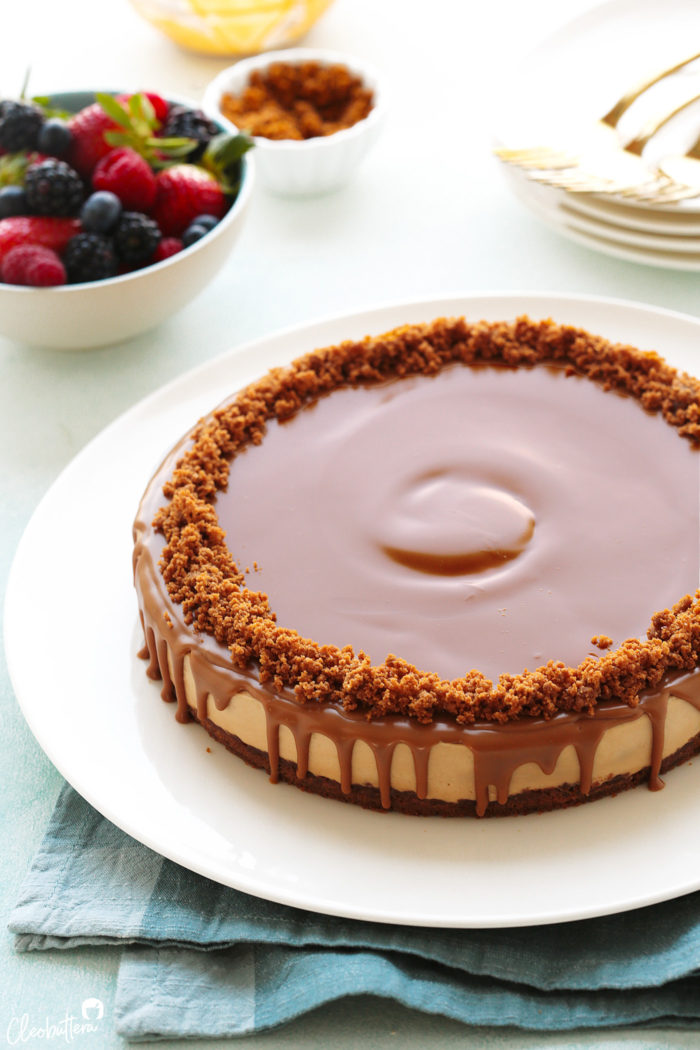
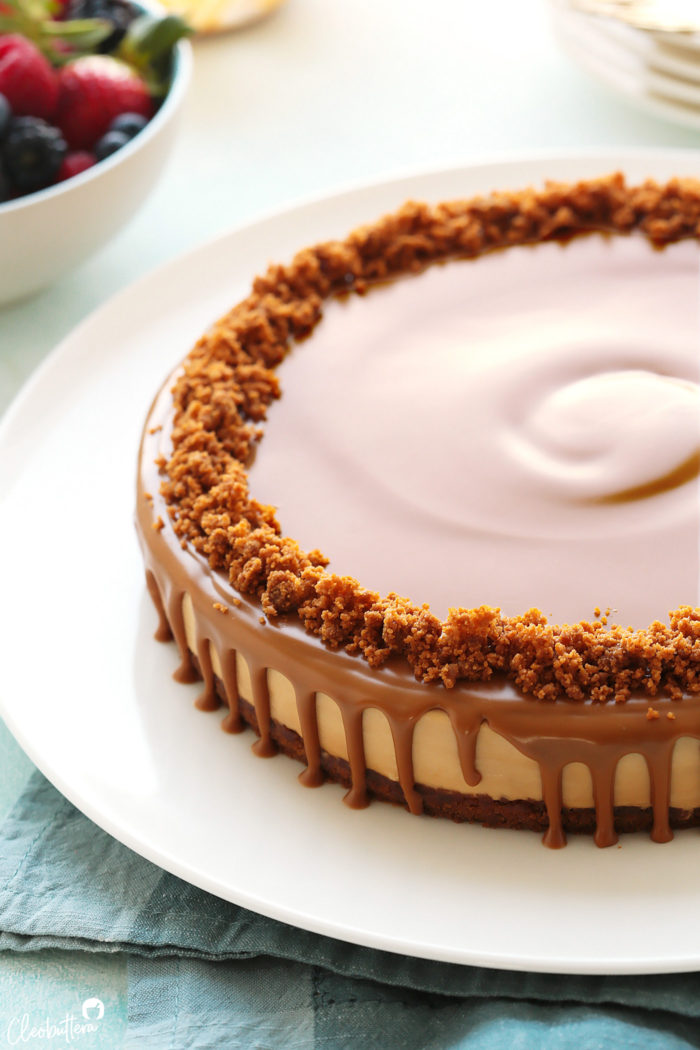
How to get that smooth topping?
- To ensure a sturdy cake that won’t wimp on you as you add the warm topping, I like to pop the cheesecake in the freezer for about 30 minutes before unmolding it from the pan.
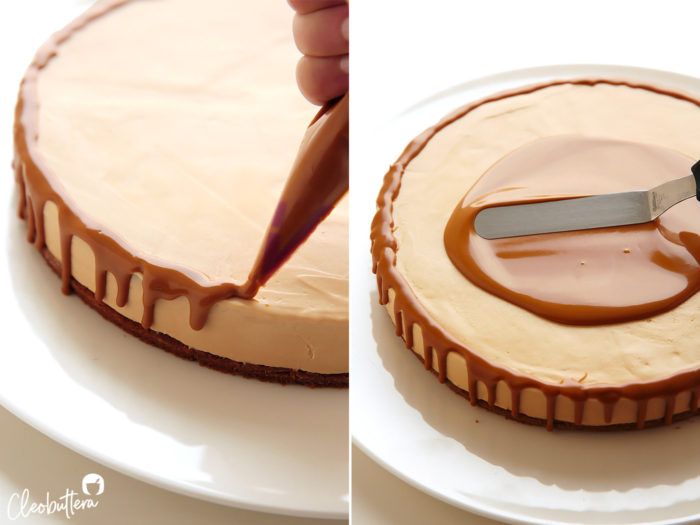
- After that, transfer it to your serving platter, then microwave whatever’s left of the Lotus jar until melted.
- Now this is totally optional, but if you’d like to get that side drip effect, then use a piping bag with the end snipped off to drizzle some of the melted Lotus Biscoff spread around the edges. Then pour the remaining spread all over the surface, quickly smoothing it out into a smooth, even layer. You could totally skip the piping bag step and just pour the warm Lotus all in one go, but you’ll get more of a side overflow look instead of a drip one….which is also great!
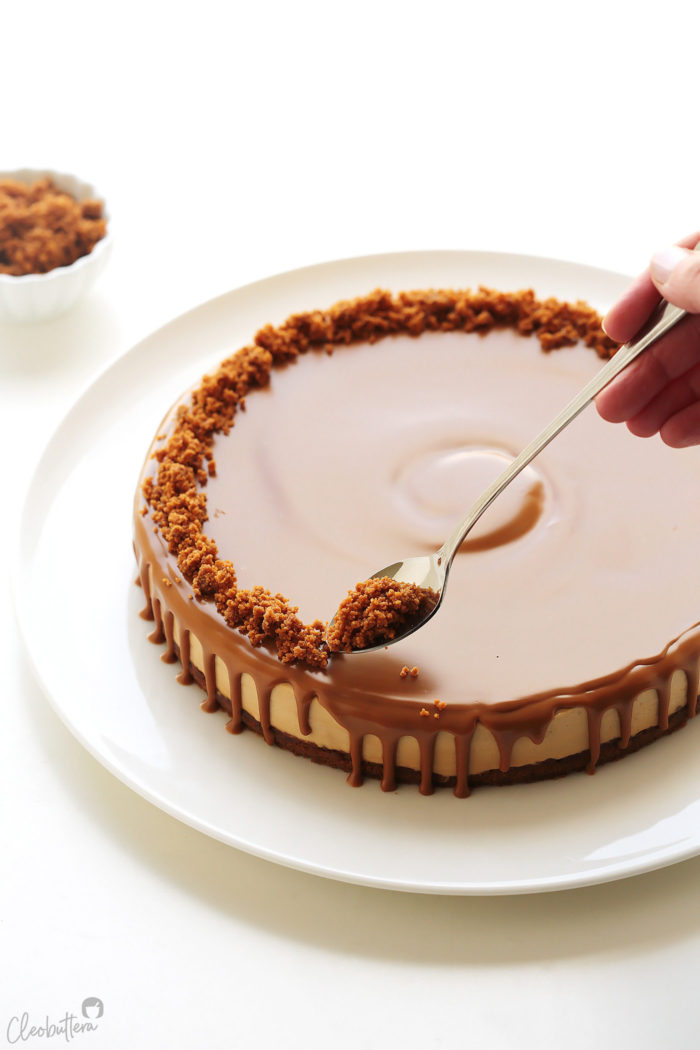
- Refrigerate the cake once more, to set the topping, then remember that 1/4 cup of crumb mixture that we’ve set aside? Now’s the time to pull it out! Sprinkle it all around the rim.
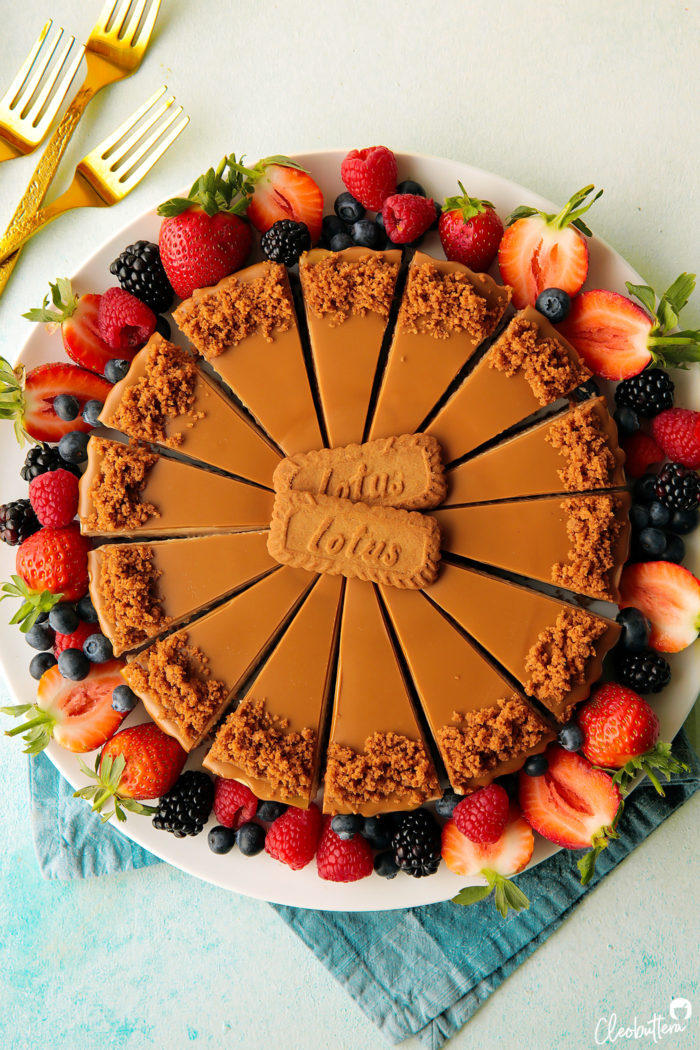
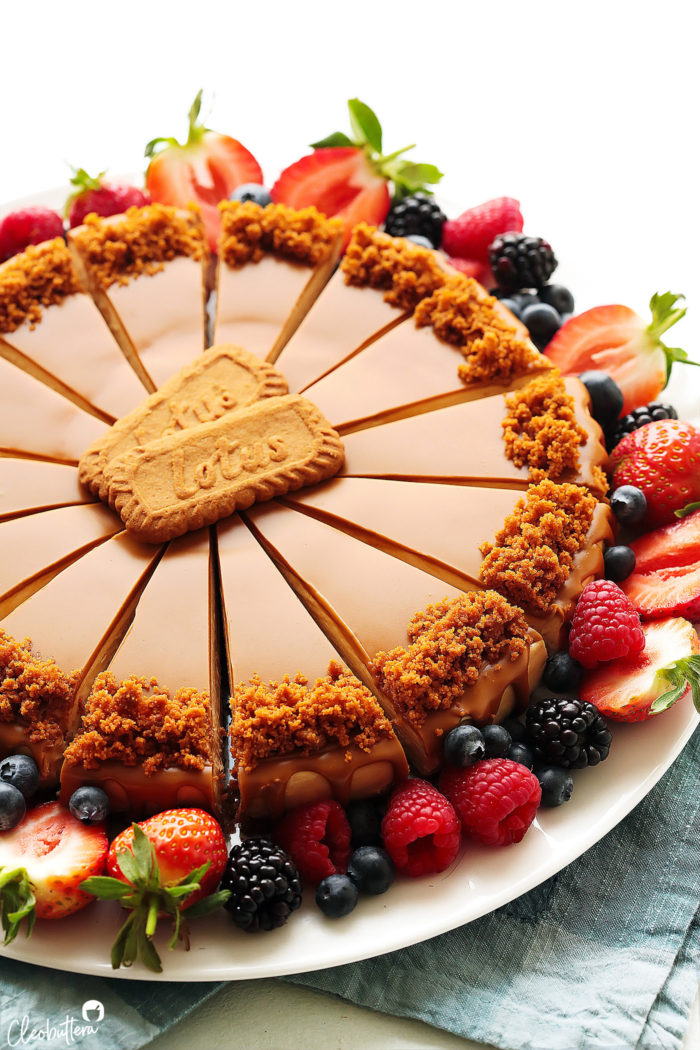
How to serve?
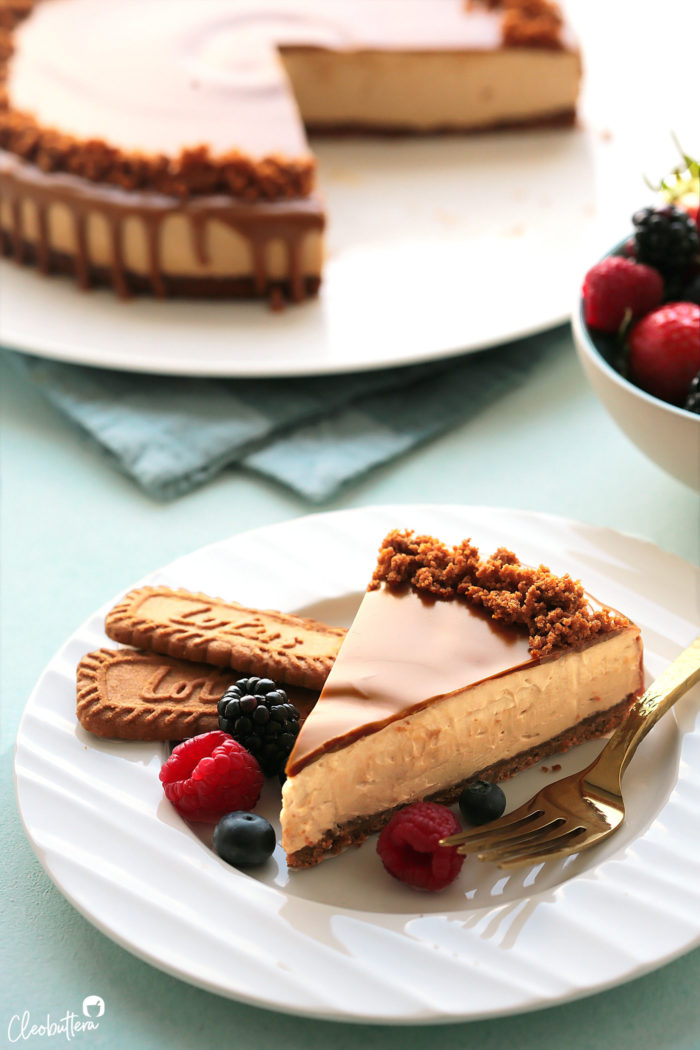
You can totally serve it in one piece and let everyone cut their own slice, but I’ve found that pre-slicing it in advance and garnishing it with berries, not only reduces the chance of people destroying your work of art and crushing your heart, but it adds this breathtaking wow-factor that never seizes to impress.
- To get those perfectly cut slices, simply dip a sharp knife in hot water, wipe it dry, the slice. Repeat, wiping the knife clean between each slice.
- Serve cold…straight for the fridge.
Tips for success:
- Whip it good. A perfectly prepared whipped cream is essential to the success of this recipe. Before you begin, make sure the whipping cream is super cold. Room temperature cream won’t whip properly. Get all your equipment cold too! Chill the bowl and whisk attachment as long as you can in the fridge before using. As soon as the cream starts forming soft peaks, stop the mixer and finish whipping by hand until you achieve stiff peaks. This lowers the chances of over-whipping the cream. Over-whipped cream, will split and curdle and basically turn into butter, so be careful not do that, or you’ll need to start over.
- Fold gently. When folding the whipped cream into the cream cheese mixture, take your time to do it gently, so as to not deflate all the air bubbles that gives the cheesecake its distinctive airy texture.
- Only full-fat cream cheese will do. Now’s not the time to cut on the fat. This is a decadent treat that’s meant to be enjoyed in small quantities on special occasions. So splurge on full fat variety of cream cheese, as lower fat simply won’t give you the same results.
- Freeze briefly. Before topping it with the melted spread, pop the cheesecake (still in the pan) in the freezer for about 30 minutes. Since this cheesecake is on the soft (but sturdy) side, a super cold cake will be less likely to soften up as you add the warm topping. It also makes slicing neatly a breeze.
FAQs:
How far in advance can I make this cheesecake?
I have made the cheesecake two days in advance before serving with great results. Leftovers will keep well in the fridge for 5 days.
Does this cheesecake freeze well?
Yes! I actually froze a slice (in an airtight container) for 10 days to be able to answer this question, and I’m happy to report back that it worked wonderfully. It thaws back as good as new. You must try it while its still semi-frozen…tastes like the most delicious ice cream cake!
What brand of cream cheese do you use?
I use Kiri Creamy, the one in the tub, not the squares, as it’s the most accessible, high quality brand available where I live (Egypt). If using Philadelphia, be sure to use brick-style, not the spreadable type in the tub. Whatever brand you choose, be sure it’s full fat.
Can I used the crunchy Lotus Biscoff variety?
Although I haven’t tried it myself to be 100% sure, but I don’t think there should be any issues with using the crunchy variety.
Can I use any other brand of cookie butter?
Sure! Lotus Biscoff is what’s available to me, but feel free to use whatever equivalent accessible to you.
Can I substitute the Lotus Biscoff spread with peanut butter?
That should work! You’ll most likely need to increase the amount of powdered sugar though, as peanut butter is a lot less sweet than Lotus.
Can I use Cool Whip Topping instead of whipping my own cream?
I haven’t tried itself so can’t speak from experience, but it’s usually a viable substitute. If you’d like to try it out, I’d recommend using an 8oz container.
I prefer dense cheesecakes, how can I make this one denser?
You can omit the whipped cream. However, the amount of batter will yield a lesser quantity, so you might want to consider making 1 1/4 to 1 1/2 times the amount of filling, to compensate for the lost volume. It will be pretty RICH too.
Why didn’t you use gelatin to stabilize the cheesecake?
I don’t feel like it needs it; its pretty sturdy the way it’s made. Soft yes, but stable and won’t melt on you. Plus, believe or not, I didn’t want to complicate things? I love the simplicity of the recipe as is and am very happy with the stability it has. If you prefer a stiffer cheesecake, please feel free to experiment with adding gelatin to it. I’m not sure how much though, as it’s not something I tested in this recipe.
No-Bake Lotus Biscoff Cheesecake

Lotus Biscoff lovers you're in for a treat! A creamy cheesecake with an airy, mousse-like texture that screams Lotus in every bite! Crushed Lotus biscuits in the crust, creamy Lotus in the filling, melted spread on top and a halo of Lotus crumbs to finish it off. It's a quadruple Lotus Biscoff delight that's so easy to make and doesn't require an oven!
Ingredients
For the crust:
- 30 Lotus Biscoff cookies (235g)*
- 6 tablespoons (3oz/ 85g) unsalted butter, melted
For the Filling:
- 1 cup (237ml) heavy whipping cream, very cold
- 12 1/3oz (350g) cream cheese, at cool room temperature*
- 1 cup (260g) Lotus Biscoff spread (aka Speculoos or any cookie butter)*
- 2/3 cups (75g) powdered sugar
- 1/8 teaspoon salt
For the topping:
- The remaining 140g (heaping 1/2 cup) of the Lotus Biscoff spread jar
Instructions
To make the crust:
- Adjust oven rack to middle position and heat oven to 325F/160C. Line the bottom of a 9 or 10-inch springform pan with a parchment paper round.
- Using a food processor, pulse the Lotus Biscoff cookies into fine crumbs. You can also place them in a large zipperlock bag and smash them with a rolling pin or meat mallet until finely ground.
- Stir in the melted butter until evenly combined. Measure out 1/4 cup (50g) of the mixture and reserve in a small bowl, cover with plastic wrap, and refrigerate until ready to use for garnish. Evenly spread the remaining crumb mixture to the prepared pan's bottom, then press with a flat-bottomed drinking glass or measuring cup.
- Transfer to the oven and bake until deepens in color and smells fragrant; 8 to 9 minutes. (You can skip the baking step if you prefer, but it helps set the crust better and gives it a more aromatic flavor and crisper texture). Allow to cool completely before filling. To speed things up, I like to cool it in the freezer as I work on the filling.
To make the filling:
- With an electric mixer on medium speed, beat the heavy whipping cream in a large, chilled bowl, until stiff peaks form. Be careful not to over mix the cream so it doesn't curdle. Transfer the whipped cream to a medium bowl and keep chilled in the fridge until ready to use.
- In the same bowl and using the same mixer (no need to wash), beat together the cream cheese, Lotus Biscoff spread, powdered sugar and salt until well combined and very smooth.
- Using a rubber spatula, gently fold in the whipped cream into the cream cheese mixture, until uniform in color and no white streaks remain. Mixture should be very stable and cloud-like, but not loose at all.
- Scrape the filling to the cooled cookie crust and use an offset spatula or the back of a spoon to spread into an even layer and smooth the surface.
- Cover tightly with plastic wrap and refrigerate until set, 5 to 6 hours or overnight.
To serve:
- Use a sharp knife to loosen the chilled cheesecake from the rim of the springform pan, then remove the rim. Use a thin, wide spatula, cake lifter or the removable bottom of a tart pan, to lift the cake off of the bottom; the parchment round should slide right off. Transfer to a serving platter.
- Place the remaining Lotus Biscoff spread in a microwave-safe bowl, and heat in the microwave until very fluid and melted, about 40 seconds.
- Use a piping bag (or small zipper lock bag) with the end snipped off to drizzle some of the melted Lotus Biscoff around the edges to get that drip effect. Then pour the remaining spread all over the surface, quickly spreading it out into a smooth, even layer.
- Put back the cheesecake in the refrigerator to set the topping; at least 10 minutes. Sprinkle the sides of the cake with the reserved cookie crumb mixture. For neat slices, dip a sharp knife in hot water, wipe it dry, then slice. Repeat, wiping the knife clean between each slice.. Place the remaining 2 Lotus cookies decoratively on top. Garnish the platter with berries, if desired.
- Serve cold, straight for the fridge. Cover and refrigerate leftovers for up to 5 days or freeze for up to a month, maybe longer.
Recipe Notes
- This recipe requires an entire 400g jar of Lotus Biscoff Spread. 260g goes into the filling and the remaining 140g is used for the topping.
- You'll need an entire 250g packet of Lotus cookies. The packet contains 32 cookies; 30 to grind up for the crust and crumbs around the rim, and the remaining 2 can be used to decorate the top.
- I use smooth Lotus Biscoff spread here and although I haven't tried it myself, I don't think there should be an issues with using the crunchy variety.
- For the cream cheese, I use Kiri Creamy, the one in the tub, not the squares. If using Philadelphia, be sure to use brick-style, not the spreadable type in the tub. Whatever brand you choose, be sure it's full fat.
Recipe slightly adapted from Texanerin, with changes.
Measurements Note: All recipes of this site have been developed using weight measurements. Although US volume measurements have been included for your convenience, it is highly encouraged that you weigh your ingredients using a kitchen scale to get the best possible results. Due to the sensitive nature of baking, kitchen scales are proven to yield more accurate and consistent results than measuring cups. Enjoy!
Powered by ![]()
This post may contain affiliate links.
All images and content are owned by Cleobuttera® and are copyright protected. Please do not use my images without prior permission. If you would like to republish a recipe, please rewrite it in your own words and link back to the recipe page on my site. Original recipes and creations of this site are intended for personal and home use. Commercial replication or media consumption are only allowed with a written consent and agreement with Cleobuttera owners. Otherwise it is considered a violation of intellectual property. Thank you for respecting and appreciating the amount of time and effort that goes into creating free, unique recipes that make people happy.